Advertisement
Table of Contents
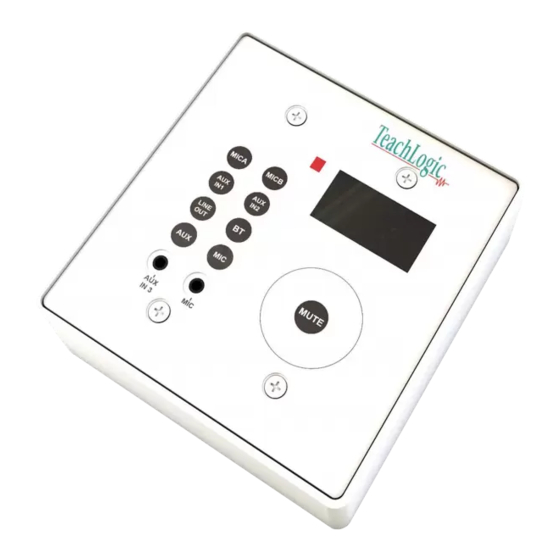
TeachLogic CPS-120, firmware versions 3.4_20220206 and BT20201222
This is the functional description of CPS-120/CPR-125 operation after upgrade to the
firmware versions given above.
Standby and Power On
Most IMA-120 amplifiers have a standby (or sleep) energy saving
mode that causes the amplifier to enter a standby mode after two
hours without audio activity. At this point, the CPS-120 control panel
display will go dark (not just dim). The panel is still powered,
however, and will respond to the following command to change the
amplifier power mode to On (or wake the amplifier):
Long-press the Mute key 3-4 seconds
The same long-press will switch the amplifier into Off mode from
the On mode. And it will switch the amplifier from Off mode to the On
mode.
The amplifier's front panel power LED is Blue when On, Red when
Off, and Amber when in Standby.
Reminder on Control Panel Button Response
Press any button to activate the control panel. If the panel display is dim, the panel is not active and
pressing any key is required. When a key is pressed, the screen will brighten. Once the screen is bright,
touch the intended key(s) for a long or short press. For example, long-press the MUTE key and the
amplifier will enter its Off mode. Thereupon, the control panel will go dark (not just dim) and remain dark
until the amplifier is powered On by a long-press of the control panel Mute button, or by a press of the
amplifier's own power button.
Bluetooth Connections
We use the term "pair" to mean the exchange of information and mutual validation between two devices
(i.e. the control panel and a portable Bluetooth device). We use the term "connect" to mean the active
and current wireless linking of the control panel's Bluetooth receiver and a device with which it has paired.
Devices must be paired before they can connect. For more general background, read
https://www.sony.com/electronics/support/articles/00196698.
1. When powered on, the Bluetooth receiver (the "BTR") in the control panel will search for and
try to connect to the most recently paired device (normally, this is the teacher's device).
2. When the system and BTR are turned on and no device is connected, a) any previously paired
device(s) may connect with BTR by initiating the connection, and b) non-paired devices may not
connect or pair with BTR.
3. No new devices will pair with the BTR unless the panel BT button is first pressed for 4-5
seconds. With this button press, the BTR is put into pairing mode and any connected devices are
disconnected. Because the BTR is in pairing mode, devices within range will see its
Teachlogic...<serial number> name advertised and can pair with the BTR. Once paired, a device
will connect to the BTR.
TeachLogic LLC | 541 Main St, Suite B, Longmont CO 80501 |
Release Notes, rev 2022.03.10
P
760-631-7800 |
| 1
P a g e
E
support@teachlogic.com | teachlogic.com
Advertisement
Table of Contents

Related Manuals for TeachLogic CPS-120

Summary of Contents for TeachLogic CPS-120
- Page 1 With this button press, the BTR is put into pairing mode and any connected devices are disconnected. Because the BTR is in pairing mode, devices within range will see its Teachlogic…<serial number> name advertised and can pair with the BTR. Once paired, a device will connect to the BTR.
- Page 2 Bluetooth control application). The ####### will be the serial number (e.g., 000000051) readable on the control panel screen. This allows a user to identify the control panel they desire for pairing or connection. If you see more than one TeachLogic device, select your desired device by serial number.
- Page 3 3. If you identify an unauthorized, undesired party that has paired with the audio system, require their device “forget” the TeachLogic system Bluetooth pairing identity. And please note that the BTR will remember the most recently connected device and try to connect with it, so pair and connect your (teacher’s) device to override this.
- Page 4 Alternatively, the device sending audio (e.g. a microphone, computer, television) can successfully send audio to another system (over the same cables) such as a powered speaker or another room’s TeachLogic system. For further help, contact your dealer that sold the product or TeachLogic at www.teachlogic.com Support page.
Need help?
Do you have a question about the CPS-120 and is the answer not in the manual?
Questions and answers