
Related Manuals for TRAMEX MRH III


Summary of Contents for TRAMEX MRH III
- Page 1 MRH III non-destructive moisture & humidity meter 1.800.544.2843 www.calcert.com sales@calcert.com...
-
Page 2: Table Of Contents
MRH III USER GUIDE TABLE OF CONTENTS Introduction..................3 How it works..................4-5 Instrument Features ..............6-7 Operating Instructions ..............8 Non-Destructive Measurement Mode ......9-10 Wood Pin Meter Mode ............11-12 Non-Destructive Measurement Mode Comparative Scales ..............14-17 Roof Scale ................14-15 Masonry Scale ...............15-16 Drywall Scale .................16... -
Page 3: Introduction
MRH III USER GUIDE INTRODUCTION Thank you for selecting the new MRH III instrument, from Tramex. It has 3 measurement modes. The MRH III utilises electronic technology to provide you with an accurate and easy to use non-invasive instrument for the non-destructive measurement and tracing of moisture in a wide range of building materials. -
Page 4: How It Works
MRH III USER GUIDE HOW IT WORKS In non-destructive moisture measurement mode i.e. without the plug-in probes, the instrument operates on the principle that the electrical impedance of a material varies with its moisture content. The electrical impedance is measured by creating a low frequency alternating electric field between the electrodes as illustrated in Figure 1. - Page 5 MRH III USER GUIDE In Pin Probe Mode (i.e. with pin probe mode selected and an electrode plugged in), the MRH III is a resistance-type pin meter for determining the percentage moisture content of wood. In Hygrometer mode (i.e. with the Hygro-i2 Probe...
-
Page 6: Instrument Features
MRH III USER GUIDE INSTRUMENT FEATURES Your MRH III employs advanced digital technology to enable the incorporation of many features, which are listed below. ● 3 modes of measurement: Non-destructive moisture measurement, hygrometer and wood pin probe. ● 6 simple membrane keypad controls:... - Page 7 BATTERY message is shown on the LCD. ● HOLD freezes reading to facilitate ease of recording readings. When the MRH III is in HOLD mode, ‘H’ will flash on the display. ● If HOLD was selected prior to the MRH III...
-
Page 8: Operating Instructions
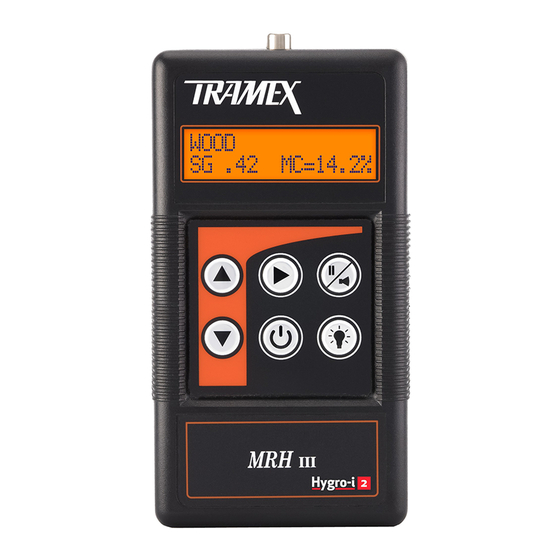
MRH III USER GUIDE OPERATING INSTRUCTIONS 1 = Phono socket for Wood Probes. 2 = Hygro-i2 Probe Socket (automatic hygrometer mode when plugged in). 3 = Backlit display. 4 = Hold / Audio Mode. 5 = Scale Key. 6 = UP / DOWN Keys 7 = ON / OFF Key 10 minute switch off 8 = Light Key. -
Page 9: Non-Destructive Measurement Mode
Select the required material scale using the key. Hold your MRH III directly on the wood, roof, masonry, drywall, laminate or other material being tested, ensuring both conductive-rubber electrodes are fully in contact with the surface. - Page 10 To turn audio tone on or off, press key twice in quick succession. The MRH III will automatically power-off after ten minutes if no key is pressed. If a key is pressed the power-off will be extended for an additional ten minutes.
-
Page 11: Wood Pin Meter Mode
Wood Electrodes into the socket at the top of the instrument and selecting Pin Probe using the key. In pin probe mode the MRH III works on the principle of electrical resistance. When the electrode pins are pressed or driven into the wood, the electrical resistance between the electrodes is measured and indicated on the digital display. - Page 12 SG of the material being tested has a significant effect on the reading. On the MRH III non-destructive test it is possible to adjust the specific gravity for better species-dependant readings if the material is of sufficient thickness. If the...
- Page 13 MRH III USER GUIDE Typical MRH III Displays Moisture Measurement Mode Battery warning 1.800.544.2843 www.calcert.com sales@calcert.com...
-
Page 14: Non-Destructive Measurement Mode - Comparative Scales
In addition moisture can cause considerable damage to the contents and fabric of the building as well as heat loss through wet insulation. Your MRH III can be used to confirm a new roof has been installed dry and help trace leaks. -
Page 15: Masonry Scale
Always press the electrodes firmly against the surface. The moisture profile of a masonry wall can be determined by moving your MRH III across the surface where it will read through most paints and wall coverings. It will help identify the different levels of moisture even if not apparent on the surface. -
Page 16: Drywall Scale
Your MRH III can be used to detect and identify areas of elevated moisture within or behind most types of wall and floor coverings. For example the MRH III can detect elevated moisture behind most types of ceramic tiles. -
Page 17: Laminate Scale
MRH III USER GUIDE Laminate Scale For applications where the Roof or Drywall scales are too sensitive and the Masonry scale is not sensitive enough, the Laminate scale can be used. This scale can be used for testing on ceramic tiles and other wall and floor coverings. - Page 18 MRH III USER GUIDE If possible, always take readings with the length of the instrument parallel to the direction of the wood grain. Calibration tests were carried out by Forbairt, the Irish Institute for Industrial Research and Standards, and are based on Douglas Fir, which had a published specific gravity (SG) of 0.50.
-
Page 19: Relative Humidity & Moisture Content
MRH III USER GUIDE Avoid taking readings on wood from the top of a stack stored outside as these may be affected by surface moisture from recent rain. When taking readings in chemically treated wood, it is advisable to allow for possible effects that the treatment may have on readings. -
Page 20: Wood Flooring
Tramex CME4 or CMEXpert should be used. Your MRH III can be used to measure the moisture content of the wood floor to ensure it meets specification. Likewise it can be used to check, on a comparative basis, through the floor covering, to identify elevated moisture in the substrate. -
Page 21: Specific Gravity Adjustment Table
NOTE: On the Wood, Drywall, Roofing and Laminate Scales the depth of penetration of the MRH III signal can be up to 1¼" (30 mm) When using any of these scales on wood or laminate over concrete or other screeds, the MRH III will be reading through the material and may be giving a much higher than expected reading. - Page 22 Concrete Your MRH III is not calibrated for concrete. The Tramex Concrete Encounter CME4, CMExpert and instruments are specifically designed for concrete flooring and are recommended where quantitative measurements are required.
-
Page 23: Table Of Wood Specific Gravities (Sg)
MRH III USER GUIDE Table of Wood Specific Gravities (SG) Hardwoods ( Am. = American ) Alder, Red (Am. Alder, Western Alder) Alnus rubra....0.41 Ash, White (Northern / Southern Ash) F. americana....0.60 Aspen, Quaking (Am. Aspen) Populus tremuloides....0.38 Basswood (Am. Basswood, Linden) Tilia americana....0.37 Beech Fagus Grandifolia.................0.64... - Page 24 MRH III USER GUIDE Softwoods Cedar, Alaska (Alaskan Yellow).............0.44 Cedar, Incense....................0.37 Cedar, Port-Orford..................0.43 Cedar, Western Red..................0.32 Douglas Fir, Coast..................0.48 Douglas Fir, Interior West...............0.50 Fir, California Red..................0.38 Fir, Grand......................0.37 Fir, Noble......................0.39 Fir, Pacific Silver..................0.43 Fir, White......................0.39 Hemlock, Western..................0.45 Larch, Western.....................0.52 Pine, Lodgepole...................0.41 Pine, Ponderosa ..................0.40...
-
Page 25: Wood Pin Meter Mode
MRH III USER GUIDE WOOD PIN METER MODE Factors Affecting Moisture Readings The readings of all moisture meters are influenced by the characteristics of different species of wood as well as temperature and other factors listed below. Species Different species of wood can vary in density and conductivity, which can have an effect on the electrical resistance of the wood. - Page 26 Your MRH III in PIN Probe mode can be used to measure the moisture content of the wood floor to ensure it meets specification.
- Page 27 MRH III USER GUIDE Calibration tests are based on Douglas fir, which has a published specific gravity (SG) of 0.50. Acceptable levels of moisture content depend on climatic conditions and we advise you check the levels acceptable in your area. The Table on page...
- Page 28 MRH III USER GUIDE Avoid taking readings on wood from the top of a stack stored outside as these may be affected by surface moisture from recent rain. When taking readings in chemically treated wood, it is advisable to allow for possible effects that the treatment may have on readings.
- Page 29 MRH III USER GUIDE Example 1: If meter reads 15% and temperature of wood is 10°C (50°F), actual moisture content is 17%. i.e.15% + 2% = 17% Example 2: If meter reads 15% and temperature of wood is 50°C (122°F), the actual moisture content is 11%.
-
Page 30: Species Correction Chart
MRH III USER GUIDE 1.800.544.2843 www.calcert.com sales@calcert.com... - Page 31 MRH III USER GUIDE 1.800.544.2843 www.calcert.com sales@calcert.com...
- Page 32 MRH III USER GUIDE 1.800.544.2843 www.calcert.com sales@calcert.com...
- Page 33 MRH III USER GUIDE 1.800.544.2843 www.calcert.com sales@calcert.com...
- Page 34 MRH III USER GUIDE 1.800.544.2843 www.calcert.com sales@calcert.com...
- Page 35 MRH III USER GUIDE 1.800.544.2843 www.calcert.com sales@calcert.com...
- Page 36 MRH III USER GUIDE 1.800.544.2843 www.calcert.com sales@calcert.com...
- Page 37 MRH III USER GUIDE 1.800.544.2843 www.calcert.com sales@calcert.com...
- Page 38 MRH III USER GUIDE 1.800.544.2843 www.calcert.com sales@calcert.com...
- Page 39 MRH III USER GUIDE 1.800.544.2843 www.calcert.com sales@calcert.com...
- Page 40 MRH III USER GUIDE 1.800.544.2843 www.calcert.com sales@calcert.com...
- Page 41 MRH III USER GUIDE 1.800.544.2843 www.calcert.com sales@calcert.com...
-
Page 42: Humidity Measurement Mode
Flooring (including in-situ method as per ASTM F2170 and the in-situ and hood methods as per British Standards BS 8201, 8203, 5325.) A typical MRH III display with the Hygro-i2 Probe is shown below. When the Hygro-i2 Probe is plugged into the MRH... - Page 43 Relative Humidity Measurement There are two International Standard methods of relative humidity measurement in flooring that can be carried out with the MRH III with the Hygro-i2 probe attached: (a) In-situ (below the surface of the slab) ASTM F2170 and BS 8201, 8203, 5325.
-
Page 44: Moisture Testing Guidelines
RH probes are not left in-situ for prolonged periods of time when the RH values are above 93%. With the Tramex system it is possible to remove the probe and seal the sleeve for future testing, thus giving a more reliable and accurate test. - Page 45 MRH III USER GUIDE Equalibration Time: Allow at least 30 minutes for probe to reach temperature equilibrium before measuring relative humidity. It is vitally important that the concrete is at the same temperature as the probe. Even a slight difference in temperature will produce a significant error in relative humidity measurement.
-
Page 46: Hole Liner Instructions Astm F2170 / Bs 8201, 8203, 5325
MRH III USER GUIDE HOLE LINER INSTRUCTION ASTM F2170 a - Cap d - Retrieval tool Drill a ¾" hole to required depth. Should the hole liner require additional sealing at the opening please consider Push hole liner to bottom of the application drilled hole. - Page 47 MRH III USER GUIDE RH Hood Method Ensure the surface is clean Seal cap to achieve an airtight seal Hygro-i2 probe Hygrohood Seal the Hygrohood to the surface with butyl tape provided Place the probe in the RH hood. Leave the Hygrohood in place...
- Page 48 MRH III USER GUIDE (b) On surface RH tests (RH hood method) The Tramex RH Hood can be used to perform testing to British Standards BS 8201, 8203, 5325. The following components are required to perform a RH Hood test: MRH III, Insulated hood (RHIH), Hygro-i2 probe and interface.
- Page 49 MRH III USER GUIDE Please refer to the period of time as specified by the standard being followed for the duration of the test. The user should always refer to national standard guidelines for definitive and current procedures and specifications.
-
Page 50: Calibration Check Salts
MRH III USER GUIDE CALIBRATION CHECK SALTS A saturated salt solution is the most suitable method for on-site testing of humidity sensors. The advantage of the on-site salt calibration check is that the user can check that the sensors are performing satisfactorily without having the need to send the sensors to a testing laboratory, which can be expensive and time consuming. - Page 51 MRH III USER GUIDE The test can be ended when RH% readings do not drift by more than 1% RH over a 5 minute period within the acceptable +/- 2% tolerance of the nominal 75% relative humidity. A temperature difference of +/- 1°C (1.8°F) can cause an error of up to +/-3 to 5% at 50%...
-
Page 52: Limitations
The MRH III will not detect or measure moisture through any electrically conductive materials inculding metal sheeting or cladding, many types of black EPDM rubber or wet surfaces. The MRH III is not suited for taking comperative readings in the concrete substrate through thick floor coverings such as wood. -
Page 53: Warranty
Ltd. This warranty shall not apply to anny defect, failure or damage caused by improper use or inadequate maintenance and care. In no event shall Tramex, its agents or distributors be liable to the customer or any other person, company or organisation for any special, indirect, or conseqential... -
Page 54: Product Development
A defective product should be returned by shipping pre paid, with full description of defect to your supplier or to Tramex at address shown on the back of this guide. PRODUCT DEVELOPMENT It is the policy of Tramex to continually improve and update all its products.
Need help?
Do you have a question about the MRH III and is the answer not in the manual?
Questions and answers