
Related Manuals for WINIA WKBE-U6RC/DT

Summary of Contents for WINIA WKBE-U6RC/DT
- Page 1 Four encastrable/Notice d’utilisation Built-in Oven / User Manual Inbouwoven / gebruikershandleiding WKBE-U6RC/DT...
- Page 2 Merci d’avoir choisi ce produit. Cette notice d’utilisation contient des informations et des consignes de sécurité importantes concernant l’utilisation et l’entretien de votre appareil. Lire attentivement cette notice d’utilisation avant d’utiliser votre appareil et la conserver pour consultation ultérieure. Icône Type Signification AVERTISSEMENT...
-
Page 3: Table Of Contents
TABLE DES MATIÈRES 1.CONSIGNES DE SÉCURITÉ ....................4 1.1. Avertissements de sécurité généraux ................4 1.2. Avertissements relatifs à l’installation ................6 1.3. Au cours de l’utilisation ....................7 1.4. Nettoyage et entretien ....................9 2.INSTALLATION ET PRÉPARATION À L’UTILISATION ........... 11 2.1. Instructions destinées à l’installateur ................11 2.2. -
Page 4: Consignes De Sécurité
1. CONSIGNES DE SÉCURITÉ • Lire attentivement cette notice d’utilisation dans son intégralité avant d’utiliser votre appareil et la conserver dans un endroit accessible pour consultation ultérieure. • Ce manuel a été préparé pour plusieurs modèles, votre appareil peut donc ne pas disposer de certaines fonctions décrites dans ce manuel. - Page 5 avec de l'eau, mais arrêter l'appareil puis couvrir les flammes par exemple avec un couvercle ou une couverture anti-feu. MISE EN GARDE : Risque d'incendie: ne pas entreposer d'objets sur les surfaces de cuisson. • L’appareil n’est pas destiné à être mis en fonctionnement au moyen d’une minuterie externe ou d’un système de commande à...
-
Page 6: Avertissements Relatifs À L'installation
dispositifs de protections non adaptés à l'appareil de cuisson peuvent provoquer des accidents. • Avant l'installation s'assurer que les conditions de distribution locale (tension et fréquence électrique) et le réglage de l'appareil sont compatibles. Les conditions de réglage de cet appareil sont inscrites sur la plaque signalétique de l’appareil. -
Page 7: Au Cours De L'utilisation
Le fabricant ne peut être tenu responsable de tout dommage causé en cas d’installation incorrecte par un techncien non qualifié. • Un moyen de déconnexion du réseau d’alimentation ayant une distance d’ouverture des contacts de tous les pôles doit être prévu dans la canalisation fixe conformément aux règles d’installation. - Page 8 • Rester prudent lors de l’ouverture de la porte du four pendant ou après la cuisson. La vapeur s’échappant du four peut provoquer des brûlures. • Ne pas placer de matériaux combustibles ou inflammables dans l’appareil ou près de l’appareil lorsqu’il est en fonctionnement.
-
Page 9: Nettoyage Et Entretien
• La lèchefrite s’incline lorsqu’on la sort du four. Attention à ne pas renverser ni à faire tomber de nourriture en la sortant du four. • Ne rien placer sur la porte du four lorsqu’elle est ouverte. Ceci pourrait déséquilibrer le four ou endommager la porte. - Page 10 Mise au rebut de votre machine Ce symbole sur le produit ou sur son emballage indique qu’il ne doit pas être traité comme un simple déchet ménager. Il doit être déposé dans un point de collecte adapté pour que les équipements électriques et électroniques soient recyclés.
-
Page 11: Installation Et Préparation À L'utilisation
2. INSTALLATION ET est peut-être endommagé, ne pas l’utiliser et contacter immédiatement un PRÉPARATION À L’UTILISATION professionnel agréé ou un technicien AVERTISSEMENT : Cet appareil doit qualifié. être installé par un professionnel • Vérifier qu’aucun élément ou matériau agréé ou par un technicien qualifié, combustible ou inflammable, par conformément aux instructions de cette exemple un rideau, de l’huile, un... -
Page 12: Branchement Électrique Et Sécurité
Installation murale Une fois les branchements électriques AVERTISSEMENT : L’APPAREIL effectués, insérer le four dans son DOIT ÊTRE BRANCHÉ À LA TERRE. emplacement en la poussant vers l’avant. • Avant le branchement sur le secteur, Ouvrir la porte du four et insérer 2 vis dans vérifier si la tension nominale de les trous du châssis du four. - Page 13 • Cet appareil est conçu pour utiliser une alimentation 220-240 V ~ et 380- 415 V 3 N~. Si votre alimentation est différente, contacter un professionnel agréé ou un électricien qualifié. • Le câble d’alimentation (H05VV-F) doit être assez long pour pouvoir être branché...
-
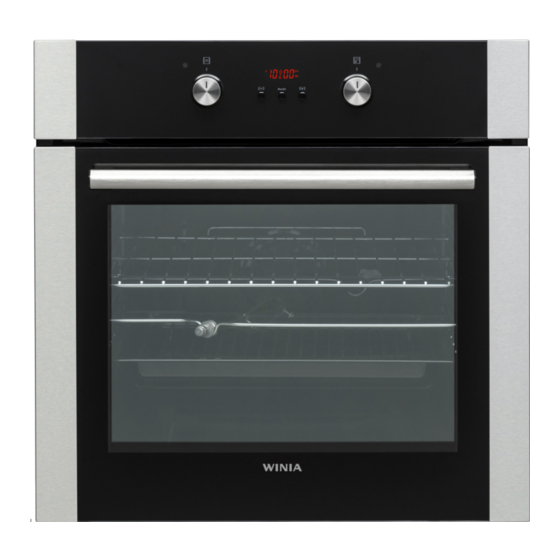
Page 14: Caractéristiques Du Produit
3. CARACTÉRISTIQUES DU PRODUIT Important : Les caractéristiques du produit varient et l’apparence de votre appareil peut être différente de celle présentée sur les figures ci-dessous. Liste des composants 1. Bandeau de commande 2. Poignée de la porte du four 3. -
Page 15: Utilisation De L'appareil
4. UTILISATION DE L’APPAREIL à la fois dans ce mode. Fonction Ventilation : Le voyant du 4.1. commAndes du four thermostat et les Manette de fonction voyants Faire tourner le bouton sur le symbole d’avertissement du correspondant à la fonction souhaitée. Pour four s’allument, les les détails des différentes fonctions, se résistances supérieure... -
Page 16: Utilisation Du Minuteur Électronique
Fonction Gril express Avertissement : Pendant la cuisson et poulet rôti : Le au gril, la porte du four doit être voyant du thermostat et fermée et la température du four doit les voyants être réglée sur 190 °C. d’avertissement du four s’allument, le gril et les 4.2. -
Page 17: Réglage De L'heure
3. Après quelques Description des fonctions secondes, le point cesse de clignoter et Cuisson automatique reste fixe. Cuisson manuelle Durée de cuisson Réglage de l’alarme sonore L’heure de l’alarme sonore peut être réglée Heure de fin de cuisson n’importe quand entre 0:00 et 23:59. L'alarme sonore existe à... - Page 18 1. Sélectionner la fonction de cuisson et 3. À l’aide des la température souhaitées à l’aide des boutons « + » et « - », manettes. définir l’heure de fin souhaitée. 2. Appuyer sur « MODE » jusqu’à ce que « dur » et le symbole s’affichent 4.
-
Page 19: Accessoires
4. L’heure actuelle disponibles. Sélectionner le son souhaité et n’appuyer sur aucun autre bouton. apparaît de nouveau Passé un court délai, le son sélectionné est à l’écran, et les symboles « A », enregistré. restent allumés. 4.4. Accessoires La grille métallique EasyFix Nettoyez soigneusement les accessoires 5. - Page 20 Grille pour lèchefrites Veiller à bien positionner la grille dans une lèchefrite. Cet accessoire est recommandé pour la grillade de steaks, de boulettes de viandes et d’aliments similaires. Lèchefrite La lèchefrite convient particulièrement à la 3. Insérer la pointe de la broche (a) dans cuisson de pot-au-feu.
-
Page 21: Nettoyage Et Entretien
5. NETTOYAGE ET ENTRETIEN Grille La grille convient particulièrement aux grillades ou aux aliments placés dans des 5.1. nettoyAge récipients allant au four. AVERTISSEMENT : Arrêter l’appareil et le laisser refroidir avant de le nettoyer. Instructions générales • Vérifier si les agents de nettoyage sont adaptés et recommandés par leur fabricant avant de les utiliser sur votre appareil. - Page 22 Nettoyage par catalyse Nettoyage des parties en verre Des parois catalytiques sont installées dans • Nettoyer régulièrement les parties en la cavité du four. Il s’agit des panneaux verre de votre appareil. mats de couleur claire placés sur les côtés •...
- Page 23 3. Fermer la porte jusqu’à ce qu’elle soit Pour replacer la vitre intérieure : presque en position fermée, puis retirer la 1. Pousser la vitre vers et en dessous du porte en la tirant vers soi. support (y), en direction de B. 3.
-
Page 24: Entretien
5.2. entretien AVERTISSEMENT : Les opérations d’entretien de cet appareil doivent être effectuées uniquement par un professionnel agréé ou un technicien qualifié. Remplacement de la lampe du four AVERTISSEMENT : Arrêter l’appareil et le laisser refroidir avant de le nettoyer. •... -
Page 25: Dépannage Et Transport
6. DÉPANNAGE ET TRANSPORT 6.1. dépAnnAge Si le problème persiste sur votre appareil après avoir suivi ces étapes de dépannage de base, contacter un professionnel agréé ou un technicien qualifié. Problème Cause possible Solution Vérifier que l’alimentation électrique est branchée. Le four ne s’allume pas. -
Page 26: Spécifications Techniques
7. SPÉCIFICATIONS TECHNIQUES 7.1. fiche énergie Marque Modèle WKBE-U6RC/DT Type de four ÉLECTRIQUE Masse de I’appareil 31,0 Indice d’efficacité énergétique - conventionnel 103,6 Indice d’efficacité énergétique - ventilation forcée 94,1 Classe énergétique Consommation énergétique (électricité) - conventionnelle kWh/cycle 0,87 Consommation énergétique (électricité) - ventilation forcée... - Page 27 ■ MISE AU REBUT : Ne jetez pas cet appareil avec les déchets municipaux non triés. Cet appareil est à mettre au rebut séparément pour pouvoir être traité de manière adaptée. WINIA est adhérent d’EcoLogic-France et assume ainsi ses obligations vis-à-vis de la réglementation sur les Déchets d’Equipements Electriques et Electroniques (DEEE).
- Page 28 Thank you for choosing this product. This User Manual contains important safety information and instructions on the operation and maintenance of your appliance. Please take the time to read this User Manual before using your appliance and keep this book for future reference. Icon Type Meaning...
- Page 29 CONTENTS 1.SAFETY INSTRUCTIONS ....................4 1.1 General Safety Warnings ....................4 1.2 Installation Warnings ......................6 1.3 During Use ........................7 1.4 During Cleaning and Maintenance .................8 2.INSTALLATION AND PREPARATION FOR USE ............10 2.1 Instructions for the Installer ..................10 2.2 Installation of the Oven ....................10 2.3 Electrical Connection and Safety..................
-
Page 30: Safety Instructions
1. SAFETY INSTRUCTIONS • Carefully read all instructions before using your appliance and keep them in a convenient place for reference when necessary. • This manual has been prepared for more than one model therefore your appliance may not have some of the features described within. - Page 31 the oven. • Handles may get hot after a short period during use. • Do not use harsh abrasive cleaners or scourers to clean the oven door glass and other surface. They can scratch the surfaces which may result in shattering of the door glass or damage to surfaces.
-
Page 32: Installation Warnings
heating a room. • Do not use the oven door handles to lift or move the appliance. • All possible measures have been taken to ensure your safety. Since the glass may break, care should be taken while cleaning to avoid scratching. Avoid hitting or knocking the glass with accessories. -
Page 33: During Use
• Any materials (i.e. cabinets) around the appliance must be able to withstand a minimum temperature of 100°C. • The appliance must not be installed behind a decorative door, in order to avoid overheating. 1.3 DurinG uSe • When you first use your oven you may notice a slight smell. -
Page 34: During Cleaning And Maintenance
• Make sure the appliance control knobs are always in the “0” (stop) position when it is not in use. • The trays incline when pulled out. Take care not to spill or drop hot food while removing it from the ovens. - Page 35 Disposal of your old machine This symbol on the product or on its packaging indicates that this product should not be treated as household waste. Instead it should be handed over to the applicable collection point for the recycling of electrical and electronic equipment.
-
Page 36: Installation And Preparation For Use
2. INSTALLATION AND do not use it and contact an authorised service person or qualified technician PREPARATION FOR USE immediately. WARNING : This appliance must be • Make sure that there are no flammable installed by an authorised service or combustible materials in the close person or qualified technician, according to vicinity, such as curtains, oil, cloth etc. -
Page 37: Electrical Connection And Safety
Installation in a wall unit After making the electrical connections, appliance’s power rating (also indicated insert the oven into the cabinet by pushing on the identification plate). it forward. Open the oven door and insert • During installation, please ensure 2 screws in the holes located on the oven that isolated cables are used. - Page 38 • Fix the supply cable in the cable clamp and then close the cover. • The terminal box connection is placed on the terminal box. Blue Brown Yellow+Green EN - 12...
-
Page 39: Product Features
3. PRODUCT FEATURES Important: Specifications for the product vary and the appearance of your appliance may differ from that shown in the figures below. List of Components 1. Control Panel 2. Oven Door Handle 3. Oven Door Control Panel 4. Timer 5. -
Page 40: Use Of Product
4. USE OF PRODUCT Fan Function: The oven’s thermostat and warning lights will 4.1 oven ControlS switch on, and the Oven function control knob upper and lower Turn the knob to the corresponding symbol heating elements and of the desired cooking function. For the fan will start operating. -
Page 41: Cooking Table
function is used for faster grilling as well as Puff Pastry 2-3-4 170-190 25-35 for grilling food with a larger surface area, such as meat. It is also suitable for roasting Cake 2-3-4 150-170 25-35 chicken using the roasting skewer. For Cookie 2-3-4 150-170... - Page 42 display. 3. The symbol will 1. Press the “+” and “-” remain illuminated, the keys simultaneously. time will be saved and Symbol will the warning will be set. appear, and the dot in the middle of the screen will start to flash.
- Page 43 Semi-automatic time adjustment (finishing time) 2. Press “MODE” until This function automatically starts the oven you see “dur” and so that cooking will finish at a set time. You symbol on the screen. can set an end time of up to 10 hours after The symbol “A”...
-
Page 44: Accessories
cooking will finish at the set finishing time. • Level T2 is recommended for single When the timer reaches zero, the oven will level cooking with the telescopic rails. switch off, an audible warning will sound • The turnspit wire grid must be and the symbols “A”... -
Page 45: Cleaning And Maintenance
WARNING Place the grid to any corresponding rack in the oven cavity correctly and push it to the end. 3. Insert the tip of the skewer (a) into the skewer insertion hole (d). 4. Fit the skewer on the skewer grid, remove the handle and close the oven door. - Page 46 General Instructions If a large amount of fat is spilled onto the liner it may reduce its efficiency. To • Check whether the cleaning materials overcome this problem, set the oven to are appropriate and recommended by maximum temperature for about 20 - 30 the manufacturer before use on your minutes.
- Page 47 Cleaning Painted Surfaces (if available) • Spots of tomato, tomato paste, ketchup, lemon, oil derivatives, milk, sugary foods, sugary drinks and coffee should be cleaned with a cloth dipped in warm water immediately. If these stains are not cleaned and allowed to dry on the surfaces they are on, they should NOT be rubbed with hard objects (pointed objects, steel and plastic scouring wires,...
-
Page 48: Maintenance
Removal of the Wire Shelf To remove the wire rack, pull the wire rack as shown in the figure. After releasing it from the clips (a), lift it up. 5.2 MaintenanCe WARNING: The maintenance of this appliance should be carried out by an authorised service person or qualified technician only. -
Page 49: Troubleshooting&Transport
6. TROUBLESHOOTING&TRANSPORT 6.1 troubleShootinG If you still have a problem with your appliance after checking these basic troubleshooting steps, please contact an authorised service person or qualified technician. Problem Possible Cause Solution Check whether there is power supplied. Oven does not switch Power is switched off. -
Page 50: Technical Specifications
7. TECHNICAL SPECIFICATIONS 7.1 enerGy fiChe Brand Model WKBE-U6RC/DT Type of Oven ELECTRIC Mass 31,0 Energy Efficiency Index - conventional 103,6 Energy Efficiency Index - fan forced 94,1 Energy Class Energy consumption (electricity) - conventional kWh/cycle 0,87 Energy consumption (electricity) - fan forced... - Page 51 Wij danken u dat u voor dit product hebt gekozen. Deze gebruikershandleiding bevat belangrijke informatie over veiligheid en instructies die zijn bedoeld u te helpen in de bediening en het onderhoud van uw apparaat. Neem de tijd om deze gebruikershandleiding door te lezen voordat u uw apparaat in gebruik neemt en bewaar hem als naslagwerk voor de toekomst.
- Page 52 INHOUD 1.VEILIGHEIDSINSTRUCTIES ....................4 1.1. Algemene veiligheidswaarschuwingen ................4 1.2. Waarschuwingen bij de installatie .................6 1.3. Tijdens het gebruik ......................7 1.4. Tijdens reiniging en onderhoud ..................9 2.INSTALLATIE EN VOORBEREIDING VOOR GEBRUIK ..........11 2.1. Instructies voor de installateur ..................11 2.2. Installatie van de oven ....................11 2.3.
-
Page 53: Veiligheidsinstructies
1. VEILIGHEIDSINSTRUCTIES • Lees deze instructies zorgvuldig en volledig voor u uw apparaat in gebruik neemt en bewaar deze op een handige locatie voor eventuele raadpleging in de toekomst. • Deze handleiding is gemaakt voor meer dan één model. Het is mogelijk dat een aantal functies, die in deze handleiding worden besproken, niet aanwezig zijn op uw apparaat. - Page 54 • Gebruik het apparaat niet met een externe timer of afzonderlijk afstandsbedieningsysteem. • Het apparaat wordt tijdens gebruik heet. Zorg ervoor geen verwarmingselementen in de oven aan te raken. • Tijdens het gebruik kunnen handvaten die men tijdens het normale gebruik kort vast neemt warm worden.
-
Page 55: Waarschuwingen Bij De Installatie
• Voor de aansluiting van uw apparaat moet u ervoor zorgen dat de lokale distributievoorwaarden (soort gas en gasdruk of elektrische spanning en frequentie) en de vereisten van het apparaat compatibel zijn. De specificaties voor dit apparaat staan vermeld op het label. •... -
Page 56: Tijdens Het Gebruik
• Het apparaat moet worden gemonteerd door een geautoriseerde monteur. De fabrikant is niet verantwoordelijk voor eventuele schade die kan worden veroorzaakt door de defecte plaatsing en installatie door niet-geautoriseerde personen. • Controleer bij het uitpakken van het apparaat of er tijdens het transport geen schade is opgelopen. - Page 57 stoom uit de oven kan brandwonden veroorzaken. • Plaats geen ontvlambaar of brandbaar materiaal in of in de buurt van het apparaat als het in werking is. • Gebruik altijd ovenhandschoenen om gerechten in de oven te verplaatsen of uit de oven te nemen. •...
-
Page 58: Tijdens Reiniging En Onderhoud
1.4. tijdens reiniging en onderhoud • Schakel het apparaat altijd uit voordat u het schoonmaakt of onderhoudt. U kunt deze activiteiten starten na het verwijderen van de stekker uit het stopcontact of nadat de hoofdschakelaars zijn uitgeschakeld. • Verwijder de bedieningsknoppen niet tijdens het reinigen van het bedieningspaneel. - Page 59 Afvoeren van uw oude machine Dit symbool op het product of op de verpakking geeft aan dat dit product niet mag worden behandeld als huishoudelijk afval. In plaats daarvan moet het worden afgevoerd naar het geschikte verzamelpunt voor de hergebruik van elektrische en elektronische apparatuur.
-
Page 60: Installatie En Voorbereiding Voor Gebruik
2. INSTALLATIE EN 2.2. instAllAtie vAn de oven VOORBEREIDING De apparaten worden geleverd met installatiekits. Ze kunnen worden VOOR GEBRUIK gemonteerd in een werkblad voorzien van WAARSCHUWING: Dit apparaat mag de correcte afmetingen. De afmetingen voor uitsluitend worden geïnstalleerd door de kookplaat en de oven vindt u hieronder. - Page 61 Installatie onder een werkblad Installatie in een wandeenheid • Nadat u de elektrische verbindingen hebt gemarkeerd, plaatst u de oven in het kastje door deze vooruit te duwen. Open de ovendeur en bevestig twee schroeven in de gaten voorzien in het ovenframe.
-
Page 62: Elektrische Aansluiting En Veiligheid
2.3. elektrische AAnsluiting • Zorg ervoor dat alle aansluitingen goed en veiligheid vastzitten. WAARSCHUWING: De elektrische • Bevestig de stroomkabel in de aansluiting van dit apparaat mag kabelklem en sluit de deksel. uitsluitend worden uitgevoerd door • De aansluiting op het klemmenblok erkend onderhoudspersoneel of een wordt gedaan op de aansluitkast. -
Page 63: Productkenmerken
3. PRODUCTKENMERKEN Belangrijk: De specificaties van het product verschillen en het uiterlijk van uw apparaat kan afwijken van de afbeeldingen die hieronder zijn weergegeven. Onderdelenlijst 1. Bedieningspaneel 2. Deurgreep van de oven 3. Ovendeur Bedieningspaneel 4. Timer 5. Bedieningsknop ovenfunctie 6. -
Page 64: Gebruik Van Het Product
4. GEBRUIK VAN HET PRODUCT voor te verwarmen en het is het beste in deze functie één bakplaat tegelijk te gebruiken. 4.1. ovenbediening Ventilatiefunctie: Het Bedieningsknop ovenfunctie thermostaatlampje en Draai de knop naar het overeenstemmende waarschuwingslampje symbool van de gewenste kookfunctie. van de oven gaan aan Zie voor details van andere functies en de onderste en... -
Page 65: Bereidingstabel
4.2. bereidingstAbel Waarschuwing: De ovendeur moet tijdens het grillen zijn gesloten, en de temperatuur moet zijn ingesteld op 190° C. Gerechten Functie met snelle grill voor geroosterde kip: Het 170 - Bladerdeeg 2-3-4 35 - 45 thermostaatlampje en waarschuwingslampje 170 - Taart 2-3-4 30 - 40... - Page 66 3. Na een aantal Functiebeschrijving seconden stopt de stip met knipperen en blijft Automatische bereiding hij branden. Handmatige bereiding Kooktijd Tijdsinstelling geluidssignaal Instellen van de eindtijd van de De instelling van het geluidssignaal kan bereiding worden ingesteld op een tijdsperiode tussen 0:00 en 23:59 uur.
- Page 67 Semi-automatische tijdsinstelling 2. Druk op 'MODE' (kookperiode) totdat u 'end' en symbool op het Deze functie helpt u om gedurende scherm ziet. 'A' en de een vaste tijdsperiode te koken. Er kan huidige tijd knippert. een tijdsbereik van 0 tot 10 uur worden ingesteld.
-
Page 68: Accessoires
4. De huidige tijd de gewenste toon en druk niet op andere knoppen. Na een korte tijd is het gekozen wordt weer zichtbaar signaal opgeslagen. op het scherm en de symbolen 'A', 4.4. Accessoires blijven branden. Het EasyFix-draadrek Reinig vóór het eerste gebruik de accessoires grondig met warm water, 5. - Page 69 Draadrooster voor diepe ovenbakplaten Zorg dat het draadrooster juist geplaatst is in een diepe ovenbakplaat. Het wordt aanbevolen dit accessoire te gebruiken wanneer u steaks, gehaktballen en soortgelijk voedsel grilt. Diepe bakplaat De diepe bakplaat wordt gebruikt voor de 3. Steek de punt van het draaispit (a) in het bereiding van stoofschotels.
-
Page 70: Reiniging En Onderhoud
5. REINIGING EN ONDERHOUD 5.1. reiniging WAARSCHUWING: Schakel het apparaat uit en laat het volledig afkoelen voordat u schoonmaakwerkzaamheden op uw apparaat uitvoert. Algemene instructies • Controleer voor gebruik van WAARSCHUWING schoonmaakmiddelen in uw apparaat of Plaats het rooster op een ze geschikt zijn en aanbevolen worden overeenstemmend rek correct in de door de fabrikant. - Page 71 Katalytische reiniging • Reinig de glazen delen binnen en buiten met een glasreiniger. Spoel daarna het Binnen de ovenruimte zijn er katalytische glas af en droog het grondig met een platen geïnstalleerd. Dit zijn de mat droge doek. afgewerkte, lichtgekleurde panelen aan de zijkanten en/of het mat afgewerkte Reinigen van roestvrij stalen onderdelen paneel aan de achterkant van de oven.
- Page 72 Om het binnenglas te vervangen: 3. Sluit de deur tot deze bijna volledig en 2. Duw het glas naar beneden uit de beugel verwijder de deur door deze naar u toe te die het op zijn plaats houdt (y) in richting B. trekken.
-
Page 73: Onderhoud
5.2. onderhoud WAARSCHUWING: Het onderhoud aan dit apparaat dient uitsluitend te worden uitgevoerd door erkend onderhoudspersoneel of een gekwalificeerd elektricien. Vervangen van de ovenlamp WAARSCHUWING: Schakel het apparaat uit en laat het volledig afkoelen voordat u schoonmaakwerkzaamheden op uw apparaat uitvoert. •... -
Page 74: Probleemoplossing En Transport
6. PROBLEEMOPLOSSING EN TRANSPORT 6.1. ProbleemoPlossing Als u na deze basisprobleemoplossing nog problemen met uw apparaat ondervindt, neem dan contact op met een erkend servicebedrijf of een erkende technicus. Probleem Mogelijke oorzaak Oplossing Controleer de stroomtoevoer. De oven gaat niet aan. De stroom is uitgeschakeld. -
Page 75: Technische Specificaties
7. TECHNISCHE SPECIFICATIES 7.1. energiefiche Merk Model WKBE-U6RC/DT Oventype ELEKTRISCH Massa 31,0 Index energie-efficiëntie - conventioneel 103,6 Index energie-efficiëntie – hete lucht 94,1 Energieklasse Energieverbruik (stroom) - conventioneel kWh/cyclus 0,87 Energieverbruik (stroom) – hete lucht kWh/cyclus 0,79 Aantal ruimtes Warmtebron... - Page 76 ONDITIONS GENERALES DE GARANTIE ONDITIONS LEGALES DE GARANTIE Indépendamment de la garantie ainsi consentie, le reste tenu des défauts de VENDEUR conformité du bien au contrat et des vices rédhibitoires dans les conditions prévues aux articles 1641 à 1649 du code civil. Article L 217- 4 du code de la consommation : est tenu de livrer un bien conforme au contrat et répond des défauts de conformité...
- Page 77 VI du présent document. a) La garantie prend effet sous réserve que le produit a été fourni par WINIA Electronics France S.A.S.U. Le numéro de série justifiant l’origine.
- Page 78 Le présent contrat ne s’applique qu’aux appareils de la marque WINIA, vendus par WINIA Electronics France S.A.S.U. (le contrôle du N° de série justifiant l’origine du produit) et donnant lieu à intervention sur le territoire de France métropolitaine. La garantie ne s’applique qu’à la condition que l’appareil vendu soit utilisé à...
- Page 79 ONDITIONS GENERALES DE GARANTIE A GARANTIE CONTRACTUELLE NE COUVRE PAS Les appareils d’exposition, les coups, chocs, casse, chutes, éraflures, avaries occultes ou tout dommage d’ordre esthétique n’entravant pas le bon fonctionnement de l’appareil, les frais et dommages résultant d’utilisation d’énergie, d’emploi ou installation non conforme aux prescriptions du constructeur, ainsi que toutes les précautions indiquées dans le manuel utilisateur, ...
Need help?
Do you have a question about the WKBE-U6RC/DT and is the answer not in the manual?
Questions and answers