Advertisement
Quick Links
Advertisement

Related Manuals for Aunger APT4300

Summary of Contents for Aunger APT4300
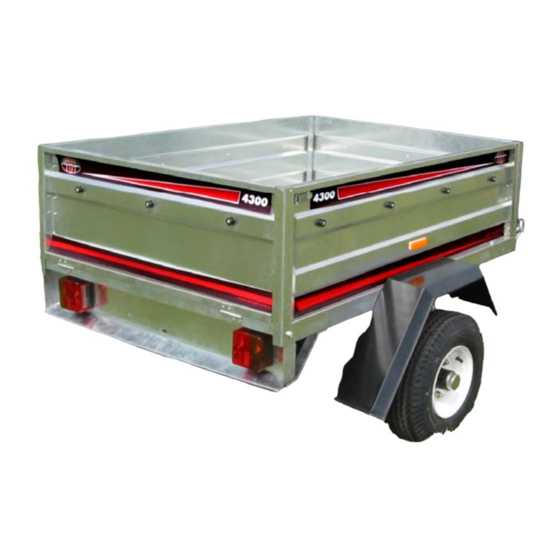
- Page 1 Aunger APT4300 Box Trailer Assembly Instructions TRAILER KIT APT4300...
- Page 2 If there are components missing, DO NOT ASSEMBLE THE TRAILER, contact Aunger on (07) 3260 2400 for replacement parts. DO NOT substitute any component as this will void warranty and may affect ADR compliance.
- Page 3 Assemby Instructions for APT4300 – Aunger 4’x 3’ Trailer This assembly instruction is for building TRAILER KIT APT4300. Please use the enclosed assembly kit: DESCRIPTION DESCRIPTION M8*20 HEX-BOLT 10 L LATCH M10*30 HEX-BOLT FRONT GATE M8*30 FLANGE HEX-BOLT REAR GATE...
- Page 4 Assemby Instructions for APT4300 – Aunger 4’x 3’ Trailer 1. Begin by placing the platform upside down as shown. The bolt holes are at the front of the trailer. 2. Place the axle on the platform as shown and use 2 x M10*30 hex-bolt, 2 x M10 Flat Washer &...
- Page 5 Assemby Instructions for APT4300 – Aunger 4’x 3’ Trailer 3. Place the elbow (drawbar bracket) (3) onto the front of trailer platform with the two right angle elbows on top as shown (1&2). Secure with 2 x M8*30 flange hex bolt and 2 x M8 lock washer.
- Page 6 Assemby Instructions for APT4300 – Aunger 4’x 3’ Trailer Fit the drawbar front and rear as shown. Attach drawbar to axle with 1 x hex-bolt M10x75 and locknut M10 and tighten (1). Secure drawbar latch as shown (2), insert R pin through latch 5.
- Page 7 Assemby Instructions for APT4300 – Aunger 4’x 3’ Trailer 7. At this time, secure the black plastic tube that contains the wiring to the body of the trailer as shown below. Simply twist these ties to secure the wire. 8. Remove the Hubnuts from the axle. Then mount a wheel on each side using 4 x M12 hubnuts (ensure tapered edge is facing in and located within hole).
- Page 8 Assemby Instructions for APT4300 – Aunger 4’x 3’ Trailer 10. Loosen the knob first and then rotate locking plate over elbow (drawbar bracket) and tighten. Ensure the nut underneath the knob on the underside of the drawbar is tightened. Put the two R pins into the two holes. One hole is on the L latch and another is on the...
- Page 9 Assemby Instructions for APT4300 – Aunger 4’x 3’ Trailer 11. Attach the side panels by aligning the panel and the holes in the trailer body (1). The bolts on the bottom at the rear of the side panel will secure the light board to the trailer (2).
- Page 10 Assemby Instructions for APT4300 – Aunger 4’x 3’ Trailer Your trailer should now look like this: 12. Mount the frontgate. The front gate is the panel with the white reflectors on it. Put 1 x M8* 15 flange hex bolt and 1 x M8 Lock Washer in each side of the gate at the top (1).
- Page 11 Assemby Instructions for APT4300 – Aunger 4’x 3’ Trailer 13. Now all the bolts can be tightened. If you have any problems with lining the panels, simply undo the the bolts, adjust the panel as necessary and retighten. Fit the tailgate into the hinges and secure the latches on the sides 14.
- Page 12 Assemby Instructions for APT4300 – Aunger 4’x 3’ Trailer 15. Attach the coupling, chain and triangle bracket to the drawbar as shown using 2 x M10*80 Hex Bolt and 2 x M10 Locknut. Place the coupling on top of the drawbar and align the holes. Place bolt through coupling, through chain (as shown) and through the triangle bracket underneath drawbar.
- Page 13 Your APT4300 is now fully assembled. WARNING NOTE :- This Trailer MUST BE Registered at the local Main Roads Authority BEFORE Road Use. Refer to the documentation on ‘How to register your Aunger Trailer’, log onto www.aunger.com.au or contact your local main roads authority Always ensure the wheel nuts are tightly fastened and the connector plug is connected correctly to allow trailer brake light, park light &...
- Page 14 Re-fill grease on bearing as deemed necessary. Signs that your hubs may require grease include noisy bearings, poor free-spin of wheels and overheated hubs. If grease does not fix this problem, call Aunger on 07 3260 2400 Always check fastening points such as coupling, chain and tilting mechanism...
- Page 15 Assemby Instructions for APT4300 – Aunger 4’x 3’ Trailer Accessories Cage - APT4310 Designed for this trailer, this cage kit doubles the useable volume of the trailer. Clips into place (no drilling required). Cage Cover - APT4311 Cover made of UV Treated PVC to fit Cage –...
-
Page 16: Troubleshooting Guide
3) Open the trailer plug to check that all wires are connected into a slot 4) If no obvious fault can be seen, contact Aunger for technical assitance Noisy Wheel Bearings 1) Check to see if the hub has any side to side to movement. If it does, the stub axle nut needs to be tightened. - Page 17 Try turning the bolt anti-clockwise to align the thread and then tighten. Check the thread of the bolt to ensure it is not burred. If it is, contact Aunger for a replacement or check the spare components bag for a duplicate...
- Page 18 Bolts Kit APT1257 Elbow (Drawbar Bracket) APT1258 Light Board Support Bracket APT1259 For costs on these spare parts or any other enquiry contact Aunger on 07 3260 2400 or visit www.aunger.com.au Information for registration: Tare Weight 80 kgs Tyre Size...
Need help?
Do you have a question about the APT4300 and is the answer not in the manual?
Questions and answers