Advertisement
Quick Links
Advertisement

Related Manuals for Aunger 5350

Summary of Contents for Aunger 5350
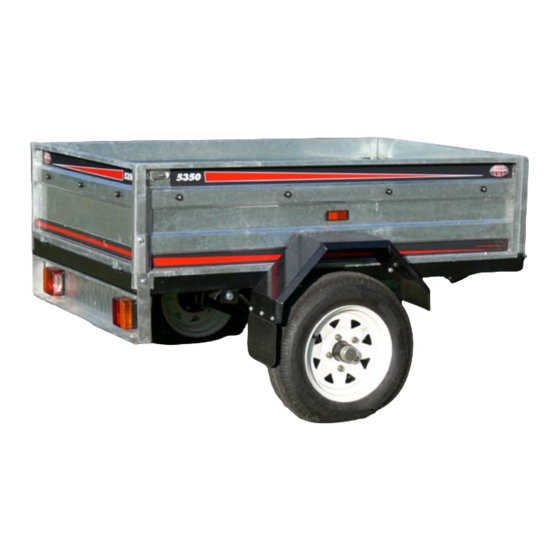
- Page 1 Aunger 5350 Box Trailer Assembly Instructions TRAILER KIT APT5350...
- Page 2 Aunger on (07) 3260 2400 for replacement parts. DO NOT substitute any component as this will void warranty and may affect ADR compliance. If you have any problems with assembling the trailer, please contact Aunger on (07) 3260 2400 for technical assistance...
- Page 3 This assembly instruction is for building TRAILER KIT APT5350 Please use the enclosed assembly kit: DESCRIPTION QTY NO. DESCRIPTION 1 M8*20 FLANGE HEX-BOLT 17 LIGHT BOARD SUPPORTS 2 2 M8*25 FLANGE HEX-BOLT 18 COTTER PIN 3 M6*16 FLANGE HEX-BOLT 19 SPRING PLATE 4 M8*16 FLANGE HEX-BOLT 20 FRONT GATE 5 M10*70 HEX-BOLT...
- Page 4 APT5350 Assembly Instructions www.aunger.com.au Start by laying the trailer platform on its back as shown. Note that the hinges are located at the back of the trailer. Now fit the leaf spring onto the trailer platform. Fit the end with the nylon insert, as pictured, to the front of the trailer.
- Page 5 APT5350 Assembly Instructions www.aunger.com.au Secure the slipper (back part of leaf spring) using an M14*80 Hex Bolt with pin hole, M14 Locknut and cotter pin same as previous step. Split the cotter pin. Repeat these steps to secure the leaf spring for the other side.
- Page 6 APT5350 Assembly Instructions www.aunger.com.au Attach the spring plate using 2 x U-Bolt and 4 x M10 Locknut (on the U-Bolt already) on each side as shown. Be sure to gradually tighten each one to ensure the plate is even and that locknuts are equally distanced along the thread.
- Page 7 APT5350 Assembly Instructions www.aunger.com.au Now secure the drawbar to the trailer frame using an M10 Flat Washer, M10 Spring Washer & M10*70 hex-bolt in that order and tighten. Repeat for second hole located at the front of trailer body. Ensure the drawbar safety chain link is facing up when fitting the drawbar.
- Page 8 APT5350 Assembly Instructions www.aunger.com.au Secure bracing to side of drawbar using M10*70 Hex Bolt and M10 Locknut. Repeat for both holes. At this point in time, check that all bolts are secure and tight. Now flip the trailer over so it is sitting on its wheels.
- Page 9 APT5350 Assembly Instructions www.aunger.com.au Sit the side panel onto the trailer frame as shown, ensuring the latch is towards the back of the trailer. Secure the side panels using 1 x M8*16 Flange Hex Bolt and M8 Lock washer at the front hole.
- Page 10 APT5350 Assembly Instructions www.aunger.com.au Attach tailgate by aligning the hinge on the gate to the body and sliding it across. The gate is then secured by securing the latch as shown below Secure the light board support brackets to the bottom of light board using M6*16 Flange Hex Bolt and M6 Locknut, M6 Flat Washer.
- Page 11 APT5350 Assembly Instructions www.aunger.com.au Secure side of supports to trailer frame and panel using M8*16 flange hex bolt and M8 lock washer for top hole. Then use M8*20 Flange hex bolt and M8 Lock Washer for bottom hole. Repeat for other side...
- Page 12 APT5350 Assembly Instructions www.aunger.com.au Secure Mudguards using M8*25 flange hex bolt and M8 Spring Washer. Two bolts per side. Ensure the mudflaps are pointing to the back of the trailer. Repeat this step for the other mudguard. Secure coupling and triangle bracket as shown using M10*80 Hex Bolt and M10...
- Page 13 Your APT5350 is now fully assembled. WARNING NOTE: This Trailer MUST BE Registered at the local Main Roads Authority BEFORE Road Use. Refer to the documentation on ‘How to register your Aunger Trailer’, log onto www.aunger.com.au or contact your local main roads authority Always ensure the wheel nuts are tightly fastened and the trailer plug is connected correctly to allow trailer brake light, park light &...
- Page 14 Check tires regularly to ensure even balance and wear. See the ‘safe towing guide’ for tips and guidelines on how to ensure safe and proper use of your Aunger 5350 Trailer and other trailers, or to view this document and browse the great range of Aunger Products logon to www.aunger.com.au...
- Page 15 APT5350 Assembly Instructions www.aunger.com.au Accessories Spare Wheel – APT5351 12” Wheel and U-Bolt bracket to secure wheel to drawbar Standard Tarp – APT5352 Flat UV Treated PVC tarp specifically designed to fit the APT5350 trailer. Mesh Cage Kit – APT5353...
- Page 16 APT5350 Assembly Instructions www.aunger.com.au Mesh Cage Kit Tarp - APT5354 Cover made of UV Treated PVC to fit APT5353 Cage Kit Handle Kit - APT5355 4 piece handle kit for protection of mudguards and tie down anchor points Moulded Plastic Lid –...
- Page 17 3) Open the trailer plug to check that all wires are connected into a slot 4) If no obvious fault can be seen, contact Aunger for technical assistance Noisy Wheel Bearings 1) Check to see if the hub has any side to side to movement. If it does, the stub axle nut needs to be tightened.
- Page 18 Try turning the bolt anti-clockwise to align the thread and then tighten. Check the thread of the bolt to ensure it is not burred. If it is, contact Aunger for a replacement or check the spare components bag for a duplicate...
- Page 19 APT5350 Assembly Instructions www.aunger.com.au Information for Registration: Tare Weight 114 kgs Tyre Size 558 mm (5.30 – 12) Ply Rating 6 ply Rim profile 12” x 4” Cold Tyre Pressure 80 psi (552 kpa) Axle Rating 600 kgs Coupling rating...
- Page 20 (12) months from the first purchase. 2. Aunger will (at Aunger’s option) repair or replace at no cost any part or parts which, in Aunger’s reasonable opinion, are shown to be defective.
- Page 21 No side to side movement in wheel Latches on back panel are secure All instructions read and followed Fax or Post this to Aunger within fourteen (14) days of purchase to validate your 12 Months Manufacturers Warranty. See Over for Warranty details Aunger Carcraft Pty Ltd...
- Page 22 Affix Stamp Here AUNGER CARCRAFT PTY LTD WARRANTY REGISTRATION PO BOX 1076 EAGLE FARM 4009 QUEENSLAND --------------------------------------------------------------------------------------------------- Fold here -------------------------------------------------------------------------------------------------- Fold here...
Need help?
Do you have a question about the 5350 and is the answer not in the manual?
Questions and answers