Advertisement
Quick Links
Advertisement

Related Manuals for ageLOC LumiSpa iO


Summary of Contents for ageLOC LumiSpa iO
- Page 1 User Manual For Hong Kong and Macau Market 2022 July...
-
Page 2: New Functions
NEW FUNCTIONS Synchronized Usage Tracking Intelligent Customized Selfie Product Treatments and Awards Coaching Treatments Timeline Recommendations* * Under Development... - Page 3 GET TO KNOW YOUR LUMISPA iO...
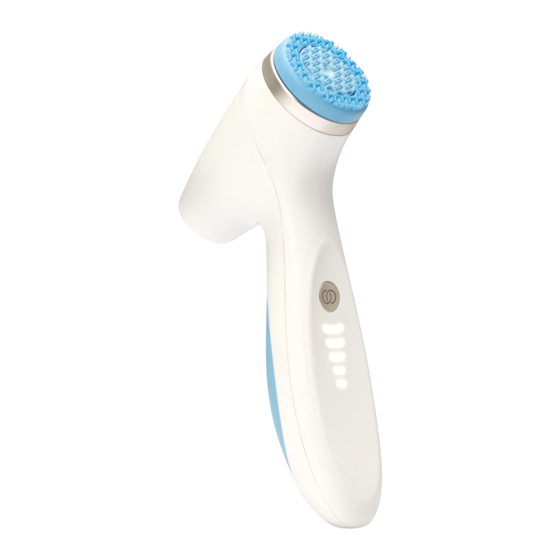
- Page 4 HEAD IMPROVED MOTOR QUADRANT LEDs Hidden until lit METALLIC POWER BUTTON UI LEDs Hidden until lit SOFT-GRIP HANDLE IMPROVED WIRELESS BATTERY CHARGER STAND...
- Page 5 COMPLETE...
- Page 6 HOW TO START A TREATMENT To start a Treatment, quick press the power button Front LEDs will light up and treatment will start...
- Page 7 USING YOUR LUMISPA iO Gently glide the treatment head back and forth in slow broad strokes...
- Page 8 HOW TO PAUSE A TREATMENT PAUSED To pause / resume treatment, quick press the power button Front LEDs will breathe while the device is paused Press again to resume...
- Page 9 HOW TO STOP A TREATMENT To turn off, hold down the power button Front LEDs will turn off...
- Page 10 HOW TO ACCESS VERA THROUGH NU TOWN APP...
- Page 11 HOW TO ACCESS VERA THROUGH NU TOWN APP Download NU TOWN App in App Store / Google Play Nu Town 星享城...
- Page 12 HOW TO ACCESS VERA THROUGH NU TOWN APP Go to Personal and tap VERA...
- Page 13 HOW TO PAIR YOUR DEVICE Using VERA Function in Nu Town App...
- Page 14 Launch your VERA Function NOTE: Make sure all other LumiSpa devices have been turned off for 10 minutes before pairing; or go into another room so your phone only detects your LumiSpa...
- Page 15 My Products on front page...
- Page 16 Pair New Device...
-
Page 17: Let's Get Started
LET’S GET STARTED... - Page 18 While the device is off, double press the power button to turn the device on LED lights on...
- Page 19 CONNECT LED lights on...
- Page 20 Tap your LumiSpa iO...
- Page 21 Device will initiate pairing...
- Page 22 If pairing succeeds, the success screen will appear (Or device version update if available) CONNECTED...
- Page 23 If pairing fails, the failure screen will appear Soft reset your LumiSpa iO by placing the device on the charger and pressing the power button for 5 seconds Try to pair again...
- Page 24 SYNCHRONIZED TREATMENTS Using VERA Function in Nu Town App...
- Page 25 SYNCHRONIZED TREATMENTS Once you have paired your device, tap on Your LumiSpa iO...
- Page 26 SYNCHRONIZED TREATMENTS Explore Treatments to discover new treatments and manage treatments...
- Page 27 SYNCHRONIZED TREATMENTS View your treatments in My Treatments...
- Page 28 SYNCHRONIZED TREATMENTS Explore new treatments in Discover...
- Page 29 SYNCHRONIZED TREATMENTS Choose from the options to start Synchronized Treatment...
-
Page 30: Start Treatment
SYNCHRONIZED TREATMENTS START TREATMENT to start a treatment and watch guided tutorial... - Page 31 SYNCHRONIZED TREATMENTS Follow along with the Guided Tutorial during your treatment Note: Intelligent Coaching will let you know if you are pressing too hard or moving too fast...
- Page 32 SYNCHRONIZED TREATMENTS Your Treatment Summary will display after a treatment is completed RED: Press / Move too much GREEN: Normal...
- Page 33 CREATE CUSTOMIZED TREATMENTS Using VERA Function in Nu Town App...
- Page 34 CUSTOMIZED TREATMENTS Once you have paired your device, tap Your LumiSpa iO...
- Page 35 CUSTOMIZED TREATMENTS To create a Custom Treatment, tap Explore Treatments...
- Page 36 CUSTOMIZED TREATMENTS CREATE NEW TREATMENT...
- Page 37 CUSTOMIZED TREATMENTS Name your treatment SELECT TREATMENT HEAD...
- Page 38 CUSTOMIZED TREATMENTS Select Your Treatment Head...
- Page 39 CUSTOMIZED TREATMENTS ADD NEW AREA NINE areas available including new areas like Neck Décolleté...
- Page 40 CUSTOMIZED TREATMENTS Choose from area drop-down list, give the area a custom name and adjust desired treatment duration SAVE Note: Treatment duration on each area will be limited in a certain range...
- Page 41 CUSTOMIZED TREATMENTS Once you have added all desired treatment areas, SAVE TREATMENT Note: This treatment is now saved to the app. To save treatment to device, follow steps in next section...
- Page 42 SAVING TREATMENTS TO DEVICE Using VERA Function in Nu Town App...
- Page 43 SAVING TREATMENTS TO DEVICE After you have created a custom treatment, it will show in the My Treatments Tap on the treatment you would like to save to your LumiSpa iO...
- Page 44 SAVING TREATMENTS TO DEVICE ADD TO DEVICE...
- Page 45 SAVING TREATMENTS TO DEVICE Choose a color to display on your LumiSpa iO for the selected treatment Then tap NEXT Then tap Update Presets Note: Your LumiSpa needs to be on in order to save a treatment. If your device is off, double press...
- Page 46 SAVING TREATMENTS TO DEVICE You can find your saved treatments in Device Treatments...
- Page 47 START YOUR TREATMENT ON DEVICE Once you have saved treatments to your device, toggle through custom treatments by double pressing the power button LED light color...
- Page 48 START YOUR TREATMENT ON DEVICE Once you have toggled to the desired saved treatment, quick press the power button to start the treatment...
- Page 49 USAGE TRACKING & AWARDS Using VERA Function in Nu Town App...
- Page 50 To view your usage and awards, Click on each Award Awards View Achievements Share them to your social medias...
- Page 51 HOW TO RESET YOUR DEVICE Reset Every Setting and Information Inside Your Device...
- Page 52 RESET YOUR DEVICE Connect your device to charger Press the power button until the colour of light change to blue and then orange (Around 10 sec)
- Page 53 SELFIE TIMELINE Using VERA to Share Your Great Selfie...
- Page 54 SELFIE TIMELINE In VERA front page, Take a Selfie Read the tips to Selfie Timeline take a great photo...
- Page 55 SELFIE TIMELINE Place your face in the middle of the Once you have multiple Compare selfies in the screen and tap the red button selfies, tap Analyze Selfies Overlay View Side By Side...
- Page 56 SELFIE TIMELINE Share Share your selfie with your friends See the new me!
- Page 57 THANK...
Need help?
Do you have a question about the LumiSpa iO and is the answer not in the manual?
Questions and answers