Advertisement
Quick Links
Advertisement

Subscribe to Our Youtube Channel
Related Manuals for Furmanac POWER OTTOMAN 2 Series


Summary of Contents for Furmanac POWER OTTOMAN 2 Series
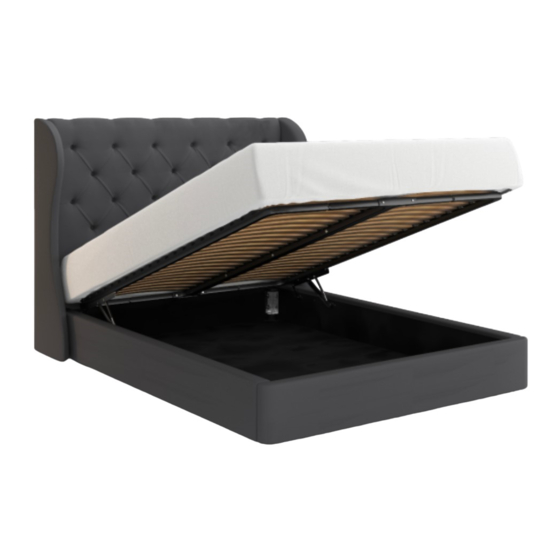
- Page 1 POWER OTTOMAN FOR ALL POWER OTTOMAN BEDFRAME MODELS Easy set up instructions for your new ottoman bed THIS INSTRUCTION PACK IS UNIVERSAL ACROSS THE RANGE THE IMAGE USED MAYBE DIFFERENT FROM THE ONE IN PACK TYPE 2 Version 15 Correct at time of publiction 12/08/2022 BOM CODE - LEAFLET-E0-V2...
-
Page 2: Safety Features
Introduction and components Unpack in the room the bed is intended to be used, remove all packaging and dispose of carefully, keeping polythene out of the reach of children. CONTENTS: • 4 x M8 Nuts (For Slatted Frame to Hinge) •... - Page 3 CONTENTS CHECK LIST - BED ASSEMBLY Please check the pack contents before attempting to assemble this product. If any components are missing, please contact the retailer from whom you bought this product. 1¥'@�1K1 •OTTOMAN � FIXING-BOLT BATTERY-9V I FIXING-NUT M8X50mm For the Transformer ENSION CABLE ::�...
- Page 5 The hinge brackets will already be fixed into place. Please Note: You are required to follow the steps as detailed to make sure that the bed is correctly set up. Left Hand Bracket 1 . Remove the M8 Nut on position A 2 .
- Page 6 Please Note: this step will require two people and requires lifting. Connect the side rails to the head board sliding the bolts into the brackets and tightening with spanner or appropriate socket set. HEAD BOARD PULL LATCH TIGHTEN TOGETHER ONTO BRACKET WITH SPANNER SUPPORT BAR Lower the support bar into the...
- Page 7 . Connect the electric cables before placing the base boards into your bed. Connect the the two leads that RIGHT HAND SIDE MOTOR link the motors on each of the side rails. Make sure your cable run along the side rail and are clear of the hinge bracket LEFT HAND SIDE MOTOR...
- Page 8 Please Note: this step will require two people and requires lifting. . Lower the first base board into place with the angled cut corners against the head board (as shown above). Make sure that the cables from the motors are laying on the top of the base board and are not behind the hinge unit.
- Page 9 Please Note: this step will require two people and requires lifting. With help, lower the slatted base onto the two rails (attached to the motorised hinge). Make sure that the welded retaining brackets are at the headboard end. Using the 4 x M8 Bolts and Nuts, attach the slatted frame to each of the hinge brackets;...
- Page 10 YOUR BED WILL ONLY LOWER ONCE THE MATTRESS IS IN PLACE Please Note: this step will require two people and requires lifting. Lower your mattress onto the slatted frame. ** Recommended mattress weight to be at least 45kg to allow for pistons to work properly.
-
Page 11: Making A Claim
For other manufacturing faults within 7 years, we will discuss with the retailer whether a repair by a Furmanac technician or replacement will be offered. Whether your Furmanac bed is repaired or replaced will be at our sole discretion. -
Page 12: Additional Warning
Major cleaning of fabric must be conducted by an upholstery specialist A multitude of fabrics consisting of different materials, fibres and constructions make up the Furmanac swatches. As a result of this it is difficult to provide generalised cleaning instructions, therefore it is recommended that any major cleaning is conducted by an upholstery specialist.
Need help?
Do you have a question about the POWER OTTOMAN 2 Series and is the answer not in the manual?
Questions and answers