Table of Contents
Advertisement
Quick Links
Advertisement
Table of Contents

Related Manuals for Teracom TCW260


Summary of Contents for Teracom TCW260
- Page 2 (0/10V) or current loop (0/20mA) modes. The mode is changed over the user interface. All digital and analog inputs are fully isolated from the power supply. TCW260 supports MODBUS RTU interface for up to 24 Teracom and third-party sensors. The used RS- 485 interface is fully isolated from the power supply.
-
Page 3: Specifications
3. Applications The energy monitoring module TCW260 is dedicated to monitoring and recording the parameters of the measurement of resources - electricity meters, gas meters, water meters, and others. Rising resource costs require reliable analysis and optimization. Depending on the search result, this can be done at a micro level (separate machine) or macro level (company). -
Page 4: Led Indicators
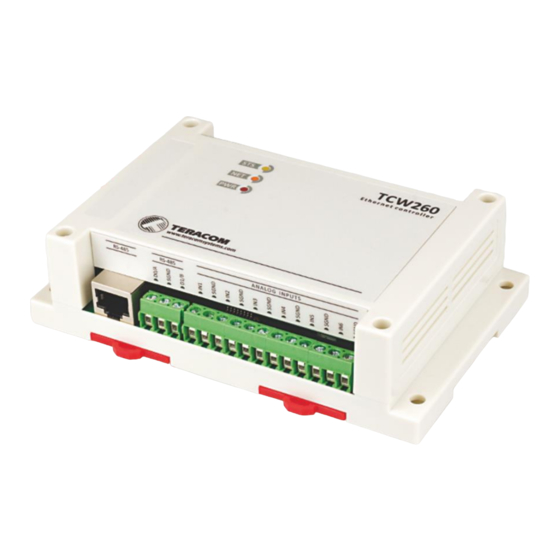
Appendix A, this provides ventilation and electrical isolation TCW260 can be mounted to a standard (35mm by 7.55mm) DIN rail. Attach the controller to the DIN rail by hooking the hook on the back of the enclosure to the DIN rail and then snap the bottom hook into place. - Page 5 Make sure that the wires are properly attached to the terminals and that the terminals are tightened. Not the proper wiring and configuration can cause permanent damage to TCW260 or the equipment to which it is connected or both. Connector 1 Ethernet - RJ45 Pin4 –...
-
Page 6: Power Supply Connection
“dry contact” outputs – door contact switch, push button, PIR detector, etc. The following picture illustrates how a dry contact switch can be connected to the input of TCW260. One side of the contact is connected to “S0+” and another side is connected to “S0-” terminals. -
Page 7: Analog Inputs Connection
They can be connected directly to analog sensors for temperature, humidity, current/voltage transducers, etc. The following picture illustrates how a battery can be connected to the analog input of TCW260 in voltage mode. The positive terminal is connected to “Analog In” and the negative terminal to “GND”. - Page 8 6.2.4. RS-485 connection RS-485 interface is galvanic isolated from the power supply. Up to 24 MODBUS RTU sensors can be connected to TCW260. The device supports Teracom and third-party sensors. Connections can be realized by a standard RJ-45 connector. The used pinout is that one recommended in the document “MODBUS over Serial Line Specification and Implementation...
-
Page 9: Network Connection
6.2.5. Network connection The Ethernet port of TCW260 should be connected to 10/100 Base-T Ethernet hub, switch or router. For configuration, TCW260 may be connected directly to the Ethernet port on a computer. The device support Auto-MDIX and it is not necessary to use “crossover” cable, standard “straight- through”... -
Page 10: Communication Setup
By default TCW260 is delivered with the following network settings: IP address: 192.168.1.2, Subnet Mask: 255.255.255.0, Default Gateway: 192.168.1.1 Communication with TCW260 can be established by assigning a temporary IP address to the computer. For computers with Windows OS assigning of IP address is made in “Local area connection properties”:... -
Page 11: Web Interface
To get access to the web interface, you should type http://192.168.1.2 into the browser. If the network settings are correct, the login pop-up window will appear: Authorization data must be entered (by default username=admin, password=admin). It is recommended to change the username and password to prevent unauthorized access to the controller. - Page 12 The controller supports a few active session. For the WEB interface, the device supports HTTP only (HTTPS is not supported). 8.1. Monitoring This section displays the status of all channels and alarms – textually and graphically. The pages “Channels” and “Alarms” are automatically refreshed on an interval of 0 to 253 seconds. Zero means no automatic refresh.
- Page 13 It is important to know that the information on graphs is static, it is not updated whit the newest values. If you want to see the last information, the page should be reloaded. The information can be exported in CSV file. 8.2.
- Page 14 8.2.2.2. Modbus RTU sensors This section allows you to add, delete or edit MODBUS RTU sensors/registers. All they are primary parameters and can be used in forming of channels. It is recommended to add sensors/registers one by one using the scan tool described in 8.2.2.1. Up to 24 sensors/registers can be added.
-
Page 15: Analog Inputs
8.2.3.1. Analog inputs TCW260 has 6 analog inputs. All they are isolated from the power supply but use the same ground. Every analog input can work in voltage (0-10V) or current loop mode (0-20mA). For every analog input Multiplier and Offset can be set. They work as follows: Value = (Raw_Value * Multiplier) + Offset. -
Page 16: Digital Inputs
8.2.3.2. Digital inputs TCW260 has 4 digital inputs. All they are isolated from the power supply but use the same ground. Every digital input can work in OPEN/CLOSE or COUNTER mode. In COUNTER mode, counting can be made on rising, falling or both edges. - Page 17 There are three types of channels – discrete (it forms by one digital input in OPEN/CLOSE mode), general (it forms by up to 2 primary parameters and constants) and cumulative (same as a general channel but with cumulating the value in time). Cumulative channels are used for energy, volume, etc.
- Page 18 For every alarm “Return notification” option is available. If this option is chosen there will be notification also when parameter returns in range. For every alarm, there is “Notification delay” parameter. It is very useful as a filter for short alarm conditions.
- Page 19 8.2.6. System On this page, some general system parameters can be set up. System name, system location, and system contact are used for device identification. They are presented in SNMP three and XML/JSON status file. WEB access authentication by default is active with admin/admin details. HTTP port for WEB access by default is 80 but it can be changed.
- Page 20 For automatic clock synchronization, the controller supports NTP (Network Time Protocol). By default NTP synchronization is disabled, server – time.google.com, Time zone +00:00 and interval of 12 hours. 8.3.2. SNMP TCW260 supports SNMPv2 and SNMPv3. The default parameters are: • SNMP disabled •...
- Page 21 User-based Authentication Mechanism is based on the following: • MD5 message-digest algorithm in HMAC; • SHA, an optional alternative algorithm; • None authentication. User-based Privacy Mechanism is based on the following: • Data Encryption Standard (DES); • Advanced Encryption Standard (AES); •...
- Page 22 8.3.3. Logger The logger works in three modes – Time, Alarm and Time&Alarm. The mode specifies what initiates a record in the logger’s memory. In Time mode, records are made periodically on “Log interval” time. In Alarm mode, records are made on every alarm condition.
- Page 23 More about the logger can be found in the Data logger section. 8.3.4. HTTP Post TCW260 can periodically upload an XML/JSON file to a dedicated server, using HTTP or HTTPS Post. The HTTPS is over TLS 1.0, TLS 1.1 and TLS 1.2 with RSA as a key exchange/agreement and authentication.
-
Page 24: Dynamic Dns
More about HTTP/HTTPS Post can be read in HTTP API section. 8.3.5. Dynamic DNS TCW260 supports the following DNS services – DynDNS, No-IP, and DNS-O-Matric. With dynamic DNS, TCW260 can be accessed from the Internet having only a dynamic public IP address. 8.3.6. MODBUS TCW260 supports MODBUS TCP/IP. - Page 25 8.3.7. MQTT Device supports MQTT 3.1.1. This page is for the MQTT settings. 8.3.7.1. MQTT General setup 8.3.7.2. MQTT Channels topic TCW260_R1.11 – October 2022 Page 25...
- Page 26 8.3.7.3. MQTT Alarms topic TCW260_R1.11 – October 2022 Page 26...
- Page 27 The TCW260 supports one user only. It has administrative rights. 8.4.2. Backup/Restore The TCW260 supports backup and restore of all user setting. All settings are saved in XML backup file. This file can be used after this to restore on many devices. This is very useful for multiplying similar settings to a batch of controllers.
- Page 28 8.5. Logout The TCW260 support a few session, but the good practice is to log out after finishing the work. 9. Protocols and API 9.1. SNMP Simple Network Management Protocol (SNMP) is a standard internet protocol for managing devices on IP networks. In typical usage of SNMP, one or more administrative computers, called managers, monitor and control devices on LAN.
- Page 29 !.6.2.2.3.1.1.7.?.0 digInpOpenToCloseDelay.? read-write Digital input Open To Close delay Integer32(0..60000) !.6.2.2.3.1.1.8.?.0 digInpCounterInitValue.? read-only Digital input counter initial value Integer32 !.6.2.2.3.1.1.9.?.0 digInpValue.? read-only Digital input value Unsigned32 monitorNcontrol -> channels -> chanTable -> chanEntry -> chIndex 1 to 24 replace “?“ with a number from 1 to 24 and “!” with ”1.3.6.1.4.1.38783” in the table below Name Access Description...
- Page 30 monitorNcontrol -> alarmsTable -> alarmsEntry -> alIndex 1 to 24 replace “?“ with a number from 1 to 24 and “!” with ”1.3.6.1.4.1.38783” in the table below Name Access Description Syntax alDescription.? read-write Alarm description DisplayString 6.3.2.1.1.2.?.0 INTEGER {none(0), v01(1), v02(2), v03(3), v04(4), v05(5), v06(6), v07(7), v08(8), v09(9), v10(10),...
- Page 31 9.2. HTTP API 9.2.1. HTTP Post TCW260 can execute HTTP/HTTPS Post to upload XML/JSON file to a dedicated server. This functionality is very useful if the controller is behind the router without a public IP address or the user don’t have access to router configuration. The server should have a public IP address.
- Page 32 See sections 8.2.4 XML file structure and 8.2.5 JSON file structure for details of files. HTTP Get can be sent at any time to TCW260 if it is on the same network or it has appropriate routing. If there isn’t direct access to the device, HTTP Get can be sent immediately after HTTP/HTTPS Post receiving from the same device.
- Page 33 9.2.3. List of HTTP API commands Command Description dataf=x Data format XML/JSON for HHTP Post – 0 XML, 1 JSON pushtls=x http(s) protocol, where x is 0 for http and 1 for https purl1=yyy URL for HTTP Post to Server 1, where yyy is a full path to php file.
- Page 34 9.2.4. XML file structure <Monitor> <DeviceInfo> <DeviceName>TCW260</DeviceName> <HostName>TCW260 </HostName> <ID>54:10:ec:4f:59:f6</ID> <FwVer>TCW260-v1.004</FwVer> <MnfInfo>www.teracomsystems.com</MnfInfo> <SysContact>info@teracomsystems.com</SysContact> <SysName>TCW260</SysName> <SysLocation>Location</SysLocation> </DeviceInfo> <CH> <CH1> <type>0</type> <description>Temperature</description> <value>24.386</value> <valuebin/> <unit>°C</unit> <alarmbin>4</alarmbin> <alarm>Minor</alarm> <selch>3</selch> </CH1> <CH2> <type>0</type> <description>Humidity</description> <value>51.323</value> <valuebin/> <unit>RH</unit> <alarmbin>1</alarmbin> <alarm>Normal</alarm> <selch>4</selch> </CH2> <CH3> <type>2</type> <description>Digital Input 1</description>...
- Page 35 <description>V07-Energy</description> <value>6587.396</value> <valuebin/> <unit>kWh</unit> <alarmbin>0</alarmbin> <alarm/> <selch>27</selch> </CH7> <CH8> <type>0</type> <description>V08</description> <value>---</value> <valuebin/> <unit/> <alarmbin>0</alarmbin> <alarm/> <selch>0</selch> </CH8> <CH9> <type>0</type> <description>V09</description> <value>---</value> <valuebin/> <unit/> <alarmbin>0</alarmbin> <alarm/> <selch>0</selch> </CH9> <CH10> <type>0</type> <description>V10</description> <value>---</value> <valuebin/> <unit/> <alarmbin>0</alarmbin> <alarm/> <selch>0</selch> </CH10> <CH11> <type>0</type> <description>V11</description>...
- Page 36 </CH14> <CH15> <type>0</type> <description>V15</description> <value>---</value> <valuebin/> <unit/> <alarmbin>0</alarmbin> <alarm/> <selch>0</selch> </CH15> <CH16> <type>0</type> <description>V16</description> <value>---</value> <valuebin/> <unit/> <alarmbin>0</alarmbin> <alarm/> <selch>0</selch> </CH16> <CH17> <type>0</type> <description>V17</description> <value>---</value> <valuebin/> <unit/> <alarmbin>0</alarmbin> <alarm/> <selch>0</selch> </CH17> <CH18> <type>0</type> <description>V18</description> <value>---</value> <valuebin/> <unit/> <alarmbin>0</alarmbin> <alarm/> <selch>0</selch> </CH18>...
- Page 37 <alarmbin>0</alarmbin> <alarm/> <selch>0</selch> </CH22> <CH23> <type>0</type> <description>V23</description> <value>---</value> <valuebin/> <unit/> <alarmbin>0</alarmbin> <alarm/> <selch>0</selch> </CH23> <CH24> <type>0</type> <description>V24</description> <value>---</value> <valuebin/> <unit/> <alarmbin>0</alarmbin> <alarm/> <selch>0</selch> </CH24> </CH> <AL> <AL1> <description>AL01-Temp.</description> <alarmbin>4</alarmbin> <alarm>Minor</alarm> <assign>1</assign> </AL1> <AL2> <description>AL02</description> <alarmbin>1</alarmbin> <alarm>Normal</alarm> <assign>5</assign> </AL2> <AL3> <description>AL03</description> <alarmbin>1</alarmbin>...
- Page 38 <alarm/> <assign>0</assign> </AL9> <AL10> <description>AL10</description> <alarmbin>0</alarmbin> <alarm/> <assign>0</assign> </AL10> <AL11> <description>AL11</description> <alarmbin>0</alarmbin> <alarm/> <assign>0</assign> </AL11> <AL12> <description>AL12</description> <alarmbin>0</alarmbin> <alarm/> <assign>0</assign> </AL12> <AL13> <description>AL13</description> <alarmbin>0</alarmbin> <alarm/> <assign>0</assign> </AL13> <AL14> <description>AL14</description> <alarmbin>0</alarmbin> <alarm/> <assign>0</assign> </AL14> <AL15> <description>AL15</description> <alarmbin>0</alarmbin> <alarm/> <assign>0</assign> </AL15> <AL16> <description>AL16</description>...
- Page 39 <alarmbin>0</alarmbin> <alarm/> <assign>0</assign> </AL22> <AL23> <description>AL23</description> <alarmbin>0</alarmbin> <alarm/> <assign>0</assign> </AL23> <AL24> <description>AL24</description> <alarmbin>0</alarmbin> <alarm/> <assign>0</assign> </AL24> </AL> <HTTPPost> <Key/> <PostPeriod>300</PostPeriod> </HTTPPost> <MQTT> <Period>300</Period> </MQTT> <Sys> <hwerr/> <HighAlarmbin>4</HighAlarmbin> <HighAlarm>Minor</HighAlarm> </Sys> <Time> <Date>15.05.2019</Date> <Time>10:32:44</Time> </Time> </Monitor> Where: <CH1>… <CH24> - channels; <AL1> … <AL24> - alarms; <alarmbin>...
- Page 40 9.2.5. JSON file structure "Monitor": { "DeviceInfo": { "DeviceName": "TCW260", "HostName": "TCW260 ", "ID": "54:10:ec:4f:59:f6", "FwVer": "TCW260-v1.004rc8-197", "MnfInfo": "www.teracomsystems.com", "SysContact": "info@teracomsystems.com", "SysName": "TCW260", "SysLocation": "Location" "CH": { "CH1": { "type": "0", "description": "Temperature", "value": "24.268", "valuebin": "", "unit": "°C", “alarmbin”: "4", “alarm”: "Minor",...
- Page 41 "description": "V07-Energy", "value": "6587.396", "valuebin": "", "unit": "kWh", “alarmbin”: "0", “alarm”: "", "selch":"27" "CH8": { "type": "0", "description": "V08", "value": "---", "valuebin": "", "unit": "", “alarmbin”: "0", “alarm”: "", "selch":"0" "CH9": { "type": "0", "description": "V09", "value": "---", "valuebin": "", "unit": "", “alarmbin”: "0", “alarm”: "",...
- Page 42 "CH15": { "type": "0", "description": "V15", "value": "---", "valuebin": "", "unit": "", “alarmbin”: "0", “alarm”: "", "selch":"0" "CH16": { "type": "0", "description": "V16", "value": "---", "valuebin": "", "unit": "", “alarmbin”: "0", “alarm”: "", "selch":"0" "CH17": { "type": "0", "description": "V17", "value": "---", "valuebin": "", "unit": "",...
- Page 43 “alarmbin”: "0", “alarm”: "", "selch":"0" "CH23": { "type": "0", "description": "V23", "value": "---", "valuebin": "", "unit": "", “alarmbin”: "0", “alarm”: "", "selch":"0" "CH24": { "type": "0", "description": "V24", "value": "---", "valuebin": "", "unit": "", “alarmbin”: "0", “alarm”: "", "selch":"0" "AL": { "AL1": { "description": "AL01-Temp.", “alarmbin”: "aa(0)",...
- Page 44 “alarm”: "", "assign":"0" "AL10": { "description": "AL10", “alarmbin”: "aa(9)", “alarm”: "", "assign":"0" "AL11": { "description": "AL11", “alarmbin”: "aa(10)", “alarm”: "", "assign":"0" "AL12": { "description": "AL12", “alarmbin”: "aa(11)", “alarm”: "", "assign":"0" "AL13": { "description": "AL13", “alarmbin”: "aa(12)", “alarm”: "", "assign":"0" "AL14": { "description": "AL14", “alarmbin”: "aa(13)", “alarm”: "",...
-
Page 45: Modbus Tcp/Ip
“alarmbin”: "aa(21)", “alarm”: "", "assign":"0" "AL23": { "description": "AL23", “alarmbin”: "aa(22)", “alarm”: "", "assign":"0" "AL24": { "description": "AL24", “alarmbin”: "aa(23)", “alarm”: "", "assign":"0" "HTTPPost": { "Key": "", "PostPeriod": "300" “MQTT”: { “Period”: “300” "Sys": { "hwerr": "", "HighAlarmbin": "4", "HighAlarm": "Minor" "Time": { "Date": "15.05.2019", "Time": "10:30:00"... -
Page 46: Write Multiple Registers (Fc=16)
03: The Function Code 3 (read Holding Registers) 4B64: The Data Address of the first register requested (4B64 hex = 19300) 0002: The total number of registers requested (read 2 registers each 2 bytes = 4 bytes) Response 03 04 41DD 4210 03: The Function Code 3 (read Channel 1 Holding Registers) 04: The number of data bytes to follow (2 registers x 2 bytes each = 4 bytes) 41DD 4210: 4 bytes value... - Page 47 This command is write a value in contiguous registers starting at address 18300 – Channel 1 parameter 1 and Channel 2 parameter 1. 10 477C 0002 04 0003 0004 10: The Function Code 16(10 hex) 477C: Starting Address of the firsrt register(477C hex = 18300) 0002: Quantity of registers 04: Byte count 0003: The value to be write 3(s01) in first register, address 18300...
-
Page 48: Exception Codes
9.3.1.5. Exception codes All exceptions are signaled by adding 0x80 to the function code of the request, and following this byte by a single reason byte for example as follows: 01 Illegal function The function code received in the query is not an allowable action for the controller. - Page 49 discrete(2) , counter(3) Channel 1 to 24 description 03, 06, 16 18100 16 bytes UTF-8 none(0), s01(3), s02(4), s03(5), s04(6), s05(7), s06(8), s07(9), s08(10),s09(11), s10(12), s11(13), s12(14), s13(15), s14(16), s15(17), s16(18), s17(19), Channel 1 to 24 parameter 1 03, 06, 16 18300 16-bit unsign int s18(20), s19(21),...
- Page 50 Channel 1 to 24 coefficient 2 03, 06, 16 18900 32-bit float Channel 1 to 24 unit 03, 06, 16 19000 16 bytes UTF-8 Channel 1 to 24 cumulative init 19200 32-bit float value Channel 1 to 24 value 19300 32-bit float Channel 1 to 24 counter 19400...
- Page 51 Alarm 1 to 24 condition 2 discrete 03, 06, 16 21200 16-bit unsign int open(0), closed(1) al. state warning(3), minor(4), Alarm 1 to 24 type 03, 06, 16 21300 16-bit unsign int major(5), critical(6) none(0), v01(1), v02(2), v03(3), v04(4), v05(5), v06(6), v07(7), v08(8),v09(9), v10(10), v11(11),...
-
Page 52: Data Logger
10. Data Logger The logger utilizes circular buffer in FLASH memory. When it is full, the new data overwrites the oldest one. In this manner FLASH memory stores full log all the time. There isn’t a command to clear the log. A copy of the full log is always available for download. - Page 53 More about MQTT can be read at www.mqtt.org. 12. Factory default settings TCW260 can be restored to its original factory default settings in 3 different ways. 12.1. Factory default from the WEB interface If the button “Factory default” from Administration->Backup/Restore is pressed, all parameters return to factory default except Network settings.
-
Page 54: Environment Information
The joint part with external component shall have space for attachment/removal of the cable after installation. Teracom does not guarantee the successful operation of the product if the product was used under conditions deviating from the product specifications. -
Page 55: Maintenance
If the equipment is used in a manner not specified by the manufacturer, the protection provided by the equipment may be impaired. In no event will Teracom Ltd. be responsible or liable for indirect or consequential damages resulting from the use or application of this equipment. - Page 56 Appendix A Fig.1 Fig.2 TCW260_R1.11 – October 2022 Page 56...
Need help?
Do you have a question about the TCW260 and is the answer not in the manual?
Questions and answers