Table of Contents
Advertisement
Quick Links
Advertisement
Table of Contents

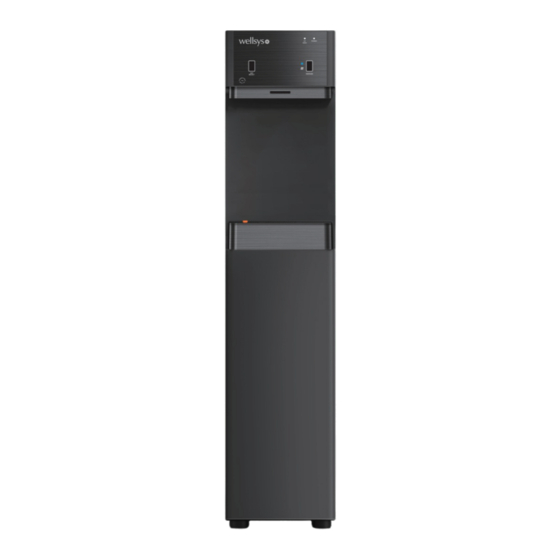
Summary of Contents for Wellsys W7
- Page 1 Owner’s Manual Note: Please read these instructions before operating the unit. Unit appearance, specifications, etc. are subject to change without prior notice if necessary for improving unit performance. The rated voltage of this unit is AC 120 v/60 Hz only. V2 | 09162022 | JDM...
- Page 2 Before You Begin Please read the information contained in this manual carefully before proceeding with installation. Failure to do so can cause damage and may void the manufacturer’ s warranty. Table Of Contents...
-
Page 3: Conditions For Use
CONDITIONS FOR USE Caution DO NOT USE WITH WATER THAT IS MICROBIOLOGICALLY UNSAFE OR OF UNKNOWN QUALITY WITHOUT ADEQUATE DISINFECTION INSTALLED BEFORE THE SYSTEM. THIS DRINKING WATER SYSTEM IS FOR USE ON POTABLE WATER SUPPLIES ONLY. Source Water Supply Municipal/ Private: Potable Water Working water pressure for M versions: 25 –... -
Page 4: Receiving Your Equipment
(877) 386 - 0823 to report the damage. Photograph all damages to be submitted with claim. THIS MUST BE DONE WITHIN FIVE BUSINESS DAYS OF DELIVERY. If not reported within five business days, Wellsys and/or carrier will not be responsible for replacement or repair. -
Page 5: Safety Precautions
To prevent electric shock and fire hazards, do not use with other than specified power source. Changes or modifications not approved by WELLSYS will void any product warranty. If system begins to leak, unplug, turn off water supply and call service center immediately. -
Page 6: Installation Procedures
A water shut off valve is recommended between the inlet connection to the cooler and the water supply connection. 5. The W7 RO system requires a drain line for the RO membrane. The drain line should include an Air Gap and back flow restrictor. See diagram. - Page 7 INSTALLATION PROCEDURES To install cold water: Allow at least 30 minutes for adequate cooling, then select “Dispense” To install hot water: Select “Hot Select”. The dispense light will change from blue to red. Then select “Dispense”. Note: Hot water will require about 30 minutes to properly heat after the tank is full. Cold water will require about 1 hour to chill.
- Page 8 Remember to open the valve after replacing filters to turn the water back on. Flushing the purification system for the W7-RO Install the supply water line to “Water In” bulkhead fitting and water drain line to “RO Drain”...
- Page 9 FILTER FLUSHING PROCEDURES Flushing the filtration system for the W7-UF 1. Install the supply water line to “Water In” bulkhead. 2. Do not plug the system into the AC socket. (No Power) 3. Remove lower front panel to access filters. Remove single screw behind drip tray, push down on the front panel and then gently pull the panel off.
-
Page 10: Final Inspection
The hot water is over 160 °F. The cold water is below 50 °F. Confirm acceptable product water flow Wellsys W7 RO system should fill at a rate of about 5 .1 L/ min. Note: Incoming water pressure and drain correctly functioning will have a ▪... -
Page 11: System Instructions
SYSTEM INSTRUCTIONS Sanitizing the cold tank: It is strongly encouraged that all systems are sanitized using a mixture of Hydrogen Peroxide and water prior to placing in the field. Please follow the steps below to properly perform this important task. 1. -
Page 12: Preventative Maintenance
PREVENTATIVE MAINTENANCE Change filters according to the filter change schedule. Reset the filter alert using the instructions above. Descale the hot tank. Drain the system and use Hydrogen Peroxide to sanitize the system. Check all fittings for signs of scale or wear and replace as needed. Check condition of the float mechanisms. - Page 13 FILTER CHANGING PROCEDURE Verify filter configuration required for servicing. Flush the appropriate filters prior to installation using a filter pre-flush station. Protect flushed filters from extreme cold temperatures and potential sources of contamination. 2. Dispose of replaced filters in accordance with local laws after removing filtration media. Filter housings may be recycled 3.
-
Page 14: System Inspection
SYSTEM INSPECTION When changing filters or performing service, the following items should be completed: Visual Inspection Hose & fitting inspection Electrical inspection Pressure & flow test Filter monitoring system reset Gallon counter reset to zero. Refer to procedure below. Clean the exterior of system and condenser coils on rear of system. Temperature check (Cold water should be below 50 °F, Hot water should be above 160°F) TDS check Hot tank switch “On”... -
Page 15: System Specifications
(including any possible pressure Spikes) could exceed 80 PSI (5. 5 bar) Failure to comply will void warranty. WELLSYS accepts no liability for damage caused by excessive water pressure. Do not use this drinking water system where the source water is microbiologically unsafe or with water of unknown quality without adequate disinfecting before or after the system. -
Page 16: Product Limited Warranty
WELLSYS. WELLSYS does not assume or authorize any person to assume any obligations of liability in connection with this product. In no event will WELLSYS be liable for special, incidental, consequential or punitive damages, or for any delay in performance of this warranty agreement due to causes beyond its control. -
Page 17: Warranty Procedure
WARRANTY PROCEDURE Contact WELLSYS technical support. Provide the following information: Serial number Failure Full details around failure Water pressure into the system Tap TDS TDS out of the cold and hot tanks Pictures Depending on the situation, technical support may request more information.


Need help?
Do you have a question about the W7 and is the answer not in the manual?
Questions and answers