Advertisement
Quick Links
Please follow these guidelines for safe assembly:
Please make sure that you have all the parts and hardware items listed before you start
assembling your product. If you fi nd that something is missing, please do not assemble.
Contact our Customer Service on 0861 466 324.
homechoice will not be held liable for damages caused by improper assembly.
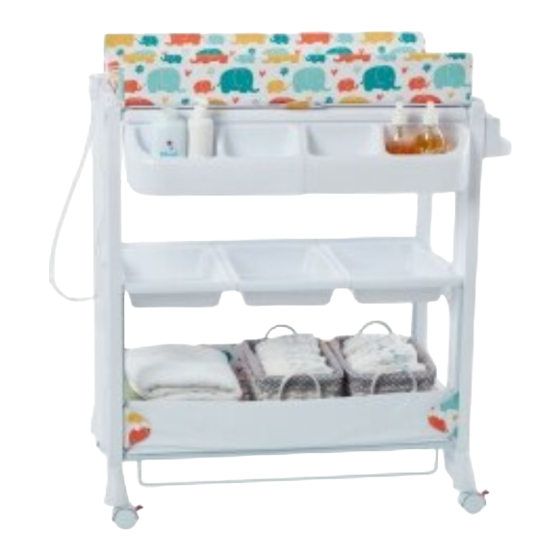
Ellie baby compactum
assembly instruction
Shop online – go to
homechoice.co.za
Advertisement

Related Manuals for homechoice Ellie baby compactum


Summary of Contents for homechoice Ellie baby compactum
- Page 1 Please make sure that you have all the parts and hardware items listed before you start assembling your product. If you fi nd that something is missing, please do not assemble. Contact our Customer Service on 0861 466 324. homechoice will not be held liable for damages caused by improper assembly.
-
Page 2: Parts List
Parts List Part Part side panels 2 pieces castors 4 pieces support 2 pieces bolts 8 pieces frames changing mat 1 piece bolts 4 pieces drainage changing mat 1 piece 1 piece support frame hose base shelf 1 piece plug 1 piece bath 1 piece... -
Page 3: Safety And Warnings
If you find that something is missing, please do not assemble. Contact our Customer Service on 0861 466 324. Safety and warnings • Never leave the child unattended • This product is suitable for children from birth to 12 months old •... - Page 4 Assembly instructions Take care to assemble while the child is cared for in another room – never leave the child unattended Securely stow or dispose of any plastic bags, fasteners and fixing ties, and keep out of reach of children during assembly Unpack all contents to check that all parts required are present before starting to assemble Step 1 •...
- Page 5 If you find that something is missing, please do not assemble. Contact our Customer Service on 0861 466 324. Step 2 • Turn the compactum onto its side as shown and assemble the changing mat support frame (D) and the change mat (C) to the assembled side panels •...
- Page 6 • Insert 2 x bolts (K) into the holes in the left side panel and tighten them into the threaded ends of the side frame using the supplied tools (O) • Slip the mesh bag (N) elastic loops onto the bolts (K) and attach the right-side panel in the same way •...
- Page 7 If you find that something is missing, please do not assemble. Contact our Customer Service on 0861 466 324. Step 3 • Attach the wheels (I) to the 4 corners of the compactum • Push the wheels firmly into place into the slots provided •...
- Page 8 Step 4 • Attach the base shelf (E) • Place the shelf with the pattern facing out and wrap the 4 flaps in and around the 2 side-frame uprights • Secure with press studs...
- Page 9 If you find that something is missing, please do not assemble. Contact our Customer Service on 0861 466 324. Step 5 • Join the utility holders (H) together and attach by hooking them over the front of the change to support frame •...
- Page 10 How to use the bath • Attach the handy drainage hose (L) to the outlet under the bath for easy draining • Insert the plug before filling with water...
- Page 11 If you find that something is missing, please do not assemble. Contact our Customer Service on 0861 466 324. Care Maintenance • The correct use and maintenance of this compactum is essential • This product requires regular maintenance to keep it in good working order •...
Need help?
Do you have a question about the Ellie baby compactum and is the answer not in the manual?
Questions and answers