Table of Contents
Advertisement
Quick Links
Advertisement
Table of Contents

Subscribe to Our Youtube Channel
Related Manuals for Xantrex 808-0888


Summary of Contents for Xantrex 808-0888
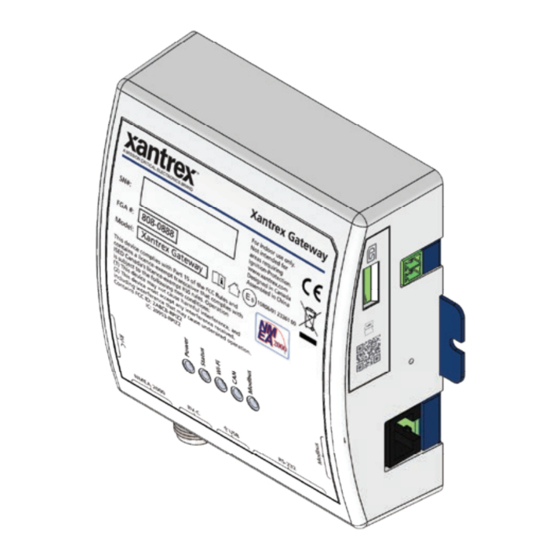
- Page 1 Owner's Guide Xantrex Gateway 808-0888 Xantrex Gateway...
- Page 2 As soon as you open your product, record the following Software Disclaimer information and be sure to keep your proof of purchase. THIS XANTREX GATEWAY SOFTWARE IS PROVIDED BY XANTREX LLC FOR A FEE OR FOR FREE, DEPENDING ON LICENSING AGREEMENTS BETWEEN DIFFERENT PARTIES. XANTREX DOES NOT Serial Number...
- Page 3 Product Number RV-C Recreational Vehicle (Caravan) CAN Bus Communications protocol Connection Terminals on page 8). Secure Digital Do not expose the Xantrex Gateway to rain, snow, spray, or SSID Service Set Identifier bilge water. For indoor use only. V, VAC, VDC Voltage, Volts AC, Volts DC Do not disassemble.
- Page 4 This device complies with part 15 of the FCC Rules and contains a licence-exempt transceiver that complies The Xantrex Gateway is designed with environmental awareness and sustainability in mind. At the end of its with ISED Canada’s licence-exempt RSS Rules. Operation is subject to the following two conditions: useful life, the Xantrex Gateway can be decommissioned and disassembled.
-
Page 5: Table Of Contents
TABLE OF CONTENTS INTRODUCTION Control Materials List Alerts Connection Terminals Xantrex Gateway Settings Port Pin Assignments Xantrex Gateway Software LED Status Indicators TROUBLESHOOTING INSTALLATION Common Issues Mounting Maintenance System Installation Diagram SPECIFICATIONS Power Source Wiring Physical Specifications Freedom Combox Wiring... - Page 6 This page is intentionally left blank. [2]...
-
Page 7: Introduction
BMS, and solar charge controllers. You can connect your smart phone, tablet, or a laptop to the Xantrex Gateway in two ways; (1) using Bluetooth and the Xantrex App or (2) via its Wi-Fi access point and access its embedded Web Application called xantrexapp.com, to monitor, control and change settings on any... -
Page 8: Connection Terminals
Freedom EX unit, Xantrex Freedom XC PRO unit, or a Xantrex Battery (PN: 884-XXXX-XX only). c If the Xantrex Gateway device is the end device of an RV-C (CAN) network, then you must turn on the CAN terminator switch. Refer to Activate RV-C (CAN Network) Internal Terminator on page 25. -
Page 9: Port Pin Assignments
NOTE: Match port pin assignments to connector pins carefully. Power Status Wi-Fi Modbus Green Power The Xantrex Gateway is connected to a 9-65VZ battery as its Pin 1: +12_CAN Pin 5: CAN1_RV-C_H main power source. Pin 2: NC Pin 6: GND RJ-45 port [RV-C (CAN)] The Xantrex Gateway is disconnected from its main power Pin 3: GND... - Page 10 This page is intentionally left blank. [2]...
-
Page 11: Installation
IP20 This chapter includes the following topics: Mounting System Installation Diagram Power Source Wiring Freedom Combox Wiring Freedom XC PRO Inverter/Charger Wiring Xantrex Battery Wiring Freedom EX Inverter/Charger Wiring MPPT Solar Charge Controller Wiring 975-1036-01-01... -
Page 12: Mounting
Consider the following suggestions for mounting. Locate the Xantrex Gateway as close as possible to its power supply. Thick walls, metallic objects, and other communication devices may interfere with the signal and affect signal strength. See Notice below. Avoid exposure to direct sunlight. -
Page 13: System Installation Diagram
System Installation Diagram System Installation Diagram This diagram illustrates a system installation that represents a complete and well-integrated Gateway network for your vehicle or vessel. Figure 1 Typical Vehicle Communication Network c The solid lines are the communication cables. The dotted lines are electrical power connections. Use the installation guide for each power system device. 975-1036-01-01... -
Page 14: Power Source Wiring
Xantrex Gateway. required. See how to activate it using the web app on page 25. a The Xantrex Gateway has no power switch. c Only one auxiliary device can be connected at any time. In this diagram, a universal control monitor is connected via the RV-C port. -
Page 15: Freedom Xc Pro Inverter/Charger Wiring
Freedom XC PRO Xantrex Battery Wiring Inverter/Charger Wiring NOTE: Consult the Xantrex Battery Owner's Guide for electrical connections. c CAN network termination may be required. See how to activate it using NOTE: Consult the Freedom XC PRO inverter/charger Owner's Guide for electrical connections to batteries, the web app on page 25. -
Page 16: Freedom Ex Inverter/Charger Wiring
Wiring Wiring NOTE: Consult the Freedom EX inverter Owner's Guide for electrical connections to batteries, AC source, NOTE: Consult the Xantrex MPPT Solar Charge Controller Owner's Guide for electrical connections to and loads. batteries, solar panel, and loads. c CAN network termination may be c Modbus network 120-ohm... -
Page 17: Configuration
How to... Steps Wi-Fi Connection Connect to the Xantrex 1. Make sure that the Xantrex Gateway is powered. Observe the Power Web Application Gateway via the Xantrex App. LED and be sure it is on. 2. Download the Xantrex App and install it on your smart phone. - Page 18 How to... Steps How to... Steps 4. Tap Settings, then Xantrex Gateway, then Wi-Fi Network, then select 5. Enter the Wi-Fi password and tap Apply. Tap Status and tap Connect to xantrexapp and tap DONE. wlan0 IP Address. WI-FI NETWORK MyOwnWifi Wi-Fi Network Password...
- Page 19 Connect to the Xantrex 1. Go to your smart phone's Wi-Fi settings, look for the xantrexapp SSID Gateway via a Xantrex and connect to it. Gateway hotspot 2.Tap the Xantrex App, tap Status, and tap Connect to aplan0 IP Address. xantrexapp 975-1036-01-01...
- Page 20 How to... Steps 3. Change the default SSID and password, if desired then Tap Save. 4. Tap Device. If other Xantrex devices are connected it will show up together with the Xantrex Gateway. STEP1: SET A NEW GATEWAY SSID AND PASSWORD...
-
Page 21: Wi-Fi Connection
LED and be sure it is on. 2. Open your smart phone, tablet, or laptop and navigate to its Wi-Fi settings. 3. Search for the Xantrex Gateway SSID in the list of Wi-Fi networks. SSID: "xantrexapp". 4. Enter the factory default password and tap Join or Connect. -
Page 22: Web Application
Web Application How to... Steps Open the XantrexApp web 1. Setup and connect to the Xantrex Gateway Wi-Fi. See Wi-Fi Requirements: Wi-Fi connection for all smart devices. application [xantrexapp.com]. Connection on page 21. Compatible operating systems such as iPhone/iPad (iOS version 2. Open the XantrexApp web application from your smart phone, tablet, or... - Page 23 7. Return to the Wi-Fi settings of 11. Write down the new Password your smart phone, tablet, or in the space provided in the back laptop. page. 8. Re-connect with the Xantrex Gateway SSID and enter the new password. 975-1036-01-01...
- Page 24 1. Open the Xantrex App web application from your smart phone, tablet, SSID. SSID and password including Xantrex Gateway as shown below to restore the SSID and password to its or laptop. all customized settings to factory values of SSID=xantrexapp and Password=12345678.
- Page 25 3. Tap Unlock to gain access to Advanced settings. 4. Modify the setting/s you want to change. 1. Select the Xantrex Gateway 2. Tap RV-C Internal Terminator. device from the Device list. 3. Select On. NOTE: Leaving the Advanced 4.
-
Page 26: Home Screen (Devices)
Control button settings (see Change Advanced Alerts button Settings for Freedom X | XC | XC PRO | EX on page 25). Settings button NOTE: Device settings vary for each device that is connected to the network. Xantrex Gateway Owner's Guide... -
Page 27: Control
See the device's Owner's Guide for information on NOTE: error codes. Controls vary for each device that is connected to the network. NOTE: Only connected devices to the Xantrex Gateway network will have their alerts aggregated in the Xantrex App [xantrexapp.com]. 975-1036-01-01... -
Page 28: Xantrex Gateway Settings
You may retain the factory set SSID Wi-Fi network that has an The only functional reason to change it internet connection from the list is if you have multiple Xantrex Gateway and enter its SSID and networks nearby. password. Xantrex Gateway Owner's Guide... -
Page 29: Xantrex Gateway Software
1. Go to https://xantrex.com/library/firmwares/ and look for software. available software. 2. Remove the microSD card from the Xantrex Gateway and insert it into the microSD card reader (included in the Xantrex Gateway c Also, make sure to install on the box). - Page 30 This page is intentionally left blank. [2]...
-
Page 31: Troubleshooting
TROUBLESHOOTING This section will help you narrow down the source of any problem you encounter. This chapter includes the following topics: Common Issues Maintenance 975-1036-01-01... -
Page 32: Common Issues
Cause Solution The Xantrex Gateway's Power The Xantrex Gateway is not Check that the Xantrex Gateway is connected to a Xantrex Battery LED indicator is not lit up. receiving power. (9-65VZ) which is its main power source. Re-check the Power LED indicator after connecting with the battery. - Page 33 The Xantrex App cannot pair with The Bluetooth server is not Unpair the Xantrex App from the smart phone/tablet. Close all Xantrex Gateway. synchronized with the smart open apps on the smart phone/tablet. Redo the pairing process.
-
Page 34: Maintenance
Maintenance WARNING ELECTRICAL SHOCK HAZARD Do not disassemble the Xantrex Gateway. It does not contain any user-serviceable parts. Attempting to service the unit yourself could result in an electrical shock or burn. Failure to follow these instructions can result in death, serious injury, or equipment damage. -
Page 35: Specifications
SPECIFICATIONS NOTE: Specifications are subject to change without prior notice. Physical Specifications This chapter includes the following topics: A - 4.2 in. (107mm) with Physical Specifications flanges B - 1.4 in. (37mm) Electrical Specifications C - 3.7 in. (95mm) Compatible Devices D - 4.1 in. (105mm) including port Regulatory Weight 0.5 lb (227 g) Housing / Mounting ABS Plastic, Wall-mount: 4-screw... -
Page 36: Electrical Specifications
Compatible PN: 710-3024-01 (shown), 709-3024-01 Power supply via Battery Power input voltage range: 9– 65VZ terminal Power input current: 3.5A at 12VZ To order Xantrex products, contact an authorized Xantrex dealer. The Xantrex Gateway requires one power source. Xantrex Gateway Owner's Guide... -
Page 37: Regulatory
Regulatory Regulatory North America (US, CA) CFR 47 (FCC) Part 15B, Class B ISED Canada ICES-003, Class B CFR 47 (FCC) Part 15C, FCC ID: 2ABCB-PRI4B ISED Canada RF, IC: 20953-RPI4B European Union (EU) Type Regulations Test Description Standard UN/EU Regulation Automotive EMC –... - Page 38 Scan with your smart phone or tablet or enter xantrexapp.com on your web browser. https://xantrex.com/support/get-customer-support/ new SSID: +1-800-670-0707 (Toll Free USA/Canada) new Password: +1-408-987-6030 (Outside USA/Canada) Printed in: 975-1036-01-01 Rev C...
Need help?
Do you have a question about the 808-0888 and is the answer not in the manual?
Questions and answers