Table of Contents
Advertisement
Quick Links
+
UPRIGHT REFRIGERATORS AND
FREEZERS
Models:
ACR82L
SCR801G
ACR1818
SCR1802G
ACRR432L
SCRR432
ACFF436L
SCFF436
ACR261RH
SCRR261G
AFG26MLLH
SCFF262GLH
User Manual
BEFORE USE, PLEASE READ AND FOLLOW ALL SAFETY RULES AND
OPERATING INSTRUCTIONS
Felix Storch, Inc.
Write Model and Serial Numbers here:
An ISO 9001:2015 registered company
Model
770 Garrison Ave
Bronx, New York 10474
Serial No.
www.accucold.com
Advertisement
Table of Contents

Related Manuals for Accucold ACR82L


Summary of Contents for Accucold ACR82L
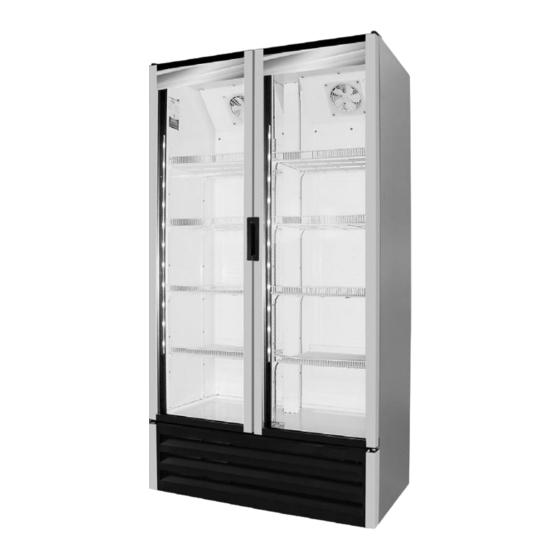
- Page 1 UPRIGHT REFRIGERATORS AND FREEZERS Models: ACR82L SCR801G ACR1818 SCR1802G ACRR432L SCRR432 ACFF436L SCFF436 ACR261RH SCRR261G AFG26MLLH SCFF262GLH User Manual BEFORE USE, PLEASE READ AND FOLLOW ALL SAFETY RULES AND OPERATING INSTRUCTIONS Felix Storch, Inc. Write Model and Serial Numbers here:...
-
Page 2: Table Of Contents
TABLE OF CONTENTS IMPORTANT SAFEGUARDS ................3 INSTALLATION INSTRUCTIONS..............5 Before Using Your Appliance ................. 5 Locating your Appliance................5 Installing the Leveling Legs ................6 Installing the Shelves ..................7 Installing the Pressure Valve ................. 7 Connecting the Power Supply ..............7 Door Reversal .................... -
Page 3: Important Safeguards
IMPORTANT SAFEGUARDS Your safety and the safety of others are very important. We have attached many important safety messages in this manual and on your appliance. Always read and obey all safety messages. This is the Safety Alert Symbol. This symbol alerts you to potential hazards that can kill or injure you and others. - Page 4 • Plug into a grounded 3-prong outlet. Do not remove the grounding prong, do not use an adapter, and do not use an extension cord. • Replace all panels before using the unit. • It is recommended that a separate circuit, serving only your refrigerator/freezer, be provided.
-
Page 5: Installation Instructions
INSTALLATION INSTRUCTIONS Before Using Your Appliance • Remove the exterior and interior packing. • Check to be sure you have all the following parts: • Set of pop-out keys • 1 instruction manual • Before connecting the appliance to the power source, let it stand upright for approximately 2 hours or let the compressor complete three on/off cycles to assure that the temperature inside is appropriate for the products before loading them into the appliance. -
Page 6: Installing The Leveling Legs
Installing the Leveling Legs Heavy-duty leveling legs are included so the unit may be leveled accurately and to allow room to clean beneath the cabinet. CAUTION: DO NOT attempt to install the level legs by yourself. You are far less likely to incur injury to yourself or the appliance if you install the legs with another person. -
Page 7: Installing The Shelves
Installing the Shelves Shelves and shelf clips (4 clips per shelf) are packed inside the cabinet before shipment. After choosing the appropriate spacing inside the cabinet, install shelf clips by inserting the top of the clip inside the pilaster and then press the lower section of the clip while pushing inwards until it snaps into place. -
Page 8: Door Reversal
Door Reversal APPLY ONLY FOR SINGLE DOOR MODELS (Except ACR82L/SCR801G) If you would like to reverse the door swing, follow the steps below. TOOLS 3/8” NUT DRIVER BIT PHILLIPS # 2 SCREWDRIVER INSTRUCTIONS Step 1: Remove the two screws from the top header sign. - Page 9 Step 2: Remove the acrylic header sign and place it on the top of the unit. Step 3: Remove the four screws from the header sign frame.
- Page 10 Step 4: Remove the four screws from the front grill, then remove the front grill from the cooler. Step 5: Remove the screws of the upper and lower hinge. Hold the door when you are removing the screws.
-
Page 11: Operating Your Appliance
Step 6: With the hinges installed on the door, rotate the door 180 degrees. Step 7: Install the door on the cooler, header sign, and front grill according to steps 1 to 5. OPERATING YOUR APPLIANCE Control Panel Your unit is manufactured with a Dixell electronic thermostat to control various functions of your unit, such as temperature, defrost cycles, alarms ,etc. - Page 12 TEMPERATURE SELECTION TEMPERATUR DEFAUL CONTROLLE TYPE RANGE MODEL POINT REFRIGERATO +5°C +2°C to +8°C (+36°F to +46°F) DIXELL XR40CX (+41°F) -20°C (- FREEZER -20.5°C to -15°C (-5°F to +5°F) DIXELL XR60CX 4°F) FRONT PANEL COMMANDS KEY/BUTTON FUNCTION To display the target set point. In programming mode, it selects a parameter or confirms an operation To start a manual defrost...
- Page 13 KEY COMBINATIONS: To lock & unlock the keyboard To enter programming mode To return to the room temperature display HOW TO SEE THE SET POINT: 1. The set point parameter is the temperature at which the compressor cuts out. 2. Push and immediately release the SET key: the display will show the set point value.
- Page 14 HOW TO CHANGE A PARAMETER VALUE The hidden menu includes all the parameters of the instrument. HOW TO ENTER THE HIDDEN MENU Enter the Programming mode by pressing the SET+DOWN keys for 3 seconds (the “°C” or “°F” LED starts blinking). Release the keys, then again push the SET+DOWN keys for more than 7 seconds.
-
Page 15: Care And Maintenance
DIXELL ALARM INDICATORS MESSAGE CAUSE COMMENTS Maximum This alarm is DEFAULT VALUES temperature alarm adjustable. Refrigerator To change the values, it is 15 °C (59 °F) necessary to enter the hidden menu Freezer and change the 0°C (32 °F) parameters. Minimum This alarm is DEFAULT VALUES... -
Page 16: Troubleshooting Chart
The control feeler tube continuously/ was not installed properly stored items are too cold Ambient probe failure Call the service Evaporator probe failure Call the service If you continue to experience issues, contact Accucold’s technical support department at 1-888-4-MEDLAB (1-888-463-3522). - Page 17 NOTES...
- Page 18 Note: Nickel is a component in all stainless steel and some other metallic compositions. Felix Storch, Inc. An ISO 9001:2015 registered company 770 Garrison Ave For parts and accessory ordering, Bronx, New York 10474 troubleshooting, and helpful hints, visit: www.accucold.com www.summitappliance.com/support...
- Page 19 R1040722...
Need help?
Do you have a question about the ACR82L and is the answer not in the manual?
Questions and answers