
Related Manuals for BINTOI BX400


Summary of Contents for BINTOI BX400
- Page 1 Bloeddrukmeter Volautomatisch Bovenarm Modelnummer: BX400 HANDLEIDING Version Number:1.0...
- Page 2 CONTENTS 1.Inleiding en beoogd gebruik............... 2.Belangrijke informatie over bloeddruk en het meten ervan....3.Componenten van uw Bloeddrukmeter..........4.Uw monitor voor de eerste keer gebruiken........5.Meetsprocedure................. 6.Verzorging en Onderhoud..............Dutch..............1--19 7.Garantie/service................. English..............20--44 8.Certificaten..................9.Technische specificaties..............
- Page 3 1. Inleiding en beoogd gebruik 1.2 Waarschuwingen en voorzorgsmaatregelen Waarschuwing: Het gebruik van andere accessoires dan die gespecificeerd of geleverd zijn door de fabrikant van dit apparatuur kunnen de elektromagnetische Het maakt betrouwbare meting van de bovendruk (systolische straling verhogen of verlagen wat elektromagnetische immuniteit met bloeddruk), onderdruk (diastolische bloeddruk) en de polsslag via de bedrijfsstoringen tot gevolg kunnen hebben.
- Page 4 Let op: 2.Belangrijke informatie over bloeddruk en de Het standaardmateriaal dat voor de blaas en de slangen wordt gebruikt, is latexvrij. meting ervan Let op: Zelfmeting betekent controle, geen diagnose of behandeling. Ongebruikelijke waarden moeten altijd met een arts worden besproken. In Bloeddruk geen geval mag u de dosering wijzigen van medicijnen die door een arts zijn De kracht waarmee het hart bloed in de vaten pompt, wordt de bloeddruk...
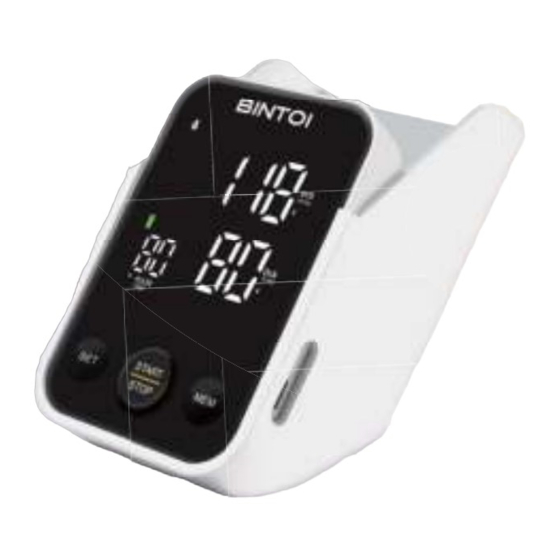
- Page 5 11. Geheugensymbool 12. Impulsweergave 13.Onderdruk (diastolische bloeddruk) 14. Bovendruk (systolische bloeddruk) SET button 3.3 Kenmerken van model BX400 1. Sprekende functie 2. Dubbele gebruikers: 2 x 120 sets geheugen 3. Manchet zelf-controle functie 4. Controle op onregelmatige hartslag 5. Gemiddelde waarde functie 6.
- Page 6 4.2.Systeem Instellingen 4. De Bloeddrukmeter voor de eerste keer gebruiken Nadat u de batterijen hebt geplaatst of de monitor op de stroom hebt aangesloten, moet u de SET knop gedurende 3seconden indrukken en dan kunt u beginnen met instellen. 4.1 Activeren van de aanwezige batterijen A.
- Page 7 5. Metingsprocedure 5.1. Vóór de meting: • Vermijd eten en roken, evenals alle vormen van inspanning direct vóór de meting. Deze factoren beïnvloeden het meetresultaat. Neem de tijd om te ontspannen door ongeveer tien minuten in een fauteuil te zitten in een rustige omgeving voordat u een meting verricht.
- Page 8 5.5. Foutindicaties Let op: positie van de patiënt: De volgende symbolen verschijnen op de display bij abnormale metingen 1) Comfortabel zittend 2) Benen niet gekruist 3) Voeten plat op de vloer 4) Rug en arm ondersteund Symbool Aanleiding Correctie 5) Midden van het CUFF ter hoogte van de rechterboezem van het hart Vervang de batterijen door nieuwe.
- Page 9 De volgende symbolen kunnen voorkomen in deze handleiding, op de De opgeslagen waarden bekijken Digitale bloeddrukmeter BX400, of op de accessoires ervan. Sommige van de symbolen staan voor standaarden en nalevingen in verband met de Druk op de Geheugentoets terwijl het toestel uit staat. Het display toont eerst Digitale bloeddrukmeter BX400 en het gebruik ervan.
- Page 10 5.8. Gebruik van de AC-adapter 6.Beheer en onderhoud U kunt deze monitor ook gebruiken met een AC-adapter (wisselstroomadapt- er; uitgang 5V DC1A met Type C aansluiting). Gebruik alleen de Was de handen na elke tijdmeting. Als een apparaat door verschillende goedgekeurde AC-adapter om beschadiging van het apparaat te voorkomen.
- Page 11 Electromagnetic compatibility: Device fulfills the stipulations of the International standard IEC60601-1-2 9. Technische Specificaties Model: BX400(C02) Gewicht: 256g (Batterijen en AC adapter niet inbegrepen) Vertoning: 62.5*63.5mm2.46 "x2.5 "LED Digitaal Vertoning Afmetingen: 118 (W) x 110 (L) x 52 (H) mm4.65"(W)x4.33"(L)x2.04"(H) Toebehoren: 1×...
-
Page 12: Table Of Contents
CONTENTS 1.Introduction and Intended Use............2.Important Information on Blood Pressure and its Measurement..3. Components of Your Blood Pressure Monitor........4. Using Your Monitor for the First Time..........5.Measurement Procedure..............6.Care and Maintenance..............Dutch..............1--19 7. Warranty/service................English..............20--44 8. Certifications..................9. Technical Specifications..............10. -
Page 13: Introduction And Intended Use
1.Introduction and Intended Use 1.2 Warnings and Precautions Warning: The use of other accessories other than those specified or It enables reliable measurement of systolic and diastolic blood pressure provided by the equipment manufacturer may cause electromagnetic radiation to increase or decrease electromag- as well as pulse through the oscillometric method. -
Page 14: Important Information On Blood Pressure And Its Measurement
Caution: To avoid damaging the device, keep this unit away from children 2.Important Information on Blood Pressure and pets. and its Measurement Caution: The standard material used for the bladder and tubing is latex-free. Attention: Self-measurement means control, not diagnosis or treatment. 2.1. -
Page 15: Components Of Your Blood Pressure Monitor
10.Average value symbol 11.Memory symbol 12.Pulse symbol 13.Diastolic blood pressure SET button 14.Systolic blood pressure 3.3 Features of Model BX400 1.Talking function 2. Double users: 2 x 120 sets memory 3.Cuff self-checking function 4. Irregular heartbeat checking 5. Average value function 6. -
Page 16: Using Your Monitor For The First Time
4. Using your Monitor for the First Time 4.2. System Settings After you load the battery or connect power for the monitor,long press the 4.1 Activating the pre-installed batteries SET button for more than 3s, and then you can start to set. Battery Installation Setting the User: Use only 1.5V “AA”... -
Page 17: Measurement Procedure
5. Measurement Procedure 5.1. Before measurement: • Avoid eating and smoking as well as all forms of exertion directly before measurement. These factors influence the measurement result. Find time to relax by sitting in an armchair in a quiet atmosphere for about ten minutes before taking a measurement. - Page 18 5.5. Error Indicates NOTE: Patient Position: The following symbol will appear on the display when measuring abnormal 1) Comfortably seated 2) Legs uncrossed 3) Feet flat on the floor 4) Back and arm supported SYMBOL CAUSE CORRECTION 5) Middle of the CUFF at the level of the right atrium of the heart Replace both batteries with new ones.
- Page 19 The following symbols may appear in this manual, on the Digital Blood Viewing the stored values Pressure Monitor BX400, or on it's accessories. Some of the symbols represent standards and compliances associated with the Digital Blood With the unit off, press the Memory button. The display first shows "A", then Pressure Monitor BX400 and its use.
-
Page 20: Care And Maintenance
5.8. Using the AC Adapter 6.Care and Maintenance You may also operate this monitor using the AC adapter (output 5V DC1A with Type-C connector). Wash hands after each time measurement. Use only the approved AC adapter to avoid damaging the unit. If one device is used by different patients, wash hands before and after a) Ensure that the AC adapter and cable are not damaged. -
Page 21: Warranty/Service
This may result in incorrect operation of the unit. 3) * Caution: This unit has been thoroughly tested and inspected to assure Model: BX400(C02) proper performance and operation! Weight: 256g (Batteries and AC adapter are not included) Display: 62.5*63.5mm 2.46"x2.5"... - Page 22 Guidance and manufacture’s declaration – electromagnetic immunity Guidance and manufacture’s declaration – electromagnetic immunity The device is intended for use in the electromagnetic environment specified below. The customer or The device is intended for use in the electromagnetic environment specified below. The customer or the user of device should assure that it is used in such an environment.
- Page 23 Guidance and manufacture’s declaration – electromagnetic emission Guidance and manufacturer’s declaration - electromagnetic immunity The device is intended for use in the electromagnetic environment specified below. The customer of the The device is intended for use in the electromagnetic environment specified below. The customer or the user of the device should assure that it is used in such an environment.
Need help?
Do you have a question about the BX400 and is the answer not in the manual?
Questions and answers