
Related Manuals for Amada ML-7 Series

Summary of Contents for Amada ML-7 Series
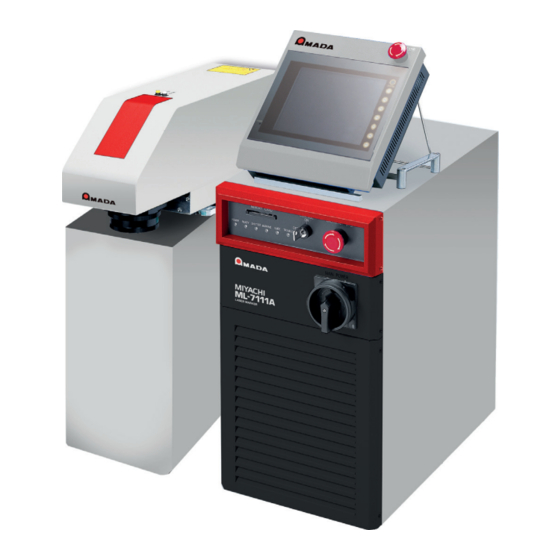
- Page 1 LD-Pumped Laser Marker ML-7 Series ML-9001A OPERATION MANUAL Installation/Maintenance Z11OM1158223-20...
-
Page 2: Organization Of This Manual
Instructions for marking from the Operating Unit touch panel. Notes ■ • This documentation is intended for ML-7 series (ML-7111A/7112AH/7064A) and ML-9001A markers. Figures and screenshots are based on the ML-7111A, unless information for other markers is significantly different. • Unauthorized reproduction of this manual in whole or in part is prohibited. -
Page 3: Chapter Overview
Chapter Overview Chapter1 Safety Precautions Precautions for safe use of the marker Chapter2 Unpacking Size and mass of the marker packaging, as well as lists of package contents Chapter3 Installation Chapter Marker installation requirements and instructions Chapter Chapter4 Maintenance Marker maintenance information and instructions Chapter Chapter Appendix... -
Page 5: Table Of Contents
3.2 Connections ................. 27 ML-7111A and ML-9001A ................28 ■ ML-7112AH ....................28 ■ ML-7064A..................... 29 ■ 3.3 Coolant Tubing (ML-7064A Only) ..........31 Coolant Tubing ..................... 31 ■ Supplying Coolant, Releasing Air in Hoses ..........31 ■ ML-7 Series/ML-9001A... - Page 6 4.8 Backup Lithium Battery Replacement .......... 72 ML-7111A and ML-9001A ................72 ■ ML-7112AH ....................73 ■ ML-7064A..................... 74 ■ 4.9 Memory Card Management ............76 Memory Card Backup................... 76 ■ Restoring Backup Data ................76 ■ Appendix A Troubleshooting ..............80 ML-7 Series/ML-9001A...
- Page 7 Contents A.1 Error Messages on the Operating Unit......... 80 A.2 Error Codes.................. 82 A.3 Problems in Marking Results ............86 A.4 If No Laser Beam Is Projected ............. 87 Index ......................... 88 ML-7 Series/ML-9001A...
- Page 8 Contents ML-7 Series/ML-9001A...
-
Page 9: Chapter 1 Safety Precautions
• The warning symbols are defined as follows: DANGER Incorrect operation poses imminent risk of serious injury or fatality. WARNING Incorrect operation may pose risk of serious injury or fatality CAUTION Incorrect operation may pose risk of injury or damage. ML-7 Series/ML-9001A... -
Page 10: Meaning Of Symbols
The prohibited action is depicted in a circle or illustrated in a figure or described in a statement nearby. The symbols indicate danger, warning, or caution items. The prohibited action is depicted in a circle or illustrated in a figure or described in a statement nearby. ML-7 Series/ML-9001A... -
Page 11: Danger, Warning, And Caution Items
Exposure to direct or scattered laser light is extremely hazardous. Direct exposure of the eye to laser beams may result in blindness. Never burn, destroy, cut, crush or chemically decompose the Laser Marker This product incorporates parts containing gallium arsenide (GaAs). ML-7 Series/ML-9001A... - Page 12 Pacemaker users must not approach the Laser Marker Unless a physician has consented, pacemaker users must not approach the Laser Marker in use, or even approach the working area. The Laser Marker generates electromagnetic fields that may affect pacemaker function. ML-7 Series/ML-9001A...
- Page 13 Keep a fire extinguisher nearby Keep a fire extinguisher in the marking area in case of fire. Maintain and inspect the unit at periodic intervals. Maintain and inspect the unit at periodic intervals. Repair any damage before resuming use. ML-7 Series/ML-9001A...
-
Page 14: Guidelines For Normal Use
• Operate only one switch or button at a time. Operating several switches or buttons at a time may damage or break the unit. ML-7 Series/ML-9001A... - Page 15 * MPE: The maximum level of permissible exposure of the eyes or skin to laser beams. Abbreviation of Maximum Permissible Exposure. • Since the surge absorber is built in, do not perform the insulation resistance test and the withstand voltage test. If the surge absorber fails, the marker may become unusable. ML-7 Series/ML-9001A...
- Page 16 Head Unit and Chiller Unit. For details, refer to the Installation and Maintenance manual. ・ Before transport or storage, always drain the water from the Head Unit and Chiller Unit. For details, refer to the Installation and Maintenance manual (this manual). ML-7 Series/ML-9001A...
-
Page 17: For Disposal
1.4 For Disposal This product incorporates parts containing gallium arsenide (GaAs). At the time of disposal, separate it from general industrial waste or domestic waste and carry out the disposal in accordance with applicable laws and regulations. Chapter ML-7 Series/ML-9001A... -
Page 18: Warning/Explanation Labels For Safety
OPEN AND INTERLOCKS DEFEATED AVOID EYE OR SKIN CLASS 4 LASER PRODUCT EXPOSURE TO DIRECT OR SCATTERED RADIATION LASER APERTURE CAUTION : LASER RADIATION IS EMITTED FROM THIS APERTURE DON’ T REMOVE A FIBER WARNING WHEN THE EQUIPMENT POWER SUPPLY IS ON. ML-7 Series/ML-9001A... - Page 19 CW, Q-SW PULSE 1.06 µm 645nm CLASS 4 LASER PRODUCT CAUTION LASER RADIATION WHEN OPEN AND INTERLOCKS DEFEATED AVOID EYE OR SKIN EXPOSURE TO DIRECT OR SCATTERED RADIATION LASER APERTURE CAUTION: LASER RADIATION IS EMITTED FROM THIS APERTURE ML-7 Series/ML-9001A...
-
Page 20: Ld (Diode Laser) Precautions
Chapter Refer to the Operating Unit manual for details: ML-7111A and ML-9001A ML-7112AH ML-7064A ● Increasing the current limit from the factory-set value during initial use will shorten the useful life of the pumping diode. ML-7 Series/ML-9001A... -
Page 21: Chapter 2 Unpacking
Approx. 35 kg accessories) Chiller Unit Approx. 525 x 580 x 760 - - - Container Approx. 53 kg Approx. 290 x 300 x 300 Coolant Container - - - Approx. 21 kg Dimensions given in mm; HxWxD ML-7 Series/ML-9001A... -
Page 22: Checking The Container Contents
ML-9001A ML-7064A Head Unit f lens* Beam expander* - Electrical ground Chapter - - - User’s manual for ML-7 Series/ML-9001A (CD-ROM) - - - User's manual for ML-7 Series/ML-9001A (excerpt) - - - User’s manual for LMDraw6 (CD-ROM) - -... -
Page 23: Control Unit Container
2.2 Checking the Container Contents Control Unit Container ■ ML-7111A ML-7112AH ML-9001A ML-7064A Control Unit User’s manual for ML-7 Series/ML-9001A (CD-ROM) - User's manual for ML-7 Series/ML-9001A (excerpt) - User’s manual for LMDraw6 (CD-ROM) - User's manual for LMDraw6 (excerpt) -... -
Page 24: Options
- ○ - Compact flash expansion card* ○ - ○ ○ Power cable for 100V AC ○ - ○ - External mask* - - - ○ Warning label ○ ○ ○ ○ Protective eyewear ○ ○ ○ ○ ML-7 Series/ML-9001A... -
Page 25: Chapter 3 Installation
C. Clearance in back At least 350 mm At least 350 mm At least 350 mm At least 500 mm D. Mass 24 kg 30 kg 24 kg 72 kg Air intake/exhaust Front/back Front/back Front/back Front/back/both sides ML-7 Series/ML-9001A... - Page 26 Do not hold the unit by the optical fiber or other cables, or by the optical fiber guide. ・ When moving models with casters on the bottom (ML-7112AH), avoid pinching your fingers between the casters. Do not hold the unit by the casters on the bottom. Chapter ML-7 Series/ML-9001A...
-
Page 27: Head Unit
・ When moving the Head Unit, support the unit in front and back to avoid touching the lens (ML-7111A, ML-9001A, and ML-7064A). With the ML-7112AH, use both hands to hold the handles on both sides. Do not hold it by the optical fiber or other cables. ML-7111A, ML-9001A, and ML-7064A ML-7112AH ML-7 Series/ML-9001A... - Page 28 Also, make sure the focal distance is correct. Positioning highly reflective materials about the marking origin or positioning workpieces closer than the lens focal distance may cause the laser to reflect from the workpiece and burn the inside of the Head Unit. ML-7 Series/ML-9001A...
- Page 29 A laser directed at parts in the other head may burn the interior of the unit. • Be sure to install the Head Unit with the base facing down (ML-7112AH). Installation in any other orientation will reduce safety and impair performance. Chapter ML-7 Series/ML-9001A...
-
Page 30: Head Unit Air Purge Installation (Ml-7064A Only)
88 x 10 The user is Air Dryer 5 to 40°C responsible for providing these items. AC100V 50/60Hz Use a regulator to adjust the pressure in the Head Unit so that it is slightly higher than atmospheric pressure. ML-7 Series/ML-9001A... -
Page 31: Connections
・ The power supply must be single-phase 100 V AC to 240 V AC, with capacity of at least 1 kVA. ・ The power cable provided with the equipment is exclusively for 100 V AC use. When using a power supply other than 100 V AC, prepare an appropriate cable. ML-7 Series/ML-9001A... -
Page 32: Ml-7111A And Ml-9001A
Power Cable At least 1.25mm or 16AWG RF Con- necting Cable Grounding Connecting Cable [Head Unit, Back] [Control Unit, Back] Guard Earth Connect the ground- ing wire to TE. Connect the grounding wire of the power supply to TE. ML-7 Series/ML-9001A... - Page 33 (Head interface) To Head Control Unit SCANNER SCANNER Twinax cable (*) (Coordinate data) (Coordinate data) LD cable ANODE LD Chamber Unit LD-PS CATHODE RF-IN RF cable Q switch RF Unit Head ground cable SW-PS Computer Coolant filter Chiller Unit ML-7 Series/ML-9001A...
- Page 34 * After connecting the twinax cable to the rear of the control unit, secure it to the mounting plate with the attached cable tie (1 piece) not to be disconnected when pulled. Twinax cable Mounting plate Secure the twinax cable with the attached cable tie. Chapter ML-7 Series/ML-9001A...
-
Page 35: Coolant Tubing (Ml-7064A Only)
Operating Unit (so that the chiller runs independently). The chiller starts up and coolant circulates through the hoses. For details on chiller startup, refer to 1.5, "Running the Chiller Alone (ML-7064A Only)" in the Operating Unit manual. ML-7 Series/ML-9001A... - Page 36 ・ Do not use the manual coolant supply pump for other purposes. To protect the pump, store it in a plastic bag to keep it free from dirt and dust. ML-7 Series/ML-9001A...
-
Page 37: Chapter 4 Maintenance
・ Use our genuine maintenance parts. ・ For defect caused by non-genuine maintenance parts or use of non-genuine maintenance parts, the repair is charged even if it is still within the maintenance contract period or the warranty period. ML-7 Series/ML-9001A... -
Page 38: Part Replacement Schedule
1029281 1042008 1029281 - f150 1029279 1029279 - - f lens Daily Clean protective f160 (5 years) 1029239 1029255 1029248 - (replace) glass (*5) f254 1029247 1029026 - f270 1029024 1029024 - - f300 1029025 - - - ML-7 Series/ML-9001A... - Page 39 Repeated marking in a very small area may damage the scanner bearings and shorten their useful life. We recommend marking a wide area at least once per day. For the ML-7064A, the maintenance schedule involves replacement every two years. Replace these components regularly regardless of how much the marker is used. ML-7 Series/ML-9001A...
-
Page 40: Air Filter Inspection And Replacement
Have the following items ready when replacing the air filter on the ML-7111A and ML-9001A: • Phillips screwdriver Remove the front cover by unscrewing the four screws on the side panel and pulling the cover toward you. Chapter Screw (M3) Screw (M3) Front cover Screw (M3) Screw (M3) ML-7 Series/ML-9001A... - Page 41 Secure the air filter in the four corners of the fixtures. Attach the front cover to the Control Unit. Chapter ML-7112AH ■ Remove the front cover by unscrewing the screw under the cover and lifting the cover up. Front cover Screw ML-7 Series/ML-9001A...
- Page 42 Remove the air filter from the cover. Vacuum the air filter to clean it. Fixture Attach the air filter to the front cover. Insert the center part of the fixtures (shown inside squares in the figure). Secure the air filter in the fixtures. ML-7 Series/ML-9001A...
- Page 43 4.3 Air Filter Inspection and Replacement Attach the air filter cover. Chapter ML-7 Series/ML-9001A...
-
Page 44: Head Unit
Remove the cover by pulling forward the tab at front. Cover Vacuum the filter to clean it. Attach the cover to the Head Unit. Removing the cover will expose the fan. Be sure to turn off the power before conducting maintenance. ML-7 Series/ML-9001A... -
Page 45: Protective Glass Inspection And Replacement
If ethanol does not clean the protective motion. glass, you will need to replace the protective glass. 4.4.2 Replacing the Protective Glass Turn off the equipment. Bottom of Head Unit Remove the protective glass holder by unscrewing it. f lens ML-7 Series/ML-9001A... - Page 46 • The protective glass may be damaged if it is not properly fitted into the stepped section. • Depending on the protective glass, be careful of its orientation. Protective glass sectional view ○ × Reattach the protective glass holder. Chapter ML-7 Series/ML-9001A...
-
Page 47: Fc-Ld (Oscillation Unit) Inspection And Replacement
Note that operating the equipment at output levels exceeding the maximum permissible level or removing any of the adhesive seals on the FC-LD will void the warranty. Chapter Percentage of Cost Borne by Customer (%) Years in Use Months in Use Refurbished 0 to 12 ML-7 Series/ML-9001A... - Page 48 Chapter 4 Maintenance Percentage of Cost Borne by Customer (%) Years in Use Months in Use Refurbished Chapter 5 and over 49 and over ML-7 Series/ML-9001A...
-
Page 49: Ml-7111A And Ml-9001A
Control Unit, side view Insert the shorting pin in the red and black terminals as shown in order to close the circuit. Be sure to insert the ends of the pin in the correct terminals. Black LD shorting pin ML-7 Series/ML-9001A... - Page 50 Disconnect the relay connectors for the LD power supply, Peltier power supply, and relay. Peltier power supply relay connector Relay connector LD power supply Relay connector Unplug the signal line connector, keeping it level as you pull it out. Signal line connector ML-7 Series/ML-9001A...
- Page 51 Contact us if you need to know the model number of the graphite sheet. With the graphite sheet between the heat sink and replacement FC-LD, secure the FC-LD with four hex screws. Remove the caps from the FC-LD and optical fiber. ML-7 Series/ML-9001A...
- Page 52 If the shorting pin is inserted in the red and black terminals (in a closed circuit) when you turn on the LD, excessive current will flow, generating heat and damaging the LD. Black LD shorting pin ML-7 Series/ML-9001A...
- Page 53 After FC- LD replacement, always set the current to “Maximum Setting Current Value” indicated on the seal attached to the FC-LD. Used FC-LDs can be reconditioned to their original performance levels for a fee. Contact us for further details. ML-7 Series/ML-9001A...
- Page 54 25 mm and lifting it Slide the cover back about 25 mm, then lift Similarly, remove the cover on the left side. Cover on right Control Unit, from right Disconnect the Peltier power supply relay connector. Relay connector for Peltier power supply ML-7 Series/ML-9001A...
- Page 55 Signal line connector Chapter To remove the optical fiber, loosen the optical fiber fixture at the back of the Control Unit. Optical fiber fixture Remove the clamp securing the optical fiber. Clamp ML-7 Series/ML-9001A...
- Page 56 Tighten the fixing nut of the optical fiber. Tighten the optical fiber fixture firmly to secure the fiber. Keep the caps for the optical fiber and LD head in a safe place. Secure the optical fiber with the clamp. ML-7 Series/ML-9001A...
- Page 57 After FC- LD replacement, always set the current to “Maximum Setting Current Value” indicated on the seal attached to the FC-LD. Used FC-LDs can be reconditioned to their original performance levels for a fee. Contact us for further details. ML-7 Series/ML-9001A...
-
Page 58: Ml-7064A (Oscillation Unit Removal)
Unscrew the six screws from the sides of the Head Unit cover and remove the Head Unit cover. Loosen the screws on the side of the head cover. (a total of six screws on both sides) ML-7 Series/ML-9001A... - Page 59 Peel off the three blue protective stickers Peel off the three blue protective stickers. on top of the Oscillation Unit and use a Use a hex wrench to remove the bolts. hex wrench to remove the three bolts. ML-7 Series/ML-9001A...
- Page 60 Head CN3 shorting connector from damaging LD elements, attach (provided) the provided head CN3 shorting connector to the CN3 connector at the back of the Oscillation Unit and turn the fastening screw to tighten it firmly. Fastening screw Chapter ML-7 Series/ML-9001A...
-
Page 61: Ml-7064A (Oscillation Unit Attachment)
Align the pinholes at the bottom of the Oscillation Unit with these positioning pins, then attach the units. Attach them carefully, avoiding any sudden impacts. Remove the handles. Reattach the three bolts that were removed when detaching the Oscillation Unit. ML-7 Series/ML-9001A... - Page 62 Adjust so that the bypass hoses face Chapter straight down. Connect the single connector at the front of the Oscillation Unit. Attach them so that the cable names are aligned with the connector names on the Oscillation Unit. Connector ML-7 Series/ML-9001A...
- Page 63 Straight head Right-angled head (4 positions) (4 positions) Chapter Attach both one-touch couplers at the coolant hoses on the back of the Head Unit. During connection, be careful not to reverse the IN and OUT hoses. Couplers ML-7 Series/ML-9001A...
- Page 64 After Oscillation Unit replacement, always set the current value of 50 W @ Chapter CW indicated in the data sheet included with the Oscillation Unit. Used Oscillation Units can be reconditioned to their original performance levels for a fee. Contact us for further details. ML-7 Series/ML-9001A...
-
Page 65: Control Unit Maintenance And Inspection (Ml-7064A Only)
Visually confirm that no screws or connectors are missing, damaged, or loose. Retighten them and replace damaged parts as needed. After entering the string, press the [ENT] button to confirm your entry, then press the [OK] button. The string is now configured, and the calendar settings screen is displayed. ML-7 Series/ML-9001A... -
Page 66: Chiller Unit Maintenance And Inspection (Ml-7064A Only)
2 cm Water gauge Confirm there are no leaks (daily) ■ Visually confirm that the coolant hoses have no cracks. Confirm there are no unusual noises (daily) ■ Confirm there are no unusual noises from the Chiller Unit. ML-7 Series/ML-9001A... -
Page 67: Using The Heater
Maintenance window Chapter Turn on the heater switch at left. (This switch is off at the time of delivery.) Heater switch Close the maintenance window. If the ambient temperature is above 20°C, be sure to keep the heater off. ML-7 Series/ML-9001A... -
Page 68: Draining Coolant
Using a bucket prepared in advance to catch the water, pull down the drain hose and drain it. Return the drain hose to its original position. Secure it with the hose clamp and put the cap back Drain hose To the bucket ML-7 Series/ML-9001A... -
Page 69: Replacing Coolant
3.3 "Coolant Tubing (ML-7064A Only)" (p. 31). Repeat these tasks until the flow error is cleared. Whenever you start up the chiller repeatedly, wait at least three minutes before each startup. Avoid running the pump dry, as this may damage the pump. ML-7 Series/ML-9001A... -
Page 70: Replacing The Coolant Filter
For details on supplying coolant and removing air from hoses, see 3.3 "Coolant Tubing (ML-7064A Only)" (p. 31). Start the chiller (running it alone) and release air. Next, check for any leakage and ensure the coolant level is acceptable. ML-7 Series/ML-9001A... - Page 71 4.7 Chiller Unit Maintenance and Inspection (ML-7064A Only) Reset the coolant and coolant filter replacement date in LMDraw6 on the [Consumable Replacement] screen and on the Operating Unit on the [Maintenance] screen. Coupler Coolant filter Fastening band Chapter ML-7 Series/ML-9001A...
-
Page 72: Replacing The Ion-Exchange Resin
Remove the coupler above the ion-exchange resin case. Remove the two screws (M4) holding the ion-exchange resin case. Ion-exchange resin case Chapter Coupler M4 screws Remove the ion-exchange resin case from the back panel of the Chiller Unit. ML-7 Series/ML-9001A... - Page 73 Start the chiller (running it alone) and release air. Next, check for any leakage and ensure the coolant level is acceptable. Reset the ion-exchange resin and coolant replacement date in LMDraw6 on the [Consumable Replacement] screen and on the Operating Unit on the [Maintenance] screen. ML-7 Series/ML-9001A...
-
Page 74: Adjusting The Flow
Return the black tape to its original position. Marks Tighten Flow valve 20 to 21 mm Roller If the flow valve roller is set in a looser position than shown, it will shorten the useful life of the ion-exchange resin. ML-7 Series/ML-9001A... -
Page 75: Cleaning The Chiller Unit Air Filter
・ If the air filter becomes dirty, the coolant pressure may rise, thus causing chiller problems. Keep the filter clean. Air filter Air condenser (on the interior side of Knob the air filter) Chapter Filter cover Air filter Knob ML-7 Series/ML-9001A... -
Page 76: Backup Lithium Battery Replacement
Six screws (M3) on both sides Control Unit, side view Remove the carrying handle by unscrewing the four hex screws on top of the Control Unit on both sides. Remove the cover by sliding it back about 15 mm and lifting it up. ML-7 Series/ML-9001A... - Page 77 Control Unit. Remove the cover on the right side by sliding it back about 25 mm and lifting it Slide the cover back about 25 mm and then lift it. Cover on right Control Unit, from right ML-7 Series/ML-9001A...
- Page 78 After normal marker shutdown, turn off the Control Unit Power keyswitch and the breaker at the back (main power supply). Unscrew the three fastening screws on Three fastening screws (M3) the Control Unit cover. Remove the cover by sliding it back and lifting it up. Control Unit ML-7 Series/ML-9001A...
- Page 79 Lithium battery Insert the new lithium battery. Be careful to insert the battery with the correct polarity. Rear Control Unit, from top Replace the Control Unit cover and tighten the three screws to secure the Control Unit. Chapter ML-7 Series/ML-9001A...
-
Page 80: Memory Card Management
If the memory card drive is displayed under My Computer, you are ready to start backing up the card. If not, refer to the documentation of the compact flash device for details. Delete all content on the memory card (all folders and files). ML-7 Series/ML-9001A... - Page 81 4.9 Memory Card Management Copy all content you backed up (all folders and files) to the memory card. The backed-up data has now been returned to the memory card. Chapter ML-7 Series/ML-9001A...
- Page 82 Chapter 4 Maintenance Chapter ML-7 Series/ML-9001A...
- Page 83 Appendix...
-
Page 84: Appendix A Troubleshooting
Connect the LMDraw to check serial registration. Memory capacity has been reached when attempting to store a calendar Date Error setting, or the calendar setting may be unsupported. Connect the LMDraw to check calendar setting. ML-7 Series/ML-9001A... - Page 85 If the error persists after restarting, contact us. Checking Definition of touch-panel operation does not match the hardware state. Accessory Error If this message is displayed, contact us. The memory card is broken. Incompatible CF If the error persists after restarting, contact us. Appendix ML-7 Series/ML-9001A...
-
Page 86: Error Codes
After restarting the marker and your computer, transfer the layout data. The LD current has been limited due to exceeding the maximum LD Current is Limited current value limit. Check the current LD value or adjust the Warning maximum current value if necessary. ML-7 Series/ML-9001A... - Page 87 Make sure the RF cable is connected securely to the Control Unit and RF Reflective Wave Head Unit. Excessive If the error persists after you connect the cable correctly and restart, contact us. RF Temperature An RF temperature error has occurred. Error If the error persists after restarting, contact us. ML-7 Series/ML-9001A...
- Page 88 If the error persists after restarting, contact us. The memory card is full. Memory Card Full Either delete data or use a new memory card. There is a problem with the controller. 85 to 96 Controller Error If the error persists after restarting, contact us. ML-7 Series/ML-9001A...
- Page 89 • Turn on the power again and wait at least 10 minutes before Error starting the laser. (ML-7112AH) If the error persists following these measures, contact us. * In the event of errors other than those listed above, contact us and identify the error code. ML-7 Series/ML-9001A...
-
Page 90: Problems In Marking Results
The Head Unit or workpiece is vibrating (lines Adjust the laser and workpiece to prevent are crooked). vibration. Excessive noise is coming from an external Eliminate the source of noise. source. The scanner is showing signs of wear. Replace the scanner. Appendix ML-7 Series/ML-9001A... -
Page 91: If No Laser Beam Is Projected
Was the Emergency Stop Release the Emergency Stop switch. switch pressed? Is the remote interlock enabled? Short pins 4 and 5 of the remote (Applies only if interlock connector. remote interlock signals are used.) Contact your Amada Miyachi representative. Appendix ML-7 Series/ML-9001A... -
Page 92: Index
Peltier Control Connecting Cable ..28 Fan Motor ......34 Power Cable ......28 FC-LD ......35 Power Cable for 100V AC ....20 FC-LD (Oscillation Unit) ....43 Protective Eyewear .... 18 fq Lens ......18 Protective Glass ...... 41 ML-7 Series/ML-9001A... - Page 93 ...... 28 Unpacking ......17 USB Cable ......20 User’s Manual ..... 18 Visible Laser Radiation Label ..... 19 Warning ......8 Warning Labels ..... 19 Warranty Period ....... 43 Water Supply Pump ....19 Work Distance ......24 ML-7 Series/ML-9001A...
Need help?
Do you have a question about the ML-7 Series and is the answer not in the manual?
Questions and answers