Advertisement
Available languages
Available languages
Quick Links
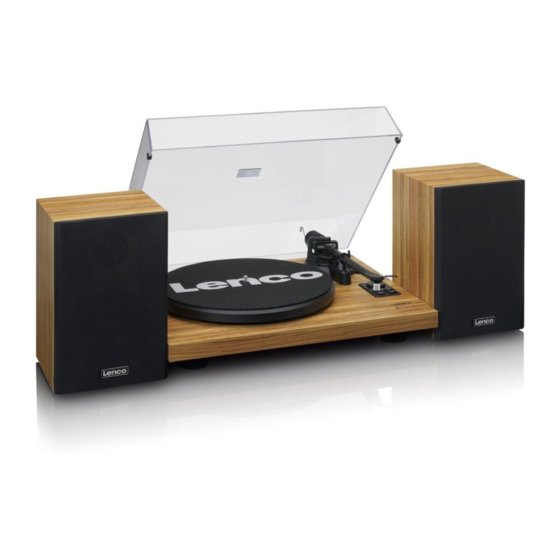
Model LS-500 (V2)
User Manual –
Turntable with built-in amplifier, Bluetooth and speakers
Gebruikershandleiding –
Platenspeler met ingebouwde versterker,
Bluetooth en luidsprekers
Bedienungsanleitung –
Plattenspieler mit integriertem Verstärker, Bluetooth und
Lautsprechern
Mode d'emploi –
Platine tourne-disque avec amplificateur intégré, Bluetooth et haut-
parleurs
Manual de usuario –
Tocadiscos con amplificador incorporado, Bluetooth y altavoces
Manuale Utente –
Giradischi con amplificatore, Bluetooth e altoparlanti integrati
Руководство пользователя –
Виниловый проигрыватель со встроенным
усилителем, Bluetooth и внешними динамиками
- 1 -
Advertisement

Subscribe to Our Youtube Channel
Related Manuals for LENCO LS-500OK


Summary of Contents for LENCO LS-500OK
- Page 1 Model LS-500 (V2) User Manual – Turntable with built-in amplifier, Bluetooth and speakers Gebruikershandleiding – Platenspeler met ingebouwde versterker, Bluetooth en luidsprekers Bedienungsanleitung – Plattenspieler mit integriertem Verstärker, Bluetooth und Lautsprechern Mode d’emploi – Platine tourne-disque avec amplificateur intégré, Bluetooth et haut- parleurs Manual de usuario –...
-
Page 2: Table Of Contents
Index English ................................- 3 - Nederlands ..............................- 13 - Deutsch ................................- 24 - Français ................................- 36 - Español ................................- 47 - Italiano ................................- 59 - Русский...................................-70 Version: 7.0 - 2 -... -
Page 3: English
English CAUTION: Usage of controls or adjustments or performance of procedures other than those specified herein may result in hazardous radiation exposure. PRECAUTIONS BEFORE USE KEEP THESE INSTRUCTIONS IN MIND: Do not cover or block any ventilation openings. When placing the device on a shelf, leave 5 cm (2”) free space around the whole device. - Page 4 the device, when the device has been exposed to rain or moisture, does not operate normally, or has been dropped. 26. Long exposure to loud sounds from personal music players may lead to temporary or permanent hearing loss. 27. If the product is delivered with power cable or AC power adaptor: ⚫...
- Page 5 Product Description Initial Setup Place the unit on a flat and level surface. The selected location should be stable and free from vibration. Install the turntable lid to the hinges. Remove the tie-wrap that is holding the tonearm. Put the drive belt around the Turntable Hub, and then use the provided belt hoot to help pull the belt to fit around the slot of motor pulley.
- Page 6 Cartridge Down force Adjustment The Counterweight supplied is suitable for cartridges weighing between 3.0-6.0g. Gently push and turn the Counterweight onto the rear of the tonearm (with the scale facing toward the front of the turntable). Remove the cartridge protection cap. Lower the tonearm lift and position the cartridge in the space between tonearm rest and platter.
- Page 7 Locate the anti-skating weight You will find a anti-skating weight with small fishing line from the package, please follow below steps to locate the anti-skating weight: Slip the looped end of the fishing line over the anti-skating weight adjustment stub and into the 3 groove (the correct anti-skating force for the factory-fitted cartridge).
- Page 8 Press the MODE button to choose Bluetooth mode, the indicator will light in blue. You will hear an activation sound from the unit. Turn on the Bluetooth feature of your audio device, search for “Lenco LS-500” and pair. Once your device is successfully paired with the unit, you will hear a short confirmation sound from the unit.
- Page 9 Cartridge Replacement Before replacement, put the stylus protector back on the stylus to prevent damage to the stylus during the replacement process. Carefully remove the wire leads from the original cartridge. Loosen the two screws on the headshell that are securing the cartridge and then remove the original cartridge.
- Page 10 Needle: AT-3600L Frequency Response 20Hz - 20kHz Channel Balance <2.5dB Channel Separation >18dB Output Voltage 2.5mV Recommended Load Resistance 47kΩ Amplifier connection MM - input Recommended Tracking Pressure 3.0±0.5g Weight Note: • Design and specifications are subject to change without notice. Power supply adaptor: Manufacturer: Brightpower Optoelectronic Technonlgy Co., Ltd.
- Page 11 Guarantee Lenco offers service and warranty in accordance to European law, which means that in case of repairs (both during and after the warranty period) you should contact your local dealer.
- Page 12 Hereby, Commaxx B.V. Wiebachstraat 37, 6466 NG Kerkrade, The Netherlands, declares that this product is in compliance with the essential EU directive requirements. The declaration of conformity may be consulted via techdoc@commaxxgroup.com Service For more information and helpdesk support, please visit www.lenco.com Commaxx B.V. Wiebachstraat 37, 6466 NG Kerkrade, The Netherlands. - 12 -...
-
Page 13: Nederlands
Nederlands LET OP: Het gebruik van afstandsbedieningen of aanpassingen of de uitvoering van procedures die niet in dit document zijn gespecificeerd, kan leiden tot gevaarlijke blootstelling aan straling. VOORZORGSMAATREGELEN VOOR GEBRUIK ONTHOUD DE VOLGENDE INSTRUCTIES: Bedek of blokkeer de ventilatieopeningen niet. Wanneer u het apparaat op een schap plaatst, dient u 5 cm (2”) vrije ruimte rondom het gehele apparaat te behouden. - Page 14 waarschuwingen of voorzorgsmaatregelen in deze gebruikershandleiding wordt niet gedekt door de garantie. 21. Verwijder nooit de behuizing van dit apparaat. 22. Plaats dit apparaat nooit op andere elektrische apparatuur. 23. Geef kinderen geen gelegenheid in aanraking met plastic zakken te komen. 24.
- Page 15 INSTALLATIE • Pak alle onderdelen uit en verwijder de beschermende materialen. • Sluit het apparaat niet aan op het stopcontact, voordat u de netspanning hebt gecontroleerd en voordat alle andere aansluitingen zijn gemaakt. Productbeschrijving Stepped Drive Pulley Getrapte aandrijfpoelie Drive Belt Aandrijfriem Turntable Spindle As platenspeler...
- Page 16 Ground Connector Aarde-verbinding R Jack for RCA Line out R-aansluiting voor RCA-lijn-uit L Jack for RCA Line out L-aansluiting voor RCA-lijn-uit Phono/Line Out Switch Schakelaar Phono/Line-uit Power Jack Lichtnetaansluiting Power Switch Aan/uit-schakelaar Power Amplifier L+ Eindversterker L+ Power Amplifier L- Eindversterker L- Power Amplifier R- Eindversterker R-...
- Page 17 De neerwaartse kracht van de Cartridge aanpassen Counterweight Tegengewicht Downforce scale ring Schaalring neerwaartse kracht Center line Middenlijn Het meegeleverde tegengewicht is geschikt voor cartridges die tussen 3,0-6,0 g wegen. Druk en draai het tegengewicht voorzichtig op de achterzijde van de toonarm (met de schaal richting de voorzijde van de platenspeler).
- Page 18 Zoek het antiskating-gewicht U vindt een antiskating-gewicht met kleine vislijn in de verpakking, volg onderstaande stappen om het antiskating- gewicht te vinden: 1. Schuif het lusvormige uiteinde van de vislijn over de instellingsstomp van de antiskating-gewicht en in 3rd Groove (de juiste antiskating-kracht voor de in de fabriek aangebrachte cartridge). Trek lichtjes aan het antiskating-gewicht om de lus van de vislijn naar de stomp te laten bewegen.
- Page 19 Druk op de MODE-toets om de Bluetooth-modus te kiezen, de indicator licht blauw op. U hoort een activatiegeluid uit het toestel. Zet de Bluetooth-functie van uw audioapparaat aan, zoek naar “Lenco LS-500” en koppel. Zodra uw apparaat is gekoppeld met het toestel, hoort u een kort bevestigingsgeluid uit het apparaat.
- Page 20 De cartridge vervangen Voordat u de cartridge vervangt, plaats de naaldbescherming terug op de naald om beschadiging van de naald tijdens de vervanging te voorkomen. Verwijder de draden voorzichtig van de originele cartridge. Draai de twee schroeven los op de behuizing die de cartridge vasthouden en verwijder vervolgens de originele cartridge.
- Page 21 Afmetingen luidspreker (B X H X D) 162 X 248 X 158 mm Gewicht 3,76 kg Naald: AT-3600L Frequentiebereik 20 Hz ~ 20 KHz Kanaalbalans < 2,5 dB Kanaalscheiding > 18 dB Uitgangsspanning 2,5 mV Aanbevolen belastingsweerstand 47 kΩ Versterkeraansluiting MM - ingang Aanbevolen trackingdruk 3,0 ±...
- Page 22 Als uw apparaat regelmatig uitschakelt, dan duidt dit niet op een defect. Garantie Lenco biedt service en garantie aan overeenkomstig met de Europese wetgeving. Dit houdt in dat u, in het geval van reparaties (zowel tijdens als na de garantieperiode), uw lokale handelaar moet contacteren.
- Page 23 Commaxx B.V. Wiebachstraat 37, 6466 NG Kerkrade, Nederland, verklaart hierbij dat dit product voldoet aan de vereisten van de essentiële EU-richtlijnen. De verklaring van conformiteit kan worden aangevraagd via techdoc@commaxxgroup.com Service Bezoek voor meer informatie en helpdeskondersteuning www.lenco.com Commaxx B.V. Wiebachstraat 37, 6466 NG Kerkrade, Nederland. - 23 -...
-
Page 24: Deutsch
Deutsch ACHTUNG: Eine andere als die hier beschriebene Bedienung, Einstellung oder Verwendung der Funktionen kann zu gefährlicher Strahlenbelastung führen. VORSICHTSMASSNAHMEN VOR DER BENUTZUNG BEFOLGEN SIE IMMER FOLGENDE ANWEISUNGEN: Blockieren oder bedecken Sie keine Lüftungsöffnungen. Wenn Sie das Gerät auf ein Regal stellen, lassen Sie um das gesamte Gerät 5 cm (2”) freien Platz. - Page 25 20. Stellen Sie sicher, dass das Gerät in einer stabilen Position aufgestellt ist. Schäden aufgrund Verwendung dieses Produkts in einer instabilen Position, Vibrationen, Stöße oder Nichtbeachtung der anderen in dieser Bedienungsanleitung enthaltenen Warnungen und Sicherheitshinweise werden nicht durch die Garantie abgedeckt.
- Page 26 ⚫ Augenmerk ist auf den ökologischen Aspekt der Batterieentsorgung zu legen. ANSCHLUSS • Packen Sie alle Teile aus und entfernen Sie danach die Schutzmaterialien. • Schließen Sie das Gerät nicht eher an das Netz an, bevor Sie die Netzspannung überprüft haben und alle anderen notwendigen Verbindungen hergestellt sind.
- Page 27 Ground Connector Masseverbinder R Jack for RCA Line out Cinch-Buchse rechter Kanal des LINE-Ausgangs L Jack for RCA Line out Cinch-Buchse linker Kanal des LINE-Ausgangs Phono/Line Out Switch Umschalter PHONO/LINE-Ausgang Power Jack Netzadapterbuchse Power Switch Ein/Aus-Schalter Power Amplifier L+ Positiver Endstufenausgang für den linken Lautsprecher Power Amplifier L- Negativer Endstufenausgang für den linken Lautsprecher Power Amplifier R-...
- Page 28 Einstellung der Auflagekraft des Tonabnehmers Counterweight Gegengewicht Downforce scale ring Skalenring der Auflagekraft Center line Mittellinie Das mitgelieferte Gegengewicht ist für Tonabnehmer mit einem Gewicht zwischen 3,0-6,0 g geeignet. Drücken und drehen Sie das Gegengewicht vorsichtig auf die Rückseite des Tonarms (mit der Skala zur Vorderseite des Plattenspielers gerichtet).
- Page 29 HINWEIS: Die empfohlene Auflagekraft für den werksseitig montierten Tonabnehmer beträgt 3,0 ± 0,5 g. Bringen Sie das Anti-Skating-Gewicht an. In der Verpackung befindet sich das Anti-Skating-Gewicht mit dünner Angelschnur. Bitte folgen Sie den nachstehenden Schritten, um das Anti-Skating-Gewicht anzubringen: 1. Schieben Sie das geschlungene Ende der Angelschnur über den Einstellstift des Anti-Skating- Gewichts in die 3.
- Page 30 Drücken Sie die MODE taste, um den Bluetooth-Modus auszuwählen, der durch Leuchten der LED in Blau angezeigt wird. Weiterhin ertönt vom Gerät aus ein Aktivierungsklang. Aktivieren Sie nun die Bluetooth-Funktion Ihres Audiogeräts, suchen Sie dann nach „Lenco LS-500“ und koppeln Sie dieses Gerät anschließend.
- Page 31 Hinweis: Vergewissern Sie sich immer dann, wenn Sie den Plattenspieler umstellen oder ihn reinigen, dass der Tonnadelschutz ordnungsgemäß auf der Tonnadel sitzt, um Schäden an der Tonnadel vorzubeugen. Öffnen Sie die Tonarmklammer von links nach rechts. Wenn Sie die PLAY/STOP-Taste einmal drücken, dann beginnt sich der Plattenteller zu drehen. Heben Sie nun den Tonarm vorsichtig aus seiner Auflage und bewegen Sie ihn dann über die Platte zu der Stelle, ab der wiedergegeben werden soll.
- Page 32 Technische Daten LS-500 Haupteinheit Stromversorgung Netzadapter, DC-Ausgang 15 V/2400 mA Leistungsaufnahme Ausgangsleistung 2 x 30 W RMS Geschwindigkeit Plattenteller: 33⅓ und 45 U/min Gleichlaufschwankungen ± 1,0 % Tonhöhenschwankungen < 0,15 % Signal-Rausch-Verhältnis 72 dB Anpresskraftbereich 0 – 6,0 g Effektive Länge des Tonarms 8,6”...
- Page 33 Wartung des Plattenspielers Berühren Sie die Nadelspitze nicht mit Ihren Fingern. Vermeiden Sie ein Aufschlagen des Tonabnehmers auf der Plattentellermatte oder einer Schallplattenkante. Reinigen Sie den Tonabnehmer regelmäßig mit einem weichen Pinsel in einer Von-hinten-nach-vorn- Bewegung. Reinigen Sie die Schallplatte mit einen Reinigungspinsel für Schallplatten und einer Schallplattenreinigungslösung, um die Schallplatte von Staub- oder Schmutzansammlungen zu befreien.
- Page 34 Wenn Ihr Gerät regelmäßig abschaltet, ist dies kein Fehler. Garantie Lenco bietet Leistungen und Garantien im Einklang mit Europäischem Recht. Im Falle von Reparaturen (sowohl während als auch nach Ablauf der Garantiezeit) sollten Sie deshalb Ihren Einzelhändler kontaktieren. Wichtiger Hinweis: Es ist nicht möglich, Produkte für Reparaturen direkt an Lenco zu schicken.
- Page 35 Hiermit erklärt Commaxx B.V. Wiebachstraat 37, 6466 NG Kerkrade, The Netherlands, dass dieses Produkt den grundsätzlichen Anforderungen der EU-Richtlinie entspricht. Die Konformitätserklärung kann unter folgendem Link abgerufen werden: techdoc@commaxxgroup.com Service Besuchen Sie bitte für weitere Informationen und unseren Kundendienst unsere Homepage www.lenco.com Commaxx B.V. Wiebachstraat 37, 6466 NG Kerkrade, Die Niederlande. - 35 -...
-
Page 36: Français
Français ATTENTION : L’utilisation de commandes ou d’ajustements ou l’exécution de procédures autres que celles spécifiées dans le présent document peuvent entraîner une exposition dangereuse aux radiations. PRÉCAUTIONS AVANT UTILISATION GARDEZ CES INSTRUCTIONS À L’ESPRIT : Ne couvrez pas et n’obturez pas les ouvertures de ventilation. Lorsque vous placez l’appareil sur une étagère, laissez 5 cm (2”) d’espace libre tout autour de l’appareil. - Page 37 20. Vérifiez que l’appareil est en position stable. La garantie ne couvre pas les dégâts occasionnés par l’utilisation de cet appareil en position instable, par les vibrations, les chocs ou par la non-observation de tout autre avertissement ou précaution contenus dans ce mode d’emploi. 21.
- Page 38 • Déballez toutes les pièces et enlevez le matériau de protection. • Ne connectez pas l’unité au secteur avant d’avoir vérifié la tension du secteur et avant que toutes les autres connexions n’aient été effectuées. Description du produit Stepped Drive Pulley Poulie d’entraînement étagée Drive Belt Courroie d’entraînement...
- Page 39 Ground Connector Connecteur de terre R Jack for RCA Line out Prise droite (R) de sortie de ligne RCA L Jack for RCA Line out Prise gauche (L) de sortie de ligne RCA Phono/Line Out Switch Commutateur phono/sortie de ligne Power Jack Prise d’alimentation Power Switch...
- Page 40 Réglage de la force d’appui du porte-pointe de lecture Counterweight Contrepoids Downforce scale ring Bague de réglage de la force d’appui Center line Le contrepoids fourni convient aux portes-pointe de lecture de 3 à 6 g. Poussez doucement le contrepoids vers l’arrière du bras en le tournant (la graduation étant orientée vers l’avant de la platine).
- Page 41 Identifiez le poids antipatinage. Vous trouverez un poids antipatinage sur une petite ligne de pêche dans l’emballage. Veuillez suivrez la procédure suivante pour identifier le poids antipatinage : 1. Faites glisser l’extrémité en boucle de la ligne de pêche sur l’embout de réglage du poids antipatinage et dans la 3 rainure (la force antipatinage correcte pour le porte-pointe).
- Page 42 Appuyez sur le bouton « MODE » pour choisir le mode Bluetooth. L’indicateur s’allumera en bleu. Vous entendrez un son d’activation provenant de l’appareil. Activez la fonction Bluetooth de votre dispositif audio et recherchez « Lenco LS-500 » comme nom d’appareil pour le couplage.
- Page 43 Remplacement du porte-pointe de lecture Avant le remplacement, placez le capuchon de protection de l’aiguille pour éviter de l’endommager pendant le remplacement. Retirez délicatement les fils du porte-pointe de lecture d’origine. Desserrez les deux vis sur la tête qui fixent le porte-pointe de lecture, puis retirez le porte-pointe de lecture d’origine.
- Page 44 Dimensions de l’enceinte (L x H x P) 162 x 248 x 158 mm Poids 3,76 kg Aiguille : AT-3600L Réponse en fréquence 20 Hz à 20 kHz Équilibre de canal < 2,5 dB Séparation de canal > 18 dB Tension de sortie 2,5 mV Impédance de charge recommandée...
- Page 45 Donc, si votre unité s’éteint régulièrement, ceci n’est pas un défaut. Garantie Lenco propose un service et une garantie conformément à la législation européenne, ce qui signifie qu’en cas de besoin de réparation (aussi bien pendant et après la période de garantie), vous pouvez contacter votre revendeur le plus proche.
- Page 46 Par la présente, Commaxx B.V. Wiebachstraat 37, 6466 NG Kerkrade, Pays-Bas, déclare que ce produit est conforme aux exigences principales des directives européennes. La déclaration de conformité peut être consultée à l’adresse techdoc@commaxxgroup.com Service après-vente Pour en savoir plus et obtenir de l’assistance, visitez www.lenco.com Commaxx B.V. Wiebachstraat 37, 6466 NG Kerkrade, Pays-Bas. - 46 -...
-
Page 47: Español
Español PRECAUCIÓN: El uso de controles o ajustes o rendimiento de procedimientos excepto aquellos que los aquí especificados puede provocar una exposición peligrosa a la radiación. PRECAUCIONES PREVIAS AL USO TENGA ESTAS INSTRUCCIONES EN MENTE: No cubra o bloquee ninguna apertura de ventilación. Cuando coloque el dispositivo en una estantería, deje 5 cm (2”) de espacio libre alrededor de todo el dispositivo. - Page 48 23. Mantenga las bolsas de plástico fuera del alcance de los niños. 24. Use únicamente los dispositivos/accesorios especificados por el fabricante. 25. Remita todas las reparaciones al personal cualificado. Es necesario el mantenimiento cuando el aparato presenta cualquier tipo de daño, por ejemplo, el cable de alimentación o el enchufe presentan daños; se ha vertido líquido sobre el aparato;...
- Page 49 • No conecte la unidad a la corriente eléctrica antes de comprobar la tensión de la corriente y antes de que se hayan hecho todas las demás conexiones. Descripción del producto Stepped Drive Pulley Polea de transmisión escalonada Drive Belt Correa de transmisión Turntable Spindle Cabezal del tocadiscos...
- Page 50 Ground Connector Conector a tierra R Jack for RCA Line out Clavija R para RCA Line out L Jack for RCA Line out Clavija L para RCA Line out Phono/Line Out Switch Conmutador de Phono/Line Out Power Jack Conector de alimentación de entrada Power Switch Interruptor de encendido Power Amplifier L+...
- Page 51 Ajuste de fuerza descendente del cartucho Counterweight Contrapeso Downforce scale ring Anillo de escala de fuerza descendente Center line Línea central El Contrapeso que se suministra es apto para cartuchos que pesen entre 3,0-6,0 g. Empuje suavemente y gire el contrapeso hacia la parte posterior del brazo (con la escala dando hacia la parte delantera del tocadiscos).
- Page 52 NOTA: La fuerza descendente recomendada para el cartucho instalado en fábrica es de 3,0 ± 0,5 g. Coloque el peso antideslizamiento Encontrará un peso antideslizamiento con un pequeño estrobo de sujeción del paquete, siga los pasos que se indican a continuación para colocar el peso antideslizamiento: Deslice el extremo enrollado del estrobo de sujeción sobre la tornamesa de ajuste de peso antideslizamiento y en la 3 ranura (la fuerza antideslizamiento correcta para el cartucho equipado de fábrica).
- Page 53 Pulse el botón MODE para elegir el modo Bluetooth, el indicador se iluminará en azul. Escuchará un sonido de activación desde la unidad. Active la función Bluetooth de su dispositivo de audio, busque «Lenco LS-500» y realice el emparejamiento. Cuando su dispositivo se empareje correctamente con la unidad, escuchará un breve sonido de confirmación.
- Page 54 siempre que mueva o limpie el tocadiscos. Abra el clip de brazo de lectura de izquierda a derecha. Pulse el botón PLAY/STOP una vez, el plato comenzará a girar. Levante con cuidado el brazo de lectura de su soporte y muévalo sobre la parte del disco donde quiere que comience la reproducción.
- Page 55 Lloro y fluctuación < 0,15 % Señal a ruido 72 dB Rango de carga 0-6,0 g Longitud efectiva del brazo 8,6” (218,5 mm) Saliente 0,73” Dimensiones del tocadiscos (Anch. X Alt. X Pro.) 418 x 123 x 346 mm, con la tapa abierta 420 x 410 x 420 mm Peso 5,77 kgs Altavoz LS-500...
- Page 56 de discos. Limpie la tapa y la caja del tocadiscos con un paño de microfibra ligeramente humedecido. Nota: No utilice un limpiador que contenga alcohol, benceno cualquier otro producto químico agresivo, ya que se podría dañar la pintura y el acabado del tocadiscos. Solución de problemas No hay alimentación •...
- Page 57 Si la unidad se apagar regularmente, no hay defectos. Garantía Lenco ofrece servicio y garantía en cumplimiento con las leyes de la Unión Europea, lo cual implica que, en caso de que su producto precise ser reparado (tanto durante como después del periodo de garantía), deberá contactar directamente con su distribuidor.
- Page 58 Servicio Para obtener más información y soporte del departamento técnico, por favor, visite la página web www.lenco.com Commaxx B.V. Wiebachstraat 37, 6466 NG Kerkrade, Países Bajos. - 58 -...
-
Page 59: Italiano
Italiano ATTENZIONE: L'utilizzo di controlli o regolazioni o l'esecuzione di procedure diverse da quelle specificate può causare l'esposizione a radiazioni pericolose. PRECAUZIONI PRIMA DELL'USO CONSERVARE QUESTE ISTRUZIONI: Non coprire o bloccare le aperture di ventilazione. Quando si posiziona il dispositivo su uno scaffale, lasciare uno spazio libero di 5 cm (2") attorno all'intero perimetro. - Page 60 25. Rivolgersi a personale qualificato per l'assistenza. L'assistenza è necessaria quando il dispositivo è stato in qualche modo danneggiato, come il cavo di alimentazione o la spina, quando è stato versato del liquido o sono caduti oggetti nel dispositivo, quando il dispositivo è stato esposto a pioggia o umidità, non funziona normalmente o è...
- Page 61 Descrizione del prodotto Stepped Drive Pulley Puleggia motrice a gradini Drive Belt Cinghia di trasmissione Turntable Spindle Alberino del giradischi Turntable Hub Mozzo del giradischi Turntable Platter Piatto girevole Dust Cover Copertura antipolvere Lid Hinge Cardini del coperchio Anti-skating Weight Peso anti-skating Tonearm Counterweight Contrappeso braccio...
- Page 62 Ground Connector Connettore di terra R Jack for RCA Line out Jack R per uscita RCA L Jack for RCA Line out Jack L per uscita RCA Phono/Line Out Switch Selettore Phono/Linea uscita Power Jack Jack alimentazione Power Switch Interruttore Power Amplifier L+ Amplificatore di potenza L+ Power Amplifier L-...
- Page 63 Regolazione della pressione della testina Counterweight Contrappeso Downforce scale ring Anello della scala di deportanza Center line Linea centrale Il contrappeso fornito è adatto a testine con peso compreso tra 3,0 e 6,0 g. Premere con delicatezza il contrappeso dal retro del braccio in avanti e ruotalo (la ghiera deve essere rivolta verso la parte frontale del giradischi).
- Page 64 Individuare il peso anti-skating Troverai un peso anti-skating con una piccola lenza dalla confezione, seguire i passaggi seguenti per individuare il peso anti-skating: Infilare l'estremità ad anello della lenza sopra il mozzo di regolazione del peso anti-skating e nella scanalatura 3a (la forza anti-skating corretta per la testina montata in fabbrica).
- Page 65 Premere il pulsante MODE per scegliere la modalità Bluetooth, la spia si illuminerà di blu. Sentirai un suono di attivazione dall'unità. Attiva la funzionalità Bluetooth del tuo dispositivo audio, cerca "Lenco LS-500" e accoppia. Una volta che il tuo dispositivo è stato accoppiato con successo con l'unità, sentirai un breve suono di conferma dall'unità.
- Page 66 Premere una volta il pulsante PLAY/STOP, il piatto smette di ruotare. Sostituzione testina prima della sostituzione, riposizionare la protezione della puntina sulla puntina per evitare danni alla puntina durante il processo di sostituzione. Rimuovere con attenzione i fili conduttori dalla testina originale. Allentare le due viti sul guscio della testina che fissano la testina e quindi rimuovere la testina originale.
- Page 67 Altoparlante LS-500 Tweeter 8Ω 10W X 2 Woofer 4Ω 30W X 2 Dimensioni altoparlante (L X A X P) 162 X 248 X 158 mm Peso 3,76kg Puntina: AT-3600L Risposta in frequenza 20Hz-20kHz Bilanciamento canale <2,5dB Separazione canale >18dB Tensione in uscita 2,5mV Resistenza di carico raccomandata 47kΩ...
- Page 68 Risoluzione dei problemi Mancanza di alimentazione • L'alimentatore non è collegato correttamente. • Non c'è alimentazione in uscita. Alimentazione presente, ma il giradischi non gira • Questa unità non è in modalità giradischi. Premere il pulsante Modalità per la modalità giradischi, la spia è rossa.
- Page 69 Garanzia Lenco offre assistenza e garanzia in conformità con la legge europea, il che significa che in caso di riparazioni (sia durante che dopo il periodo di garanzia) è necessario contattare il rivenditore locale. Nota importante: Non è possibile inviare direttamente a Lenco i prodotti da riparare.
- Page 70 Русский LS-500 ВНИМАНИЕ: Использование элементов управления или регулирования или выполнение процедур, отличных от указанных в данном документе, может привести к опасному радиационному облучению. МЕРЫ ПРЕДОСТОРОЖНОСТИ ПЕРЕД ЭКСПЛУАТАЦИЕЙ СОБЛЮДАЙТЕ СЛЕДУЮЩИЕ ИНСТРУКЦИИ: 1. Не закрывайте и не блокируйте вентиляционные отверстия. При размещении устройства на полке оставьте...
- Page 71 знаний, если они не находятся под наблюдением или не получили инструкции по правильному использованию устройства со стороны лица, отвечающего за их безопасность. 19. Это изделие не предназначено для профессионального, коммерческого или промышленного использования. 20. Убедитесь, что устройство установлено в устойчивое положение. Гарантия не распространяется на повреждения, вызванные...
- Page 72 ⚫ Аккумулятор нельзя подвергать воздействию чрезмерно высоких или низких температур, низкого давления воздуха на большой высоте во время использования, хранения или транспортировки. ⚫ Замена батареи неподходящего типа может привести к взрыву или утечке воспламеняющейся жидкости или газа. ⚫ Утилизация аккумулятора в огне или в горячей духовке, механическое раздавливание или разрезание...
- Page 73 Петли Картридж Анти-скейтинговый вес 10. Противовес тонарма 11. Регулировка анти-скейтинга 12. Механизм поднятия тонарма 13. Рычаг установки тонарма 14. Фиксирующее кольцо 15. Регулировка громкости 16. Индикатор питания 17. Переключатель скоростей 18. Кнопка PLAY / STOP 19. Переключение режимов (винил/Bluetooth) (перезапуск проигрывателя – долгое нажатие) 20.
- Page 74 Установка Установите устройство на ровную поверхность. Место установки должно исключать появление вибраций и движений поверхности. Установите защитную крышку в петли устройства. Удалите мягкий транспортировочный держатель с тонарма. Оберните приводной ремень вокруг ступицы поворотного стола, а затем используйте прилагаемую застежку, чтобы натянуть ремень и разместить его в пазе шкива двигателя. Наденьте...
- Page 75 задней части тонарма. Убедитесь, что тонарм все еще сбалансирован. Прокрутите противовес в противоположную сторону (против часовой стрелки) и отрегулируйте прижимную силу согласно рекомендациям производителя картриджа. Одно деление на шкале обозначает 0.05г прижимной силы. ПРИМЕЧАНИЕ: рекомендуемая прижимная сила для картриджа, идущего в комплекте равна 3.0±0.5г Регулировка...
- Page 76 Подключение по Bluetooth Включите проигрыватель. Выберите режим Bluetooth, индикатор загорится синим, а проигрыватель воспроизведет звук включения режима. Включите Belutooth на своем аудио устройстве и найдите в списке устройств Lenco LS-500 и создайте пару. После удачного подключения проигрыватель воспроизведет звук подтверждения.
- Page 77 Включите музыку на своем аудио устройстве. Примечание: Версия Bluetooth - 5.0 Автоматический переход в режим ожидания для энергосбережения: LS-500 автоматически переходит в режим ожидания, если в течение +/- 15 минут отсутствует аудиосигнал (запись или через Bluetooth- соединение) или аудиосигнал Bluetooth-устройства слишком слабый. Обратите...
- Page 78 Спецификации LS-500 - проигрыватель Питание AC-DC, 15 В 2400mA Потребляемая мощность 36 Вт Выходная мощность 2x 30 Вт RMS Скорости вращения диска 33 1/3, 45 RPM Расхождение в скорости ±1.0% Нестабильность вращения < 0.15% Соотношение сигнал/шум 72 дБ Прижимная сила 0-6.0 г...
- Page 79 Выходная мощность: 36 Вт Эффективность: 87.58% Эффективность при низкой нагрузке (10%): 84 % Потребление без нагрузки: 0.080 Вт Используйте только тот адаптер питания, который указан в руководстве пользователя. Обслуживание проигрывателя Не трогайте наконечник иглы пальцами. Избегайте ударов стилуса о слипмат или пластинку. Периодически...
- Page 80 Гарантийные обязательства Срок гарантии составляет 1 (один) год с даты продажи. Срок службы – до 5 (пяти) лет. Важное примечание: Компания Lenco не обеспечивает обслуживание оборудования в случае непосредственного обращения в головной офис компании. Важное примечание: Гарантия не действует, если устройство вскрывалось или подвергалось изменениям вне...
- Page 81 Вибахштраат 37, 6466НГ, Керкраде, Нидерланды (Wiebachstraat 37, 6466NG, Kerkrade, The Netherlands) заявляет, что этот продукт соответствует основным требованиям. С декларацией соответствия можно ознакомиться по адресу techdoc@lenco.com. «Ленко Бенелюкс БВ», Термикстраат 1а, Нют, 6361 HB, Нидерланды Маркировка «EAC» Товар сертифицирован для использования на территории Таможенного Союза без...
- Page 82 Название торговой организации: Телефон торговой организации: Адрес, e-mail: Подпись продавца______________________ М.П. Подпись покупателя_____________________ Изделие получил в исправном состоянии и в полной комплектации. С условиями гарантии ознакомлен и согласен. ВНИМАНИЕ! Гарантийный талон недействителен без печати продавца. Поддержка: https://www.lenco.ru - 82 -...
Need help?
Do you have a question about the LS-500OK and is the answer not in the manual?
Questions and answers