Sign In
Upload
Download
Table of Contents
Contents
Add to my manuals
Delete from my manuals
Share
URL of this page:
HTML Link:
Bookmark this page
Add
Manual will be automatically added to "My Manuals"
Print this page
×
Bookmark added
×
Added to my manuals
Manuals
Brands
Seiko Manuals
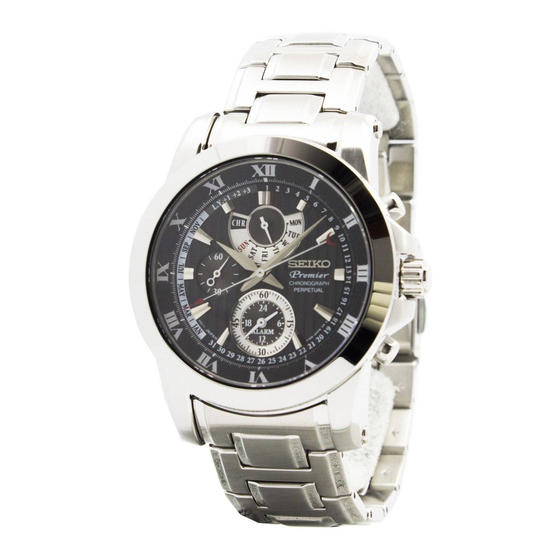
Watch
SPC161P1
Instructions manual
Seiko SPC161P1 Instructions Manual
Hide thumbs
1
Table Of Contents
2
3
4
5
6
7
8
9
10
11
12
13
14
15
16
17
page
of
17
Go
/
17
Contents
Table of Contents
Bookmarks
Table of Contents
Table of Contents
Features
Display & Buttons
Screw Lock Type Crown
How to Change the Display Mode
Time Setting and Hand Position Adjustment
Perpetual Calendar
How to Use the Stopwatch
How to Use the Alarm
Battery Change
Necessary Procedure after Battery Change
Specifications
Advertisement
Quick Links
1
Table of Contents
2
Time Setting and Hand Position Adjustment
3
How to Change the Display Mode
4
Perpetual Calendar
5
Battery Change
Download this manual
INSTRUCTIONS
BEDIENUNGSANLEITUNG
INSTRUCTIONS
ISTRUZIONI
INSTRUCCIONES
INSTRUÇÕES
Cal. 7T86
(P. 3 )
(S. 35 )
(P. 67 )
(P. 99 )
(P. 131)
(P. 163)
(195 )
Table of
Contents
Previous
Page
Next
Page
1
2
3
4
5
Advertisement
Table of Contents
Need help?
Do you have a question about the SPC161P1 and is the answer not in the manual?
Ask a question
Questions and answers
Related Manuals for Seiko SPC161P1
Watch Seiko 7T86 Instructions Manual
Analogue quartz watch (17 pages)
Seiko 7T86 - Watch Manual
(article)
Watch Seiko Arctura SKA201 Reference Manual
Analogue quartz and mechanical watches (5 pages)
Watch Seiko SPC159P1 Instructions Manual
(17 pages)
Watch Seiko SPC051P1 Instructions Manual
(17 pages)
Watch Seiko SPC244P1 Instructions Manual
(11 pages)
Watch Seiko SPC167P1 Instructions Manual
(14 pages)
Watch Seiko SPC168P1 Instructions Manual
(14 pages)
Watch Seiko SPC163P1 Instructions Manual
(14 pages)
Watch Seiko SPC163P2 Instructions Manual
(14 pages)
Watch Seiko 9R86 Instruction
Spring drive chronograph (13 pages)
Watch Seiko Presage SPB309J Instruction Manual
(14 pages)
Watch Seiko King Seiko SPB365J Instruction Manual
(14 pages)
Watch Seiko Presage SPB305J Instruction Manual
(13 pages)
Watch Seiko King Seiko SPB371J Instruction Manual
(14 pages)
Watch Seiko Presage SPB305 Instructions Manual
(93 pages)
This manual is also suitable for:
7t86
Spc159p1
Spc159j1
Spc051p1
Table of Contents
Print
Rename the bookmark
Delete bookmark?
Delete from my manuals?
Login
Sign In
OR
Sign in with Facebook
Sign in with Google
Upload manual
Upload from disk
Upload from URL


Need help?
Do you have a question about the SPC161P1 and is the answer not in the manual?
Questions and answers