Table of Contents
Advertisement
Advertisement
Table of Contents

Related Manuals for Leaf Leaf Aptus 54S


Summary of Contents for Leaf Leaf Aptus 54S
-
Page 3: Fcc Compliance
FCC Compliance Any Kodak equipment referred to in this document has been tested and found to comply with the limits for a Class A digital device, pursuant to part 15 of the FCC Rules. These limits are designed to provide reasonable protection against harmful interference when the equipment is operated in a commercial environment. -
Page 4: Limitation Of Liability
You understand and agree that, except as may be stated specifically in your contract, Kodak shall not be liable for any direct, indirect, incidental, special, consequential or exemplary damages, including but not limited to, damages for loss of profits, goodwill, use, data or other intangible losses (even if Kodak has been advised of the possibility of such damages), resulting from: (i) the use or the inability to use the product or software;... -
Page 5: Table Of Contents
Overview ... 2 Using the Stylus... 4 The Basic Steps... 5 2 Getting Started Turning on the Leaf Aptus Digital Camera Back ... 8 Compact Flash Card and Battery... 8 Digital Magazine... 9 Tethered Mode... 9 Turning off the Leaf Aptus Digital Camera Back... 10 Preparing a Compact Flash Card for Shoot ... - Page 6 Flagging and Annotating in Shoot View ... 35 Viewing Information About Your Shot ... 36 6 Editing Your Images Edit View ... 38 Accessing Edit View from Shoot View ... 38 Browsing Through Your Images ... 39 Selecting a View for Your Images ... 39 Viewing Information and EXIF Data...
- Page 7 9 Working With Leaf WiView What Is Leaf WiView?... 70 Starting Leaf WiView on Your Leaf Aptus Camera Back ... 70 Changing the PIN ... 71 Working With Leaf WiView on an iPAQ Pocket PC... 72 Starting Leaf WiView on the iPAQ Pocket PC ... 73 Changing the Name of the Camera Back ...
- Page 8 Leaf Aptus User Guide...
-
Page 9: Introduction
Introduction Overview...2 Using the Stylus ... 4 The Basic Steps ...5... -
Page 10: Overview
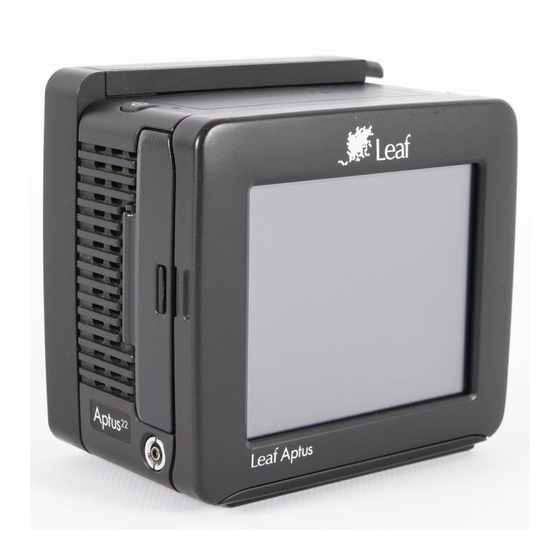
Overview The Leaf® Aptus™ digital camera back is the world’s first camera back that includes a built-in (6×7 cm) LCD screen and an innovative graphic user interface. An integrated battery and compact flash (CF) storage card facilitate shooting. New hardware offers continuous non-stop shooting and a faster capture rate. - Page 11 Overview The following picture shows the location of the Leaf Aptus digital camera back controls and stylus: On/Off button User button Stylus...
-
Page 12: Using The Stylus
Using the Stylus The Leaf Aptus digital camera back is supplied with a stylus. Use the stylus to tap the touch screen. To remove the stylus for use, slide it out of the slot located at the top of the LLeaf Aptus digital camera back. -
Page 13: The Basic Steps
Take and evaluate Take a shot. Check the exposure, focus, a shot. and composition of your shot, and set the gray balance for future shots. Edit your images. Organize your images using the Leaf Aptus digital camera back editing tools. -
Page 15: Getting Started
Getting Started Turning on the Leaf Aptus Digital Camera Back... 8 Turning off the Leaf Aptus Digital Camera Back ...10 Preparing a Compact Flash Card for Shoot...11 Inserting a Compact Flash Card ... 15 Removing a Compact Flash Card ...16... -
Page 16: Turning On The Leaf Aptus Digital Camera Back
Compact Flash Card and Battery To turn on your Leaf Aptus digital camera back when using a compact flash card and battery: 2. If this is the first time that you are using the compact flash card with your Leaf 3. -
Page 17: Digital Magazine
Turning on the Leaf Aptus Digital Camera Back Digital Magazine To turn on your Leaf Aptus digital camera back when using a digital magazine: 2. Press and hold the On/Off button on the digital magazine until the green light 3. Verify that the... -
Page 18: Turning Off The Leaf Aptus Digital Camera Back
Turning off the Leaf Aptus Digital Camera Back Turn the Leaf Aptus digital camera back off in one of the following ways: When using a compact flash and battery: Press and hold the On/Off button until the light turns orange. If you changed a setting in the Setup menu, the camera saves the new setting and then shuts down. -
Page 19: Preparing A Compact Flash Card For Shoot
If the compact flash card is new. • If you have used the compact flash card on a non-Leaf digital camera back. You can format the card on a computer running either Mac OS or Windows. When formatting the compact flash card, you can use either a card reader, or the Leaf Aptus digital camera back to read the card. - Page 20 Chapter 2 – Getting Started 5. Click the Erase tab. 6. In the Volume Format box, select MS-DOS File System. In the Name box, type LEAF-CF 8. Click Erase.
-
Page 21: Formatting In Windows
Preparing a Compact Flash Card for Shoot 9. In the confirmation message that appears, click Erase. 10. On the desktop, select the LEAF-CF volume. 11. Select File > Get Info. 12. In the Leaf-CF Info window, ensure that Format shows 13. - Page 22 3. Right-click Removable Disk, and from the menu, select Format. 4. In the Format dialog box, in the File System box, select FAT32. 5. In the Volume label box, type 6. Click Start. 8. Right-click Removable Disk, and from the menu, select Eject. LEAF-CF When the format procedure is complete, go to the desktop and click My Computer.
-
Page 23: Inserting A Compact Flash Card
If this is the first time that you are using the compact flash card with your Leaf Aptus digital camera back, you should first format the card. For more information, see Preparing a Compact Flash Card for Shoot on page 11. -
Page 24: Removing A Compact Flash Card
Removing a Compact Flash Card Open the compact flash card door, and then press the Release button. 2. Remove the compact flash card. Release button Chapter 2 – Getting Started... -
Page 25: Preparing To Shoot
Preparing to Shoot Changing the Interface language...18 Setting the Date and Time...19 Viewing and Defining Camera Settings ...20 Creating a Folder ... 21 Selecting a Folder for Your Shot... 22 Assigning a Base Name to a Shot ... 23 Adding Notes and Copyright Information to Your Shots ... 24... -
Page 26: Changing The Interface Language
Changing the Interface language 2. Tap the desired Scroll down, and then tap Interface Language. language. Chapter 3 – Preparing to Shoot... -
Page 27: Setting The Date And Time
Setting the Date and Time Setting the Date and Time Scroll down, and then tap Date and Time. 2. Using the virtual keypad, tap the date and time values, and then tap ok. Note: You need to set the date and time only once. If the time-zone that you work in changes, reset the date and time accordingly. -
Page 28: Viewing And Defining Camera Settings
Viewing and Defining Camera Settings 2. If necessary, change the camera setting or an individual setting. The To change a camera setting: The selected camera setting. To view and select other predefined camera settings, tap presets. View the current settings by scrolling up and down. -
Page 29: Creating A Folder
Creating a Folder Creating a Folder Your shots are automatically saved in the storage unit connected to your camera: digital magazine (Leaf DM) or compact flash (CF). To enhance organization, you can create folders for storing your shots. 2. Tap down. 3. -
Page 30: Selecting A Folder For Your Shot
Chapter 3 – Preparing to Shoot Selecting a Folder for Your Shot Select the folder to save your shots in, Tap a folder, and then tap choose. -
Page 31: Assigning A Base Name To A Shot
Assigning a Base Name to a Shot Assigning a Base Name to a Shot You can define a base name for your shots. The Leaf Aptus digital camera back applies this name to all shots, adding a number in sequence each time, until you define a new base name. -
Page 32: Adding Notes And Copyright Information To Your Shots
Adding Notes and Copyright Information to Your Shots 2. Click in either the 3. Use the virtual Scroll down, and then tap Notes. Description or Copyright Notice area. keypad to enter the desired information, and then tap ok. Chapter 3 – Preparing to Shoot... -
Page 33: Taking A Shot
Taking a Shot Taking a Shot... 26... -
Page 34: Taking A Shot
Taking a Shot Take a shot. Note: To guard against accidental taps to the screen, you can “lock” it. For more information, see Configuring a Long Press of the User Button on page 60. Chapter 4 – Taking a Shot... -
Page 35: Evaluating Your Shot
Evaluating Your Shot Checking the Exposure ... 28 Checking Focus ... 31 Setting the Gray Balance ... 32 Checking Composition... 33 Browsing Through Your Images...34 Browsing Through Your Images...34 Flagging and Annotating in Shoot View... 35 Viewing Information About Your Shot ... 36... -
Page 36: Checking The Exposure
Checking the Exposure Check the exposure of your shot in the following ways: • Examine the histogram exposure data. • Use the picker tool to view the exposure data for a specific spot on the image. • Use the exposure alarms to view the overexposed and underexposed areas of the image. -
Page 37: Checking Exposure With The Picker Tool
Checking the Exposure Checking Exposure with the Picker Tool 2. Tap histogram. The exposure meter, exposure in f-stops. Tap histog to open the histogram. , and then tap a spot on the image. The spot that you tap is marked by a magenta circle. A magenta line on the histogram indicates the exposure data related to the spot to enlarge the... -
Page 38: Checking Exposure With The Overexposure And Underexposure Alarms
Checking Exposure with the Overexposure and Underexposure Alarms Note: It is possible to configure which exposure areas appear, overexposed or underexposed. For more information, see Setting the Exposure Alarm on page 53. Tap over. A flashing mask covers the overexposed and underexposed areas of the image. -
Page 39: Checking Focus
Checking Focus Checking Focus 2. To magnify the image area 100% (1:1), tap a desired point on the 3. To Increase or 4. To pan the image, 5. To revert to a view of the entire image, tap fit. Tap zoom. image. -
Page 40: Setting The Gray Balance
Setting the Gray Balance To set the gray balance for future shots: 2. Tap gray. 3. Tap the gray card 4. Tap OK to use the new gray balance setting, or tap Note: If your gray card is not large enough in full-screen view, use the zoom tool to enlarge your picture before setting the gray balance. -
Page 41: Checking Composition
Checking Composition Checking Composition To help your composition you can use a grid (see next paragraph) or a crop mask. For more information on setting crop masks, see Adjusting Settings for a Shoot on page 47. View the image. -
Page 42: Browsing Through Your Images
Browsing Through Your Images Do one of the following: • Tap more and then tap the prev and next buttons. • Roll the user button back or forwards. Deleting Shots in Shoot View To delete shots in Shoot view: Tap the image and hold until the flag, note and delete buttons appear. -
Page 43: Flagging And Annotating In Shoot View
Flagging and Annotating in Shoot View Flagging and Annotating in Shoot View While you are shooting, you can flag your image or add a note, as desired. You can then see the flag or note on the image in Edit view and in the image information. Tap the image and hold until the flag, note and delete... -
Page 44: Viewing Information About Your Shot
Viewing Information About Your Shot Tap info. The image information and EXIF data appear on the image. Chapter 5—Evaluating Your Shot... -
Page 45: Editing Your Images
Editing Your Images Edit View... 38 Browsing Through Your Images... 39 Viewing Information and EXIF Data ... 40 Viewing Information Using the User Button...41 Selecting Multiple Images...42 Flagging, Annotating, and Deleting in Edit View ...42 Selecting a Folder ...44 Moving Your Images...45 Opening Images in Shoot View...46... -
Page 46: Edit View
Edit View Use Edit view to: • Display your images in various view modes • Browse through your images • Flag, annotate, and delete single or multiple images • Move images from one folder to another Accessing Edit View from Shoot View If you are in Shoot view, you can access Edit view directly without returning to the main menu. -
Page 47: Browsing Through Your Images
Browsing Through Your Images Browsing Through Your Images To browse through your images, do one of the following: • Tap prev and next. • Use the scroll bar. • Roll the user button back or forward. As you move from one image to the next, the image is automatically selected. -
Page 48: Viewing Information And Exif Data
Viewing Information and EXIF Data Tap more, and tap an image. 2. Tap view, and select a single view. Information saved with the image and the EXIF data appears beside the image. Chapter 6 – Editing Your Images... -
Page 49: Viewing Information Using The User Button
Viewing Information Using the User Button Viewing Information Using the User Button To show/hide information using the user button: Press the user button. -
Page 50: Selecting Multiple Images
Selecting Multiple Images In Edit view, tap an image and hold your stylus on it until the Multi button appears on the image. 2. Tap the Multi button, and then tap the images that you want to select. Flagging, Annotating, and Deleting in Edit View Tap the image, and then tap flag, note, or delete. -
Page 51: Sorting Your Images
Sorting Your Images Sorting Your Images 2. Tap sort, and Tap more. select the desired sort method (by name, time or flag). -
Page 52: Selecting A Folder
Selecting a Folder Tap more. 2. Tap folder. 3. Tap on the desired folder, and tap choose. Note: The Shots folder always appears at the top of the folder list. Shots folder Chapter 6 – Editing Your Images... -
Page 53: Moving Your Images
Moving Your Images Moving Your Images Tap an image and hold your stylus on it until the Move button appears on the screen. 2. Tap Move. 3. Tap the desired destination folder. 4. Tap Move. -
Page 54: Opening Images In Shoot View
Opening Images in Shoot View If you want to view your images at full-screen size, you can open individual images in Shoot view. This is useful for checking focus or composition. To open a specific image in Shoot view: Do one of the following: Tap the image and then tap... -
Page 55: Adjusting Settings For A Shoot
Adjusting Settings for a Shoot Shooting Without Overlays ...48 Working in Full-Screen View...49 Using the Crop Mask...50 Adjusting the Transparency of the Crop Mask ... 51 Adjusting the Transparency of the Histogram and Info Bar ... 52 Setting the Exposure Alarm... 53 Resetting the File Name Counter ...54... -
Page 56: Shooting Without Overlays
Shooting Without Overlays After you take each shot, indicators and information about the shot appear as an overlay. Clear the overlays if you do not want this information to appear while you are shooting. Tap Shoot View Options. 2. Tap On Shoot. 3. -
Page 57: Working In Full-Screen View
Working in Full-Screen View Working in Full-Screen View If desired, hide the menu buttons and view your shots full-screen while you work. 2. Tap On Shoot. 3. On the Maximize To view the menu buttons when working in full-screen view, tap the image. Tap Shoot View Options. -
Page 58: Using The Crop Mask
Using the Crop Mask You can show or hide the crop mask as you shoot. 2. In the Crop Tap Shoot View Options. Masking bar, do one of the following: To view the crop mask, tap To hide the crop mask, tap Off. -
Page 59: Adjusting The Transparency Of The Crop Mask
Adjusting the Transparency of the Crop Mask Adjusting the Transparency of the Crop Mask 2. Tap Crop Mask 3. Tap the desired Tap Shoot View Options. Transparency. intensity, where 0% is opaque and 100% is completely transparent. -
Page 60: Adjusting The Transparency Of The Histogram And Info Bar
Adjusting the Transparency of the Histogram and Info Bar 2. Tap Histogram/ 3. Tap the desired Tap Shoot View Options. Info Transparency. intensity, where 0% is opaque and 100% is completely transparent. Chapter 7 – Adjusting Settings for a Shoot... -
Page 61: Setting The Exposure Alarm
Setting the Exposure Alarm Setting the Exposure Alarm Set the exposure alarm to show underexposed areas, overexposed areas, or both. 2. Tap Exposure 3. Tap the desired Tap Shoot View Options. Alarm. setting. -
Page 62: Resetting The File Name Counter
Resetting the File Name Counter Leaf Aptus adds a number in sequence to the base name that you define each time you take a shot. You can reset the counter to zero at any time. 2. Tap reset. Tap File name Chapter 7 –... -
Page 63: Defining The Camera Back Settings
Defining the Camera Back Settings Formatting the Compact Flash Card in Portable Mode ... 56 Configuring a Long Press of the User Button ...60 Aligning the Touch Screen...61 Turning Off the Backlight... 62 Turning On the Backlight ... 63 Setting the Volume for the Camera Back Sounds ...64 Setting the Owner Information... -
Page 64: Formatting The Compact Flash Card In Portable Mode
If the compact flash card is new, or if you have used the compact flash card on a non- Leaf digital camera back, do not perform a quick format. Perform the procedure detailed in Preparing a Compact Flash Card for Shoot on page 11. - Page 65 Formatting the Compact Flash Card in Portable Mode 3. Tap ok.
-
Page 66: Configuring The User Button
Configuring the User Button Configure the user button for viewing indicators or flagging images in Shoot view, and for flagging or deleting images in Edit view. Configuring the User Button for Shoot View 2. Tap Shoot view. 3. In the Action bar, 4. -
Page 67: Configuring The User Button For Edit View
Configuring the User Button Configuring the User Button for Edit View To configure the user button for flagging or deleting images: 2. Tap Edit view. 3. Tap Flag or Tap User Button. Delete. -
Page 68: Configuring A Long Press Of The User Button
Configuring a Long Press of the User Button You can set the user button so that a long press can either lock or unlock the touch screen, or turn the display on or off. Tap User Button. 2. Tap Long Press. 3. -
Page 69: Aligning The Touch Screen
Aligning the Touch Screen Aligning the Touch Screen 2. Tap Align Touch 3. Follow the instructions on the screen. Tap Display. Screen. -
Page 70: Turning Off The Backlight
Turning Off the Backlight 2. Tap Backlight Off 3. Tap a power 4. Tap the desired Chapter 8 – Defining the Camera Back Settings Tap Display. After. source. time. -
Page 71: Turning On The Backlight
Turning On the Backlight Turning On the Backlight 2. Tap Backlight On 3. Select the desired Tap Display. After. option. -
Page 72: Setting The Volume For The Camera Back Sounds
Setting the Volume for the Camera Back Sounds 2. Tap the desired Chapter 8 – Defining the Camera Back Settings Tap Sounds. option and set the volume as desired. -
Page 73: Setting The Owner Information
Setting the Owner Information Setting the Owner Information 2. Tap the relevant 3. Use the virtual Tap Owner Information. area. keypad to enter the desired information, and tap ok. -
Page 74: Restoring Factory Settings
Restoring Factory Settings 2. Tap ok. Chapter 8 – Defining the Camera Back Settings Tap Restore Factory Settings. -
Page 75: Viewing The Leaf Aptus Version Information
Viewing the Leaf Aptus Version Information Viewing the Leaf Aptus Version Information Tap About. The Leaf Aptus About screen displays the Leaf Aptus version information. - Page 76 Chapter 8 – Defining the Camera Back Settings...
-
Page 77: Working With Leaf Wiview
Working With Leaf WiView What Is Leaf WiView?...70 Starting Leaf WiView on Your Leaf Aptus Camera Back ...70 Changing the PIN... 71 Working With Leaf WiView on an iPAQ Pocket PC ... 72... -
Page 78: What Is Leaf Wiview
What Is Leaf WiView? Leaf WiView is a wireless application that enables you to view and work with images on an HP® iPAQ® Pocket PC as you shoot. Before you begin working with the Leaf WiView application, you must first install it on the iPAQ Pocket PC. For more information, see the Leaf WiView Installation Guide (731-00576E-EN). -
Page 79: Changing The Pin
Changing the PIN Changing the PIN The Leaf Aptus digital camera back comes with a default personal identification number, 1234. To change the PIN: Tap Wireless. 2. Tap Change PIN. 3. In the Enter new PIN box, use the virtual keyboard to tap a new PIN. -
Page 80: Working With Leaf Wiview On An Ipaq Pocket Pc
Working With Leaf WiView on an iPAQ Pocket PC The Leaf WiView application enables you to work independently on an iPAQ Pocket PC while another person is working with the Leaf Aptus digital camera back. You can perform all image functions on the iPAQ Pocket PC. -
Page 81: Starting Leaf Wiview On The Ipaq Pocket Pc
Starting Leaf WiView on the iPAQ Pocket PC The first time you work with the Leaf WiView application, you need to set the iPAQ Pocket PC to work with your Leaf Aptus digital camera back. For more information on installing the Leaf WiView Installation Guide (731-00576E-EN). - Page 82 4. Tap Search 5. Wait while the Leaf WiView application searches for the camera back. This process takes 30 seconds. Chapter 9 – Working With Leaf WiView...
- Page 83 8. Tap ok. Note: After the first time, the iPAQ Pocket PC automatically connects to the Leaf Aptus digital camera back. If your iPAQ Pocket PC does not connect to the camera back, perform steps 2-5 of this procedure. A list of available camera backs appears.
-
Page 84: Changing The Name Of The Camera Back
Changing the Name of the Camera Back Tap name. 2. Using the virtual keypad, tap a new name. 3. Tap ok. Chapter 9 – Working With Leaf WiView... -
Page 85: Evaluating The Current Shot With Leaf Wiview
Working With Leaf WiView on an iPAQ Pocket PC Evaluating the Current Shot With Leaf WiView While another person is shooting with the Leaf Aptus digital camera back, you can do the following in Shoot view on the iPAQ Pocket PC: •... -
Page 86: Changing The Shoot View Options In Leaf Wiview
Changing the Shoot View Options in Leaf WiView While another person is shooting with the Leaf Aptus digital camera back, you can change the following Shoot view options on the iPAQ Pocket PC: • Clear Overlays. For more information, see Shooting Without Overlays on page 48. -
Page 87: About Leaf Wiview
Working With Leaf WiView on an iPAQ Pocket PC About Leaf WiView Tap About. The Leaf WiView application About screen displays the Leaf WiView version number.