Table of Contents
Advertisement
Installation and
Maintenance Manual for
model
WARNING
If the information in these instructions is not followed exactly, a fire or explosion may result causing property
damage, personal injury or death.
— Do not store or use gasoline or other flammable vapors and liquids in the vicinity of this or any other appliance.
— WHAT TO DO IF YOU SMELL GAS
• Do not try to light any appliance.
• Do not touch any electrical switch; do not use any phone in your building.
• Immediately call your gas supplier from a neighbor's phone. Follow the gas supplier's instructions.
• If you cannot reach your gas supplier, call the fire department.
— Installation on and service must be performed by a qualified installer, service agency or the gas supplier.
SFK 57 - RAD - ING - Inst. Manual - 2210.1_SKM1_firm.L188i58_CSA
SFK 57
FOR YOUR SAFETY
Advertisement
Table of Contents

Related Manuals for Radiant QUATTRO AQUA 4


Summary of Contents for Radiant QUATTRO AQUA 4
- Page 1 Installation and Maintenance Manual for model SFK 57 WARNING If the information in these instructions is not followed exactly, a fire or explosion may result causing property damage, personal injury or death. FOR YOUR SAFETY — Do not store or use gasoline or other flammable vapors and liquids in the vicinity of this or any other appliance. —...
-
Page 2: Table Of Contents
SUMMARY SUMMARY INTRODUCTION 1. INSTALLER SECTION 1.1. INSTALLATION 1.1.1. GENERAL INSTALLATION WARNINGS 1.1.2. WATER HEATER LOCATION ENVIRONMENTAL REQUIREMENTS 1.1.3. REFERENCE LEGISLATION 1.1.4. UNPACKING (inch) 1.1.5. OVERALL DIMENSIONS 1.1.6. POSITIONING AND CLEARANCES TO COMBUSTIBLE MATERIAL AND SERVICE CLEARANCES 1.1.7. CIRCULATOR PERFORMANCE CURVE 1.1.8. - Page 3 SUMMARY 2.2.11. WIRING DIAGRAM 2.2.12. ACCESSING THE WATER HEATERS 2.2.13. ACCESSING THE ELECTRONIC BOARD 2.2.14. EMPTYING THE DOMESTIC SYSTEM 2.2.15. FAULT SIGNALLING CODES 2.2.16. ACTIVE FUNCTIONS SIGNALLING CODES 2.2.17. POSITIONS OF THE ELECTRODES 2.2.18. CONVERSION TO A DIFFERENT GAS TYPE 2.2.19.
-
Page 4: Introduction
INTRODUCTION INTRODUCTION WARNING › Unit: this term is used referring to the water heaters. Before starting any operation it is mandatory to read this instruction manual, in relation to DANGER the activities performed as described in each It identifies information related to a relevant section. - Page 5 › The right to modify the tools and relative technical documentation without any obligation to third parties; › The material and intellectual ownership of this manual and forbids its distribution and duplication, even partial, without prior written authorization. PRODUCT CONFORMITY RADIANT BRUCIATORI with reference CSA/ANSI Z21.10.3:19 GAS-FIRED Water heaters, declares that its gas water heaters are professionally manufactured.
-
Page 7: Installer Section
1. INSTALLER SECTION 1. INSTALLER SECTION The installation operations described in this section should be performed only by qualified personnel, having the appropriate technical training in the field for the installation and maintenance of components of civil and industrial domestic hot water production and heating plants. -
Page 8: Installation
WARNING WARNING Use only original RADIANT optional or After having removed the packing, make kit accessories (including electrical). sure the equipment is intact. In case of doubt, do not use the equipment and contact the supplier. -
Page 9: Reference Legislation
1. INSTALLATION for Combustion and Ventilation, of the National WARNING Fuel Gas Code, ANSI Z 223,1/NFPA 54, or section If the temperature in the water heaters 7,2, 7.3, or 7.4, of CAN/CSA B 149, Installation installation location goes below 35.6°F (2°C) , Codes, or local codes having jurisdiction. -
Page 10: Unpacking
1. INSTALLATION 1.1.4. UNPACKING WARNING Please unpack the unit just before installing it. The Company is not responsible for the damages caused to the unit due to incorrect storage. WARNING packing elements (cardboard box, wooden crate, nails, fasteners, plastic bags, expanded polystyrene, etc.) are dangerous and must be kept out of the reach of children. -
Page 11: Overall Dimensions (Inch)
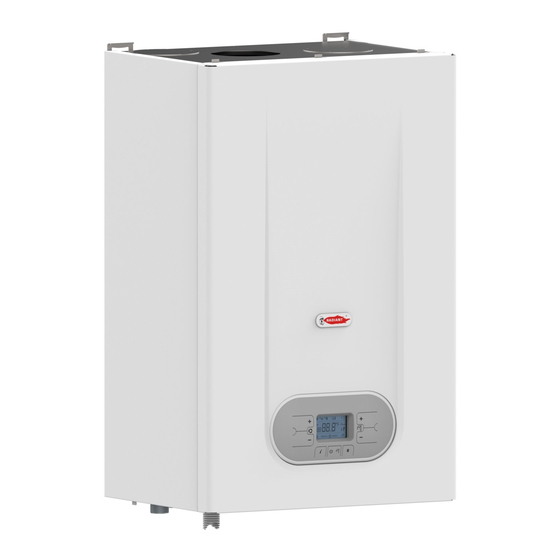
1.1.5. OVERALL DIMENSIONS (inch) fig. 2 HYDRAULIC CONNECTION KIT fig. 3 hydraulic equipped with hydraulic connections is supplied by RADIANT. fig. 4 Ø 3/4” * DOMESTIC WATER OUTLET Ø 3/4” * DOMESTIC WATER INLET Ø 3/4” * RECIRCULATION OPTIONAL G GAS Ø3/4”... -
Page 12: Positioning And Clearances To Combustible Material And Service Clearances
1. INSTALLATION 1.1.6. POSITIONING AND CLEARANCES TO COMBUSTIBLE MATERIAL AND SERVICE CLEARANCES The appliance must be installed exclusively on a flat horizontal solid floor capable of supporting its weight. This water heaters has been certified to be installed with “0” clearances to combustible material. In order to allow the access inside the water heaters for maintenance operations, follow the minimum service clearances indicated in figure 5. -
Page 13: Circulator Performance Curve
1. INSTALLATION 1.1.7. CIRCULATOR PERFORMANCE CURVE UPS 15-48 CIL2 H (ft) Q (US gpm) FLOW RATE US gpm fig. 6 Circulator priority maximum speed Circulator priority at second speed Circulator priority at minimum speed - - - - Appliance Loss SFK 57 - RAD - ING - Inst. - Page 14 1. INSTALLATION PROBE FOR THE STORAGE Electrical nominal resistance at 25 °C 10000 B 3435 +/- 1% (25-85) fig. 7 Temp. °C R NTC 27279 17959 12090 8313 5828 4161 3021 2229 1669 SFK 57 - RAD - ING - Inst. Manual - 2210.1_SKM1_firm.L188i58_CSA...
-
Page 15: Water Connection
1. INSTALLATION 1.1.9. WATER CONNECTION installed units. Based on the characteristics of the inlet water, you should install suitable water DANGER treatment devices, for residues presence please Make sure that the water tubes are not install an inline filter. used as grounding system for the electrical plant. HEATING CIRCUIT There are not suitable for such use. -
Page 16: Piping Diagram For Basic Installation
1. INSTALLATION 1.1.9. PIPING DIAGRAM FOR BASIC INSTALLATION This is not an engineering drawing. It is intended only as a guide and not as a replacement for professionally engineering project drawings. This drawing is not intended to describe a complete system. It is up to the contractor / engineer to determine the necessary components and configuration of the particular system being installed. -
Page 17: Piping Diagram For Recirculation Mode
1. INSTALLATION 1.1.10. PIPING DIAGRAM FOR RECIRCULATION MODE fig.8b CONDENSATE LINE BAL VALVE 3/4” NPT UNION DRAIN VALVE CIRCULATING PUMP OPTIONAL RECIRCULATION KIT CODE: 65-00747 1.1.11. PIPING DIAGRAM FOR COMBINATION MODE (DHW + HEATING) CONDENSATE LINE fig. 8c BAL VALVE 3/4”... -
Page 18: Condensate Drain
1. INSTALLATION 1.1.12. CONDENSATE DRAIN FILLING THE CONDENSATE COLLECTION SIPON Before starting the water heaters you have to fill the condensate collection siphon in order to avoid fuel backup through the siphon. Fill the condensate collection siphon as follows (see fig. 9): ›... -
Page 19: Relief Valve Connection
1. INSTALLATION CONDENSATE NEUTRALIZER KIT (a) is a size at least equal to the size of the outlet of the valve; The condensate neutralization system neutralizes the condensate created by the products of (b) is not installed through a wall into another combustion. -
Page 20: Anti-Freeze Protection
1. INSTALLATION 1.1.14. ANTI-FREEZE PROTECTION The water heater is protected against freezing using the electronic board design with a function that start the burner and heat the water in the boiler when their water temperature goes below the minimum pre-set values, protecting the water heater up to an external temperature of 14 °F (-10 °C). -
Page 21: Gas Connection
1. INSTALLATION 1.1.16. GAS CONNECTION pressures equal to or less than ½ psi (3.5 kPa). WARNING The gas piping must be installed › The appliance shall be installed such that the according to all local and state codes, or in absence gas ignition system components are protected of local and state codes, with the latest “Natural from water (dripping, spraying, rain etc.) during... - Page 22 1. INSTALLATION WARNING Make sure that the phase and neutral cables connection is installed in compliance with the wiring diagram (see 1.1.16 POWER SUPPLY). WARNING It is strictly forbidden to use adaptors, multiple plugs and/or extensions for the general power supply of the equipment from the electrical supply.
-
Page 23: Power Supply
1. INSTALLATION 1.1.17. POWER SUPPLY To power the water heaters connect the electrical cables to the terminal inside the control panel as follows: DANGER Shut off the voltage from the main switch. › remove the water heaters's front casing (refer to WHITE 2.2.13 ACCESSING THE WATER HEATERS). -
Page 24: Optional Electrical Connections
1. INSTALLATION 1.1.18. OPTIONAL ELECTRICAL fig. 11 CONNECTIONS The cables should be inserted inside the water heater using the cable glands ‘P1’ and ‘P2’ placed under the board (see fig. 11). Make a hole on the cable gland, smaller than the cable diameter, to make sure that the air cannot pass through. -
Page 25: Venting
(loosely supplied in water heaters). It is recommended to install discharge systems approved Use of cellular core PVC (ASTM F891), cellular by Radiant. core CPVC, or Radel® (polyphenylsulfone) in non- metallic venting systems is prohibited. WARNING... - Page 26 1. INSTALLATION 15 ft Regulator vent outlet In the event no regulator is present, H and l can be disregarded. fig. 14 Canadian installations US installations Clearance above grade, 12 in (30 cm) 12 in (30 cm) veranda, porch, deck, or balcony Clearance to window or door For inputs up to and including...
- Page 27 1. INSTALLATION Canadian installations US installations Clearance to unventilated soffit 12 in (30 cm) 12 in (30 cm) Clearance to outside corner Zero Clearance Zero Clearance Clearance to inside corner In accordance with the local installation codes and the requirements of the local gas supplier. Clearance to each side of 3 ft (91 cm) within a height 15 ft In accordance with the local...
-
Page 28: Types Of Exhaust Systems
1. INSTALLATION 1.1.21. TYPES OF EXHAUST SYSTEMS The use of thermal insulation shall be prohibited on non- metallic vent pipe and fittings in conditioned space. However, GENERAL INTRODUCTION for vent runs in unconditioned space where freezing is a concern, a minimum of 1/2” thick Armaflex is recommended. The venting installation must conform to the requirements I - CO-LINEAR VENT (FRESH AIR AND EXHAUST) of the authority having jurisdiction or, in the absence of such... - Page 29 Product Code 2” 19698RAD 3” 196985RAD 4” 196986RAD *Kits must be purchased via Radiant North America for proper kit. I (b) - THROUGH THE ROOF LNSTALLATION: 2ZDCTV35 Z-DENS Concentric Termination Vertical Through the roof installations can terminate with 3”/5” (80/125 mm) two separate pipes or with a co-axial terminal.
- Page 30 1. INSTALLATION II (a) - THROUGH THE WALL INSTALLATION: Please refer to figure ‘E’ for through the wall single vent installations. II (b) - THROUGH THE ROOF INSTALLATION: Please refer to figure ‘F’ for through the roof single vent installations. fig.
- Page 31 1. INSTALLATION AIR INTAKE / FLUE EXHAUST Ø 3” (80 MM) cod.: 65-00433 ADAPTORS WITH PP TEST POINT (COD.: 65- 00433) These adapters are to be installed on co-linear vent (two separate pipes for exhaust and combustion air), and single exhaust vent (using room air for combustion).
- Page 32 Product Code Ø 2.3/3.9 in 2PPC-HKRAD (fig. 16) (Ø 60/100 mm) Ø 3.1/4.9 in 3PPC-HKRAD (fig. 17) (Ø 80/125 mm) *Kits must be purchased via Radiant North America for proper kit. Ø2.3 in (Ø60 mm) Ø3.9 in (Ø100 mm) fig. 17...
- Page 33 1. INSTALLATION 1.1.21. TABLE 1: ALLOWABLE VENT LENGTHS Minimum Length Equivalent Vertical and length Vertical Vent Horizontal and Horizontal Configuration Pipe Size for Vent Run for vent run Gas Type Exhaust Vent Intake Vent Co-axial vent Ø2.3/3.9” 1 ft (0.3 m) + 32 ft (10 m) + Natural or Polypropylene...
- Page 34 44 in (1.1 m) 196116 197117 52CVKGVS6503-44 52CVKGVSF9003-44 4” (100 mm) 36 in (900 196021 197021 52CVKGVS6504 52CVKGVSF9004-36 *Kits must be purchased via Radiant North America for proper kit. SFK 57 - RAD - ING - Inst. Manual - 2210.1_SKM1_firm.L188i58_CSA...
- Page 35 1. INSTALLATION Polypropylene venting listed to ULC-S636 Diameter Length Brand Part Number Description 3/5” (80/125mm) Z-Dens 2ZDACLC3335 Adaptor Collinear to Concentric 3” (80mm) 12” (305mm) Z-Dens 2ZDP312 Single Wall Pipe 24” (305mm) Z-Dens 2ZDP324 Single Wall Pipe 36” (305mm) Z-Dens 2ZDP336 Single Wall Pipe 72”...
-
Page 37: Support Center Section
1. SUPPORT CENTER SECTION 2. SUPPORT CENTER SECTION All operations described below relative to first start-up, maintenance and replacement and should be performed only by qualified service technician. -
Page 38: First Start-Up
2. FIRST START-UP 2.1. FIRST START-UP 2.1.1. PRELIMINARY OPERATIONS › make sure that the D.H.W. system gate valves FOR FIRST START-UP are open; The first start-up operations consist of checking › make sure that there is no intake of gaseous the correct installation, adjustment and operation products within the system;... -
Page 39: Water Heaters Commissioning
2. FIRST START-UP 2.1.2. WATER HEATERS COMMISSIONING fig. 18 Proceed with water heaters commissioning as follows: › Power the water heaters. › Open the gas valve. › Ignite the unit by pressing the button › Open the D.H.W. taps at the maximum flow rate. The unit is ignited. -
Page 40: Co2 Value Check And Calibration
2. FIRST START-UP › Access parameter ‘P07’ following the procedure 2.1.3. CO2 VALUE CHECK AND described in 2.1.4 “Parameters accessing and CALIBRATION programming” and stay in edit mode. WARNING › Insert the combustion analyser probe in the The CO value should be measured with suitable ‘PF’... -
Page 41: Accessing And Programming The Parameters
2. FIRST START-UP 2.1.4. ACCESSING AND PROGRAMMING THE PARAMETERS To access the parameters menu and adjust their values, follow the procedure below: Hold at the same time the keys ‘ ’ and ‘ ’ until on the display appears the symbol ‘ ’with the message ‘P00’, and release the keys ‘... - Page 42 2. FIRST START-UP Press the key ‘ ’ to confirm the action and wait for the display to stop blinking, indicating the adjustment was implemented. fig. 24 To exit the parameters menu, hold at the same time the keys ‘ ’...
-
Page 43: Parameters Table
2. FIRST START-UP 2.1.5. PARAMETERS TABLE PARAMETER DESCRIPTION RANGE FUNCTION SELECTION OF THE FIRE RATING 0 - 3 0 = 24 KW 1 = 28 KW (SFK 57) 2 = 34 KW 3= 55 KW (SFK 55 - SFK 56) GAS TYPE SELECTION 0 - 1 0 = NATURAL GAS... - Page 44 2. FIRST START-UP PARAMETER DESCRIPTION RANGE FUNCTION RECIRCULATION DIFFERENTIAL ACTIVATION 5 - 15 VALUE EXPRESSED IN °C THROUGH THIS PARAMETER ANTICIPATE RECIRCULATION FUNCTION, COMPARED RECIRCULATION SET POINT PRESET BY THE END-USER, BY MODIFYING THE TEMPERATURE DIFFERENCE. FAN MINIMUM SPEED ADJUSTMENT 43 - 255 VALUE EXPRESSED IN HERTZ THROUGH THIS PARAMETER YOU CAN SET THE FAN MINIMUM...
- Page 45 2. FIRST START-UP PARAMETER DESCRIPTION RANGE FUNCTION EXECUTION PERIOD OF THE OVERHEATING FUNCTION 0 - 60 VALUE EXPRESSED THROUGH THIS PARAMETER YOU CAN ENABLE AND SET THE SECONDS (FACTORY SET AT 0 DURATION OF THE EXECUTION PERIOD OF THE OVERHEATING SECONDS) FUNCTION, DURING WHICH THE CIRCULATING PUMP ACTIVATES BY DISSIPATING THE HEAT IN EXCESS.
- Page 46 2. FIRST START-UP PARAMETER DESCRIPTION RANGE FUNCTION ADDITIONAL POST-VENTILATION TIMING 20 - 120 VALUE EXPRESSED THROUGH THIS PARAMETER YOU CAN SET A PERIOD OF SECONDS (FACTORY SET AT 30 OPERATION, ADDITIONAL TO THE 20 STANDARD SECONDS OF SECONDS) THE FAN, AFTER THE BURNER SHUTDOWN. ANTI-WATER HAMMER SELECTION 0 - 20 0 = DISABLED (FACTORY SET...
- Page 47 2. FIRST START-UP PARAMETER DESCRIPTION RANGE FUNCTION HEATING FAN MAXIMUM SPEED ADJUSTMENT VALUE SET FOR THE VALUE IS EXPRESSED IN THROUGH THIS PARAMETER YOU CAN SET THE FAN MAXIMUM PARAMETER HERTZ SPEED IN HEATING PHASE, THAT CORRESPONDS TO THE P23 - 203 (1HZ = 30 RPM) MAXIMUM BURNER POWER DURING A REQUEST TO OPERATE IN HEATING MODE [SEE CHAPTER ‘COMBUSTION BLOWER...
- Page 48 2. FIRST START-UP PARAMETER DESCRIPTION RANGE FUNCTION CLIMATE COMPENSATION CURVE 0 - 30 (SET BY DEFAULT AT 15) THE (NOT APPLICABLE TO THE SFK 57 MODEL)(ONLY WITH EXTERNAL NUMBERING OF THE VALUE PROBE CONNECTED) CORRESPONDS ‘KD’ YOU CAN CONNECT AN EXTERNAL TEMPERATURE PROBE (SEE CURVES ON THE CHART (SEE CHAPTER ‘ELECTRICAL CONNECTIONS’) THAT AUTOMATICALLY CHART BELOW).
- Page 49 2. FIRST START-UP PARAMETER DESCRIPTION RANGE FUNCTION MODBUS COMMUNICATION BAUD RATE 0 - 5 0 = 9600 BY MEANS OF THIS PARAMETER, IT IS POSSIBLE TO SELECT THE MODBUS COMMUNICATION BAUD RATE SUPPORTED BY THE SAME INTERFACE. 1 = 1200 2 = 2400 3 = 4800 4 = 9600...
- Page 50 2. FIRST START-UP PARAMETER DESCRIPTION RANGE FUNCTION MAXIMUM HEATING SETPOINT 104 - 160 THE VALUE IS EXPRESSED IN THROUGH THIS PARAMETER YOU CAN SET THE USER- °F ADJUSTABLE MAXIMUM HEATING TEMPERATURE. HEATING TIMING 0 - 90 VALUE EXPRESSED IN THROUGH THIS PARAMETER YOU CAN SET THE MINIMUM MULTIPLES OF 5 SECONDS TIME FOR WHICH THE BURNER WILL BE TURNED OFF ONCE (PRE-SET AT 6 X 5 = 30...
- Page 51 2. FIRST START-UP PARAMETER DESCRIPTION RANGE FUNCTION MIXING VALVE TYPE OF OPERATION SETTING 0 - 2 0 = DISABLED (SET BY DEFAULT) 1 = ENABLED FOR WATER HEATER COMBINATION MODE (DHW + HEATING – SFK 56) OPERATION. (IF THE P02 PARAMETER VALUE IS SET TO ‘0’...
-
Page 52: Combustion Blower Frequency/Heat Capacity Diagram
2. FIRST START-UP 2.1.6. COMBUSTION BLOWER FREQUENCY/HEAT CAPACITY DIAGRAM 88715 81891 75067 68242 61418 54594 47769 Natural Gas 40945 Propane 34121 27297 20472 13648 6824 fig. 28 MINIMUM MAXIMUM MINIMUM MAXIMUM FREQUENCY IN FREQUENCY IN HEATING HEATING DOMESTIC HOT DOMESTIC HOT GAS TYPE FREQUENCY FREQUENCY... -
Page 53: Maintenance
RADIANT BRUCIATORI spa. › check the sealing of the gas components, and WARNING replace the gaskets if necessary;... - Page 54 2. MAINTENANCE › Check the vent pipe. › Visually inspect for leaks around internal and external water piping every six months. › Visually inspect the flue gas vent piping monthly Immediately call a qualified service technician for detecting any signs of blockage, leakage or to repair any leaks.
-
Page 55: Technical Data
2. MAINTENANCE 2.2.8. TECHNICAL DATA Model SFK 57 Maximum nominal heat capacity in heating circuit btu/h - (kW) 88716 - (26) Maximum nominal heat capacity in domestic circuit btu/h - (kW) 98952 - (29) Minimum nominal heat capacity in heating circuit btu/h - (kW) 13650 - (4) Minimum nominal heat capacity in domestic circuit... - Page 56 2. MAINTENANCE Electrical specifications Voltage-frequency V/Hz 120/60 Max Absorbed Power Gas supply Nominal supply pressure - Natural Gas psi - (mbar) 0.25 - (17.4) Heating Max. fan speed - Natural Gas D.H.W Max fan speed - Natural Gas Heating Min. fan speed - Natural Gas D.H.W Min.
-
Page 57: Technical Assembly
2. MAINTENANCE 2.2.9. TECHNICAL ASSEMBLY EXHAUST SAFETY HIGH LIMIT SWITCH HEAT EXCHANGER BURNER UNIT IONIZATION ELECTRODE COMBUSTION BLOWER CONDENSATE COLLECTION SIPHON THERMAL EXPANSION TANK D.H.W. WATER PRESSURE SWITCH ANODE 10. STORAGE TANK 11. TANK DRAINING TAP 12. AIR ELIMINATOR 13. AIR PRESSURE SWITCH 14. -
Page 58: Internal Piping Schematic
2. MAINTENANCE 2.2.10. INTERNAL PIPING SCHEMATIC DRAW DEMAND WITH CIRCULATOR ACTIVE AND WITHOUT RECIRCULATION LINE G. GAS INLET C. DOMESTIC WATER OUTLET F. DOMESTIC WATER INLET SC. CONDENSATE DRAIN RC. RECIRCULATION A. HEATING WATER OUTLET R. HEATING WATER INLET EXHAUST SAFETY HIGH LIMIT SWITCH HEAT EXCHANGER BURNER UNIT COMBUSTION BLOWER... - Page 59 2. MAINTENANCE RECIRCULATION MODE COMBINATION MODE (DHW + HEATING) fig. 31 fig. 32 SFK 57 - RAD - ING - Inst. Manual - 2210.1_SKM1_firm.L188i58_CSA...
-
Page 60: Wiring Diagram
2. MAINTENANCE 2.2.11. WIRING DIAGRAM CAUTION: Label all wires prior to disconnection when servicing controls. Wiring errors can cause improper and dangerous operation. Verify proper operation after servicing. 120 V 60 Hz 40-00087 40-00091 40-00088 40-00106 40-00518 40-00660 31388LA 40-00631 fig. -
Page 61: Accessing The Water Heaters
2. MAINTENANCE 2.2.12. ACCESSING THE WATER HEATERS All maintenance and service procedures can be performed by removing the upper (1) or lower (2) front access panels. To remove the upper front panel; › remove the two screws found on the top of the upper front panel ›... -
Page 62: Accessing The Electronic Board
2. MAINTENANCE 2.2.13. ACCESSING THE ELECTRONIC BOARD In order to intervene on the wirings of the control panel, please proceed as follows: DANGER Cut off the voltage from the main switch. › Grab at the same time the support brackets of the control panel (fig. -
Page 63: Emptying The Domestic System
2. MAINTENANCE 2.2.15. EMPTYING THE DOMESTIC SYSTEM If there is freezing risk, you have to empty the domestic system as follows: › close the main supply tap of the water supply network; › open all cold and hot water taps and the discharge tap;... -
Page 64: Fault Signalling Codes
2. MAINTENANCE 2.2.16. FAULT SIGNALLING CODES To view the last 5 fault signalling codes chronologically, starting with the most recent one, activate the ‘OFF’ mode by pressing the FUNCTION ‘ ’ key and hold the key INFO ‘ ’ for 5 seconds. Use keys ‘ ’... - Page 65 2. MAINTENANCE CODE FAULT POSSIBLE CAUSE SOLUTION RESET EXHAUST SAFETY HIGH HIGH LIMIT BROKEN; REPLACE IT; MANUAL RESET LIMIT SWITCH (PRESS THE RESET HIGH LIMIT CABLE CHECK THE WIRING. ‘ ’ KEY). DISCONNECTED. LOW WATER CUTOFF INSUFFICIENT WATER LOAD THE SYSTEM; AUTOMATIC.
- Page 66 2. MAINTENANCE CODE FAULT POSSIBLE CAUSE SOLUTION RESET AIR PRESSURE SWITCH PRESSURE SWITCH CHECK THE WIRING; MANUAL RESET CABLE DISCONNECTED; (PRESS THE RESET ‘ ’ KEY). DISCHARGE OR SUCTION CHECK THE FUMES DISCHARGE DUCT; CLOSED; AIR PRESSURE SWITCH REPLACE IT. DEFECTIVE.
- Page 67 2. MAINTENANCE CODE FAULT POSSIBLE CAUSE SOLUTION RESET LACK WATER HEAT EXCHANGER CLEAN REPLACE HEAT MANUAL RESET CIRCULATION OBSTRUCTED; EXCHANGER; (PRESS THE RESET ‘ ’ KEY). CIRCULATOR PUMP CLEAN THE IMPELLER OR REPLACE BROKEN DIRTY THE CIRCULATOR PUMP; IMPELLER; DEFECTIVE MICRO. REPLACE IT.
- Page 68 2. MAINTENANCE CODE FAULT POSSIBLE CAUSE SOLUTION RESET SUPPLY VOLTAGE SUPPLY VOLTAGE OUT OF CHECK THE POWER SUPPLY LINE (THE AUTOMATIC. OPERATION RANGE ERROR DEACTIVATES AUTOMATICALLY AS SOON AS THE SUPPLY VOLTAGE FALLS BACK WITHIN THE REQUESTED LIMITS). COMMUNICATION FAULT ELECTRICAL CHECK THE WIRING;...
- Page 69 2. MAINTENANCE CODE FAULT POSSIBLE CAUSE SOLUTION RESET TEMPERATURE OUTLET ELECTRIC POWER CHECK THE WIRING; MANUAL RESET FROM THE MIXING VALVE SUPPLY TO THE MIXING (PRESS THE RESET TOO HIGH COMPARED TO VALVE ‘ ’ KEY). THE SETPOINT SET BY THE USER MIXING VALVE BROKEN REPLACE IT.
-
Page 70: Active Functions Signalling Codes
2. MAINTENANCE 2.2.16. ACTIVE FUNCTIONS SIGNALLING CODES CODE FUNCTION DESCRIPTION STORAGE TANK ANTI-FREEZE WHEN THE SANITARY SENSOR DETECTS A TEMPERATURE BELOW 41 °F (5°C), THE PUMP RUNS AND THE BURNER LIFTS UP THE TEMPERATURE TO °F (30°C). WHEN THIS LATTER TEMPERATURE IS ACHIEVED, THE BURNER SHUTS OFF AND THE PUMP RUNS FOR 20 SECONDS AS POST CIRCULATION. -
Page 71: Positions Of The Electrodes
2. MAINTENANCE 2.2.17. POSITIONS OF THE ELECTRODES If the water heaters does not restart, check the positions of the electrodes (especially the ignition electrode). LIGHT UP ELECTRODE DETECTION ELECTRODE 0.16" (3mm) LIGHT UP ELECTRODE LIGHT UP ELECTRODE DETECTION ELECTRODE fig. 36 SFK 57 - RAD - ING - Inst. -
Page 72: Conversion To Adifferent Gas Type
2. MAINTENANCE 2.2.18. CONVERSION TO A DIFFERENT GAS TYPE ATTENTION Make sure that the gas induction tube is suitable for the new type of fuel with which the water heaters is supplied. FOR CONVERSION PROCEED AS FOLLOWS: › loosen the two screws ‘1’ (fig. 37) from the fastening bush, and remove the air suction tube;... -
Page 73: Storage Tank Maintenance
2. MAINTENANCE 2.2.19. STORAGE TANK MAINTENANCE Please have the anode checked on a regular basis. The anode has to be checked at least once every year and, if necessary, it has to be replaced to protect the storage tank. Should the mains water be particularly hard and aggressive, it might be necessary to have it checked two times per year. - Page 76 RADIANT BRUCIATORI s.p.a. Via Pantanelli, 164/166 - 61025 Loc. Montelabbate (PU) Tel. +39 0721 9079.1 • fax. +39 0721 9079279 e-mail: info@radiant • Internet: http://www.radiant.it...
Need help?
Do you have a question about the QUATTRO AQUA 4 and is the answer not in the manual?
Questions and answers