Table of Contents
Advertisement
Quick Links
Canopy Breeze
®
Canopy Fan Quick Start Guide
Congratulations on choosing the Canopy Breeze® canopy fan, the next level of tailgating comfort! To ensure maximum enjoyment and
years of trouble-free service from this product, please read these instructions thoroughly and store them in a safe place. Please visit
www.mekooutdoors.com for further information and instructional videos.
One-Year Limited Warranty
Meko Outdoors, Inc warranties this product to be free from defects in material or workmanship for a period of one (1) year following the date of purchase,
provided the product is used in a non-commercial manner. This limited warranty does not cover failures as a result of abuse, droppage, or using this
product in a manner contrary to its intent. Damage caused by collapsed/toppled canopies as a result of wind or other acts of nature are excluded from
this warranty. For warranty inquiries or claims, please do not return the unit to your retailer . Email us at service@mekooutdoors.com with your inquiry.
What's Included
Compatible Frames
Standard or vented 10' and 12' canopies
with perpendicular roof joists, available in
most sporting, home improvement and
discount stores.
Installation
⚠
"
$ WARNING : Do not install or operate the fan if rain, windy or inclement conditions are expected.
#
⚠
$ WARNING : Be sure to secure the canopy with stakes, weights or rope when operating the fan.
#
"
K
J
H
�� G
I
Vented canopies will pull more air than enclosed canopies, creating a more comfortable environment.
�� G
H
I
J
K
If sustained winds are expected to be 10 mph or higher, the breeze from the fan will be largely ineffective.
① Unfold canopy; only raise it halfway up.
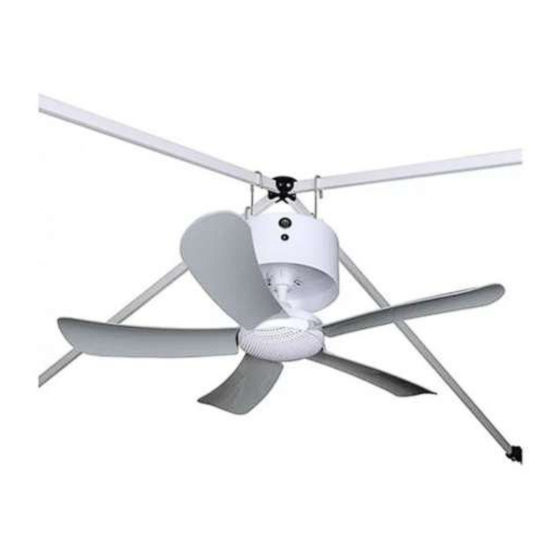
④ Insert each of the five fan blades into the slots on the
fan motor assembly and push firmly.
Model CB101
NON-Compatible Frames
Offset roof joist members
② Raise the four hooks on top of the fan.
⑤ The inner curve, or concave side of fan blade
must face downward (toward the ground) when
installed.
Copyright ã 2022 Meko Outdoors Incorporated. U.S.A. All rights reserved.
�� Master power switch
�� Charging port
�� 5 fan blades
�� Motor Assembly
�� Fan remote control
�� Case
�� Battery Housing
�� Battery charger
Canopy Breeze will not fit on these type frames
Canopies with a center pole
③ Center the hooks between the four roof joists of the canopy
frame apex with the hooks over the top of the frame. Rotate the
fan ¼ turn counterclockwise, then lower each hook onto a roof
⑥ You will hear a "click" once the fan blade snaps into place.
joist.
Advertisement
Table of Contents

Related Manuals for Canopy Breeze CB101

Summary of Contents for Canopy Breeze CB101
- Page 1 Model CB101 Congratulations on choosing the Canopy Breeze® canopy fan, the next level of tailgating comfort! To ensure maximum enjoyment and years of trouble-free service from this product, please read these instructions thoroughly and store them in a safe place. Please visit www.mekooutdoors.com for further information and instructional videos.
- Page 2 It will be hard to reach otherwise. the remote control. Uninstalling Canopy Breeze® Turn the fan off using the remote. Lower the canopy back to the half-height position. Flip the Master Power Switch to the “OFF” position.
- Page 3 This device complies with Part 15 of the FCC Rules. Operation is subject to the following two conditions: (1) this device may not cause harmful interference, and (2) this device must accept any interference received, including interference that may cause undesired operation NOTE: This equipment has been tested and found to comply with the limits for a Class B digital device, pursuant to Part 15 of the FCC Rules.
Need help?
Do you have a question about the CB101 and is the answer not in the manual?
Questions and answers