
Related Manuals for ELINTA CHARGE HomeBox Slim

Summary of Contents for ELINTA CHARGE HomeBox Slim
- Page 1 Public Electric Vehicle Charging station HomeBox Slim Installation Manual Elinta Charge, UAB | Partizanu g. 63M, Kaunas 50306, Lithuania | www.elintacharge.com...
- Page 2 No portion of these materials may be duplicated, used or disclosed without prior written permission from Elinta Charge, UAB Disclaimer: This installation manual includes the latest information available at the time of printing. Elinta Charge, UAB reserves the right to make changes to this installation manual and/or product without further notice.
-
Page 3: Table Of Contents
Charging Station Overview ............17 Standard Unit and Optional Extras ..........21 Charging Station Unpacking ............25 Preparation For Installation ............26 HomeBox Slim Internal Structure ..........28 Wall mounting ................29 Installation Of Protection Devices ..........30 Connection Diagram (With DLM) ..........31 Power Cable Introduction ............. - Page 4 4.1 First Time Start-UP ................ 44 4.2 Using The Charging Station ............46 SETTINGS AND TESTING ............... 48 5.1 Changing The HomeBox Slim Power Output ......... 49 RCD Type B (optional) ..............51 RCD Type A and Type B Testing ........... 52 Dynamic Load Management Setup online (optional) .....
-
Page 5: Introduction
Chapter 1 INTRODUCTION... -
Page 6: Purpose Of The Manual
Purpose of the Manual This manual provides information about the installation process of the charging station HomeBox Slim and HomeBox Slim Plus. This document is designed for engineers and electricians who possess a general knowledge of electrical installation. Qualified Personnel... -
Page 7: High Voltage Warning
It is recommended that your HomeBox Slim be installed by a licensed electrician. To avoid serious injury or death, stallation must be in accordance with the manufacturer’s installation instructions and must comply with all local codes. -
Page 8: Definitions
Definitions (Alternating Current): A charge of electricity that regularly AC - changes direction. (Alternating Current): A charge of electricity that regularly kW - changes direction. The strength of an electric current measured in amperes or A / mA - milliamperes A unit of energy equivalent to the energy transferred in one hour by one thousand watts of power. - Page 9 Moving, Transporting and Storage instructions It is recommended to store charging station indoors and in a non humid environment, keeping it in its original packaging until it is ready to be installed. Storage temperature should be between –30 °C and +60 °C...
-
Page 10: Preparation
Chapter 2 PREPARATION... -
Page 11: Site Selection
Site Selection Selecting a site for HomeBox Slim installation will likely require con- sideration of a combination of factors. While every site is unique and every HomeBox Slim host has priorities for installation. Some of the most common design elements to look for:... - Page 12 Power Rating of Charging Station - Connecting the Charging station to a power source will require evaluation of existing electrical capacity. Sometimes greater power charging stations are unnecessary for the selected location. Such as: workplac- es, where people tend to stay the whole workday and bigger power charging station will not be beneficial.
- Page 13 Available Network Communications - Charging stations are much more with internet communication: mobile phone apps, payment solutions, charging reservations - all these features are available with internet connectivity. When choosing a location for the charging station: make sure there are possibilities to share a network with charging station. Chargers usually accept all the most popular communication types: Wi-Fi, LAN, or GSM/4G.
-
Page 14: Electrical Requirements
Electrical Requirements Make sure to follow these electrical installation requirements. Failure to do so may cause equipment damage or personal injuries This Charging station was designed to work with TNC-S; TNS or TT Power supply systems. Make sure grounding resistance is no greater than 10 Ω Do NOT install charging station with TNC or IT power supply systems. -
Page 15: Wiring Recommendations
Wiring Recommendations Recommended calculated values for HomeBox Slim charging station wires: (When calculated cable length Max: 50 meters; Power factor (cosφ): 0,95; voltage drop (%): 7%; Cabling method: Four single core copper wire in the pipe (three- phase)): Total Charger Power... -
Page 16: Installation
Chapter 3 INSTALLATION... -
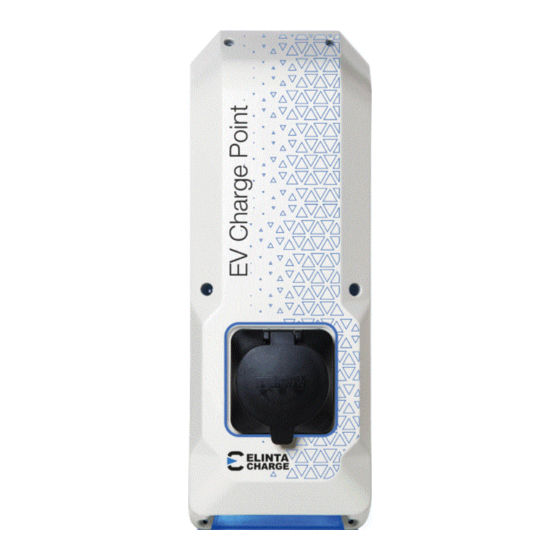
Page 17: Charging Station Overview
Charging Station Overview HomeBox Slim is designed to be used at home or office with top industry quality, ensuring long life and high reliability. HomeBox Slim is a simple and cost effective solution for Mode 3, charging up to 22 kW. HomeBox Slim can be used in garages, parking lots and other private areas. - Page 18 Charging Station HomeBox Slim technical specification: Weight: 5,5 kg Dimensions: 440 x 160 x 130 mm Phase Count: 1 or 3 Operating Voltage: 230 / 400 V/AC Maximum Power: 22 kW Impact protection rating: IK08 IP class: IP54 Temperature range: -30 °C to +50 °...
- Page 20 RFID authorization, cable lock, RGB status LED, 4G/GSM modem: RFID tag reader Status LED Charging 62196-2 socket Charging station HomeBox Slim comes in a compact package. Measuring width just over 160 mm, thickness 130 mm, and height of 440 mm.
-
Page 21: Standard Unit And Optional Extras
The cable remains locked until the user swipes an RFID card/tag on the charging sta- TYPE B RCD - Standard HomeBox Slim comes with Type A residu- al current devices: Type: A. These RCD type A ensures: The control and isolation of electrical circuits. - Page 22 1:2017 and is certified by TÜV Rheinlandfor. This solution can be used as a cheaper alternative for Type B RCD. Shut socket - HomeBox Slim with shutter 62196-2 socket. This shutter protects against foreign objects entering the socket. The socket allows...
- Page 23 DLM must be provided with internet connectivity. Power output - We are offering single phase as well as three phase option for the HomeBox Slim. For power output available, see the table below: Power Output (kW)
- Page 24 Communication Types - For a complete user experience: software up- dates, back-end system, full charging control, it is recommended to choose the HomeBox Slim with one of the three communication options: • Wi-Fi • GSM/4G • Lan - communication uses ethernet cable - it is the most reliable com- munication type.
-
Page 25: Charging Station Unpacking
After removing the Charging station from the package, save the carton box for all the warranty period in case there would be needed to send the charger back for repairs. Standard package includes: Charging Station HomeBox Slim - 1 pcs. • Circuit breaker 3p 32A - 1 pcs. •... -
Page 26: Preparation For Installation
Preparation For Installation Take out the charging station from the package. Unscrew x6 screws from the charging station housing:... - Page 27 Lift the HomeBox Slim cover up. Carefully, while holding both sides, lift and place the charging station to the safe place. Do not allow the HomeBox Slim cover to hang by the wires.
-
Page 28: Homebox Slim Internal Structure
3.5 HomeBox Slim Internal Structure Power supply RFID module Contactor Optional* LAN module Energy Optional* meter Wi-Fi module Optional* Charge Controller Cable lock Wire terminals Wire sealant GSM modem 62196-2 socket Optional*... -
Page 29: Wall Mounting
4. Using a 6 mm drill bit, drill through the mounting template into the wall. 5. Plug the wall anchors into the wall. 6. Place the HomeBox Slim on the wall and check that the drilled holes correspond to the holes of the HomeBox Slim. -
Page 30: Installation Of Protection Devices
Installation Of Protection Devices The HomeBox Slim charging station comes with all the necessary safety devices: Three phase 32 Amp circuit breaker and a residual current device (RCD 40 Amp; 30mA). Circuit breaker Because of the small HomeBox Slim package, these safety devices must be installed inside a separate power distribution box. -
Page 31: Connection Diagram (With Dlm)
Connection Diagram (With DLM) In this connection diagram, the dashed lines show that the protection devic- es and the energy meter must be installed inside the power distribution box. The smart energy meter must be installed on the input line of the building, measuring the total consumption of the building. -
Page 32: Power Cable Introduction
Power Cable Introduction The HomeBox Slim charging station accepts a power supply cable from the bottom of the housing. When introducing the power supply cable into the charging station, make sure to use the given grommet (cable sealer) in order to protect the charging station from the humid environment. -
Page 33: Lan Cable Connection (Optional)
Power Supply cable. Switch off the power to the Charging Station. If the HomeBox Slim charging station is equipped with a LAN op- tion, make sure you follow these procedures to route the cable correctly in the charging station. - Page 34 1. Make sure that LAN cable routing does not disturb the cable lock or any other internal charger component. Use zip ties to tie the LAN cables to existing charging station cables. Use the separate grommet for LAN cable introduction into the charging station.
-
Page 35: Wi-Fi Set-Up (Optional)
3.11 Wi-Fi Set-Up (optional) If the HomeBox Slim charging station comes with Wi-Fi option, make sure to follow these procedures to correctly set up the Wi- Fi correctly: 1. Switch off the Power supply. 2. Locate DIP switches on the RFID board. - Page 36 7. Go to configuration website via IP address 192.168.4.1 or Manage router: 8. Connect to webpage with same elioscitycharge password:...
- Page 37 9. Go to the Online tab and you will find two windows: SSID and Password 10. Enter your WiFi network name (SSID) and password. Elinta Charge WiFi can accept only 2.4 GHz WiFi network (5 GHz WiFi network is not accepta-...
- Page 38 11. Click the Save button. If the configuration was saved successfully, you will see the message "Configuration set successfully!": 12. You can check your SSID and Password in Log tab: 13. Turn off the power supply for the charging station. 14.
-
Page 39: Gsm Modem Settings And Setup (Optional)
LAN, Wi-Fi, GSM/3G/4G. The charging station can be in- stalled in a remote location and has a good communication speed via the mobile network. If the HomeBox Slim is selected with the GSM/3G/4G option, the additional device is installed in the charging station: Teltonika RUT240 modem:... - Page 40 To set up the station for operation with GSM/3G/4G communication, the card SIM must first be inserted into the modem: Using a sharp object, push the SIM card tray release button. Take out the SIM card tray. Put the SIM card into the tray. Push SIM card tray into the modem.
-
Page 41: Alternative Lan Connection
WAN LED should light up and start flashing, indicating that communica- tion has started. DO NOT press the "reset button" on the modem. The HomeBox Slim is shipped fully configured for use. Pressing the "Reset" button will erase all configuration settings. -
Page 42: Dynamic Load Management Wiring (Optional)
3.14 Dynamic Load Management Wiring (optional) Danger: Before Dynamic Load Man- agement connection, make sure that there is no power running through the Power Supply cable. Switch off the power to the Charging Station. Dynamic Load Management (DLM) requires extra cabling between a smart energy meter and a charging station. -
Page 43: Initial Startup
Chapter 4 INITIAL STARTUP... -
Page 44: First Time Start-Up
4.1 First Time Start-UP STEP 1: Turn on the Circuit Breaker and the RCD to power ON the charging station. STEP 2: Charging station LED should be blank for approx. 10 seconds. RGB LED STEP 3: The LED should briefly light up green for approx. 1-2 seconds. - Page 45 STEP 4: LED should light up in RED color for brief moment: STEP 5: The sequence ends and LED remains to shine in Green color: STEP 6: The charging station is now ready to be used.
-
Page 46: Using The Charging Station
4.2 Using The Charging Station In standby mode, the charger LED remains green. STEP 1: Place the RFID tag at the location marked with the RFD symbol: Put RFID here STEP 2: The charging station LED starts to blink in green color. STEP 3: Connect your charging station to the EV with a cable. - Page 47 STEP 4: When the EV reaches full charge, the LED starts flashing green: STEP 5: To end the charging process: Place the RFID tag on the location marked with the RFD symbol. The charging station unlocks the charging cable and LED changes back to green.
-
Page 48: Settings And Testing
Chapter 5 SETTINGS AND TESTING... -
Page 49: Changing The Homebox Slim Power Output
5.1 Changing The HomeBox Slim Power Output The HomeBox Slim charging station has the option of changing the char- ging power output of the Type 2 socket. This can be useful if you made a mistake when buying a charging station and bought one that was too powerful - the circuit breaker on your power box will trip when the electric car is charging. - Page 50 If your HomeBox Slim comes with this MainBoard DO NOT adjust the knob on the charger controller Knob For Power Adjustment Using the rotating switch these currents and power outputs can be selected: Switch position Current Power (kW) @ 1 Power (kW) @ 3 phase phase...
-
Page 51: Rcd Type B (Optional)
RCD Type B (optional) The standard HomeBox Slim comes with residual current devices Type: A. These RCD type A ensures: The control and isolation of electrical circuits. The protection of persons against direct and indirect contacts. The protection of installations against insulation faults. - Page 52 Dynamic Load Management Setup offline (optional) If the HomeBox Slim charging station comes with offline DLM option, make sure to follow these procedures to correctly set up the DLM correctly: 1. Switch off the Power supply. 2. Locate DIP switches on the RFID board.
-
Page 53: Dynamic Load Management Setup Online (Optional)
7. Go to configuration website via IP address 192.168.4.1 or Manage router: 8. Connect to webpage with same elioscitycharge password: Go to the Offline tab and make the following settings as described in "Dynamic Load Management Setup (online)": Maximum power (dynamic input) - rating of the building circuit breaker. Maxi- mum current allowed to flow through the circuit breaker. -
Page 54: Rcd Type A And Type B Testing
2. Disconnect the charging cable from the electric vehicle and from the charging station. 3. Switch off the HomeBox Slim circuit breaker located in the main dis- tribution box. 4. Press the "Test" button on the residual current device (RCD). -
Page 55: Dynamic Load Management Setup Offline (Optional)
Dynamic Load Management Setup online (optional) Log in to your administrative elios.cloud website: 1. Go to the Stations tab. 2. Select the station whose power you want to regulate. 3. Go to the Edit tab. 4. At the bottom of the page, configure these settings: Balance Mode - how the charger balances power: If selected: None - charger does not balance power at all. - Page 56 Maximum power (socket) - maximum amperage which is allowed to use by the socket. Maximum power (dynamic input) - Building’s circuit breaker nominal. Max amperage which is allowed to flow through circuit breaker. Maximum power (dynamic reserve) - Amperage reserve left for sud- den current spikes, when using home appliances.
-
Page 57: Troubleshooting
Chapter 6 TROUBLESHOOTING... - Page 58 The table below lists the most common solutions to problems Charging station HomeBox Slim Troubleshooting Table Problem Possible cause Troubleshooting Charging station not work- No power to charg- Open power distribu- ing. The LED is not shin- ing station. Or tion box.
- Page 59 Check the charger con- figuration. If possible, try the charging station with a different EV. If the problem persists, contact technical sup- port at Elinta Charge. Charging station LED Charging station Check charging log of flashes red. EV cannot be had a fault charging station.
-
Page 60: Warranty
Chapter 7 WARRANTY... -
Page 61: Warranty Rules And Conditions
7.1 Warranty Rules and Conditions 1. Elinta Charge guarantees the high quality of the HomeBox Slim charging station. 2. Elinta Charge will repair or replace, free of charge, any defect caused by the manufacturer's fault during the warranty period. 3. All warranty conditions apply in accordance with consumer protection laws. -
Page 62: Not Included Into The Warranty
Note the serial number of the station from the sticker. The la- bel is located on the bottom of the station. Contact the technical service Elinta Charge, tel. +370 653 66633 or +370 615 71604 or support@elintacharge.com. When registering a fault, have the serial number of the charg- ing station, the device name and a detailed description of the fault ready. -
Page 63: Final Thoughts
Elinta Charge. This document does not restrict the consumer's rights to the warranty when purchased product (equipment) is poor quality. Elinta Charge | Partizanu str. 63M, Kaunas 50306, Lithuania | www.elintacharge.com...
Need help?
Do you have a question about the HomeBox Slim and is the answer not in the manual?
Questions and answers