
Related Manuals for Hydra-Flex Sonny's CarWash Backroom Aqua-Lab 3

Summary of Contents for Hydra-Flex Sonny's CarWash Backroom Aqua-Lab 3
- Page 1 CHEMICAL DISPENSING SYSTEM User Manual REV G 3/4/9 2/3/7 2/5/9 4000240 revG0422 © Sonny’s Backroom by Hydra-Flex 2022...
-
Page 3: Table Of Contents
TABLE OF CONTENTS SPECIFICATIONS INSTALLATION INSTRUCTIONS Estimated Installation Timeline Unpacking Location Layouts & Mounting Layout Drawings Grundfos Pump Installation 20 GPM Grundfos With Integrated VFD Installation Instructions 40 GPM Grundfos With Integrated VFD Installation Instructions Aqua-Lab 3 Panel Installation ™ Pneumatic Connections Alfred Gateway and Disconnect Box Mounting Electrical Connections... -
Page 4: Specifications
15 GPM 50 Micron valve port Cord length 23 feet / 7 meters BACK ROOM AMBIENT AIR TEMP AIR OUTLET LINE MAX: 130°F (54°C) 3/8” OD Poly Tube per application 4 | © Sonny’s CarWash Backroom by Hydra-Flex, Inc. 2022... -
Page 5: Installation Instructions
INSTALLATION INSTRUCTIONS ESTIMATED INSTALLATION TIMELINE PRE-INSTALLATION TASK EST. TIME DISTRIBUTOR & CUSTOMER DETERMINE LOCATION TO INSTALL EQUIPMENT 1 HR PLUMBER INSTALL WATER SUPPLY LINE 4 HR ELECTRICIAN INSTALL ELECTRICAL SUPPLY LINE 4 HR TECHNICIAN LABEL ALL CONTROLLER RELAYS AT CONTROLLER 1 HR TECHNICIAN RUN SOLUTION AND AIR LINES (IF NECESSARY) -
Page 6: Unpacking
Inspect the shipment for any damage or missing components. Please call us immediately at 952-808-3640 if either occurs. • If pumps are included with order, utilize proper lifting technique and mechanical assistance if necessary. 6 | © Sonny’s CarWash Backroom by Hydra-Flex, Inc. 2022... -
Page 7: Location Layouts & Mounting
INSTALLATION INSTRUCTIONS 2. LOCATION LAYOUTS & MOUNTING • If location has not been identified during the Pre-Installation Process, make sure to consider the system’s proximity to feed water, power supply, and the control cabinet, as well as space near the system to store chemical containers. - Page 8 2 PANELS, 2 20GPM GRUNDFOS PUMPS 5” 8” 12” 8” 28” 28” 6” 4” 6” 15” 5” 41” 41” 52” 44” 10” 14” 10” 108” Total Width 108 Total Width 3/30/2021 8 | © Sonny’s CarWash Backroom by Hydra-Flex, Inc. 2022...
-
Page 9: Grundfos Pump Installation
INSTALLATION INSTRUCTIONS 3 PANELS, 2 20GPM GRUNDFOS PUMPS 14” Additional 13” 5” 5” Disconnect 8” 6” 12” 9” 8” 7” 8” 28” 28” 27” 6” 3” 17” 4” 41” 28” 10” 10” 10” 27” 10” 52” 142” Total Width 4/1/2021 3. -
Page 10: Gpm Grundfos With Integrated Vfd Installation Instructions
20 GPM GRUNDFOS WITH INTEGRATED VFD INSTALLATION INSTRUCTIONS 20 GPM GRUNDFOS WITH INTEGRATED VFD CONT. 29” 11” 33” Top Of Pump Mount 44” 26” 44” Main Water Inlet 952-808-3640 • www.hydraflexinc.com RevD0422_4000230 10 | © Sonny’s CarWash Backroom by Hydra-Flex, Inc. 2022... - Page 11 INSTALLATION INSTRUCTIONS 20 GPM GRUNDFOS WITH INTEGRATED VFD INSTALLATION INSTRUCTIONS 20 GPM GRUNDFOS WITH INTEGRATED VFD PLUMBING BOX(ES) PLUMBING BOX(ES) Contains: (1) Plug. Note all of these parts may not be needed depending on your system configuration. Contains: Inlet Filter Plumbing Kit. STEP 1 If attaching your pump to a concrete wall: Decide where you want your pump to be located and secure to wall using...
-
Page 12: Gpm Grundfos With Integrated Vfd Installation Instructions
VFD). Using the Inlet Plumbing Box 1, using pipe clamps provided (or hard plumb into filter). thread in part A and tighten. Then place rubber gasket in the groove on part A. 952-808-3640 • www.hydraflexinc.com 4000231_RevF0422 12 | © Sonny’s CarWash Backroom by Hydra-Flex, Inc. 2022... - Page 13 INSTALLATION INSTRUCTIONS 40 GPM GRUNDFOS WITH INTEGRATED VFD INSTALLATION INSTRUCTIONS 40 GPM GRUNDFOS WITH INTEGRATED VFD CONT. PHOTO 1 STEP 7 Remove (3) plugs from pump. STEP 5 Thread outlet manifold into the outlet of the pump and tighten until the manifold is oriented as shown in Photo 1. STEP 8 Connect pump to electrical supply.
- Page 14 NOTE: Some water will spray out of vent cap, so we recommend having a bucket handy. 5. Open ball valve to Aqua-Lab manifold inlet. STEP 10 Open ball valve to Aqua-Lab manifold inlet. 952-808-3640 • www.hydraflexinc.com 4000231_RevF0422 14 | © Sonny’s CarWash Backroom by Hydra-Flex, Inc. 2022...
-
Page 15: Panel Installation
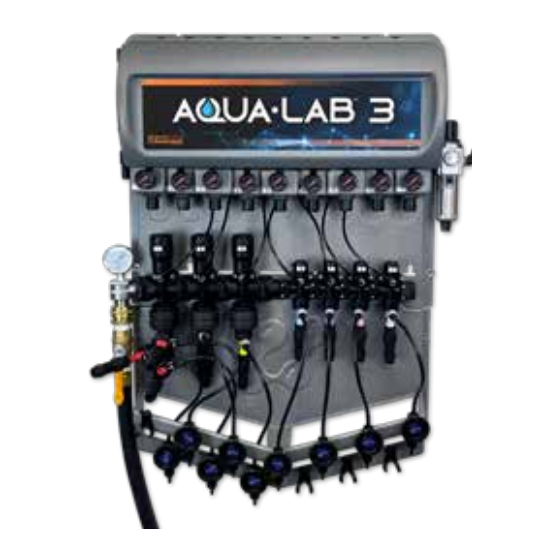
INSTALLATION INSTRUCTIONS 4. PANEL INSTALLATION • We highly recommend mounting your main panel 32” from floor to the base of the panel for easy injector access. • For easier installation, remove the door during install. Be sure to replace door when finished mounting the panel. -
Page 16: Electrical Connections
Quick Connect connection out and then from here the pump is on (input) goes to the next panel or pump. Always ending with the pump. (output) Home Run Cable to MCC 16 | © Sonny’s CarWash Backroom by Hydra-Flex, Inc. 2022... -
Page 17: Wiring Diagrams
INSTALLATION INSTRUCTIONS WIRING DIAGRAMS Ethernet Cable 3 Phase Power Cable 24 DC Power Cable Data Line Cable Home Run Cable 3 Phase Power Cable Node Power Cable Data Line (Black cable comes from the (24 VDC) Cable main supply & the gray is the (Can be gray or black) (Modbus) quick connect to the pump) - Page 18 Continue for remainder of panels ending with the pump. 2 PANELS, 1 PUMP ALFRED DISCONNECT GATEWAY BOX W/ POWER 3 PHASE SITE VOLTAGE 24VDC 4A START 230/460V 18 | © Sonny’s CarWash Backroom by Hydra-Flex, Inc. 2022...
- Page 19 INSTALLATION INSTRUCTIONS 2 PANELS, 2 PUMPS ALFRED DISCONNECT GATEWAY BOX W/ POWER DISCONNECT BOX (for added pump) 3 PHASE 3 PHASE SITE VOLTAGE SITE VOLTAGE START 24VDC 4A 230/460V 3 PANELS, 2 PUMPS ALFRED DISCONNECT GATEWAY BOX W/ POWER DISCONNECT BOX (for added pump) 3 PHASE 3 PHASE...
-
Page 20: Solutions Connections
Note: Occasionally, if all three regulators are pre-set too high, you may need to lower all three regulators to their lowest setting and then turn them up to the desired pressure. 20 | © Sonny’s CarWash Backroom by Hydra-Flex, Inc. 2022... -
Page 21: Optimizing The System
INSTALLATION INSTRUCTIONS OPTIMIZING THE SYSTEM Consistently achieve the desired cleaning and presentation/performance using the least amount of chemical and water. INJECTORS VS. METERING TIPS & VERSADIAL VS. NOZZLES The key to optimizing the system is through trial and error. Don’t be afraid to try these steps to achieve your ideal performance. -
Page 22: Alfred Gateway Installation
LED activity visible on the top of the board. You can verify basic network connectivity by seeing yellow and green LED activity on the bottom of the board near where the Ethernet cable is connected. 22 | © Sonny’s CarWash Backroom by Hydra-Flex, Inc. 2022... - Page 23 INSTALLATION INSTRUCTIONS BEFORE RUNNING THE ALFRED SETUP TOOL: The Gateway needs to have been successfully connected to the internet for at least 15 minutes so that the latest Gateway code can be automatically installed. ALFRED SETUP TOOL • This tool will configure your new Aqua-Lab 3 and send that configuration to the cloud, which will enable Alfred functionality.
- Page 24 The Alfred Gateway is able to be padlocked to increase physical security • Keep network-connected device software up to date • Hydra-Flex securely updates the Alfred Gateway via Microsoft’s Azure loT Edge plaform 24 | © Sonny’s CarWash Backroom by Hydra-Flex, Inc. 2022...
- Page 25 INSTALLATION INSTRUCTIONS Aqua-Lab 3 - PANEL PARTS DIAGRAM & LIST ™ NUMBER PART NAME PART NUMBER Single MAM Valve Replacement 1002505 Single BAM Valve Replacement 1002216 MAM Valve Repair Kit 1002752 BAM Valve Repair Kit 1002223 MAM O-Ring Repair Kit 1002751 BAM O-Ring Repair Kit 1002222...
-
Page 26: Grundfos Pump With Integrated Vfd Parts & Diagram List
Pressure Transducer 40 GPM Grundfos integrated VFD 1003101 Replacement strainer 20 GPM Grundfos 1003102 Pressure Transducer 20 GPM Grundfos 3001705 47 (Not Shown) Grundfos O-ring kit 1003104 Shop Parts & Accessories online: www.hydraflexinc.com/chemical-dispensing-parts-accessories/ 26 | © Sonny’s CarWash Backroom by Hydra-Flex, Inc. 2022... -
Page 27: Grundfos Fault Finding
INSTALLATION INSTRUCTIONS GRUNDFOS PUMP FAULT FINDING General information 1. Check the main supply to the pump. 2. Read fault messages via means of Grundfos Eye, Grundfos GO Remote, PC Tool or R100. Note: Make a copy of motor settings. 3. If possible, test if the motor can run without load. Remove the coupling to the pump (if possible) and set the operating signal to max. - Page 28 Soft pressure buildup, timeout a) Check the system for leakages. (215) 1. The system has been in the mode “soft pressure buildup” longer than the set time limit. 28 | © Sonny’s CarWash Backroom by Hydra-Flex, Inc. 2022...
- Page 29 INSTALLATION INSTRUCTIONS Grundfos Eye Condition/Cause Remedy Replace motor bearings (30) a) Follow the instructions for the pump. See section 7.12 Replacing the bearings. 1. The bearings must be replaced. Internal sensor fault (88) a) Check that the plug and cable are connected correctly to the sensor.
-
Page 30: Troubleshooting
System won’t regulate up to Ensure good connections or replace cable. or damaged 200 PSI Press power button, ensure power button icon is not Power button was hit the screen 30 | © Sonny’s CarWash Backroom by Hydra-Flex, Inc. 2022... - Page 31 Valves are not actuating improperly connected If green light goes on for a valve but valve does not Valve failure actuate, please contact Hydra-Flex Panel is not powered (white light Ensure that there is a power cable properly connected not visible on manifold)
- Page 32 32 | © Sonny’s Backroom by Hydra-Flex, Inc. 2022...
-
Page 33: Appendix
APPENDIX APPENDIX INJECTOR OPTIMIZATION TOOL BACKGROUND This tool is for initial setup and troubleshooting of Chem-Flex™ Injectors and an Aqua-Lab 3 Chemical Dispensing System. In order for the injector to work properly and draw chemical, this gauge must be “GREEN” in the section when installed immediately after an injector that is running. -
Page 34: Injector Vacuum Check
Due to the lower water usage determined by the injector of the Aqua-Lab 3, you will need to match the flow of the application device to the injector. • Setup the nozzle spray patterns to “paint” the car - slightly overlapping each other. 34 | © Sonny’s CarWash Backroom by Hydra-Flex, Inc. 2022... -
Page 35: Chemical Usage Measuring
APPENDIX MINIMUM NUMBER OF NOZZLES NECESSARY WITHOUT FOAMING AIR (Assuming <10 PSI line loss and ~ 40 PSI at the nozzle) SPRAY NOZZLE SIZE # 2.0 # 3.0 # 4.0 # 5.0 # 6.0 # 7.0 # 8.0 # 9.0 # 10.0 0.25 0.50... -
Page 36: Recommended Maintenance
5. Insert spring (B) into valve housing (2). 6. Thread end cap (A) back into valve housing. Use adjustable wrench to snug tight (DO NOT OVERTIGHTEN). Recommend replacing every 300,000 cycles. 36 | © Sonny’s CarWash Backroom by Hydra-Flex, Inc. 2022... -
Page 37: Recommended Setup Starting Points
APPENDIX RECOMMENDED SETUP STARTING POINTS For optimal performance, match the flow of the injector to the flow of the nozzles or applicator. This may involve changing nozzles and/or removing or plugging some ports. See below for recommended set up starting points. APPLICATOR INJECTOR(S) PART NUMBER/COLOR Scent Dispenser... -
Page 38: Composite Chem-Flex Injector Part Numbers
Up to 250 PSI (17 bar) Maximum Wrench Torque (PC2) Hand-tighten only (30 in-lbs) Temperature Range 33°F - 140°F (.5°C - 60°C) Maximum Wrench Torque (PC3) Hand-tighten only (60 in-lbs) 38 | © Sonny’s CarWash Backroom by Hydra-Flex, Inc. 2022... - Page 39 APPENDIX www.SonnysDirect.com | 39...
-
Page 40: Versadial™ Chem-Flex Injector Part Numbers
Maximum Wrench Torque (PC2) Hand Tighten Only (30 in-lbs) Maximum Wrench Torque (PC3) Hand Tighten Only (60 in-lbs) PC2 Inlet/Outlet Connection PC2 x 3/8” MNPT PC3 Inlet/Outlet Connection PC3 x 3/4” MNPT 40 | © Sonny’s CarWash Backroom by Hydra-Flex, Inc. 2022... -
Page 41: Pressure Loss In Run Length
APPENDIX PRESSURE LOSS IN RUN LENGTH GREEN = GOOD YELLOW= USE CAUTION RED = NOT RECOMMENDED All solution line tubing should be selected for 10 PSI or less of pressure loss. • 20 PSI pressure loss may be acceptable depending upon nozzle sizing, foamers, check valves, and other line restrictions present in application. -
Page 42: Warranty
Alfred Gateway) to be free from defect in material or workmanship under proper normal use for a period of one (1) year beginning the date of purchase. Hydra-Flex, Inc. warrants the Grundfos pumps to be free from manufacturers defect under proper normal use for a period of two (2) years beginning the date of purchase. - Page 43 www.SonnysDirect.com | 43...
- Page 44 8401 Eagle Creek Parkway, Savage MN 55378 952.808.3640 | www.hydraflexinc.com...
Need help?
Do you have a question about the Sonny's CarWash Backroom Aqua-Lab 3 and is the answer not in the manual?
Questions and answers