
Subscribe to Our Youtube Channel
Related Manuals for Opera FONDA 800


Summary of Contents for Opera FONDA 800
- Page 1 FONDA 800-830-900 Installationshandbuch Installation manual Montagehandleiding Istruzioni per il montaggio Instrucciones de montaje Installation manual Instructions de montage...
- Page 3 Sehr geehrte Kundin, sehr geehrter Kunde - Die Installation, insbesondere für den Abluftbetrieb, darf nur durch autorisiertes Fachpersonal durchgeführt bzw. überprüft werden. - Für einen sicheren Abluftbetrieb sollte unbedingt ein Fensterkontakt mit DIBt-Zulassung verwendet werden. (ist bereits in manchen Bundesländern Pflicht) Falls ihr Dunstabzug keinen Fensterkontakt-Anschluss besitzt, muss zusätzlich ein Stromzufuhr-Unterbrecher installiert werden.
- Page 4 SEITE...
- Page 7 Bevor die Dunstabzugshaube unser Werk verlässt wird diese vor Versand von unse- rer Qualitätskontrolle einen ausführlichem Funktionstest unterzogen an dem sämtliche Funktionen getestet werden. Die auf den Bedienungs.– Montageanleitungen dargestellten Bilder, Zeichnungen und Modelle können von dem gelieferten Modell abweichen bzw. können Optionen enthalten die nicht im Lieferumfang enthalten sind.
- Page 14 Vorderansicht Netzanschluss Kochfeld Kabellänge ~ 1300 mm Seitenansicht...
- Page 15 Draufsicht Netzanschluss Kochfeld Kabellänge ~ 1300 mm...
- Page 16 Vorderansicht Netzanschluss Kochfeld Kabellänge ~ 1300 mm Seitenansicht...
- Page 17 Draufsicht Netzanschluss Kochfeld Kabellänge ~ 1300 mm...
- Page 18 Vorderansicht Netzanschluss Kochfeld Kabellänge ~ 1300 mm Seitenansicht...
- Page 19 Draufsicht Netzanschluss Kochfeld Kabellänge ~ 1300 mm...
- Page 25 Arbeitsplattenstärke 15 - Arbeitsplattenstärke 15 -...
- Page 26 Arbeitsplattenstärke 15 - Arbeitsplattenstärke 15 -...
- Page 27 Arbeitsplattenstärke 15 - Arbeitsplattenstärke 15 -...
- Page 28 Arbeitsplatte...
- Page 29 Arbeitsplatte Hinweis:...
- Page 30 elektrischer Anschluss...
- Page 32 flächenbündiger Einbau“ 2mm Fuge...
- Page 34 (siehe hierzu...
- Page 42 FENSTERKONTAKTSCHALTER ( Abluftbetrieb )
- Page 43 FENSTERKONTAKTSCHALTER ( Abluftbetrieb )
- Page 45 Thank you for choosing a extractor hood. Please carefully read the following information and explanations on the proper use of your new hood before using the appliance for the first time. Please also read our operating and installation instructions as well as the cleaning recommendations to ensure that you enjoy many years of service from your appliance.
-
Page 46: Table Of Contents
TABLE OF CONTENTS WARNING AND SYMBOLS PRELIMINARY REMARKS 1 SAFETY INSTRUCTIONS 2 TECHNICAL DATA, CONNECTION VALUES 3 PRODUCT DESCRIPTION 4 MOUNTING ACCESSORIES SCOPE OF DELIVERY 5 DIMENSIONS 6 ASSEMBLY PREPARATION REQUIREMENTS - WORKTOP 8 INSTALLATION PREREQUISITE ELECTRICAL CONNECTION ASSEMBLY INSTRUCTIONS SWITCH... - Page 47 WARNING NOTICE AND SYMBOLS Warnings in these operating instructions are placed in front of an instruction that may result in personal injury or property damage. Measures to avert a hazard must be observed. WARNING MEANING SIGNS Warning of a danger spot ! Indicates potentially dangerous situations.
-
Page 48: Preliminary Remarks
PRELIMINARY REMARKS Safety instructions Assembly, connection, commissioning and repair may only be carried out by a specialist. This specialist can determine the suitable mounting and exhaust air routing of the cooker hood. The fastening must be suitable for the weight of the cooker hood and the load on the substrate. -
Page 49: Safety Instructions
1. SAFETY INSTRUCTIONS Exhaust air duct (for exhaust air operation) combustion gases can be returned to the room through a negative pressure. The ope- rator must therefore ensure an adequate supply of air at all times. The negative pres- sure in the room must not exceed 4 Pa (0.04mbar). Do not exceed max. duct length of 5m with B-version. -
Page 50: Technical Data, Connection Values
2. TECHNICAL DATA AND CONNECTION VALUES Designation: - Fonda Type: Dimensions: - 8 0 x 5 x 110 mm oltage: Integrated motor: - Airflow: free flow: 900 m³/h - Power: Watt Cooktop: Power: - Voltage: Filter: - 1 ondensation filter - 1 grease filters fine dust / odour filter Control element:... - Page 51 TECHNICAL DATA AND CONNECTION VALUES Designation: - Fonda Type: Dimensions: - 830 x 515 x 110 mm oltage: Integrated motor: - Airflow: free flow: 900 m³/h - Power: Watt Cooktop: Power: - Voltage: Filter: - 1 condensation filter - 1 grease filters fine dust / odour filter Control element: - Touch interface (glass)
- Page 52 TECHNICAL DATA AND CONNECTION VALUES Designation: - Fonda Type: Dimensions: 0 x 5 x 110 mm oltage: Integrated motor: - Airflow: free flow: 900 m³/h - Power: Watt Cooktop: Power: - Voltage: Filter: - 1 piece 355x220x75 mm, condensation filter - 1 piece 218x100x17 mm grease filters piece fine dust / odour filter Control element:...
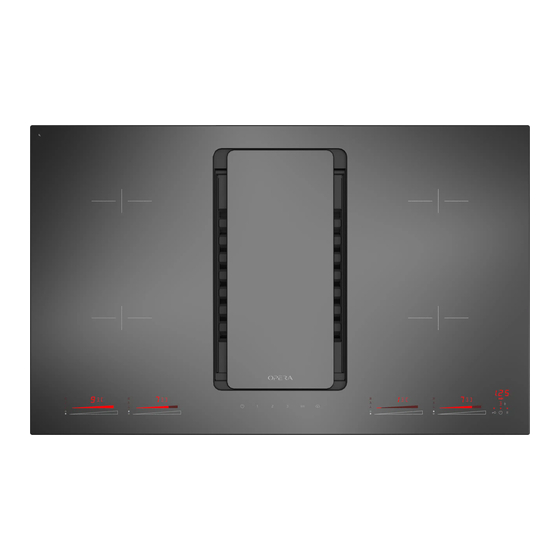
- Page 53 3. PRODUCT DESCRIPTION FONDA B/C-Version Fonda Touch control panel Naber canal (fitting length) Fan motor B/C version Electrical connection hob Electrical supply line for ventilation Control line control panel (1,2 m) Outlet nozzle in air direction Nozzle plate for change of blowing direction Suction silencer Outlet silencer...
-
Page 54: Product Description
PRODUCT DESCRIPTION Safety glass, variably adjustable Condensation filter with tub Grease filters Fine dust / odour filter (C version only) Installation sequence:... - Page 55 4. MOUNTING ACCESSORIES - SCOPE OF DELIVERY- FONDA B/C-Version Fan motor Intake silencer Hob with extractor B/C - Version Cover sheet kit Blow-out silencer Safetyglass B/C - Version Grease filter Condensate filter with tub Fine dust odour filter C - version only Adhesive tape Naber 10 x Sheet metal screws...
- Page 56 5. DIMENSIONS...
-
Page 57: Dimensions
DIMENSIONS... - Page 58 DIMENSIONS...
- Page 59 DIMENSIONS...
- Page 60 DIMENSIONS...
- Page 61 DIMENSIONS...
- Page 62 DIMENSIONS...
- Page 63 DIMENSIONS...
- Page 64 DIMENSIONS ! It is essential to insert the cover ! DETAIL Adjusting the nozzle extension min. - max.: 48 - 515 mm min. - max.: 45 - 48 mm min. - max.: 42 - 45 mm min. - max.: min. - max.: min.
- Page 65 DIMENSIONS Intake silencer silencer Duct terminal changeable...
-
Page 66: Assembly Preparation
6. ASSEMBLY PREPARATION Transport, unpacking, setting up If the device is brought from a cold environment into the operating room, condensati- on may occur. Please wait until the device has reached the correct temperature and is absolutely dry before putting it into operation. The acclimatization time depends on the temperature difference and the device as well as its construction. - Page 67 7. FITTING REQUIREMENT Surfaces flush mounting Cutout for Fonda 8 0 x 5 Surfaces mounting Cutout for Fonda 8...
- Page 68 FITTING REQUIREMENT Surfaces flush mounting Cutout for Fonda 830 x 515 Surfaces mounting Cutout for Fonda 830 x 515...
- Page 69 FITTING REQUIREMENT Surfaces flush mounting Cutout for Fonda 0 x 5 Surfaces mounting Cutout for Fonda 0 x 5...
- Page 70 FITTING REQUIREMENT - Worktop Safety instructions for the kitchen furniture fitter • Veneers, adhesives or plastic coverings of adjacent furniture must be temperature- resistant (min. 75°C). If the veneers and coverings are not sufficiently temperature- resistant, they may deform. • The use of solid wood wall end strips on the worktop behind the hob is permitted, provided that the minimum distances are observed in accordance with the installation sketches.
- Page 71 FITTING REQUIREMENT - Worktop Installation, important notes! must be sealed against the worktop with plastic sealing materials (e.g. Novasil® - Excessive heat development from be- or Ottoseal® ). low, e.g. from a baking oven without Note: cross-flow fan, should be avoided. - If sealing adhesive is used for sealing - If pyrolysis operation takes place at and fixing, a later, non-destructive re-...
- Page 72 WARNING AGAINST ELECTRICAL Connected loads ENERGY! Mains voltage: 380-415 V 2N~, 50/60 Hz THERE IS DANGER TO LIFE! Nominal component voltage: There are voltage-carrying parts near 220-240V ( see instructions hob ) this symbol. Covers marked with this symbol may Connecting cable available at the factory only be removed by a qualified electrici- - The hob is equipped with a tempera-...
- Page 73 ASSEMBLY INSTRUCTION Note : Minimum distances "A" hob - upper cabinet > 600 mm "B" hob - side cabinet > 300mm should be maintained. To avoid water steam damage, we rec- ommend placing a panel behind the wall cupboards. This will prevent accumula- tion of moisture between the cabinets.
- Page 74 9. FITTING INSTRUCTIONS "flush mounting" 5 mm 24 H FOR EXAMPLE: Novasil® or Ottoseal®...
- Page 75 FITTING INSTRUCTIONS 3. PU sealing tape at the mount bearing surfaces all around. Flush mounting also possible in the countersink. Consider the height of the glass plate. Level adjustment if required. Installation instructions for hobs with downdraft fan If t underlay has to be carried out, this underlay must be carried out evenly according to the specification below.
- Page 76 FITTING INSTRUCTIONS 5. Remove front from kitchen block 6. Apply sealing tape to the bearing surfaces 7. Before installation, make sure that the rear sight is set to the correct depth (see Dimension...
- Page 77 FITTING INSTRUCTIONS FRONT BACK...
- Page 78 FITTING INSTRUCTIONS 7. Insert FONDA, align, create silicone joint. 8. Create duct connection...
- Page 79 FITTING INSTRUCTIONS duct length x-30mm sawing to length...
- Page 80 FITTING INSTRUCTIONS 9. Install ventilation duct and motor Fonda Naber Bl ower Ribbon cable...
- Page 81 FITTING INSTRUCTIONS 10. Install silencer 1 / 2 / 3...
- Page 82 FITTING INSTRUCTIONS 11. Install ventilation duct and motor incl. silencer Self-tapping tapping screw Fonda Naber Blower motor incl. silencer Ribbon cable...
- Page 83 FITTING INSTRUCTIONS Electrical connection to be carried out by qualified personnel 1 . Carry out function test! Commissioning After the field has been installed and the supply voltage has been applied (mains connection), a self-test of the controller is carried out first and service information for customer service is displayed.
- Page 84 10. CONTACT WITH WINDOW SWITCH ( exhaust air operation ) Contact opened ! Contact closed ! Operation with closed window Extractor hood operation only with deactivated if suction from Opened window or Exhaust emission possible Supply air duct possible ( e.g. by gas heating or open chimney ) Please note that your gas boiler or open fireplace will produce exhaust gases through convection of the heated exhaust air from your living spaces to the outside.
- Page 85 Connection to the control board of the cooker hood: As shown in the illustration, the connection cable is fixed to the unit surface with a label. For direct connection of a pressure switch or Reed switch on the cooker hood must open when the window is closed. nly potential-free window contact switches.
- Page 86 1 . CLEANING INSTRUCTIONS fter completion of the assembly work we recommend the cleaning of the stain less steel surfaces of the glass . For aluminium surfaces use a soft microfibre cloth. Do not use dry cloths. Use a mild window cleaner and no aggressive, acidic or alkaline cleaners! Do not use abrasive cleaners! 1 .
- Page 87 hartelijk dank voor uw besluit om een -dampkap te kopen! Lees de volgende informatie en uitleg voor een vakkundig gebruik van uw nieuw dampkapmodel van de firma voor de eerste inbedrijfstelling aandachtig. Volg eveneens onze bedieningsen onderhoudshandleiding evenals de daarin vervatte reinigingsaanbevelingen, zodat u lang plezier aan uw toestel heeft.
- Page 88 INHOUDSOPGAVE WAARSCHUWINGEN EN SYMBOLEN 1 VEILIGHEIDSINSTRUCTIES 2 TECHNISCHE GEGEVENS AANSLUITWAARDEN 3 PRODUCTBESCHRIJVING 4 MONTAGETOEBEHOREN LEVERINGSOMVANG VAN DE LEVERING 5 AFMETINGEN TECHNISCHE TEKENINGEN 6 MONTAGEVOORBEREIDING 7 MONTAGEVOORWAARDE - WERKBLAD MONTAGE-INSTRUCTIES MON AGENLOPEN 10 ON-SITE RAAMCONTACTSCHAKELAAR...
- Page 89 WAARSCHUWINGEN EN SYMBOLEN In deze handleiding staan waarschuwingen voor instructies waarbij gevaar voor persoonlijk letsel of schade aan voorwerpen bestaat. Houd u aan de maatregelen om het gevaar te voorkomen. WAAR- STEKEN BETEKENIS SCHUWING Waarschuwing voor een gevaarlijke plek ! Geeft een mogelijk gevaarlijke situatie aan.
- Page 90 1 INLEIDENDE OPMERKINGEN Veiligheidsinstructies Montage, aansluiting, inbedrijfstelling en reparatie mogen alleen door een vakman worden uitgevoerd. Deze specialist kan de geschikte montage en afvoerluchtrouting van de afzuigkap bepalen. De bevestiging moet geschikt zijn voor het gewicht van de afzuigkap en de belasting van de ondergrond. Let op de uittrekwaarden van de meegeleverde deuvels.
- Page 91 1. VEILIGHEIDSINSTRUCTIES Afvoerluchtkanaal (voor luchtafvoerbediening) afzuigkap tijdens de werking van de afzuigkap gelijktijdig met andere ruimteluchtaf- hankelijke haarden (bijv. hout-, gas-, olie- of kolengestookte apparaten) in één ruimte wordt gebruikt, kunnen dodelijke verbrandingsgassen in de ruimte worden teruggevo- erd als gevolg van een daaruit voortvloeiende onderdruk. De exploitant moet daarom te allen tijde voor een toereikende luchttoevoer zorgen.
- Page 92 2. TECHNISCHE GEGEVENS EN AANSLUITWAARDEN Benaming: - Fonda Afmetingen: - 8 0 x 5 x 110mm panning: Geïntegreerde motor: - Luchtvermogen: vrijblazend: 900 m³/h - Vermogen: Watt Kookplaat: ermogen - Spanning Filter: - 1 condensatie filter - 1 vetfilter fijnstof / geurfilter Bedieningselement: - Touch control panel (glas) Verbindingsstuk:...
- Page 93 2. TECHNISCHE GEGEVENS EN AANSLUITWAARDEN Benaming: - Fonda Afmetingen: - 8 0 x 5 x 110mm panning: Geïntegreerde motor: - Luchtvermogen: vrijblazend: 900 m³/h - Vermogen: Watt Kookplaat: ermogen - Spanning Filter: - 1 condensatie filter - 1 vetfilter fijnstof / geurfilter Bedieningselement: - Touch control panel (glas) Verbindingsstuk:...
- Page 94 2. TECHNISCHE GEGEVENS EN AANSLUITWAARDEN Benaming: - Fonda Afmetingen: 0 x 5 x 110mm panning: Geïntegreerde motor: - Luchtvermogen: vrijblazend: 900 m³/h - Vermogen: Watt Kookplaat: ermogen - Spanning Filter: - 1 condensatie filter - 1 vetfilter fijnstof / geurfilter Bedieningselement: - Touch control panel (glas) Verbindingsstuk:...
- Page 95 3. PRODUCTOMSCHRIJVING FONDA B/C versie Fonda Aanraakbedieningspaneel Naberkanaal (inbouwlengte) Ventilatormotor B/C versie Elektrische aansluitkookplaat Elektrische toevoerleiding voor ventilatie Bedieningspaneel (1,2m) Uitlaatmondstuk in luchtrichting Nozzle plaat voor verandering van Zuiggeluiddemper Uitlaatdemper...
- Page 96 3. PRODUCTOMSCHRIJVING Veiligheidsglas, variabel instelbaar Condensatiefilter met kuip Vetfilter Fijnstof / geurfilter (alleen C-versie) Installatievolgorde...
- Page 97 LEVERINGSOMVANG - FONDA B/C versie 4. MONTAGETOEBEHOREN - Kookplaat met geïntegreerde Ventilatormotor Aanzuiggeluiddemper afzuiging B+C-versie Uitblaasgeluiddemper Veiligheidsglas Afdekplaten kit B+C-versie Condensaatfilter met trog Vetfilter Fijnstof geurfilter alleen C-versie Tape 10 x zelftappende schroef Naber-kanaal PU-schuimband...
- Page 98 5. DIMENSIE...
- Page 99 DIMENSIE...
- Page 100 DIMENSIE...
- Page 101 DIMENSIE...
- Page 102 DIMENSIE...
- Page 103 DIMENSIE...
- Page 104 DIMENSIE...
- Page 105 DIMENSIE...
- Page 106 DIMENSIE ! Het is van essentieel belang om de afdekking te plaatsen ! Instellen van het verlengstuk van de sproeier...
- Page 107 DIMENSIE kanaalverbinding omwisselbaar...
- Page 108 6. MONTAGEVOORBEREIDING Als het apparaat vanuit een koude omgeving in de operatiekamer wordt gebracht, kan condensatie optreden. Wacht tot het apparaat de juiste temperatuur heeft bereikt en absoluut droog is voordat u het in gebruik neemt. De acclimatisatietijd is afhankelijk van het temperatuurverschil en het apparaat en de constructie.
- Page 109 7. ASSEMBLAGEVOORWAARDE Inbouwmontage Uitsparing voor de Fonda 8 0 x 5 Uitsparing voor de Fonda...
- Page 110 ASSEMBLAGEVOORWAARDE Inbouwmontage Uitsparing voor de Fonda 8 Uitsparing voor de Fonda...
- Page 111 ASSEMBLAGEVOORWAARDE Inbouwmontage Uitsparing voor de Fonda Uitsparing voor de Fonda...
- Page 112 - Werkblad Veiligheidsinstructies voor de installateur van het keukenmeubilair - Fineer, kleefstoffen of kunststof bekledingen van aangrenzende meubels moeten temperatuurbestendig zijn (min. 75°C). Als het fineer en de bekledingen niet voldoende temperatuurbestendig zijn, kunnen ze vervormen. - De bescherming tegen onbedoeld contact moet door de installatie worden gewaarborgd.
- Page 113 - Werkblad Installatie, belangrijke opmerkingen! - Als de kookplaat in een ongelijkmatig werkblad wordt geïnstalleerd, bijv. - Vermijd overmatige warmteontwikke- met een keramische of soortgelijke ling van onderen, bijv. uit een bekleding (tegels, enz.), moet het bakoven zonder kruisstroomventila- kookoppervlak tegen het werkblad tor.
- Page 114 Aangesloten belastingen WAARSCHUWING TEGEN ELEKTRISCHEENERGIE!ER IS Netspanning: 380-415V 2N~, 50/60Hz GEVAAR VOOR HET LEVEN! Er zijn levende delen in de buurt van dit Nominale component spanning: symbool. Afdekkingen met dit symbool 220-240V ( zie handleiding mogen alleen door een gekwalificeerde kookplaat ) elektricien worden verwijderd.
- Page 115 Opmerking : houd rekening met mini- male afstanden - "A". Kookplaat - bovenkast> 600 mm "B". Kookplaat - zijkast> 300 mm Om vochtschade te voorkomen, raden we aan een zijpaneel onder de boven- kasten te plaatsen. Dit voorkomt dat er vocht tussen de kasten ontstaat.
- Page 116 " " 5 mm 24 H VOORBEELD: Novasil® of Ottoseal®...
- Page 117 3. PU-afdichtingstape voor het aanbrengen Met verzonken montage ook mogelijk in de verzinkbodem. Houd rekening met de hoogte van de glasplaat. Niveau-aanpassing indien nodig. Montagehandleiding voor kookplaten met afzuigventilator Het frezen moet na montage van het werkblad op vlakheid worden gecontroleerd. Indien er behoefte is aan ondervloer, dient deze ondervloer egaal uitgevoerd te worden volgens onderstaande specificatie.
- Page 118 5. Verwijder de voorkant van het keukenblok 6. Breng afdichtband aan op de contactvlakken 7. Controleer voor de installatie of het zicht naar achteren op de juiste diepte is ingesteld (zie Meten...
- Page 119 FRONT BACK...
- Page 120 7. FONDA inbrengen, uitlijnen, siliconenvoeg maken 8. Kanaalverbinding maken...
- Page 121 Kanaallengte x-30mm zaag tot lengte...
- Page 122 9. Ventilatiekanaal en motor installeren Fonda Naber Ventilatormotor Lintkabels...
- Page 123 10. Geluiddemper installeren 1 / 2 / 3...
- Page 124 11. Ventilatiekanaal en motor incl. geluiddemper installeren Zelftappende tapschroef Fonda Naber Ventilatormotor incl. geluiddemper Lintkabelser...
- Page 125 11. Elektrische aansluiting door gekwalificeerd personeel 12. Functietest uitvoeren!! nbedrijfstelling Nadat het veld is geïnstalleerd en de voe- dingsspanning is aangebracht (netaansluiting), wordt eerst een zelftest van de regelaar uitgevoerd en wordt ser- viceinformatie voor de klantenservice ver- strekt wordt weergegeven. Belangrijk: Er mogen zich geen voorwerpen op de toetsen van de Touch-Control-sensor bevinden om op het lichtnet aan te sluiten!
- Page 126 (werking van de afvoerlucht) Contact open ! Contact gesloten ! Bediening met gesloten raam Rookgasafzuiging alleen in combinatie met gedeactiveerd als de afzuiging van Geopend venster of Uitlaatgasemissie mogelijk Luchttoevoerleiding mogelijk. ( bv. door middel van gasverwarming of open vuur ) Houd er rekening mee dat uw gasketel of open haard uitlaatgassen produceert door middel van convectie van de verwarmde afvoerlucht van de leefruimtes naar buiten.
- Page 127 (werking van de afvoerlucht) Aansluiting op het bedieningspaneel van de afzuigkap: Zoals op de afbeelding is te zien, is de aansluitkabel met een label aan het oppervlak van het apparaat bevestigd. Voor directe aansluiting van een drukschakelaar of De Reed-schakelaar op de afzuigkap moet opengaan wanneer het raam gesloten is.
- Page 128 REINIGING 1 . REINIGINGSINSTRUCTIES Gebruik voor aluminium oppervlakken een zachte microvezeldoek. Gebruik geen droge doeken. Gebruik een milde ruitenreiniger en geen agressieve, zure of alkalische reinigingsmiddelen! Gebruik geen schurende reinigingsmiddelen! erpakking De verpakking van de afzuigkap is recyclebaar. Als verpakkingsmateriaal worden karton en polyethyleenfolie (PE) gebruikt.
- Page 129 Gentile Cliente, La ringraziamo per aver scelto una cappa aspirante > L'installazione, in particolare per il funzionamento dell'aria di scarico, può essere > Per un funzionamento sicuro dell'aria di scarico, è necessario installare un contatto e la cappa non è dotata di un collegamento di contatto con la finestra, è necessario installare inoltre una possono essere installati degli interruttori di alimentazione.
- Page 130 PAGINA...
- Page 131 AVVERTENZE E SIMBOLI SEGNALE SIGNIFICATO PERICOLO Avviso di pericolo - punto pericoloso ! Avviso di pericolo - tensione elettrica pericolosa ! Avviso di pericolo - superficie molto calda ! Avviso di pericolo - lesioni alle mani ! Avviso di pericolo - sostanze nocive ! Avviso di pericolo - sostanze combustibili ! Avviso di pericolo - lesioni da taglio dovuto alla rottura del vetro !
- Page 132 Istruzioni di sicurezza Pericolo di lesioni ! Pericolo di scosse elettriche !
- Page 133 Condotto del l'aria di scarico (per il funzionamento del l'aria di scarico) Caminetto per combustibili solidi Impianto Prima di lasciare il nostro stabilimento, la cappa viene sottoposta ad un dettagliato test di funziona- mento da parte del nostro reparto di controllo qualità prima della spedizione. Tutte le funzioni vengono testate su questo test.
- Page 139 B B / / C C - - DOTAZIONE DI FORNITURA - DOTAZIONE DI FORNITURA...
- Page 140 vista frontale Piano cottura con collegamento alla rete elettrica Lunghezza cavo ~ 1300 mm vista laterale...
- Page 141 disegno Piano cottura con collegamento alla rete elettrica Lunghezza cavo ~ 1300 mm...
- Page 142 vista frontale Piano cottura con collegamento alla rete elettrica Lunghezza cavo ~ 1300 mm vista laterale...
- Page 143 disegno Piano cottura con collegamento alla rete elettrica Lunghezza cavo ~ 1300 mm...
- Page 144 vista frontale Piano cottura con collegamento alla rete elettrica Lunghezza cavo ~ 1300 mm vista laterale...
- Page 145 disegno Piano cottura con collegamento alla rete elettrica Lunghezza cavo ~ 1300 mm...
- Page 148 ! E' indispensabile inserire il coperchio !
- Page 151 Montaggio ad incasso Ritaglio per Fonda 8 0 x 5 Spessore piano 15 - Montaggio Ritaglio per Fonda 8 0 x 5 Spessore piano 15 -...
- Page 152 Montaggio ad incasso Ritaglio per Fonda 830 x 515 Spessore piano 15 - Montaggio Ritaglio per Fonda 830 x 515 Spessore piano 15 -...
- Page 153 Montaggio ad incasso Ritaglio per Fonda 0 x 5 Spessore piano 15 - Montaggio Ritaglio per Fonda 0 x 5 Spessore piano 15 -...
- Page 154 Istruzioni di sicurezza per l'installatore di mobili da cucina Aerazione...
- Page 155 Installazione, note importanti! Taglio del piano di lavoro Apertura scarico dell'aria Guarnizione per piano cottura...
- Page 156 AVVERTIMENTO CONTRO L'IMPIANTO ELETTRICO ENERGIA!C'È PERICOLO DI VITA! Cavo di collegamento disponibile in fabbrica...
- Page 157 Nota...
- Page 158 5 mm 24 H 2mm spaccatura...
- Page 159 4. Istruzioni per l'installazione per piani on ventilatore downdraft ! Non ci assumiamo alcuna responsabilità per piani cottura posizionati in modo errato !
- Page 161 FRONTE RETRO...
- Page 163 Tagliare la lunghezza del canale X-30 mm a misura...
- Page 165 1 / 2 / 3...
- Page 167 Messa in servizio...
- Page 168 Descrizione del funzionamento: Il comando della cappa è dotato di un circuito di contatto finestra. Il contatto deve essere chiuso quando la finestra è aperta!
- Page 169 Collegamento alla scheda di comando della cappa: olo interruttori a contatto finestra a potenziale zero. Attenzione : Osservare le istruzioni e far confermare l'esecuzione da parte dell'azien-da specializzata al termine dell'installazione!
- Page 170 mballaggio Cappa aspirante...
- Page 171 Especialista en instalación Nombre del empleado: Fecha: Especialista en aceptación: Nombre del empleado: Fecha:...
- Page 174 indicaciones de seguridad Peligro de lesiones! Peligro de descarga eléctrica...
- Page 175 Conducto de aire de escape (para el funcionamiento con aire de escape) Chimenea para combustibles sólidos olocación...
- Page 181 - ALCANCE DE SUMINISTRO - FONDA B/C-Variante...
- Page 190 ! Es imprescindible colocar la tapa!
- Page 193 Montaje empotrado Montaje del accesorio...
- Page 194 Montaje empotrado Montaje del accesorio...
- Page 195 Montaje empotrado Montaje del accesorio...
- Page 196 Indicaciones de seguridad para el montador de muebles de cocina ción...
- Page 197 Instalación, notas importantes! Desconexión de la encimera unta de cocción Aire de escape - abertura de salida...
- Page 198 Tensión de red: 380-415V 2N~, 50/60Hz Tensión nominal del componente: 220-240V...
- Page 200 5 mm...
- Page 203 AL FRENTE...
- Page 210 Descripción funcional:...
- Page 211 Conexión a la tarjeta de control de la campana extractora:...
- Page 212 Empaquetado Campana extractora...
- Page 213 Nous vous remercions pour l’achat de votre hotte aspirante Spécialiste de l'installation : Nom de l'employé : Date: Spécialiste de l'acceptation : Nom de l'employé : Date:...
- Page 215 ET SYMBOLES SIGNAL DE AVERTIS- SIGNIFICATION SEMENT Mise en garde contre un endroit dangereux ! Mise en garde contre une tension électrique dangereuse ! Mise en garde contre une surface chaude ! Avertissement relatif au risque de blessures aux mains ! Mise en garde contre les substances toxiques ! Mise en garde contre les substances inflammables ! Mise en garde contre les coupures dues à...
- Page 216 Consignes de sécurité Risque de blessure ! Risque d'électrocution !
- Page 217 Conduit d'évacuation d'air (pour le fonctionnement de l'air évacué) eminée pour combustibles solides nstallation...
- Page 218 CARACTÉRISTIQUES TECHNIQUES ET VALEURS DE RACCORDEMENT...
- Page 219 CARACTÉRISTIQUES TECHNIQUES ET VALEURS DE RACCORDEMENT...
- Page 220 CARACTÉRISTIQUES TECHNIQUES ET VALEURS DE RACCORDEMENT...
- Page 223 ÉTENDUE DE LA LIVRAISON - FONDA B/C-Mouture...
- Page 232 ! Il est indispensable d'insérer le couvercle ! D TAIL...
- Page 234 Transport, déballage, mise en place...
- Page 235 Montage encastré Découpe pour Fonda 8 0 x 5 Montage Découpe pour Fonda 8 0 x 5...
- Page 236 Montage encastré Découpe pour Fonda 830 x 515 Montage Découpe pour Fonda 830 x 515...
- Page 237 Montage encastré Découpe pour Fonda 0 x 5 Montage Découpe pour Fonda...
- Page 238 Consignes de sécurité pour l'installateur de meubles de cuisine Ventilation...
- Page 239 écoupe du plan de travail oint de table de cuisson Air d'échappement - ouverture de sortie...
- Page 240 MISE EN GARDE CONTRE LES RISQUES D'ÉLECTROCUTION ÉNERGIE ! IL Y A DANGER POUR LA VIE !
- Page 241 Remarque...
- Page 242 5 mm...
- Page 243 Instructions d'installation pour les tables de cuisson avec ventila ! Nous déclinons toute responsabilité pour les plaques de cuisson mal placées !
- Page 244 Dimension...
- Page 245 À L'AVANT À L'ARRIÈRE...
- Page 247 Coupez la longueur du canal X-30mm sur mesure...
- Page 249 1 / 2 / 3...
- Page 251 Mise en service...
- Page 252 INTERRUPTEUR DE CONTACT DE FENÊTRE SUR SITE (FONCTIONNEMENT DE L'AIR ÉVACUÉ) Le contact doit être fermé lorsque la fenêtre est ouverte !
- Page 253 INTERRUPTEUR DE CONTACT DE FENÊTRE SUR SITE (FONCTIONNEMENT DE L'AIR ÉVACUÉ) Raccordement au tableau de commande de la hotte aspirante : Attention :...
- Page 254 Empaquetage Hotte aspirante...
- Page 259 Product codes DFO80A120 DFO80A121 DFO80A140 DFO80A141 DFO80B120 DFO80B121 DFO80B140 DFO80B141 DFO80C120 DFO80C121 DFO80C140 DFO80C141 DFO83A120 DFO83A121 DFO83A140 DFO83A141 DFO83B120 DFO830B121 DFO83B140 DFO83B141 DFO83C120 DFO83C121 DFO83C140 DFO83C141 DFO90A120 DFO90A121 DFO90A140 DFO90A141 DFO90B120 DFO900B121 DFO90B140 DFO90B141 DFO90C120 DFO90C121 DFO90C140 DFO90C141...
- Page 260 OPERA Hausgeräte GmbH Unterm Wolfsberg 9/9a 75177, Pforzheim - Germany +49 (0)7231-1677265 info@operahsg.de operahsg.com...
Need help?
Do you have a question about the FONDA 800 and is the answer not in the manual?
Questions and answers