Table of Contents
Advertisement
Quick Links
ORDER NO. EMID0006010C0
A5
PCM KEYBOARD
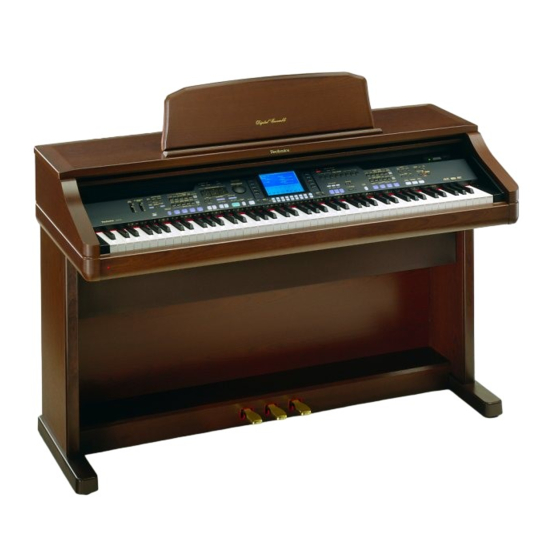
SX-PR703 / SX-PR703M
(P) U.S.A., Mexico
(PC) Canada
(EX) Norway, Sweden, Denmark, Finland, Spain, Portugal, South
Africa
(EF) France
(EZ) Germany
(EG) Switzerland, Italy, Austria, Holland, Belgium
(EB) the United Kingdom
(GN) Australia, New Zealand
(XS) Malaysia, Singapore
(XT) Taiwan
(X) Thailand, Columbia, Panama, Chile, Brazil, Philippines,
Venezuela, Ecuador
(XA) Argentina
(XD) Saudi Arabia, Hong Kong, Kuwait
SPECIFICATIONS
1
Advertisement
Table of Contents

Related Manuals for Panasonic SX-PR703


Summary of Contents for Panasonic SX-PR703
- Page 1 ORDER NO. EMID0006010C0 PCM KEYBOARD SX-PR703 / SX-PR703M (P) U.S.A., Mexico (PC) Canada (EX) Norway, Sweden, Denmark, Finland, Spain, Portugal, South Africa (EF) France (EZ) Germany (EG) Switzerland, Italy, Austria, Holland, Belgium (EB) the United Kingdom (GN) Australia, New Zealand...
-
Page 2: Specifications
SPECIFICATIONS 88 KEYS KEYBOARD SOUND GENERATOR 64 NOTES MAX. POLYPHONY SOUNDS NUMBER OF SOUNDS: 1009 SOUNDS + 33 DRUM KITS + 2 DIGITAL DRAWBARS PIANO GROUP: GRAND, UPRIGHT, ELECTRIC, MODERN SOUND GROUP: GUITAR & HARPSI, STRINGS, BRASS, VOCAL, SAX & WOODWIND, ORGAN &... - Page 3 MODE: BASIC, ADVANCED 1, AUTO PLAY CHORD ADVANCED 2, PIANIST ON BASS, CHORD FINDER, LEFT HOLD Supported MUSIC STYLE ARRANGER Supported SOUND ARRANGER Supported PIANO STYLIST Supported ONE TOUCH PLAY Supported TECHNI-CHORD 3 BANKS × 8, SET, NEXT PANEL MEMORY BANK, BANK VIEW SEQUENCER 16 TRACKS...
- Page 4 Supported DEMO PHONES × 2, LINE OUT (R/R+ TERMINALS L,L), AUX IN (R/R+L,L), COMPUTER, MIDI (IN, OUT, THRU), PEDAL IN Supported (MIC REVERB & MIC INPUT EFFECT) 120 W (60 W × 2) OUTPUT 16 cm × 2, 6.5cm × 2, MONITOR SPEAKERS SPEAKER ×...
-
Page 5: Safety Precaution
electric switch, electrical cord, noise-prevention condenser, etc.), wind the lead wire and secure it by soldering. 5. Do not let the wiring come into contact with heat-emitting devices (fuse resistor, radiator plate, etc.). 6. When replacing the wiring, make sure that it is not in contact with the unfinished or rough edge of a part. - Page 6 2. Turn on the power switch. 3. Measure the resistance value with an ohmmeter between the jumpered AC plug and each exposed metal cabinet part, such as screw heads, connectors, control shafts, handle brackets, etc. Measurements should range from 4 M Ohm to infinity for all exposed parts.
- Page 7 3. Place the piano body - Place the piano body on the stand and secure it with 4 black screws. Figure-4 4. Connect the pedal cord and power cord - Connect the pedal cord and power cord to the terminals located on the rear of the piano unit as shown below.
-
Page 8: Parts Location
5. KEYBOARD RANGES This keyboard features Touch Response, by which you control the volume by playing the keys harder or softer. Figure-6 6. PARTS LOCATION Figure-7 Figure-8... - Page 9 7. DISASSEMBLY INSTRUCTIONS 7.1. Removing the top cover 1. Remove the top cover mounting screws (A × 4 pcs.) as shown in Figure-9. 2. Slide the top cover forward and lift up (as shown by the arrows). 7.2. Removing the keyboard cover 1.
- Page 10 1. Remove the keyboard cover (see step “Removing the keyboard cover”). 2. Remove the control panel mounting screws (A × 2 pcs. and B × 4 pc.) as shown in Figure-10. 3. Slide the control panel forward and pull out (as shown by the arrows).
- Page 11 2. While inserting a thin plate to press down a claw, push the rear of the key forward to disengage the key claw from the chassis. 3. Lift the key up to remove it. Note: - The key claw is easily broken. Do not apply undue force. Should a key claw break, it can still be used.
- Page 12 7.6. Disassembly of the pedal assembly 1. Remove the pedal assembly from the pedal box. 2. Disassemble the pedal assembly as shown in Figure-14. Figure-14 7.7. Removing the speaker 1. Remove the rear panel mounting screws (A × 4 pcs. and B × 10 pcs.).
- Page 13 - Pull out the connectors on the printed circuit boards. MAIN P.C.B. 1. Remove the MAIN P.C.B. mounting screws (A x 2 pcs, B x 3 pcs.). 2. Release the claws of the 3 P.C.B. holders. AS P.C.B. 1. Release the claws of the 9 P.C.B. holders. 2.
- Page 14 Figure-16 7.11. Removing the LCD, INVL P.C.B. - Remove the control panel (see step “Removing the control panel”). LCD P.C.B. - Remove the LCD P.C.B. mounting screws (A x 6 pcs.). INVL P.C.B. 1. Release the claws of the 3 P.C.B. holders. 2.
- Page 15 7.12. Removing the CPL, CPR P.C.B. - Remove the control panel (see step “Removing the control panel). CPR P.C.B. 1. Remove the CP mount bracket (A x 2 pcs., B x 2 pcs.). 2. Remove the CPR P.C.B. mounting screws (C x 15 pcs.). CPL P.C.B.
- Page 16 3. Use the PAGE button below the display to select the respective test. Figure-20 8.1. ROM device test Figure-21 - Press the EXECUTE button to begin the test. - The test result (OK or NG) is displayed within a few seconds. If the test result is NG, not only the respective IC, but a break or short circuit in the ADDRESS/DATA BUS as well as in any of the strobe signal lines may be the cause of the failure.
- Page 17 - Press the EXECUTE button to begin the test. - The test result (OK or NG) is displayed within few seconds. If the test result is NG, not only the respective IC, but a break or short circuit in the ADDRESS/DATA BUS as well as in any of the strobe signal lines may be the cause of the failure.
- Page 18 - Insert a formatted floppy disk into the Disk Drive. Press the START button to begin the test. - The test is carried out repeatedly. Data is saved and loaded, and then the two data sets are compared. The number of times that the test results in OK or NG are counted and displayed on the LCD.
- Page 19 LEDs light. If all switches are OK, “ALL SW OK” is shown on the LCD. (If a switch is defective, nothing is shown.) - To light all the LEDs, press and hold the DEMO button. If an LED fails to light, the LED may be defective or there may be a break in the surrounding circuit.
- Page 20 - The operation status of each input action part can be confirmed. If the part is operating properly, “OK” is shown, excluding the Sustain Pedal. - When a keyboard key is pressed, the corresponding pitch and velocity are displayed (only as long as the key is depressed). - The respective statuses for other input action parts are displayed.
- Page 21 circuit. 8.9. WAVE ROM test Figure-29 - Press the EXECUTE button to start the test. - The test result (OK or NG) is displayed within thirty seconds. If the test result is NG, not only the respective IC, but a break or short circuit in the ADDRESS/DATA BUS as well as in any of the strobe signal lines may be the cause of the failure.
- Page 22 If no sound is generated or if the sound is distorted, the sound generator ROM corresponding to the key position is defective. 2. For confirming the output pathway from the sound generator. (Fixed scale, no touch) The Lch and Rch sound outputs are confirmed separately. 3.
- Page 23 9.2. Notes on replacing FLASH ROMs The replacement parts include a FLASH ROM with a available memory and the PROGRAM DISKs which contains the program to be written into the PROGRAM ROM. After replacing the PROGRAM ROM, always write the program into it from the PROGRAM DISKs included in the replacement parts.
-
Page 24: Precautions Before Servicing
4. In next FLASH MEMORY UPDATE screen, confirm the procedure and push [*UPDATE*] button again. 5. In next <PROGRAM VERSION INFO> screen, confirm the version at “NOW(CURRENT) = “ column is “Ver F.F.” If the version to update from disks is latest, proceed to update by [* UPDATE*] button. - Page 25 10.2. Important safety notice - Components identified by a mark have special characteristics important for safety. - When replacing any of these components, use only manufacture’s specified parts. 10.3. Symbolic marks The symbolic marks for resistors and capacitors which used in this circuits are classified as following Table-1 and Table-2.
-
Page 26: Specification
SYMBOL SPECIFICATION TYPE Non-Polarized Electrolytic ECEA_KN_type Capacitors Non-Polarized Electrolytic (for ECEA_Y_type Network system) Tantalum Solid Electrolytic ECS_type Capacitors Metallized Plastic Film Capacitors ECQV_type (TF Series) Temperature Compensating ECC_type Ceramic Capacitors High-Dielecytric Constant Ceramic ECK_type, ECR_type Capacitors Axial Lead Ceramic Capacitors ECB_type Metallized Polyester Film ECQ_EW_type... - Page 27 11.2. Measuring condition of AS P.C.B. Check Point 3 - 8 Set to the Self-diagnostic Mode followings. - While pressing two E keys simultaneously, turn on the power switch. - SOUND : SOUND EXPLORER - MAIN VOLUME: Max. - Keyboard: A1 Check Point 1 Set to the Initial mode (refer to “OWNERS...
- Page 28 12. SCHEMATIC DIAGRAM 13. PRINTED CIRCUIT BOARD 14. BLOCK DIAGRAM 15. WIRING CONNECTION DIAGRAM 16. REPLACEMENT PARTS LIST Notes: *Important safety notice: Components identified by mark have special characteristics important for safety. Furthermore, special parts which have purposes of fire-retardant (resistors), high-quality sound (capacitors), low-noise (resistors), etc.
- Page 29 check those indications in the Remarks. Ref. No. Part No. Part Name & Description Remarks QMFG1083AB FELT SBLG7-2 STAY QKQGP002AAZ MUSIC STAND QKQGP002ABZ MUSIC STAND SX-PR703M SBHG5003-2 HINGE QKQGA144AAZ TOP COVER ASS'Y QKQGA144ABZ TOP COVER ASS'Y SX-PR703M QMFG1221AA FELT QMFG1222AA FELT SGBG160B BADGE...
- Page 30 Ref. No. Part No. Part Name & Description Remarks XTT4+10A SCREW XTB4+10B SCREW XTT4+12AFZ SCREW XTT4+14A SCREW XYN4+F16FZ SCREW XTB35+14A SCREW SNE499-1 SCREW XTT4+12A SCREW QHDG004AA SCREW XTT4+25AFZ SCREW QHDG016AB SCREW WITH WASHER XTT5+20AFZ SCREW QHDG032AB SCREW WITH WASHER QGUG1202BC BUTTON QGUG1205BC BUTTON...
- Page 31 Ref. No. Part No. Part Name & Description Remarks QMBG023AA SPRING QKSGG028CA GUIDE QKSGG029CA GUIDE QAUG027AA DISK DRIVE UNIT QMFG1220AA FELT QEXGRA01007H WIRE QMGG029AA FLOATING RUBBER QMFG4222AA CUSHION SBNG7050A KNOB QGUG3002BB DIAL WHEEL QKWG033AB LCD PANEL QLZG017A CORE QLZG021A CORE QTPG1M053A POWER TRANSFORMER EXCEPT P PC...
- Page 32 Ref. No. Part No. Part Name & Description Remarks QMFG1104AA FELT QMWG1041AA WHITE KEY(FIRST OCT A KEY QMWG1042AA WHITE KEY(B KEY) QMWG1043AA WHITE KEY(C KEY) QMWG1044AA WHITE KEY(D KEY) QMWG1045AA WHITE KEY(E KEY) QMWG1046AA WHITE KEY(F KEY) QMWG1047AA WHITE KEY(G KEY) QMWG1048AA WHITE KEY(A KEY) QMWG1049AA...
- Page 33 Ref. No. Part No. Part Name & Description Remarks ECKF1E473X 0.1UF MKB1 ECQE1A104M6 0.1UF ECRF1H104ZF 0.1UF ECRR1H104ZF 0.1UF JACK ECUV1H104ZFX 0.1UF MAIN QCBG1H104ZFA 0.1UF QCBG1H473ZFA 0.047UF JACK2 ECBT1C222MR5 2200PF ECBT1C222MR5 0.0022UF ECCR1H221J5 220PF JACK ECEA0JKA470 6.3V 47U MKB1 ECOS1HP682D 6800UF 50V ECQB1H473JF3 0.047UF INVL...
- Page 34 Ref. No. Part No. Part Name & Description Remarks ECRR1H104ZF 0.1UF JACK ECRR1H104ZF1 0.1P JACK2 ECUV1H104ZFX 0.1UF MAIN QCBG1H104ZFA 0.1UF QCBG1H104ZFA 0.1UF ECBT1C222MR5 2200PF JACK ECRR1H104ZF1 0.1UF JACK2 ECUV1H104ZFX 0.1UF MAIN QCBG1H104ZFA 0.1UF QCBG1H104ZFA 0.1UF ECBT1C222MR5 2200PF JACK ECEA1CKA100 10UF 16V ECEA1HKN010B 1UF 50V JACK2...
- Page 35 Ref. No. Part No. Part Name & Description Remarks ECUV1H104ZFX 0.1UF MAIN ECQG1H152KZ 0.0015UF ECUV1H104ZFX 0.1UF MAIN ECQV1H104JM 0.1UF ECUV1H104ZFX 0.1UF MAIN ECQG1H682KZ 0.0068UF ECUV1H104ZFX 0.1UF MAIN ECQV1H224JM 0.22UF ECUV1H104ZFX 0.1UF MAIN ECQB1H103JF3 0.1UF 50V ECUV1H104ZFX 0.1UF MAIN ECQV1H224JM 0.22UF ECUV1H104ZFX 0.1UF MAIN...
- Page 36 Ref. No. Part No. Part Name & Description Remarks C121 ECUV1H104ZFX 0.1UF MAIN C123 ECEA1HKA010 1UF 50V MAIN C124-27 ECUV1H104ZFX 0.1UF MAIN C129-31 ECUV1H104ZFX 0.1UF MAIN C132 ECRR1H104ZF 0.1UF MAIN C201 ECUV1H104ZFX 0.1UF MAIN C202,03 ECUV1H100DCN 10PF MAIN C204-06 ECUV1H104ZFX 0.1UF MAIN C207...
- Page 37 Ref. No. Part No. Part Name & Description Remarks QJTG01005AA CONNECTOR JACK QJUG00703AA CONNECTOR JACK2 SJPG12JS020A CONNECTOR SJPG2JS040A CONNECTOR INVL SJPG2JS050A CONNECTOR SJPG2JS060A CONNECTOR SJPG7JS030A CONNECTOR QJTG00904BA CONNECTOR INVL QJTG01007AA CONNECTOR JACK QJTG01014AA CONNECTOR SJPG12JS040A CONNECTOR SJPG2JS050A CONNECTOR SJPG2JS060A CONNECTOR JACK2 QJTG01010AA CONNECTOR...
- Page 38 Ref. No. Part No. Part Name & Description Remarks MA165TA5VT DIODE JACK SVDGS3V20-15 RECTIFIER MA165 DIODE MKB1 MA165TA5 DIODE MA165TA5VT DIODE MA165TA5VT DIODE JACK MA165 DIODE MKB1 MA165TA5 DIODE MA165TA5VT DIODE MA165TA5VT DIODE JACK SVDGS3V20-15 RECTIFIER MA165 DIODE MKB1 MA165TA5 DIODE MA165TA5VT DIODE...
- Page 39 MA165TA5 DIODE...
- Page 40 Ref. No. Part No. Part Name & Description Remarks MA165TA5VT DIODE MA165 DIODE MKB1 MA165TA5 DIODE MA165TA5VT DIODE MA165 DIODE MKB1 MA165TA5 DIODE MA165TA5VT DIODE EK04W DIODE MA165 DIODE MKB1 MA165TA5 DIODE MA165TA5VT DIODE MA165 DIODE MKB1 MA165TA5 DIODE MA165TA5VT DIODE MA165TA5VT DIODE...
- Page 41 Ref. No. Part No. Part Name & Description Remarks MA165TA5 DIODE MA165TA5VT DIODE MA165 DIODE MKB1 MA165TA5 DIODE MA165TA5VT DIODE MA165 DIODE MKB1 MA165TA5 DIODE MA165TA5VT DIODE MA165 DIODE MKB1 MA165TA5 DIODE MA165TA5VT DIODE MA165 DIODE MKB1 MA165TA5 DIODE MA165TA5VT DIODE MA165 DIODE...
- Page 42 Ref. No. Part No. Part Name & Description Remarks MA165TA5 DIODE MA165TA5VT DIODE MA165 DIODE MKB1 MA165TA5 DIODE MA165TA5VT DIODE MA165 DIODE MKB1 MA165TA5 DIODE MA165TA5VT DIODE MA165 DIODE MKB1 MA165TA5 DIODE MA165TA5VT DIODE MA165 DIODE MKB1 MA165TA5 DIODE MA165TA5VT DIODE MA165 DIODE...
- Page 43 Ref. No. Part No. Part Name & Description Remarks MA165 DIODE MKB1 MA165TA5 DIODE LN382GPXVTX3 LED(GREEN) MA165 DIODE MKB1 MA165TA5 DIODE LN282RPXVTX3 LED(RED) LN282RPXVTX3 LED(RED) MA165 DIODE MKB1 LN282RPXVTX3 LED(RED) LN282RPXVTX3 LED(RED) MA165 DIODE MKB1 LN282RPXVTX3 LED(RED) LN282RPXVTX3 LED(RED) MA165 DIODE MKB1 LN282RPXVTX3...
- Page 44 Ref. No. Part No. Part Name & Description Remarks LN282RPXVTX3 LED(RED) MA165 DIODE MKB1 LN382GPXVTX3 LED(GREEN) LN382GPXVTX3 LED(GREEN) MA165 DIODE MKB1 LN382GPXVTX3 LED(GREEN) LN382GPXVTX3 LED(GREEN) MA165 DIODE MKB2 LN282RPXVTX3 LED(RED) MA165 DIODE MKB2 LN382GPXVTX3 LED(GREEN) LN382GPXVTX3 LED(GREEN) MA165 DIODE MKB2 LN382GPXVTX3 LED(GREEN) MA165...
- Page 45 Ref. No. Part No. Part Name & Description Remarks D104 MA165 DIODE MKB2 D104 W6E05 ASUB D105 LN282RPXVTX3 LED(RED) D105 MA111TX DIODE MAIN D105 MA165 DIODE MKB2 D106 LN382GPXVTX3 LED(GREEN) D106 MA111TX DIODE MAIN D106 MA165 DIODE MKB2 D107 LN382GPXVTX3 LED(GREEN) D107 MA165...
- Page 46 Ref. No. Part No. Part Name & Description Remarks D218 MA8051LTX ZENER MAIN D219 MA111TX DIODE MAIN D220,21 MA152WK DIODE MAIN D301,02 MA121TX DIODE MAIN D303 MA159ATX DIODE MAIN XBA1C40NB100 T4A 125V XBA2C31TB0L T3.15A 250V ACP(X XA XD XT XS ONLY) F2,F3 XBA2C16TB0L T1.6A 250V...
- Page 47 Ref. No. Part No. Part Name & Description Remarks IC110 T74VHCT541AF CMOS MAIN IC111 M66273FP LCDC MAIN IC112 T74LCX16244A CMOS MAIN IC201 M51V18165D70 DRAM16M-EDO MAIN IC202 TC7SU04FT85L INVERTER MAIN IC203 TMS57070FFT MAIN IC204 PCM1734EA-E2 MAIN IC205 PCM1800E-T1 MAIN IC206 M5218AFPE3 OP AMP MAIN IC207...
- Page 49 Ref. No. Part No. Part Name & Description Remarks QLQGT3T131TA 130UH×3 JACK QLQGT1D600MA COIL QLQGT3T131TA 130UH×3 JACK QLQGT1D600MA COIL L8,L9 QLQGT3T131TA 130UH×3 JACK L10-13 QLQGT1B100MA 10UH JACK QLQGT1B800MA 80UH JACK QLBG005A COIL JACK L101 QLBG005A COIL MAIN L201 QLQGT1T121LA COIL MAIN L202 QLBG005A...
- Page 50 Ref. No. Part No. Part Name & Description Remarks Q10,11 2SA1015TPE2 TRANSISTOR 2SD592ARS TRANSISTOR 2SB621ARS TRANSISTOR 2SD592ARS TRANSISTOR 2SB621ARS TRANSISTOR FX30KMJ FS30KMJ FX30KMJ FS30KMJ Q20-24 2SC1815TPE2 TRANSISTOR 2SA1015TPE2 TRANSISTOR Q26-28 2SC1815TPE2 TRANSISTOR 2SA1015TPE2 TRANSISTOR Q101 2SA1015TPE2 TRANSISTOR ASUB Q101 UN511NTX TRANSISTOR MAIN Q102...
- Page 51 Ref. No. Part No. Part Name & Description Remarks ERDS2TJ680T JACK ERG1SJ470 1W 47 JACK2 ERJ6GEYJ102V MAIN ERDS2T0 1/4W ERDS2T0T ERDS2TJ103 ERDS2TJ562T 5.6K INVL ERDS2TJ680T JACK ERG1SJ470 1W 47 JACK2 ERJ6GEYJ472V 4.7K MAIN ERDS2TJ101 ERDS2TJ101T ERDS2TJ151 JACK ERDS2TJ332T 3.3K ERG1SJ470 1W 47 JACK2 ERJ6GEYJ102V...
- Page 52 Ref. No. Part No. Part Name & Description Remarks ERDS2TJ472 4.7K ERDS2TJ472 4.7k ERDS2TJ473T ERJ6GEYJ470V MAIN ERDS2TJ101T JACK2 ERDS2TJ103 ERDS2TJ471T JACK ERDS2TJ472 4.7K ERJ6GEYJ470V MAIN ERDS2TJ103T JACK2 ERDS2TJ332T 3.3K ERDS2TJ473T ERJ6GEYJ472V 4.7K MAIN ERDS2TJ332T 3.3K JACK2 ERDS2TJ334 330K ERDS2TJ471T JACK ERDS2TJ473T ERJ6GEYJ472V 4.7K...
- Page 53 Ref. No. Part No. Part Name & Description Remarks ERDS2TJ103 ERDS2TJ103T ERDS2TJ220 ERDS2FJ222 2.2K ERDS2TJ103 ERDS2TJ103T ERJ6GEYJ472V 4.7K MAIN ERD2FCVJ4R7T ERDS2TJ103 ERDS2TJ103T ERJ6GEYJ472V 4.7K MAIN ERD2FCVG220 1/4W FUSE TYPE ERDS2TJ103 ERDS2TJ103T ERJ6GEYJ472V 4.7K MAIN ERDS2TJ103 ERDS2TJ103T ERJ6GEYJ472V 4.7K MAIN ERQ2CJP2R0S 2W FUSE TYPE ERDS2TJ101 ERDS2TJ101T...
- Page 54 ERDS2TJ101T...
- Page 55 Ref. No. Part No. Part Name & Description Remarks ERDS2TJ182 1.8K ERJ6GEYJ470V MAIN ERDS2TJ101T ERDS2TJ104T 100K ERDS2TJ333T ERJ6GEYJ332V 3.3K MAIN ERDS2TJ101T ERDS2TJ152 1.5K ERJ6GEYJ331V MAIN ERDS2TJ101T ERDS2TJ104T 100K ERDS2TJ471 ERDS2TJ224T 220K ERDS2TJ472 4.7K ERDS2TJ332T 3.3K ERDS2TJ823T ERDS2TJ152 1.5K ERDS2TJ104T 100K ERDS2TJ182 1.8K ERJ6GEYJ101V...
- Page 56 Ref. No. Part No. Part Name & Description Remarks ERDS2TJ103 ERDS2TJ104T 100K ERDS2TJ104T 100K ERDS2TJ103 ERDS2TJ472 4.7K ERDS2TJ103 ERDS2TJ472 4.7K ERDS2TJ473T ERDS2TJ332T 3.3K ERDS2TJ103 R97,98 ERQ2CJP6R8S 2W FUSE TYPE R101 ERD2FCVG221T 1/4W FUSE TYPE ASUB R101 ERDS2TJ682T 6.8K R101 ERJ6GEYJ102V MAIN R102 ERDS2TJ152...
- Page 57 Ref. No. Part No. Part Name & Description Remarks R120 ERJ6GEYJ331V MAIN R121 ERDS2TJ103 ASUB R121 ERJ6GEYJ331V MAIN R122 ERDS2TJ103 ASUB R122 ERJ6GEYJ331V MAIN R123 ERJ6GEYJ474V 470K MAIN R124,25 ERJ6GEYJ152V 1/10W 1.5K MAIN R126 ERJ6GEYJ124V 120K MAIN R127 ERJ6GEYJ101V MAIN R128,29 ERJ6GEYJ472V 4.7K...
- Page 58 Ref. No. Part No. Part Name & Description Remarks R248,49 ERJ6GEYJ332V 3.3K MAIN R250-53 ERJ6GEYJ682V 6.8K MAIN R254,55 ERJ6GEYJ223V MAIN R256 ERJ6GEYJ471V MAIN R257 ERJ6GEYJ101V MAIN R259,60 ERJ6GEYJ102V MAIN R262,63 ERJ6GEYJ103V MAIN R264 ERJ6GEYJ101V MAIN R301 ERJ6GEYJ221V MAIN R302 ERJ6GEYJ470V MAIN R303 ERJ6GEYJ105V...
- Page 59 Ref. No. Part No. Part Name & Description Remarks QEXGSS06075A CONNECTOR WITH WIRE QEXGVH03140B CONNECTOR WITH WIRE QJLG013AA PEDAL CORD QEXGSS16110A CONNECTOR WITH WIRE QEXGSS05045B CONNECTOR WITH WIRE GEXGZA12060A CONNECTOR WITH WIRE QEXGZA05078B CONNECTOR WITH WIRE QEXGSS05095C CONNECTOR WITH WIRE QEXGZA34075B CONNECTOR WITH WIRE QEXGSS10030A...
-
Page 60: Cabinet Parts Location
Ref. No. Part No. Part Name & Description Remarks Z307 EXBS8V223J MAIN × 4 Z308,09 EXBV8V472J MAIN 4.7K × 4 Z310 EXBS8V470J MAIN × 4 Z311-14 EXBV8V470J MAIN × 4 Z315-26 EXBV8V471J MAIN × 4 ZC101-04 ECJRVC1H470K 47PF × 4 MAIN ZC105 06 ECJRVC1H101K... - Page 63 18. PACKAGING...
- Page 64 / Printed in Japan / S000600000 HM/AM...
- Page 65 PIANO PERFORMANCE PADS Add various phrases to your performance with the pad buttons. PIANO STYLIST RHYTHM GROUP You can choose to have Various rhythm patterns are all the settings of this available for each rhythm group. instrument automatically set. PIANIST SONG FADE IN/OUT AUTO PLAY CHORD When you play a song from...
- Page 66 DISPLAY Displays performance information, function settings and other messages. • Use the LCD CONTRAST buttons to adjust the display so that it is easy to read. SOUND GROUP EFFECT Various sounds are Add various effects to the available for each sound sounds.
- Page 67 This instrument has many settable functions and storable memories. However, you can return the settings and memory to the factory-preset status. Press the PROGRAM MENUS button to turn Use the buttons to select the desired it on. type of initialization. •...
- Page 68 (on the rear panel) LINE OUT AUX IN COMPUTER PEDAL IN THRU R + L R + L MIDI MIDI AUX IN (input level 0.5 Vrms, 6 kΩ) COMPUTER Other instruments such as a sound generator can be con- By connecting this terminal to the serial port of a computer, nected to this terminal, and the sound will be output from performance data can be exchanged.
- Page 69 The following changes in performance may occur in the Technics Keyboard but do not indicate trouble. Phenomenon Remedy • Turn off the POWER button once, then turn it on again. If this The buttons, keys, etc. malfunction. procedure is not successful, turn off the POWER button once. Then, while pressing the three lower left buttons in the RHYTHM GROUP section (SOUL &...
- Page 70 Phenomenon Remedy • The remaining memory capacity of the COMPOSER is 0. Storage is not possible. • The time signature and number of measures cannot be changed Setting the time signature and number of measures is not possible. for a pattern which is currently recorded in the COMPOSER. If you wish to change the time signature and/or measure data, first follow the procedure to clear the memory.
-
Page 71: Punch Record
Contents Contents The data on the disk that you are using is for a The time signature of the pattern from which you different product. are copying is different from the COMPOSER memory that you are using. An error has occurred while the disk was loading. Either: Change the time signature Please try again! of the COMPOSER memory... - Page 72 MIDI Implementation Chart Digital Ensemble [ PR703/PR903 ] Function Transmitted Recognized Remarks Default 1-16 1-16 Assigned to the part. Basic Channel Changed 1-16 1-16 Default OMNI OFF, POLY MODE Mode 3 Messages *M=1 only Mode Mode 3, 4 (M=1) Mode 3, 4 (M=1) Altered 0-127 0-127...
-
Page 73: Schematic Diagram
SCHEMATIC DIAGRAM-18 ASUB CIRCUIT +15A +VCC-A C102 R107 680P R101 220 R105 Q121 Q101 2SC1815 2SA1015 Q107 2SC1815 Q105 2SA970 R104 D104 4.7K Q109 Q104 2SA1015 -15A -15A 2SA1015 R109 +15A +15A -VCC -VCC-A Q103 +VCC +VCC-A D101 R110 2SA1015 MA165 GATE-A2 D103... - Page 74 SCHEMATIC DIAGRAM-19 CPL CIRCUIT +5IP M37471M2196S (8BIT MICROCOMPUTER) START SUMR /STOP SUML SYNCHRO ROUT START LOUT +5IP TEMPO 6V220 HELP QRVG25P01B53 OTHER EFOEC4004T3 PARTS/TR +5IP XOUT R1 0 R2 0 0.0022 +5IP VREF VREF +5IP 6V100 2SA830 LN282RPXVTX3 INTRO& 4.7K 4.7K +5IP ENDING 1...
- Page 75 SCHEMATIC DIAGRAM-20 SW20 SW14 MUSIC SW25 SW32 SOUL& STYLE FADE IN DEMO 8&16BEAT DISCO ARRENGER SW21 SW15 SW26 MUSIC SW33 GOSPEL& SPLIT STYLE FADE OUT BALLAD BLUSE ARRENGER1 POINT SW22 SW27 SW16 MUSIC SW34 PIANIST COUNTRY& SOUND STYLE JAZZCOMBO SONG WESTERN ARRENGER2 ARRENGER...
- Page 76 SCHEMATIC DIAGRAM-21 SW38 SW46 SW54 PIANO AUTO MUTE PARFORMANCE PADS 1 SETTING DOWN 1 SW39 SW55 PIANO SW47 MUTE PARFORMANCE BANK PADS 2 UP 1 SW40 SW56 PIANO SW48 MUTE PARFORMANCE STOP PADS 3 DOWN 2 SW41 SW57 PIANO SW49 MUTE PARFORMANCE CPL 1...
- Page 77 SCHEMATIC DIAGRAM-22 CPR CIRCUIT +5IP M37471M2196S (8BIT MICROCOMPUTER) PLAY STPINGS EASY REC BRASS +5IP SAX& WOODWIND SW10 0.1P ORGAN& DISK ACCORDION SW11 EFOEC4004T3 FAVORITES SYNTH SW12 PROGRAM SOUND MENUS EXPLORER XOUT R1 0 R2 0 0.0022P +5IP VREF 2SA830 LN282RPXVTX3 LN282RPXVTX3 SOUND SOUND...
- Page 78 SCHEMATIC DIAGRAM-23 SW13 SW32 SW40 SW19 SW25 MULTI PART PAGE EFFECT VOCAL GRAND SELECT DOWN SW20 SW33 SW41 SW14 SW26 GUTAR& PART PAGE CHORUS HARPSI UPLIGHT SELECT SW21 SW34 SW42 SW15 SW27 MALLET& PART DISPLAY REVERB CRCHPERC ELECTRIC SELECT HOLD SW16 SW22 SW28...
- Page 79 SCHEMATIC DIAGRAM-24 SW55 SW63 SW47 PANEL MUTE MEMORY 1 DOWN 5 SW48 SW56 SW64 NEXT PANEL MUTE BANK MEMORY 2 UP 5 SW49 SW57 SW65 BANK PANEL MUTE VIEW MEMORY 3 DOWN 6 SW58 SW66 SW50 PANEL MUTE CPR 1 MEMORY 4 UP 6 SW59...
- Page 80 SCHEMATIC DIAGRAM-25 MKB1 CIRCUIT HD74LS138P +VCC (3 TO 8 DECODER) 6.3V47 UNLESS OTHERWISE SPECIFIED: DIODES ARE MA165.
- Page 81 SCHEMATIC DIAGRAM-26...
- Page 82 SCHEMATIC DIAGRAM-27 MKB2 CIRCUIT UNLESS OTHERWISE SPECIFIED: DIODES ARE MA165.
- Page 83 SCHEMATIC DIAGRAM-28 HD74LS138P (3 TO 8 DECODER) +VCC...
- Page 84 SCHEMATIC DIAGRAM-29 HD74LS138P (3 TO 8 DECODER) +VCC...
- Page 85 SCHEMATIC DIAGRAM-30...
- Page 86 SCHEMATIC DIAGRAM-31 PKB CIRCUIT PEDAL CORD CN1 +5 PEDAL QSTGT001AA QSTGT001AA QSTGT001AA 4.7K 4.7K 4.7K INVL CIRCUIT QTDG003A +5IP MAIN2/4 CIRCUIT +5IP CCFLV R1 5.6K (CN108) ON SCHEMATIC DIAGRAM 6 R2 5.6K 6V1000 0.047 2SD592ARSTA 2SD592ARSTA 1 FRM LOAD 2 LOAD 3 CP 4 VDD 5 VSS...
- Page 87 SCHEMATIC DIAGRAM-32 JACK CIRCUIT PEDAL IN SOFT QLBG005A SUST SOSU 0.1P QLQGT1B800MA QLQGT1B100MA QLQGT1B100MA MRXD MTXD MIDI THRU 130uHx3 2SA9335TRS 220P MIDI OUT 130uHx3 COMPUTER 2SA9335TRS 220P MIDI SVIGTLP513 QLQGT1B100MA MSEL (PHOTO COUPLER) TXD- MIDI IN 130uHx3 MIDI TXD+ 1,7,8 RXD+ RXD- 0.047P...
- Page 88 SCHEMATIC DIAGRAM-33 JACK2 CIRCUIT C5 47P R8 330K 130uHx3 4.7K 50N1 100K 0.1P +VCC M5218AL 0.1P (OP.AMP) -VCC 50N1 100P 50N1 100K MA165 150K 2SC1815 3.3K 16V47 QRVG09A02B54 HEADPHONE2 MSNS 0.1P LEDK LEDA 130uHx3 HEADPHONE1 0.047P 0.047P SEL4214RLC05 POWER INDICATOR...
- Page 89 SCHEMATIC DIAGRAM-1 MAIN 1/4 CIRCUIT A[0-25] D[0-31] IORST CP.GATE SELF.LED FDC.TC PMUT MACSEL CP.CLK PC.TX PC.RX MIDI.TX MIDI.RX CP.DATA +3.3D 4.7K +3.3D 100K 0.22 2SB709ARTX 2SD601AQTX MA111TX 4.7Kx8 4.7K +3.3D MA111TX 4.7Kx8 +3.3D +3.3D TC74VHC138F (3 TO 8 DECORDER) PORT.EXP LCD.NIOCS TGCS 4.7Kx8...
- Page 90 SCHEMATIC DIAGRAM-2 QLBG005A +3.3D 47x4 4.7Kx8 4.7Kx8 +3.3D +3.3D 4.7K 4.7K +3.3D RESET 4.7K DSDSAT 4.7K DSCLK 4.7K MMODE 4.7K BMODE VDD MN103002A (32BIT MICROCONTROLLER) DMR0 IRQ0 DMK0 DMR1 4.7K DMK1 DMR2 4.7K DMK2 A26/CS4/RAS4 DMR3 +3.3D A27/CS5 DMK3 QLBG005A A28/CS6 SYSCLK OSCI...
- Page 91 SCHEMATIC DIAGRAM-3 +3.3D +3.3BB K16V1204CTL6 (16M BIT DYNAMIC RAM) TC7SH08FU (INVERTER AND GATE) 4.7Kx8 LCAS UCAS 1 2 3 4 5 33 DE +3.3D +3.3BB 220P 4.7Kx8 +3.3BB TC74VHC08F (QUAD 2 INPUT AND GATE) +3.3BB IC15 K16V1204CTL6 (16M BIT DYNAMIC RAM) LCAS UCAS 33 DE...
- Page 92 SCHEMATIC DIAGRAM-4 +3.3D BYTE IC11 M29LV160B8TN RESET (16M BIT FLASH ROM) RY/BY...
- Page 93 SCHEMATIC DIAGRAM-5 IC12 +3.3D QSIGX3C64016 (64M BIT RHYTHM DATA ROM) IC16 T74VHCT374AF (D TYPE FLIPFLOP) BYTE CLOCK DSP.INT3 DSP.CS DSP.RST DSP.INT +3.3D +3.3D C39 IC17 T74VHCT374AF (D TYPE FLIPFLOP) CLOCK DAC.ML DAC.MC DAC.MD IC18 TC7W32FU DAC.CS (DUAL 2 INPUT OR GATE) EEP.DO IC14 BR93LC56RFE2...
- Page 94 SCHEMATIC DIAGRAM-6 NOTE: The number which noted at the connectors on the schematic diagram as "SCHEMATIC DIAGRAM-1" or "SCHEMATIC DIAGRAM-2" indicates the schematic diagram serial number located on the left corner in the schematic diagram. MAIN 2/4 CIRCUIT IC102 TC7WT241FU DUAL 3 STATE +3.3D BUFFER...
- Page 95 SCHEMATIC DIAGRAM-7 CN103 RXD- D102 D101 RXD+ MA152WATX MA152WATX TXD+ JACK CIRCUIT TXD- DRIVER Z105 (CN3) ON SCHEMATIC IC108 47x4 MSEL DIAGRAM 32 T7SET04FT85L (INVERTER) MIDI DRIVER RECEIVER 1 2 3 4 5 ZC104 ZC105 RECEIVER 100P D103 L101 C121 0.1 MA152WATX QLBG005A IC109...
- Page 96 SCHEMATIC DIAGRAM-8 C130 +3.3D +3.3D Z112 IC112 7 18 31 42 4.7K T74LCX16244A VCC(3.3V) (16BIT BUS BUFFER) +3.3D Z111 4.7Kx4 R132 4.7K Z108 100x4 R128 4.7K +3.3D R129 4.7K 10 15 21 28 34 39 45 R130 +3.3D C127 1 2 3 4 5 6 7 8 9 10 11 12 13 14 15 16 17 18 19 20 21 22 23 24 C126 IC111 M66273FP...
- Page 97 SCHEMATIC DIAGRAM-9 CN106 +3.3D +3.3D SELF.LED PORT.EXP CN105 SOSTE SUSTAIN SUSTN SOFT JACK CIRCUIT (CN2) ON SCHEMATIC Z110 DIAGRAM 32 +5MI 47x4 MRXD MTXD ZC106 100P DSP.DRBY EEP.D0 MIDI.TX MIDI.RX DSP.EMPTY MIC.SNS MACSEL IORST C124 CN107 +3.3D +3.3D JIGU JIGU.9M IRQ0 JIGL.CS LCD.NICOS...
- Page 98 SCHEMATIC DIAGRAM-10 MAIN 3/4 CIRCUIT CKOUT LRCK SDO0 DAC.CS DAC.MD DAC.MC DAC.ML DSP.CS DSP.RST C207 0.001 IC202 TC7SU04FT85L (INVERTER) C208 C206 1 2 3 4 5 R201 R264 EA5/ED17 R202 X201 EA4/ED16 ARLR2 QSXG1A2500A EA6/ED18 ARLR1 EA7/ED19 DIV512 C202 C203 EA8/ED20 EA9/ED21 R204...
- Page 99 SCHEMATIC DIAGRAM-11 D201 MA2051LF +3.3D +3.3D C209 6V1000 D219 MA111TX L201 D221 120uH MA152WKTX D202 SFPB74V D220 R205 680 MA152WKTX R206 680 Q201 +3.3BB 2SB952ADS Z205 R257 R256 22x4 D203 C216 R209 MA111TX 6800P Q210 C258 2SB709ARTX D204 Q203 5.5V1F MA111TX 2SC1815TPE2 Q202...
- Page 100 SCHEMATIC DIAGRAM-12 C257 R252 C254 220P 6.8K 50N1 R255 CN204 +15A IC208 C265 AUXR M5218AFPE3 0.1P (OP.AMP) AUXL R247 +VCC C259 C260 C261 C262 -VCC 470P 470P 470P 470P C266 R254 0.1P CN203 -15A C256 R250 C253 220P 6.8K 50N1 AMPL AMPR +15A...
- Page 101 SCHEMATIC DIAGRAM-13 MAIN 4/4 CIRCUIT SDOE[0-5] SDIE[0-5] RCKX LRCKX MTNG LRCK SDO0 CKOUT +3.3D Z306 4.7Kx4 Z304 4.7Kx4 Z301 220x4 Z302 220x4 ZC301 D301 D303 +3.3D 100Px4 MA121TX MA159ATX CN301 ZC302 100Px4 +3.3 C319 0.1P KS0 4 KF1 5 KS1 6 Z305 22Kx4 Z307...
- Page 102 SCHEMATIC DIAGRAM-14 IC302 T7SZ32FUT85L (2 INPUT OR GATE) 1 2 3 4 5 R313 +3.3D C306 C311 C309 C313 WCEY1 WCEY0 WAY0 WAY1 WAY2 WAY3 WAY4 WAY5 WAY6 WAY7 WAY17 WAY18 WAY20 WAY21 Z308 +3.3D 4.7Kx4 WAY19 WAY8 WAY9 Z309 WAY10 4.7Kx4 WAY11...
- Page 103 SCHEMATIC DIAGRAM-15 +3.3D IC306 QSIGX3C64012 JP301 JP302 (64M BIT MASK ROM) C315 C317 IC304 QSIGX3C64010 Z326 (64M BIT MASK ROM) VCC BYTE VCC BYTE 220x4 Z318 220x4 Z319 220x4 Z320 220x4 Z321 220x4 Z322 IC303 220x4 T7SZ32FUT85L (2 INPUT OR GATE) VSS VSS VSS VSS R314...
- Page 104 SCHEMATIC DIAGRAM-16 AS CIRCUIT ACP CIRCUIT POWER PRODUCTS FOR TRANSFORMER X XS XT XD XA QSRGT005AA BLUE 4700P BLACK JK1 L1 POWER QLQGT2T100SA CORD BLUE 125V0.1 PRODUCTS FOR P PC ERA1502V5 4700P 3.3K LEDK LEDA 130uHx3 JK1 L1 QLQGT2T100SA PRODUCTS FOR OTHERS 800MA 4700P JK1 L1...
- Page 105 SCHEMATIC DIAGRAM-17 +VCC1 QLBG005A QLBG005A +VCC 2SD2374A-P MA4180 2SC1815 SVDGS3V20-15 +15A 16V10 50V6800 R101 50V1 MA4160M 16V10 SVDGS3V20-15 6.8K R102 50V1 MA4160M 16V100 6.8K ERA1502V5 ERA1502V5 -15A 16V100 50V6800 SVDGS3V20-15 2SA1015 MA4180 SVDGS3V20-15 2SB1548A-P 2SA1015 +15HM QLBG005A QLBG005A EK04W -VCC PMUT -VCC1 3.3K...
- Page 106 QEXGZA34075B PKB P.C.B. JACK P.C.B. PEDAL IN CORE QJLG013AA MAIN P.C.B. CN101 CN203 CN103 CN105 CN204 JACK2 P.C.B. CN301 CN201 QEXGSS16110A QEXG05095C CN202 CN102 CN108 CN104 QEXGSS12060A QEXGZA05078B CPL P.C.B. INVL P.C.B. MKB1 P.C.B.
-
Page 107: Speaker Box
SPEAKER BOX 6.5cm, 8 6.5cm, 8 16cm, 6 16cm, 6 AS P.C.B. ACP P.C.B. QEXGVH06028B POWER TRANSFORMER QEXGVH03140B POWER SWITCH QEXGVH04095C QEXGSS06075A CPR P.C.B. 15cm, 8 15cm, 8 MKB2 P.C.B. - Page 108 JACK (1/2) FLOPPY DISK DRIVE MIDI COMPUTER INVL POWER TRANSFORMER MAIN CN101 CN104 CN108 CN103 IC109 DRIVER IP102 SBO2 SBI2 RECEIVER IC110 BUFFER 32 BIT MICRO CONTROLLER CP DATA,CP CLK ADDRESS BUS A0-A21 IC101 IC111 SBI1 A1-A3 A1-A14 FLOPPY DISK SBO1 CONTROLLER CONTROLLER...
- Page 109 MKB1 MKB2 SWITCHES & LEDS Q1-5 IC2,3 DECODER BUFFER DRIVER MAIN VOLUME SWITCHES SEG0-SEG8 CM0-CM4 SW0-SW7 & DIODES DECODER DECODER 8BIT MICROCOMPUTER DATA,SCK SWITCHES & DIODES CN301 CN202 CN102 IP101 IC102,104 3-5V I/F IC206 IC204 CONVERTER IC205 CONVERTER...
- Page 110 CN203 +VCC SWITCHES & LEDS Q1-5 IC2,3 +15A IC209 BUFFER DRIVER Q210,C258 D220 -15A SEG0-SEG11 CM0-CM4 SW0-SW7 8BIT MICROCOMPUTER MEMORY DATA,SCK +3.3BB BACK UP Q201,203 Q206,208 D219 +3.3D REGULATOR REGULATOR Q205 +3.3D REGULATOR IC208 CN201 CN204 CN105...
- Page 111 Q1,2 D3,5 +15V POWER REGULATOR TRANSFORMER POWER SWITCH Q3,4 D7,9 -15V AC CORD REGULATOR IP3,7 +15A +VCC SP2(Rch) IP4,8 16cm; 6 -15A -VCC SP6(Rch) 6.5cm; 8 IC2,3,4 IC8,9 SP1(Lch) 16cm; 6 SP5(Lch) 6.5cm; 8 ASUB IC5,6,7 IC8,9 SP3(Rch) 15cm; 8 EQUALIZING POWER AMPLIFIER SP4(Lch)
- Page 112 MAIN P.C.B. (COMPONENT SIDE) CN104 CN102 CN301 CN201 D210 C243 D211 C264 ZC303 Z303 ZC302 Z301 IP101 C123 Q101 IC102 IC14 D301 R226 Q205 Q102 Q104 ZC301 Z302 D303 CN108 C120 IP102 Z317 Z316 Z315 Z314 Z313 Z312 Z311 Q103 IC104 D302 R125...
-
Page 113: Electrical Parts Location
ELECTRICAL PARTS LOCATION Ref.No. Lo.No. Ref.No. Lo.No. Ref.No. Lo.No. Ref.No. Lo.No. Ref.No. Lo.No. Ref.No. Lo.No. MAIN P.C.B. (COMPONENT SIDE) Q206 Z101 L101 R226 C215 Q207 Z107 L201 R228 C220 Q208 Z109 L202 R230 C221 Z110 L203 R231 C224 D105 Z111 L204 R232 C225... - Page 114 MAIN P.C.B. (FOIL SIDE) C319 C132 R134 C101 C233 R225 Q211 R229 C239 C240 C235 Z304 R115 D208 Z106 C263 R124 Z306 IC103 R116 R R R R R R R R R R 1 1 1 2 2 2 2 2 2 2 2 7 7 7 7 7 7 R R R R R R R R R R 1 1 1 2 2 2 2 2 2 2 2 7 7 7 7 7 7 R109 R222...
-
Page 115: Main P.c.b. (Foil Side)
ELECTRICAL PARTS LOCATION Ref.No. Lo.No. Ref.No. Lo.No. Ref.No. Lo.No. Ref.No. Lo.No. Ref.No. Lo.No. Ref.No. Lo.No. MAIN P.C.B. (FOIL SIDE) R115 R245 C218 IC12 R116 R246 C219 IC17 R118 R247 C222 IC19 Z102 R119 R248 C223 IC103 Z103 R120 R249 C232 IC106 Z104 R121... - Page 116 AS P.C.B. J159 J160 SUML R50 R51 SUMR J153 J1 R54 R6 Q3 R44 R45 R46 R47 R48 R49 J160 R102 R5 Q1 R37 R38 R39 R40 R101 R31 R32 R33 R34 R11 Q10 J154 PMUT J155 J156 J157 J123 J125 J91 J90 J89 J124...
- Page 117 ELECTRICAL PARTS LOCATION Ref.No. Lo.No. Ref.No. Lo.No. Ref.No. Lo.No. Ref.No. Lo.No. Ref.No. Lo.No. Ref.No. Lo.No. AS P.C.B. R101 R102...
- Page 118 CPL P.C.B. AUTO SETTING D100 SW46 RHYTHM GROUP JAZZ AUTO PLAY CHORD BIG BAND& LATH & COMBO SWING WORLD APC/SEOUENCER 8&16BEAT BALLAD METRONOME SW26 VOLUME OFF/ON MODE SPLIT SW38 J60 J62 POINT SW32 SW33 SW34 SW35 SW36 SW37 SW31 SW30 SW41 J59 J61 COUNTRY&...
- Page 119 ELECTRICAL PARTS LOCATION Ref.No. Lo.No. Ref.No. Lo.No. Ref.No. Lo.No. Ref.No. Lo.No. Ref.No. Lo.No. Ref.No. Lo.No. CPL P.C.B. SW32 SW33 SW34 SW35 SW36 SW37 SW38 SW39 SW40 SW41 SW42 SW43 SW44 SW45 SW46 SW47 SW10 SW48 SW11 SW49 SW12 SW50 SW13 SW51 SW14 SW52...
- Page 120 CPR P.C.B. J203 J133 SW47 SW48 SW50 SW49 NEXT BANK BANK VIEW PANEL MEMORY SW51 D107 D108 D109 D110 D111 D112 D113 SW61 SW56 SW57 SW58 SW59 SW55 SW60 SW52 J201 SW53 PART SELECT SW54 SW35 SW36 SW32 SW33 SW34 TRANSPOSE LEFT RIGHT 1...
- Page 121 ELECTRICAL PARTS LOCATION Ref.No. Lo.No. Ref.No. Lo.No. Ref.No. Lo.No. Ref.No. Lo.No. Ref.No. Lo.No. Ref.No. Lo.No. CPR P.C.B. D115 SW33 D116 SW34 D117 SW35 D118 SW36 D119 SW37 D120 SW38 D121 SW39 SW40 SW41 SW42 SW43 SW44 SW45 SW46 SW47 SW48 SW49 SW10 SW50...
- Page 122 MKB1 P.C.B. D72 D70 SW40 SW38 SW32 SW30 SW29 SW28 SW27 SW26 SW25 SW24 SW23 SW43 SW42 SW41 SW39 SW37 SW36 SW35 SW34 SW33 SW31 SW44 D25 J6 SW19 SW18 SW15 SW22 SW21 SW20 SW17 SW16 SW14 SW13 SW12 SW11 SW10 (SXPG231111A) ELECTRICAL PARTS LOCATION...
- Page 123 MKB2 P.C.B. D142 D140 D138 D136 D134 D176 D174 D172 D170 D168 D166 D164 D162 J17 D160 D158 D156 D154 D152 D150 D148 D146 D144 D167 D165 D163 D159 D157 D155 D151 D149 D147 D145 D139 D137 D135 D133 D175 D173 D171 D169...
- Page 124 PKB P.C.B. JR1 JR3 SUSTAIN SOSUTENUTO SOFT (SXPG218121) ELECTRICAL PARTS LOCATION Ref.No. Lo.No. Ref.No. Lo.No. Ref.No. Lo.No. Ref.No. Lo.No. PKB P.C.B.
- Page 125 ASUB P.C.B. J312 J300 J322 J321 Q123 Q117 Q116 Q112 Q114 Q109 Q121 Q107 Q106 Q102 Q104 Q119 C101 D110 C104 D108 D104 D102 R121 R119 R118 R115 R116 J309 R109 C102 R107 R106 R103 R104 C105 Q120 Q124 Q118 Q115 Q111 Q113...
- Page 126 JACK P.C.B. JK4 JK5 D3D1D2 C3 R1 (SXPG229911) ELECTRICAL PARTS LOCATION Ref.No. Lo.No. Ref.No. Lo.No. Ref.No. Lo.No. Ref.No. Lo.No. Ref.No. Lo.No. Ref.No. Lo.No. JACK P.C.B. JACK2 P.C.B. C6 C6 (SXPG229611B) ELECTRICAL PARTS LOCATION Ref.No. Lo.No. Ref.No. Lo.No. Ref.No. Lo.No. Ref.No. Lo.No. Ref.No. Lo.No. Ref.No. Lo.No. JACK2 P.C.B.
- Page 127 ACP P.C.B. X XS XT XD XA P PC (SXPG230461) (SXPG230421) OTHERS ELECTRICAL PARTS LOCATION Ref.No. Lo.No. Ref.No. Lo.No. ACP P.C.B. (SXPG230411)
Need help?
Do you have a question about the SX-PR703 and is the answer not in the manual?
Questions and answers