Table of Contents
Advertisement
10/24/22, 11:16 AM
Defiant G7X2D01AA Instructions / Assembly
G32-KPDA612 Rev. 16/03-00
(/fullviews/1749761/1749761_files/1749761-1.jpg)
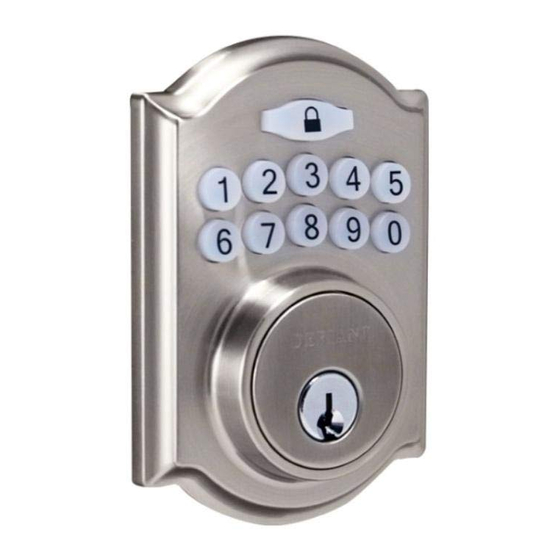
3 Pre-installation (continued) – Door Preparation
NOTE: If your door is pre-drilled, check the hole sizes to make sure they are the proper
size. If they are the proper size, skip to the INSTALLATION section.
FOR
TOLL FREE HELP LINE 1-877-ONE-LOCK HOMEDEPOT.COM
^ Cut out TEMPLATE (reverse page) and use to mark the door, drill holes, and chisel out
the mortise.
Your experience on this site will be improved by allowing cookies. Allow cookies
https://mans.io/files/fullviewer/825373
(/fullviews/1749761/1749761_files/1749761-2.png)
(/fullviews/1749761/1749761_files/1749761-3.png)
Defiant G7X2D01AA Instructions / Assembly
1/19
Advertisement
Table of Contents

Related Manuals for Defiant G7X2D01AA

Summary of Contents for Defiant G7X2D01AA
- Page 1 10/24/22, 11:16 AM Defiant G7X2D01AA Instructions / Assembly Defiant G7X2D01AA Instructions / Assembly G32-KPDA612 Rev. 16/03-00 (/fullviews/1749761/1749761_files/1749761-1.jpg) 3 Pre-installation (continued) – Door Preparation NOTE: If your door is pre-drilled, check the hole sizes to make sure they are the proper size.
-
Page 2: Warranty
10/24/22, 11:16 AM Defiant G7X2D01AA Instructions / Assembly NOTE: Drill from both sides of the door to prevent wood splitting. Centerline (/fullviews/1749761/1749761_files/1749761-4.jpg) 2-1/8"(54 mm) or 1-1/2"(38 mm) Backset (25 mm) (/fullviews/1749761/1749761_files/1749761-5.jpg) 2-1/8"(54 mm) or Faceplate (/fullviews/1749761/1749761_files/1749761-6.jpg) Outline Chisel 5/32” deep For 2-3/8”... - Page 3 10/24/22, 11:16 AM Defiant G7X2D01AA Instructions / Assembly The retailer of this product, hereby warrants, subject to the conditions set forth below, that it will either repair or replace, at its option, this product if it proves to be defective by reason of improper workmanship or materials within the original purchaser's limited time.
-
Page 4: Care And Maintenance
10/24/22, 11:16 AM Defiant G7X2D01AA Instructions / Assembly (/fullviews/1749761/1749761_files/1749761-8.jpg) CARE and MAINTENANCE: The following instructions should be followed to properly protect and maintain your lockset: A. Remove locks, or do not install locks, prior to painting your door. B. Periodically clean with mild soap and a soft cloth only. -
Page 5: Installing The Latch
10/24/22, 11:16 AM Defiant G7X2D01AA Instructions / Assembly 5/32"(4 mm) 2-1/4"(57 mm) 1"(25 mm) 4 Installation ^ INSTALLING THE LATCH A. Attach the correct faceplate Edge of door (/fullviews/1749761/1749761_files/1749761-12.png) (/fullviews/1749761/1749761_files/1749761-13.png) (/fullviews/1749761/1749761_files/1749761-14.jpg) Edge of door Faceplate Drive-in collar For 2-3/4" backset. - Page 6 10/24/22, 11:16 AM Defiant G7X2D01AA Instructions / Assembly (/fullviews/1749761/1749761_files/1749761-15.jpg) sure the latch cam is upright before making any backset adjustment. Turn to extend the latch bolt. Turn back to retract the latch bolt. 2-3/4 should be visible. C. Install the latch B.
- Page 7 10/24/22, 11:16 AM Defiant G7X2D01AA Instructions / Assembly Wood block (not included) Optional Optional Optional Optional Optional A. Door bore options B. Install the lock assemblies Remove the Battery Cover Quantity Thread the cable through the hole and under the latch.
- Page 8 10/24/22, 11:16 AM Defiant G7X2D01AA Instructions / Assembly (/fullviews/1749761/1749761_files/1749761-18.jpg) CAUTION : 1.Please use four alkaline batteries for better performance. Your experience on this site will be improved by allowing cookies. Allow cookies https://mans.io/files/fullviewer/825373 8/19...
- Page 9 10/24/22, 11:16 AM Defiant G7X2D01AA Instructions / Assembly 2.Please set up the lock and perform bolt direction determination to complete the installation. Enter default programming code (123456) and the lock will set up bolt direction to complete installation. Part Description 2-5/16"...
- Page 10 10/24/22, 11:16 AM Defiant G7X2D01AA Instructions / Assembly Strike Plate Dust Box Drive-in Collar (Optional) Exterior Gasket (/fullviews/1749761/1749761_files/1749761-21.png) The bulged part of the mounting plate must face towards the door. Slide the cable through the notch in mounting plate Connect the cable firmly into connector port .
-
Page 11: Overview Of Functions
10/24/22, 11:16 AM Defiant G7X2D01AA Instructions / Assembly Insert screws and tighten. (/fullviews/1749761/1749761_files/1749761-25.jpg) TEMPLATE NOTE: Double check your product for the correct hole sizes. (/fullviews/1749761/1749761_files/1749761-26.jpg) (/fullviews/1749761/1749761_files/1749761-27.jpg) PROGRAMMING 1 OVERVIEW OF FUNCTIONS HOW TO LOCK / UNLOCK THE LOCKSET Your experience on this site will be improved by allowing cookies. Allow cookies https://mans.io/files/fullviewer/825373... -
Page 12: Battery Cover
10/24/22, 11:16 AM Defiant G7X2D01AA Instructions / Assembly (/fullviews/1749761/1749761_files/1749761-28.png) (/fullviews/1749761/1749761_files/1749761-29.png) (/fullviews/1749761/1749761_files/1749761-30.png) ^ ^ ^ ^ ENTER / LOCK BUTTON 1. Red light: Represents an incorrect entry or the unit is in programming mode. 2. Yellow light: Flashes when the batteries are low in power. - Page 13 10/24/22, 11:16 AM Defiant G7X2D01AA Instructions / Assembly [SET] BUTTON 1. Press set button for 1 second to enter programming mode. 2. Please refer to 2 - ^ for more information about programming mode. INTERIOR THUMBTURN 1. Lock or unlock the lockset manually.
-
Page 14: Basic Settings
10/24/22, 11:16 AM Defiant G7X2D01AA Instructions / Assembly Keypad is temporarily disabled for 1 minute after 4 consecutive incorrect entries. 2 PROGRAMMING RESTORE TO FACTORY SETTINGS (/fullviews/1749761/1749761_files/1749761-35.png) Remove one battery (/fullviews/1749761/1749761_files/1749761-36.png) Press and hold SET button while inserting the battery back. Hold the set button until long beep over. -
Page 15: Advanced Settings
10/24/22, 11:16 AM Defiant G7X2D01AA Instructions / Assembly User Code / Single-entry Delete Press Programming Code (4-6 individual [SET] ・Delete individual User Code(s). Code digits) User / Single- digits) entry Code(s) second. Delete another code Press Delete all User Programming ・... -
Page 16: Installation
10/24/22, 11:16 AM Defiant G7X2D01AA Instructions / Assembly ^ INSTALLATION QUESTIONS ANSWERS 1. Make sure the backset on the latch is set to the proper length. A.The latch does 2. Make sure prior to installation latch bolt is retracted and key is not... - Page 17 10/24/22, 11:16 AM Defiant G7X2D01AA Instructions / Assembly D. What should I 1. Press button once and continue to input code according to regular do if wrong code procedures. was entered? 1. Make sure the whole code entering process is completed within 10 seconds, otherwise the unit will time out.
-
Page 18: Federal Communications Commission Statement
10/24/22, 11:16 AM Defiant G7X2D01AA Instructions / Assembly J. How to operate the lockset 1. Press any button to activate the lockset back light. in darkness? 1. Check if [SET] button is jammed. K. The red indicator is still on after setting is completed. - Page 19 10/24/22, 11:16 AM Defiant G7X2D01AA Instructions / Assembly - Reorient or relocate the receiving antenna. - Increase the separation between the equipment and receiver. - Connect the equipment into an outlet on a circuit different from that to which the receiver is connected.
Need help?
Do you have a question about the G7X2D01AA and is the answer not in the manual?
Questions and answers