Advertisement
Quick Installation Guide of eSolar AIO3 Module
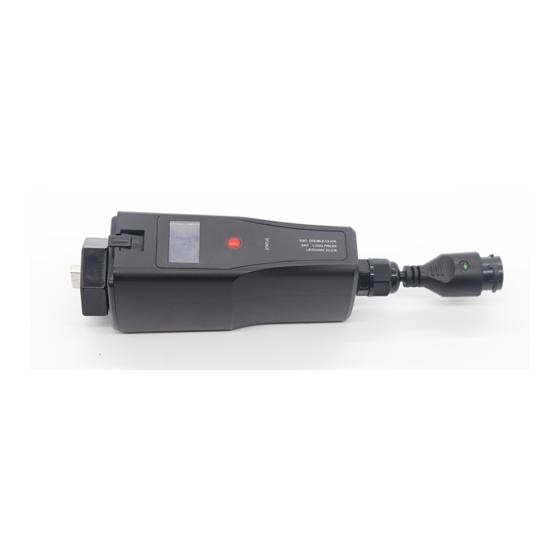
1. Product Appearance
USB interface
OLED screen
Key
LED indicator
RJ45 connector
LED Indicator Status Description
LED indicator status description
Blinks blue
slowly
5s on, 5s off
Blinking
Blue
Blinks blue
(Wifi)
quickly,
0.5s on, 0.5s off
Off
Not connected to server
Blinks green
slowly
5s on, 5s off
Green
Blinking
Blinks green
(Ethernet)
quickly,
0.5s on, 0.5s off
Off
Not connected to server
Table 1 LED indicator on the module description
Blinking
Sending data to router
Green
Solid
Module is connected to router
Off
Module is not connected to router
Table 2 LED indicator on RJ45 connector description
OLED Operation
Module provides a button for users to set the safety
standards, check power generation information, fault
information, etc., and the operations are as below:
Operations
Single click
Double click
Long press
2019
18:28
05/20
Power: 0.00KWh
Mode: Init
Long press
double click
---Main menu---
Module
>Grid Compliance
Inverter Err
connected to
Factory Set
server
---Main menu---
Inverter/ module
Grid Compliance
>Inverter Err
is upgrading
Factory Set
Click
---Main menu---
Inverter Err
Module
Factory Set
>Restart Module
connected to
server
Inverter/ module
Screen will return to home interface if no further
is upgrading
operation for 40 seconds. OLED monitor will turn off if
no further operation for 50 seconds.
2. Installation & Connection
Step 1. Turn the module hexagon nut position to a
horizontal position.
Function
Up/Down page selection
Returning to the main interface
Confirm
Delay 2 s
2019
18:28
Click
05/20
E-Day: 0.00KWh
double click
E-Tol : 0.00KWh
Grid Compliance
Long press
Are you sure to
Long press
Australia
set it ?
AS 4777
2019
18:30
2019
18:30
05/20
05/20
Long press
Click
ERR:1/2 >
ERR:2/2 >
L1 No Grid Err
S
L1 No Grid Err
M
Temp. Low Err
M
Long press
Are you sure to
restart ?
Step 2. Insert the module into the inverter USB interface
and fasten the hexagon nut in clockwise direction.
Step 3. Connect RJ45 connector to router.
3. Installer Configuration
3.1 Download eSolar O&M APP
For iOS system, search "eSolar O&M" in App Store to
download. For Android system, search "eSolar O&M"
in Google Play to download.
3.2 AIO3 module connection
After installation of the module, power on the inverter.
Wait for 2 minutes, if the module signal light is blinking
slowly (refer to Table 1), it indicates that the module is
working normally. If the station is built, the inverter
information can be viewed in APP or website.
Bluetooth connection
②
Turn on mobile phone Bluetooth connection.
② Sign in eSolar O&M APP→ Select "My" →Select
"Remote Configuration" → Select "Bluetooth" → "Next"
→Search devices → Select the Bluetooth(such as
Bluelink:00012).
Fig 3.1 Bluetooth connection
Advertisement
Table of Contents

Subscribe to Our Youtube Channel
Summary of Contents for SAJ eSolar AIO3
- Page 1 Quick Installation Guide of eSolar AIO3 Module OLED Operation Step 2. Insert the module into the inverter USB interface Module provides a button for users to set the safety 1. Product Appearance and fasten the hexagon nut in clockwise direction.
- Page 2 ⑤ Module working mode are included auto, WiFi and ② ③ Choose the Wi-Fi or Ethernet to access internet Click on the Device info to check the basic info, from the pop-up window, data can only be sent to Ethernet mode which can be set as per user running info, power info and event info of inverter server after accessing the internet.


Need help?
Do you have a question about the eSolar AIO3 and is the answer not in the manual?
Questions and answers