Table of Contents
Advertisement
Advertisement
Table of Contents

Related Manuals for Mercku Tech M6

Summary of Contents for Mercku Tech M6
- Page 1 USER GUIDE M6 AX1800 Mesh Wi-Fi Router...
-
Page 2: Table Of Contents
3.1 Tips When Installing Your M6 Router or Nodes .............16 3.2 Installing Your M6 Using the Mercku App/Portal ..............16 3.3 Connect a Device to Your M6 via Ethernet Cable ............17 3.4 Adding an M6 Node to Your Existing Mesh ..............17 3.5 Positioning Your Mesh Nodes ..................21... - Page 3 4.4.2 From Router to Internet ...................28 4.5 Monitor Internet Traffic Usage ..................29 Chapter 5: Wi-Fi Settings ......................30 5.1 Wi-Fi Name and Router Management ................31 5.1.1 How to Change Your Wi-Fi Name and Password ...........31 5.1.2 Change Router Encryption ..................32 5.2 Smart Connect........................34 5.3.
- Page 4 Chapter 11: Upgrading Devices....................72 11.1 Firmware Upgrades ......................73 11.1.1 Online Upgrade ......................73 11.1.2 Offline Upgrade ......................74 11.2 Automatic Upgrade ......................75 Chapter 12: Diagnostic Tools ....................78 12.1 Network Diagnosis .......................79 12.2 System Log ........................79 12.3 Technical Feedback .....................80 FAQ ............................81 1.3.0 Update – 2021-06-24.......................86 1.3.0-1.
-
Page 5: About This Guide
About This Guide Thank you for purchasing Mercku' s M6 AX1800 Mesh System! This User Guide is meant to compliment the Quick Start Guide provided with the device. The Quick Start Guide walks you through quick set-up and node addition instructions for your new Mercku M6, whereas this User Guide provides a detailed description of each function and shows you how to optimize your function configurations to best suit your needs. -
Page 6: Chapter 1: Mercku M6 Overview
Chapter 1: Mercku M6 Overview This chapter introduces technical specifications for the M6 router: • M6 Technical Specifications • LEDs Page | 5... -
Page 7: M6 Technical Specifications
1.1. M6 Technical Specifications The M6 router, when placed in an open location, can provide coverage for a home of up to 3,000 ft (280 m ). Please refer to the information below for technical specifications for the Model M6R0... - Page 8 Port forwarding WAN MAC Clone Firewall ICMP Smurf, IP Land, IP Spoof, IP Teardrop, Ping of Death, TCP Scan, TCP SynwithData, UDP Bomb, UDP Echochargen System log Customized DNS Network diagnosis ping / traceroute / nslookup Smart connect 2.4 GHz /5 GHz SSID separation Guest Network Certification...
-
Page 9: Leds
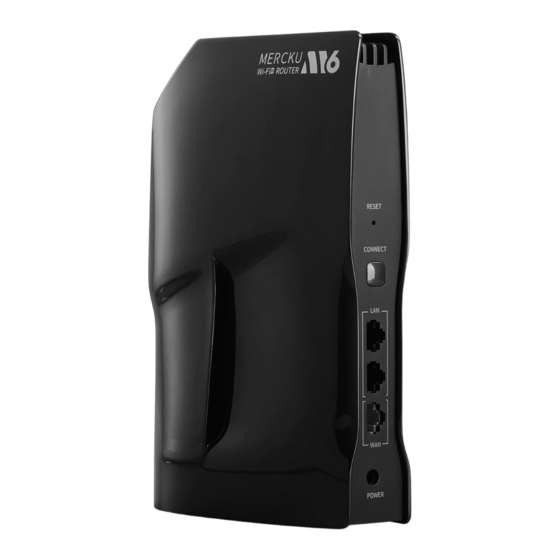
1.2. LEDs The LED indicator at the front of the M6 indicates its status: Blinking slowly: operation in progress (e.g. booting up, upgrading firmware) Blinking quickly: undergoing factory reset Blinking: router is in pairing mode Steadily illuminated: stable network No internet connection... -
Page 10: Chapter 2: Managing Your System
Chapter 2: Managing Your System This chapter goes through options for managing and accessing your new Mercku wireless network. • Installing the Mercku App • Creating an Account in the Mercku App Using your Phone Number Using your Google or Facebook Account •... -
Page 11: Installing The Mercku App
2.1 Installing the Mercku App The Mercku App runs on iOS and Android devices, such as smartphones and tablets. Go to the Apple App Store for iOS devices or Google Play for Android devices and search " Mercku" or simply scan the QR code to download and install the app. 2.2 Creating an Account on the Mercku App 2.2.1 Using your Phone Number 1. -
Page 12: Using Your Google Or Facebook Account
2.2.2 Using your Google or Facebook Account Go to the Mercku App and click on " Login", select 2.3 Set Up Your Network Without an Account When you open the Mercku App, you can select the Setup without login option to set up your network without linking an account to your phone number, Facebook, or Google account. -
Page 13: Managing Your Network From The Mercku App
2.4 Managing Your Network from the Mercku App After setting up your Mercku account, you can " bind" the M6 to your phone' s Mercku App for remote and on-site access to the network. The M6 network may only be bound to a single device at any given time. -
Page 14: Country/Region Settings
Using the Mercku web portal: 1. Visit http://mywifi.mercku.tech and log in using your Router Admin Password. 2. Go to Settings > Timezone 3. Select your time zone 2.8 Country/Region Settings You can set the country/region for your Mercku network. This may influence the channels available for certain settings including Wi-Fi channel switching, as well as other Wi-Fi time management settings such as parental controls and guest Wi-Fi. - Page 15 You can change your country/region using either the Mercku App or the web portal. Using the Mercku App: 1. Open the Mercku App on your mobile device. 2. Go to Settings > Country/Region > Select your country/region from the list. Using the Mercku web portal: 1.
-
Page 16: Chapter 3: Installation And Mesh Set-Up
Wi-Fi network. • Tips When Installing Your M6 Router • Installing the M6 Using the Mercku App/ Portal • Connecting a Device Directly to the M6 • Adding an M6 Node to Your Existing Mesh •... -
Page 17: Tips When Installing Your M6 Router Or Nodes
3.2 Installing Your M6 Using the Mercku App/Portal 1. Plug in the M6 and connect the one end of the provided ethernet cable to the WAN port of the M6 and the other end to the LAN port of your modem. Once connected via ethernet cable, a white light in front of the M6 will light up, confirming a successful connection. -
Page 18: Connect A Device To Your M6 Via Ethernet Cable
Simply plug in your device' s ethernet cable to the LAN port of the M6. When the M6 is powered up, a red light shows up, and the LED light in front of the router will change to white once a successful local connection has been established. - Page 19 Open the Mercku App on your mobile device. b. Select the "+" sign at the right -top corner > Start c. Plug in the M6 node - the indicator light on the front will start off as red, then orange...
- Page 20 Press the "Connect" button on the M6 node until the indicator light blinks blue, follow the instructions in the App, and wait for about to 1 minute for the M6 node to be added e. When the nodes are meshing, an animation of this activity shows up, please wait for 1 minute until the "Successfully added"...
- Page 21 Router Admin Password. b. On the homepage, click on Add a node > Start Plug in the power to the M6 node - the indicator light on the front will show red light at first, then turn orange.
-
Page 22: Positioning Your Mesh Nodes
3.5 Positioning Your Mesh Nodes • Place nodes in open locations around the M6 router • The higher the node is placed, the better coverage • Avoid placing nodes close to appliances which may cause signal interference. E.g. microwaves, 2.4 GHz wireless mouse, 2.4 GHz wireless telephones •... -
Page 23: Chapter 4: Router Management
Chapter 4: Router Management This chapter will review details on how you can manage your Mercku hardware, from testing network speeds to rebooting and factory resetting. • Increase Mesh Coverage • Mesh Topology and Connection Quality • Managing Your Mercku Hardware Opening Your Device List Reboot Factory Reset... -
Page 24: Increase Mesh Coverage
4.1 Increase Mesh Coverage I ncrease mesh coverage is a feature that manages communication between mesh units on the Mercku network. When disabled, Mercku mesh units will decide which of the bands is stronger and will connect to it automatically. When this feature is enabled, you will force all units to stay only on the 2.4 GHz band in order to improve the reach of your mesh system. -
Page 25: Mesh Topology And Connection Quality
4.2 Mesh Topology and Connection Quality The Mesh Topology diagram is a depiction of your Mercku network, the available wireless connections between them, and the connection quality between each node. The connection quality between nodes is illustrated by the following: •... - Page 26 Using the Mercku Portal: 1. Visit http://mywifi.mercku.tech and log in using your Router Admin Password 2. Under My Wi-Fi > Select Router Management > Click on List Page | 25...
-
Page 27: Reboot
There are three ways you can factory reset your router: 1. Manual factory reset: Use the pin to press and hold the Reset button of your M6 for approximately 5 seconds until the LED indicator light starts blinking red, then release. - Page 28 3. Using the Mercku App: a. Open the Mercku App on your mobile device b. Under My Wi-Fi> Select Wi-Fi point c. In the wireless topology diagram > Select the M 6 node you would like to reset > Press Factory Reset Page | 27...
-
Page 29: From Device To Router
2. Select Toolbox > Speedtest > Beside Mobile>Router, press Start 4.4.2 From Router to Internet This tests the wired network speed between the M6 router and the internet. It can be tested either via the Mercku App or the Mercku portal. -
Page 30: Monitor Internet Traffic Usage
Using the Mercku Web Portal: 1. Visit http://mywifi.mercku.tech, and log in using your Router Admin Password 2. Under My Wi-Fi> Select Internet > Click on Speedtest under the Traffic Statistics header 4.5 Monitor Internet Traffic Usage From the Mercku Portal you can monitor the following: •... -
Page 31: Chapter 5: Wi-Fi Settings
Chapter 5: Wi-Fi Settings This chapter includes the following sections: • Wi-Fi Name and Router Management How to Change Your Wi-Fi Name and Password How to Change Your Router Encryption • Smart Connect • Channel Switching • Adjusting Channel Width Page | 30... -
Page 32: Wi-Fi Name And Router Management
5.1 Wi-Fi Name and Router Management From the Mercku App and Mercku Portal, you can manage your Wi-Fi name (SSID) and its encryption method. 5.1.1 How to Change Your Wi-Fi Name and Password Change your Wi-Fi name (SSID) for each band and Wi-Fi password using either the Mercku App or Portal. -
Page 33: Change Router Encryption
5.1.2 Change Router Encryption Router encryption encodes the data transmitted between your device s and your M6 router. The default encryption method the M6 uses is WPA2. The default encryption method may also support old Wi-Fi devices without WPA2, and supports WPA3. - Page 34 Using the Mercku Portal: 1. Visit http://mywifi.mercku.tech, and log in using your Router Admin Password 2. Select Settings > Wi-Fi Settings > Select preferred encryption type under “Encryption” Page | 33...
-
Page 35: Smart Connect
5.2 Smart Connect Smart Connect combines both the 2.4 GHz and 5 GHz networks into a single SSID. This enables your device to connect automatically to the appropriate network depending on your device' s hardware capabilities. Smart Connect is on by default, so if you would like to split the 2.4 GHz and 5 GHz networks you can do the following to turn off this function: Using the Mercku App: 1. -
Page 36: Channel Switching
Once you disable Smart Connect, you will see two networks - the 2.4 GHz network (will have the same SSID), and the 5 GHz network (SSID - 5G). The passwords and SSID' s for both networks will remain the same unless you choose to change them. Please Note: Some wireless devices only support connection with the 2.4 GHz channel, mainly IoT (Smart Home) devices like thermostats, and smart cameras. - Page 37 Using the Mercku Portal: 1. Visit http://mywifi.mercku.tech, and log in using your Router Admin Password 2. Select Settings > Wi-Fi Settings 3. Select which channels you would like to use from the "2.4G channel" and "5G channel" dropdown lists. 4. Click Save. Page | 36...
-
Page 38: Adjusting Channel Width
5.4 Adjusting Channel Width Adjusting your channel width impacts the amount of bandwidth used during data transmission. Increasing the channel width generally leads to faster speeds but makes it more susceptible to interference. You can adjust your Mercku network' s channel width to the following on each band: •... - Page 39 Using the Mercku Portal: 1. Visit http://mywifi.mercku.tech, and log in using your Router Admin Password 2. Select Settings > Select Wi-Fi Settings 3. Under "2.4G channel" and "5G channel", you can select what width you would like your channel to use. 4.
-
Page 40: Chapter 6: Guest Network
Chapter 6: Guest Network A Guest Network uses a different SSID from your main wireless network . It is designed to provide visitors in your house, apartment, or workplace with internet access while keeping your main Wi-Fi network separate and secure. This section will cover the following topics: •... -
Page 41: Setting Up Your Guest Network
6.1. Setting Up Your Guest Network Using the Mercku App: 1. Open the Mercku App on your mobile device 2. Select Settings > Select Guest Wi-Fi > Press the toggle to enable Guest Wi-Fi Using the Mercku Portal: 1. Visit http://mywifi.mercku.tech, and log in using your Router Admin Password 2. -
Page 42: Customizing Your Guest Network
6.2 Customizing your Guest Network Once Guest Wi-Fi is enabled, you will be able to create a separate SSID that differentiates the network from your main network, and you will be able to set the following functions: Active Time: you can put a limit to the amount of time the guest Wi-Fi is active •... -
Page 43: Chapter 7: Network Security
Chapter 7: Network Security Protect your network from cyber attacks and unauthorized users by implementing the following network security measures: • Firewall • WAN Ping • Blocklisting Devices • Universal Plug and Play (UPnP) Page | 42... -
Page 44: Firewall
WAN IP address is valid and supports a network. When WAN Ping is off, the public WAN IP address on the M6 will not respond to ping commands. This function is off by default and it is recommended to keep it off. -
Page 45: Upnp
2. Select Settings > Wi-Fi Devices > Select the device you would like to blocklist > Add to Blocklist Using the Mercku Portal: Visit http://mywifi.mercku.tech and log in using your Router Admin Password Under My Wi-Fi> Select Devices > Click Add to Blocklist beside the device you want to blocklist >... - Page 46 3. You' re free to enable or disable this function. Using the Mercku Portal: 1. Open the Mercku App on your mobile device 2. Select Settings > UPnP 3. You' re free to enable or disable this function. Page | 45...
- Page 47 Page | 46...
-
Page 48: Chapter 8: Parental Controls
Chapter 8: Parental Controls These functions allow you to block inappropriate, explicit, and malicious websites, control access to specified websites at certain times, and limit the bitrate of user ' s devices. This chapter contains the following sections: • How to Set Time Limits •... -
Page 49: Set Time Limits
8.1 Set Time Limits Setting time limits enables you to control the amount of time a specific device on your network can stay connected to your Mercku Wi-Fi. Using the Mercku App: 1. Open the Mercku App on your mobile device 2. - Page 50 Using the Mercku Portal: 1. Visit http://mywifi.mercku.tech, and log in using your Router Admin Password 2. Select My Wi-Fi > Devices > Select the device you want to set limit for and click their Settings > Select Time Limit > Click Add > Enter cut off time parameters > Save. Page | 49...
-
Page 51: Set Rate Limits
8.2 Set Rate Limits Setting rate limits allows you to control the upload and download speeds for specific devices that are connected to your Mercku Wi-Fi. Using the Mercku App: 1. Open the Mercku App on your mobile device 2. Select My Wi-Fi> Devices > Select the device you want to set limit for > Rate Limit > Enter rate limit parameters >... -
Page 52: Website Blocklisting
Using the Mercku Portal: 1. Visit http://mywifi.mercku.tech, and log in using your Router Admin Password 2. Select My Wi-Fi > Devices > Select the device you want to set limit for and click their Settings > Select Rate limit > Click Add > Enter rate limit parameters > Save 8.3 Website Blocklisting Blocklisting inappropriate, explicit, and malicious websites allows you to control what kind s of content certain devices can access. - Page 53 Please Note: Specific website URLs such as google.com/adc/er cannot be added to the Blocklist. Using the Mercku Portal: 1. Visit http://mywifi.mercku.tech, and log in using your Router Admin Password 2. Select My Wi-Fi > Devices > Select the specific device you want to blocklist websites on >...
-
Page 54: Chapter 9: Advanced Settings
Chapter 9: Advanced Settings This chapter includes the following sections: • Port Forwarding • DMZ Host • Changing DHCP LAN IP • Set Up a Static DHCP Lease • Clone MAC Address • Set Up Dynamic DNS Service Account • •... -
Page 55: Port Forwarding
IP address to communicate with devices on the internet . The M6' s port forwarding function can forward one or more ports in your network to a network on the internet. By configuring this feature, you can share services or systems within your network to specific Internet users. -
Page 56: Dmz Host
The M6 DMZ host solves issues where the external net work cannot access the internal network server after installing a firewall and sets up a buffer between the non -secured system and the secured system. -
Page 57: Change Dhcp Lan Ip
Make sure you assign a static IP address to the device that you want to become the DMZ Host. This is important so that your router does not assign a random IP to a device that you don' t wish to be the DMZ host. Using the Mercku App: 1. - Page 58 2. Select Advanced Settings > DHCP How to change the DHCP LAN I P: By default, M6 runs a DHCP server on the LAN IP 192.168.127.1, with a default range of 192.168.127.100 through 192.169.127.199. You may also decide the time these released IP' s or enabled by changing the "...
-
Page 59: Set Up A Static Dhcp Lease
IP address is needed, especially in port forwarding. DHCP will provide temporary IP addresses while static DHCP will lease permanent IP addresses. The M6' s static DHCP is a feature to make the DHCP always assign the same IP address to a certain MAC address. -
Page 60: Clone Mac Address
To avoid this, you can clone the MAC address of the identified MAC address when you registered. The M6 supports router WAN MAC Clone feature. You will be able to modify the MAC address of the router WAN with this function on. -
Page 61: Set Up A Dynamic Dns Service Account
Using the Mercku Portal: 1. Visit http://mywifi.mercku.tech, and log in using your Router Admin Password 2. Select Advanced Settings > Clone MAC Address To clone your MAC address you must do the following: Enable the "Clone MAC Address" and enter t he custom MAC address of the device whose MAC address you want cloned. - Page 62 The M6 provides with a passthrough to the DDNS service by DynDNS and Oray. As a result, you will need to buy a DDNS service pr ovided by either of these two operators and enter account information in the DDNS section.
-
Page 63: Vpn
The M6 currently supports both VPN passthrough and VPN client s. For VPN passthrough, the M6 can pass VPN traffic between a device inside the router ' s network and the VPN server outside of the network. This function is enabled by default. -
Page 64: Set Up Bridge Mode
4. Press Save. How to configure VPN passthrough: Since the M6 offers VPN passthrough, you will need to get an VPN service in advance and fill in the VPN information accordingly. The M6 only supports PPTP, L2TP, and OpenVPN protocols for the VPN connection. Please enable both ' MPPE Encryption' and ' MPPC Compression' for the PPTP protocol. - Page 65 Using the Mercku App: 1. Open the Mercku App on your mobile device 2. Settings > Network Settings > Network Mode > Bridge Mode > Save Using the Mercku Portal: 1. Visit http://mywifi.mercku.tech, and log in using your Router Admin Password 2.
- Page 66 To see which features are available in bridge mode, please view the table below: M6 Feature I s this available in bridge mode? Wi-Fi Management Increase Mesh Coverage Smart Connect Channel Switching Channel Width Selection Device Blocklisting Time Zone Selection...
-
Page 67: Chapter 10: Internet Protocol Settings
Chapter 10: Internet Protocol Settings This chapter includes the following sections: • Internet Protocol Setup • Internet VLAN Configuration (for PPPoE) • IPv6 Page | 66... -
Page 68: Internet Protocol Setup
10.1 Internet Protocol Setup Please Note: Contact your Internet Service Provider (ISP) before changing the internet setup protocol to retrieve all the necessary information. Please note that not using your ISP ' s setup information may impact your ability to use the Mercku network . Using the Mercku App: 1. -
Page 69: Internet Vlan Configuration (For Pppoe)
Using the Mercku Portal: 1. Go to Settings > Internet Settings 2. You can change your Internet Settings from DHCP to PPPoE or Static IP. Please contact your Internet Service Provider (ISP) and request the required information to do so. 3. - Page 70 3. Enable Advanced Settings and enter your Internet VLAN ID Using the Mercku Portal 1. Visit http://mywifi.mercku.tech, and log in using your Router Admin Password 2. Under Settings > Internet Settings > Select PPPoE 3. Select Advanced Settings and enter the Internet VLAN ID information Page | 69...
-
Page 71: Ipv6
10.3 IPv6 IPv6 (Internet Protocol version 6) is a new IP protocol designed to solve problems that the previous version (IPv4) encountered using an address length of 128 bits rather than 32. Using the Mercku App: 1. Open the Mercku App on your mobile device 2. - Page 72 1. Visit http://mywifi.mercku.tech, and log in using your Router Admin Password 2. Select Settings > IPv6 Page | 71...
-
Page 73: Chapter 11: Upgrading Devices
Chapter 11: Upgrading Devices This chapter will go through to process to complete online and offline upgrades for your Mercku devices and will go through a sample scenario if your network ' s devices' firmware is mismatched. • Firmware Upgrades Online Upgrade Offline Upgrade •... -
Page 74: Firmware Upgrades
1. Open the Mercku App on your mobile device 2. Settings > Upgrade Firmware 3. Now select the M6 node that you wish to upgrade > Click Upgrade. 4. Once the upgrade process is over, you can check that you are using the latest firmware version by going to Settings >... -
Page 75: Offline Upgrade
Visit http://mywifi.mercku.tech, and log in using your Router Admin Password Go to Upgrade Firmware > Online Upgrade Select all the M6 node that you wish to upgrade > Click Upgrade The message below will appear, click on Upgrade: After the upgrade, you will be re-directed to the homepage. Click on My Wi-Fi> Router Management >... -
Page 76: Automatic Upgrade
11.2 Automatic Upgrade Automatic firmware upgrades allow you to upgrade the M6 firmware on a pre-set to avoid interrupting the local Wi-Fi. There are two ways you can upgrade the firmware version of your Mercku nodes to the latest version: online upgrade and offline upgrade. - Page 77 3. Set up a preferable time for automatic firmware upgrade, select a time frame to auto detect the latest firmware for the automatic upgrade. Page | 76...
- Page 78 Using the Mercku Web Portal: 1. Open the Mercku web portal on your device, log in 2. Go to Upgrade Firmware on the top bar > Click "Timer" on the top right 3. Set up a preferable time for automatic firmware upgrade, select a time frame to auto - detect the latest firmware for the automatic upgrade.
-
Page 79: Chapter 12: Diagnostic Tools
Chapter 12: Diagnostic Tools This chapter covers the tools you can use to diagnose any issues you ' re currently having with your device(s) and/or network. • Network Diagnosis • System Log • Technical Feedback Page | 78... -
Page 80: Network Diagnosis
12.1 Network Diagnosis The M6 has three tools for network diagnosis, only available using the Mercku Portal: ping: A utility that checks if an IP address or host is accessible or not. Ping works by sending a packet to the specified address and waits for the reply. It also measures round trip time and reports errors. -
Page 81: Technical Feedback
12.3 Technical Feedback You can also report any issues you' re having with your system through the Mercku App b y sending our team a technical feedback form. 1. Open the Mercku App on your mobile device 2. Press at the top left of your screen to open your profile > Press Technical Feedback >... -
Page 82: Faq
1. I have recently changed my phone number; how come I can 't log into my Mercku App? I f your Mercku account has been associated with your phone number, you can unbind your router by factory resetting the M6, or manually unbinding it. Please see section 2.6 for instructions on how to unbind your router. - Page 83 FCC STATEMENT This device complies with Part 15 of the FCC rules. Operation is subjected to the following two conditions: (1) this device may not cause harmful interference, and (2) this device must accept any interference received, including interference that may cause undesired operation. Changes or modifications not expressly approved by the party responsible for compliance could void your authority to operate this equipment.
- Page 84 CE Mark Warning This is a class B product. In a domestic environment, this product may cause radio interference, in which case the user may be required to take adequate measures. RF Exposure I nformation This device meets the EU requirements (2014/53/EU Article 3.1a) on the limitation of exposure of the general public to electromagnetic fields by way of health protection.
- Page 85 Page | 84...
- Page 86 Page | 85...
-
Page 87: Update - 2021-06-24
1.3.0 Update – 2021-06-24 1.3.0-1. Automatic Channel Selection Automatic channel selection allows your Mercku network to regularly scan for the optimal channels your network is connected to on the 2.4 and 5 GHz bands. Scanning and connecting to the best channel optimizes network speeds and throughput, all done automatically so you don’... -
Page 88: Led Control
1.3.0-2. LED Control Enabling LED control allows users to schedule when the M6’ s front LED turns off, and back Using the Mercku App: 1. Open the Mercku App on your mobile device 2. Select Settings > LED Page | 87... - Page 89 3. Press the toggle to enable LED, and select Turn off at to input the time the router LED turns off, and select Turn on at to input the time the router LED turns back on. Using the Mercku Portal Page | 88...
-
Page 90: Wi-Fi 5 Compatibility Switch
1.3.0-3. Wi-Fi 5 Compatibility Switch When certain Wi-Fi 5 devices (e.g. laptops, wireless cards) are unable to see the M6 SSID on their network list, we recommend enabling this Wi-Fi 5 switch. - Page 91 Page | 90...
Need help?
Do you have a question about the M6 and is the answer not in the manual?
Questions and answers