Advertisement
Quick Links
Advertisement

Related Manuals for ChiQ FSS559NEI32D


Summary of Contents for ChiQ FSS559NEI32D
- Page 1 Refrigerator Service Manual Applicable to Model: FSS559NEI32D(BCD-570WPDR)(C1873)
-
Page 2: Table Of Contents
Contents Product features ..........................3 Outer appearance and structure ....................4 III. Main technical parameters ............... 错误!未定义书签。 IV. Operation instructions........................4 Display rules........................... 7 VI. Cooling system ..........................8 VII. Control system ..........................8 VIII. Maintenance guide ........................11 IX. Explosive view and spare parts list ............错误!未定义书签。... -
Page 3: Product Features
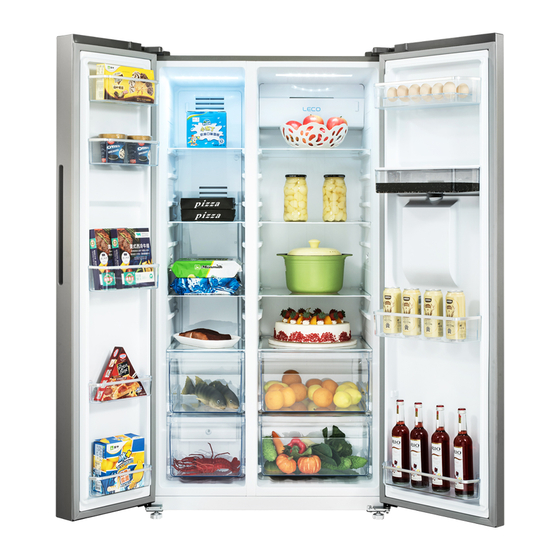
Product features This is a frost-free side-by-side fridgefreezer. Its right side is the fridge compartment for fresh food storage, such as fruits, vegetables, eggs, milk, cooked foods, etc.; and its leftside is the freezer compartment where fish, meat, etc. can be frozen for the long-term storage. ★Real-time monitoring;... -
Page 4: Outer Appearance And Structure
Outer appearance and structure Note: Due to technological innovation, the product descriptions in this manual may not be completely consistent with your refrigerator. Details are in accordance with the real product. III. Operation instructions 1. Keys Temp.Zone This is the key to select the temperature zone, and the temperature zone changes once... - Page 5 with each response of the key. When the fridge zone is selected (with icon of the fridge door flickering), temperature digits starts flickering. After temperature setting, press the OK key to validate it. When the freezer zone is selected (with the icon the freezer door flickering), set the temperature by reference to the fridge temperature setup.
- Page 6 3) The selected function takes effect after the ‘OK’ key is pressed. When a function has not been set, press this key to select the function, and then press the OK key, the selected function can be enabled; and if a function has been set, press this key to select the function, and then press the OK key, the function will exit.
-
Page 7: Display Rules
When the display is unlocked, the Child Lock function will be enabled automatically if no key operation within 3 minutes. To exit Child Lock. Refer to the Key operation. When the Child Lock function is enabled, the refrigerator temperature and function are subject to no change. -
Page 8: Cooling System
can be displayed by pressing any key. And the normal display is restored 10s later or by pressing any key again. Special function program display contents When the ‘Smart’ function is enabled, the character ‘Smart’ and its icon light up, with the fridge temperature and the freezer temperature displayed as 5℃and -18℃;... - Page 9 Components output: Compressor(~220V / 50Hz,200W) Buzzer LED display Fridge lamp(12V,3W) Fridge lamp (12V,3.5W) Freezer fan(12VDC,4W) Freezer defrosting heater(~240V / 50Hz,240W) Diagram of the control board-the board integrating the inverter control with the main control...
- Page 10 控 制 板 简 图 Components control rules Compressor Make sure to wait for at least 5 minutes before you start it again after it is shut down.
-
Page 11: Maintenance Guide
Lamp If any refrigerator door switch is detected to be on, the corresponding compartment lamp gets switched on. If any refrigerator door switch is detected to be off, the corresponding compartment lamp gets switched off. The lamp gets switched off after keeping illuminated for more than 10 minutes Fridge air damper When the fridge is cooling, the fridge air damper is opened;... - Page 12 Freezer sensor fault The graphic of the freezer zone lights up, with E0 displayed. Freezer evaporator he graphic of the freezer zone lights up, with E1 sensor fault displayed. Communication fault EC is displayed. Ambient temperature EH is displayed. sensor fault If the fault messages E0 and E1 need to be displayed at the same time, E2 will be displayed instead.
- Page 13 insert it again, and then power on the system to observe whether there is alarm or not; If the alarm continues, cut off power supply, insert a new temperature sensor into the cabinet terminal, power on the system to observe whether the display panel will continue to alarm;...
- Page 14 If the alarm continues, for the compartment equipped with the proximity switch, open the compartment door and then close it, leaving some gaps, and observe whether the corresponding compartment LED lamp (if any) turns off;If the LED lamp turns on/off as the door is opened/closed, the proximity switch and magnet under test are qualified;...
- Page 15 not. If it still cannot start, cut off power supply, replace the control board, and power on the system after inserting well the terminal, observing whether the compressor can start normally or not. If it still cannot start, it is judged as the compressor fault, then replace the compressor.
- Page 16 fridge door, hold down the door lamp switch, checking whether there is cool air blown out of the fridge air outlet. Cut off power supply, replace the main board, power on the system when the door is opened, close the door for cooling 10 minutes, and then open the fridge door, hold down the door lamp switch, checking whether there is cool air blown out of the fridge air outlet.
- Page 17 program, and turn on the fan, checking whether the fan can be turned on normally. (7) The refrigerator does not defrost. Cut off power supply, remove the electrical box cover, and check whether the terminals on the main board are properly connected. After the power is cut off, remove the freezer air duct assembly, checking whether the defrosting heater terminal is properly connected, whether the terminal is sealed properly, and whether the terminal is in good condition.
- Page 18 How to check the fuse. Dismantle the freezer air duct assembly by referring to the disassembly method of "freezer air duct assembly", unplug the fuse terminal, set the multimeter as illustrated below, and apply the electroprobe to the position as the picture illustrates, so as to test whether the fuse is blown out:...
- Page 19 Special programs Maintenance program (by holding down the combination keys of ‘Child Lock’ and ‘OK’) (1) When you press the "Temp. Zone" key, the parameter items and adjustable operating parameter values as listed in the following table will be displayed from left to right and from top to bottom.
- Page 20 Standby (this FL(condenser fan) 0(OFF), 1(ON) feature not actually available) (3) During the running of the maintenance program, the compressor keeps rotating at 3000rpm. (4) After the operating state is set, the refrigerator will run according to the maintenance program. (5) During the running of the maintenance program, you can press the ‘Temp.’...
- Page 21 (b) After removing the fridge air hood, take out the EPS foam block shown as the figure, and unplug the terminal of the electric damper, the disassembly of the fridge air duct is completed. (c)Remove the fridge air duct, tear off the masking tape attached tothe air duct surface, take out the electric air duct wire, take apart the air duct splicing parts, and take out the fridge electric air damper, then the disassembly of the fridge air duct assembly is completed.
- Page 22 (b)Tear off the sponge and remove the temperature sensor. How to dismantle the fridge LECO. (a) Remove the duct cover assembly with an electric pen or flat head screwdriver, and replace it directly.
- Page 23 How to dismantle the fridge top LED lamp.
- Page 24 (a) Pry off the lampshade with an electric pen or flat screwdriver; The lamp shade is fixed by the clamping claws, 3 on each of the front and back sides, with the clamping claw positions shown as the Figure. (b)Remove the screw from the lamp holder with a screwdriver, remove the lamp holder, and unplug the socket terminal on the back.
- Page 25 (c) The display panel is fixed by two screws and four claws, and it can be removed after the screws are screwed off. How to dismantle the freezer air duct assembly. (It is the same as that for dismantling the fridge air duct assembly, so only text descriptions are made hereunder.) (a)Use a screwdriver to remove the two screws on the left and right sides of the freezer air duct assembly.
- Page 26 then pull out the freezer air duct assembly from the bottom up. (c) After pulling out the air duct assembly, unplug the molded case connector on the back, and then remove the air duct assembly. How to dismantle the freezer evaporator sensor. (a) Refer to the instructions for dismantling the freezer air duct assembly, and remove the freezer...
- Page 27 How to dismantle the heater. (a)Remove the freezer air duct assembly by (b)Unplug the heater connector terminal, reference to the instructions for dismantling the screw off the screw as illustrated by the left freezer air duct assembly; picture, and cut off the cable ties as shown by the above picture.
- Page 28 How to dismantle the hinge. (a) Use a screwdriver to remove the hinge cover screw. (b) Open the hinge cover, and unplug the two connector terminals. (c) Remove the hinge cover, and screw off the three bolts that secure the hinge, then the hinge can be dismantled.
- Page 29 How to disassemble the main board. (a) Use a screwdriver to remove the two screws that secure the electrical box cover. (b) Remove the electrical box cover, use a screwdriver to remove the two screws fixing the control board. (c) Take out the main board, and unplug all the connector terminals on the main board, then the main board can be disassembled.
- Page 30 How to dismantle the compressor compartment. (a)Use a screwdriver to remove the nine screws on the compressor compartment rear cover. (b) Screw off the two screws as illustrated aboveto remove the two crimping blocks. Remove the compressor terminal box in the arrow direction, usingthe screwdriver as an assistant tool.
- Page 31 How to dismantle the water dispenser. (a) Remove the support base assembly (as shown in the figure):first, gently tilt the end of the decorative label mapshellwith an art knife, tear off the shell of the decorative label map slowly, screw off the screws, and then remove the support base assembly;...
- Page 32 (b) Remove the water tank assembly (as shown in the figure): stabilize the fridge door, apply a tilting force to the water tank in the upward direction, so as to remove the storage tank assembly. How to change the compressor and how to disconnect and weld the refrigeration system pipeline.
- Page 33 3.Cut off the compressor pipeline -❶Truncate the process tube -❷Truncate the low-pressure air return pipe -❸Truncate the high-pressure exhaust pipe. 4. Remove screws: - 2 outside screws; - 1 inside screw; 5. Remove the crimping block 6.Dismantle the protective cover...
- Page 34 7.Disassemble the starter and protector Unplug the starter and protector in turn (you can use a screwdriver to slowly pry them off.) 8.Loosen the fixing screws of the compressor on the bottom plate, and dismantle the compressor from the cabinet together with the bottom plate.
- Page 35 11.Replace the compressor and weld the pipes: -❿ Weld the process tube; -⓫Weld the low pressure air return pipe; -⓬Weld the high pressure exhaust pipe; 12.Replace the filter, use the silver electrode for the copper-iron pipe⓭ connection, copper electrode for the copper-copper pipe ⓮ connection.
Need help?
Do you have a question about the FSS559NEI32D and is the answer not in the manual?
Questions and answers