
Related Manuals for SPT Labtech Apricot S3

Summary of Contents for SPT Labtech Apricot S3
- Page 2 © 2021 SPT Labtech Ltd Notes:...
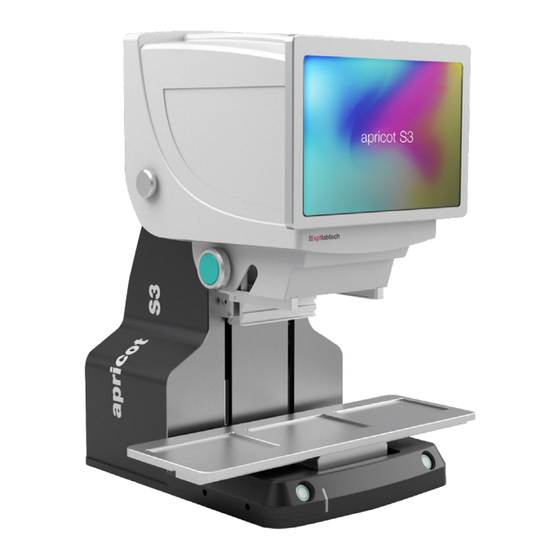
- Page 3 © 2021 SPT Labtech Ltd Thank you for purchasing the apricot S3, part of the S-Pipette series, by SPT Labtech. The S-Pipette series multi-channel liquid handling pipettors bring automated liquid handling within reach of any lab that needs to routinely perform pipetting operations onto microplates.
- Page 4 © 2021 SPT Labtech Ltd 1. Speci cations ....................7 1.1 – Software Specs and Requirements ..............8 2. Unpacking the Instrument ................ 9 2.1 – Unboxing the Instrument ................... 9 2.2 – Inspecting the Instrument ................10 2.3 – Moving the Instrument ..................10 3.
- Page 5 © 2021 SPT Labtech Ltd 6. Create Protocol ..................49 6.1 – Aspirate ......................50 6.1.1 – Varieties of Menus ..................50 6.1.2 – Station......................51 6.1.3 – Variables ...................... 51 6.1.4 – Pause ......................52 6.1.5 – Pre-Airgap and Post-Airgap ............... 52 6.1.6 –...
- Page 6 © 2021 SPT Labtech Ltd 6.10.1 – Comment ....................67 6.10.1 – Change Tips ....................67 6.11 – Comment ......................68 6.12 – Set Parameter ....................69 6.13 – Loop ......................... 70 7. Settings ....................72 7.1 – Con rm Head Volume ..................72 7.2 –...
- Page 7 © 2021 SPT Labtech Ltd The following is a list of the ideal operating parameters for the S3. This instrument will perform optimally and safely under standard laboratory settings. The use of this instrument in other environments is not recommended, and results may prove unsatisfactory.
- Page 8 © 2021 SPT Labtech Ltd o Compatible with Windows 10/8/7 o i5 CPU Processor, 4gb RAM, 1gb HD o USB cable, type B to type A o Power cord o Access -> AccessDatabaseEngineFor2007up.exe o This is included in the SPTLabtech folder after installation. No need for further steps.
- Page 9 © 2021 SPT Labtech Ltd With a Phillips screwdriver, remove the 28 packaging screws from all four sides of the crate. Lift off the top of the crate and remove any boxes and accessories. Lift the sides of the crate up and off the base and remove the tool kit.
- Page 10 © 2021 SPT Labtech Ltd After unboxing the instrument, inspect for any visible damage that may have occurred during shipping such as scratches or dents. After con rming that there is no damage you can proceed. Contact SPT Labtech immediately –...
- Page 11 © 2021 SPT Labtech Ltd o High-performance instrument – easily con red for a variety of applications o Automated pipetting into all wells of a 96-well plate with the 96 core o Automated pipetting into all wells of a 384-well plate with the 384 core o Automated pipetting 24-96, or 96-384 o 12x faster than an 8-channel handheld pipettor –...
- Page 12 © 2021 SPT Labtech Ltd The “pipette head” is separate from the pipetting mechanism, allowing easy and economical recon ration in the lab. Changing heads only takes a few seconds – easily recon re as needed! For best pipetting results – consider pipette tip selection along with the “pipette head”...
- Page 13 Tips are available in Non-Sterile (NS), Sterile (S), and Filter Sterile (FS). Please see the matrix below for complete Core/Head/Tip compatibility. The part numbers listed are for your convenience in ordering. *Please contact your SPT Labtech Sales Representative or email apricotsupport@sptlabtech.com for assistance.
- Page 14 © 2021 SPT Labtech Ltd The S3 Pipettor uses the exclusive EZ-Load tips to simplify pipettor operation with disposable tips. This patented technology is the only system using disposable tips that do not need to be “pressed on” with excessive downward force in order to create a reliable seal.
- Page 15 © 2021 SPT Labtech Ltd Step 2 Unscrew silver screws on both sides.
- Page 16 © 2021 SPT Labtech Ltd Step 3 Raise the hood, pull out the support rod to place the hood.
- Page 17 © 2021 SPT Labtech Ltd Step 4 Adjust the plunger position by using the software. Step 5 Exchange the core and select “OK” and “Apply” to return to the main menu.
- Page 18 © 2021 SPT Labtech Ltd The function operation menus will vary depending on the type of plate, full head or single column head, and channel tip the user selects. For example, here are the di erent types of menu for Aspirate function of a 96-...
- Page 19 © 2021 SPT Labtech Ltd 96 Core 384 Core 24 Ch- 4 Ch- 96 Ch- 8 Ch- Channel Channel Channel Channel Aspirate Dispense Empty Transfer Serial Dilution Fill Plate Pooling 96 Core 384 Core 24 Ch- 4 Ch- 96 Ch-...
- Page 20 Do not attempt to make an adjustment or try to repair something that is not working correctly – this could result in injury and will void the warranty. If you encounter a problem with the instrument, please contact SPT Labtech. or your distributor.
- Page 21 © 2021 SPT Labtech Ltd Here’s a general overview of how a user will run the apricot S3:...
- Page 22 Double click the S3 software icon after it has been downloaded. The login screen will display. If this is the rst time using the software, a SPT Labtech professional will log in and set up a Username and Password for you. If you have any questions, please contact SPT Labtech for assistance.
- Page 23 © 2021 SPT Labtech Ltd There are three account levels: Admin, Super User, and User. The table below shows the password for each account. Example Priority Level Password Name Highest Admin Admin 9663299 Medium Super User Apricot 654321 User Customer...
- Page 24 © 2021 SPT Labtech Ltd If the password is entered incorrectly, an alert message will pop up for 10 seconds. Make sure to input the correct password within 10 tries. Otherwise, the login will be locked for 5 minutes.
- Page 25 © 2021 SPT Labtech Ltd Admin Accounts have access to all features. Only Admin level logins can add Super User logins. Select “Change Password” from Setting. Fill in Username and Password. Then click “Add Super User” on the left. To delete the Super User account, select the desired username and click “Delete User”.
- Page 26 © 2021 SPT Labtech Ltd left. “Apricot” is the username for Super User account. As shown in the picture below, it does not have the same access as the Admin account. It does not have the option to Enable GLP, Clear Plunger, or Reset the instrument.
- Page 27 © 2021 SPT Labtech Ltd Select the desired username and click “Delete User”. The username for general User account is “Customer”. It is the most basic account. The purpose for User account is to open the le and run the protocol. Therefore, it cannot create new les, edit labware types, train plates, edit variables, edit protocols, or create protocol.
- Page 28 © 2021 SPT Labtech Ltd...
- Page 29 © 2021 SPT Labtech Ltd User cannot edit most of the features in settings. Users can only access Change Core and Change Password. Click “Change Password”, then select the desired Username, and ll in the current and new password elds. Con rm the new password and click “OK”.
- Page 30 © 2021 SPT Labtech Ltd The tablet can communicate with the S3 via the built in USB wired connection or the Bluetooth connection. There are 2 steps for setting the connection up: hardware and software. Both need to be satis ed to utilize the instrument either by Wire connection or Bluetooth connection.
- Page 31 © 2021 SPT Labtech Ltd 2. Raise the hood. 3. Adjust the left switch to either “Wire” or “BLT” (Bluetooth). Adjust the right switch to “Run”.
- Page 32 © 2021 SPT Labtech Ltd Open Settings in the software. Select “COM Port” for wired connection. Select “Bluetooth” for wireless connection. This Pipette Connection has to match the Hardware Setting. For Wire Connection, check the COM Port setting in the computer device manager.
- Page 33 © 2021 SPT Labtech Ltd There are multiple ways to initialize the instrument: Software Initialization Method 1: After open the software, a con rmation window will be popped up asking the user to initialize the pipettor. Click on “Yes” will initialize the instrument.
-
Page 34: Hardware Initialization
© 2021 SPT Labtech Ltd Hardware Initialization Method 1: This method is usually for debug purpose only. 1. Push the STOP button to “in” position while the instrument is powered o . 2. Turn on the Power. 3. Release the STOP button for the instrument to initialize. - Page 35 © 2021 SPT Labtech Ltd User can enter Select Head/Plate from the “Check head and maximum volume” prompt after Initializing or click the “Select Head/Plate” from the Setup tab. There are 2 sections: Select Head and Select Plate. User can browse...
- Page 36 © 2021 SPT Labtech Ltd To select the plate, click on the desired plate in the left, and click on the desired station to put. If user wants to create a new plate, then leave the station empty and proceed to calibrate plate.
- Page 37 © 2021 SPT Labtech Ltd There’s an option to select “My Plate Only” under Select Plate section. By checking the box, software will only display the plates that created by that speci c account. Unchecking “My Plate Only” will display all plates.
- Page 38 © 2021 SPT Labtech Ltd If you are receiving errors shown to the right, such as “You can’t rename the plate”, this is due to your account type. Access to Features by User Type o Can create or edit their own plate under “My Plate”.
- Page 39 © 2021 SPT Labtech Ltd Note: A full head must be loaded to train plate. To calibrate new plate, click “Training Plate” from Setup tab, then select the empty station. Follow the steps to de ne the plate name and de ne the plate type. Note that Step 1...
- Page 40 © 2021 SPT Labtech Ltd There are four types of Plate user can train: 96 Well, 384 Well, Reservoir, and Washer. Either 96 Wash or 384 Wash will be displayed depending on using a 96 Core or 384 Core. A full 96 head can train 96 well plate and 384 well plate. A full 24 head can train 24 well plate and 96 well plate, but it cannot train 384 Well.
- Page 41 © 2021 SPT Labtech Ltd To calibrate an existed plate, click “Calibrate Plate” from Setup Main Menu, then select the desired plate to enter Calibrate Plate menu. Follow the steps to calibrate the plate. Notice that Step 1 and Step 2 are not allowed to make changes and cannot...
- Page 42 © 2021 SPT Labtech Ltd When having an existing protocol opened, select “New File” once will empty the Protocol Line Section. Select the second time will empty the Plate Display. When having an empty protocol, and existing Plate Display, select “New File” once will...
- Page 43 User can select “Save File” to save a new created le. To save an edited le, user have to enter Password for “SPT Labtech Electronic Signature Required Record”.
- Page 44 © 2021 SPT Labtech Ltd This can be used either for a new created protocol le or an edited protocol le. Select “Save As” will open the Open File window. Select the desired folder, enter a File Name, and select “Apply” to save.
- Page 45 © 2021 SPT Labtech Ltd An overview of the Function main menu is shown below: The display should match how the plates are physically being put on the S3. This will show di rent numbers of stations depending on di rent machine model.
- Page 46 © 2021 SPT Labtech Ltd User must initialize the instrument to switch from Simulation Mode to Operation Mode. User can create or edit protocol during Simulation Mode but have to switch to Operation Mode to run the protocol. Software will automatically detect which core user put in after initialization. “Select Head/Plate”...
- Page 47 © 2021 SPT Labtech Ltd Below is the main menu for Manual Operation. There are 15 pro les user can de ne. Operational parameters can be de ed on the right and can be stored by double click the Pro le number on the top right. Then operate using the manual operations commands on the left.
- Page 48 © 2021 SPT Labtech Ltd If user check the “Use Auto Depth”, the shuttle will lift automatically to the de depth when perform Aspirate, Dispense, Empty/Blowout, and Mix. The height it lifted is de ed from Plate Training. If disable this, user would have to lift the shuttle manually to the appropriate height, or hole the plate manually right below the tips, then select the desired function.
- Page 49 © 2021 SPT Labtech Ltd After the system is connected, head and plates are de ed, and the plates are trained, user can start to create protocol. Procedure to operate the functions would 1. Select the desired function 2. Select the desired station number from Plate Display...
- Page 50 © 2021 SPT Labtech Ltd Select “Aspirate” under Function Main Menu and select the desired plate to enter the Aspirate Main Menu. Below shows the menu for 96-Channel tip with 384 well plate. The options for user are to edit the station number, aspirate volume, pause period, aspirate depth and speed, pre and post airgap, increased steps, Preview Position, and quadrant selection.
- Page 51 © 2021 SPT Labtech Ltd Select the Station number will open an interface for user to choose other desired station. To edit the aspirate volume, click on the number next to the volume to open Change Value Interface shown below. User can either use:...
- Page 52 © 2021 SPT Labtech Ltd To pause after aspirate and before tips leave the well, edit the Pause seconds. Here’s the owchart to aspirate with pre- and post- airgap. The airgaps will be emptied after other dispensing functions. Increased Steps can be edit between 1 to 10. It is the number of di erent aspiration points from Start Depth to End Depth.
- Page 53 © 2021 SPT Labtech Ltd Preview Position highlights the plate position that will be operated by the instrument. In this example, it is using a 96 core with 96 channel head and aspirate in a 96 well plate, all wells are highlighted.
- Page 54 © 2021 SPT Labtech Ltd Below shows the Dispense menu for 96-Channel tip with 384 Well plate. The red and blue boxes indicate that the same color features are operate together. Noticed in the above gure, multiple quadrants are selected. Only Dispense function can perform multi-selecting quadrants.
- Page 55 © 2021 SPT Labtech Ltd The Bottom Touch Depth will be operated only if the user selects “Yes” for Bottom Tip Touch. The tips will be going to the Bottom Touch Depth after liquid dispensed. Decremental Steps can be edit between 1 to 10. It is the number of di rent dispensing points from Start Depth to End Depth.
- Page 56 © 2021 SPT Labtech Ltd Below shows the Empty menu for 96-Channel tip with 384 Well plate. Most of the features are already covered in previous sections. Notice that for Empty function, only one quadrant can be selected.
- Page 57 © 2021 SPT Labtech Ltd Below shows the Mix menu for 24-Channel tip with 96 Well plate. Volume retained is the volume will aspirate after nished mixing. This feature can be set as variable. After enabling this feature, the tip will mix by each side depending on the mix cycles.
- Page 58 © 2021 SPT Labtech Ltd Below shows the Transfer menu for 8-Channel tip and transfer from 384 Well plate to 96 Well plate. Notice that the Quadrant gure only showed under Source because station 1 is a 384 well plate.
- Page 59 © 2021 SPT Labtech Ltd...
- Page 60 © 2021 SPT Labtech Ltd Below shows the Serial Dilution menu for 8-Channel tip from 96 Well plate to 384 Well plate. This function is not allowed using a full head (384-channel, 96-channel or 24-channel) operation. The columns from Start Column to End Column will perform Serial Dilution through mixing.
- Page 61 © 2021 SPT Labtech Ltd Below shows the Operate Position Preview from the Serial Dilution Menu. The instrument picks up 10uL from the Source Station 2 Column 1. Then mix and dispense 10uL in the Target Station 1 from Column 1 to 24 with an interval of 3.
- Page 62 © 2021 SPT Labtech Ltd Unlike other functions that user would give direct command on how much to aspirate in the Source well, Fill Plate function give direct command on how much liquid to dispense in the Target well. Therefore, user only need to set the ll volume, and de ne other features if needed, the system will automatically calculate how much to aspirate in the Source well.
- Page 63 © 2021 SPT Labtech Ltd Below shows the Operate Position Preview for Fill Plate. The instrument will aspirate 60uL from Source Station 1, and dispense 10uL to the Target Station 2 from Column 12 to Column 1 with an interval of 2.
- Page 64 © 2021 SPT Labtech Ltd Unlike Fill Plate that aspirate from one and distributes to multiple. Pooling aspirates from multiple and dispense to one. If Pooling Volume is large, it will perform pooling multiple times by going back and forth between the Source and Target plate.
- Page 65 © 2021 SPT Labtech Ltd This function is similar with Mixing, but the purpose is to wash the tips with or without Pump. Above shows the example to wash 96-channel tip in a 384 plate. Notice the quadrant ure is not showing for user to select because system assumes Wash function is...
- Page 66 © 2021 SPT Labtech Ltd If the instrument connects to the Pump, select “Yes” to use pump. This is the period in seconds the system can pause before washing. This is the period in seconds the system can pause after washing.
- Page 67 © 2021 SPT Labtech Ltd To pause between functions, select Pause from Function Main Menu. User can set instrument to Home X, Y, and Z during Pause. There are two options to pause: 1. Set pause period by using “Minute” and “Second”...
- Page 68 © 2021 SPT Labtech Ltd This is di rent than the Comment in Pause. Comment function is worked as a note that can be seen in protocol lines for user and will be ignored during the Protocol running.
- Page 69 © 2021 SPT Labtech Ltd The protocol will be running according to these set parameters after this protocol line. The XYZ speed are the axis motor speed where 0 is the slowest and 10 is the fastest. Dwell Time is the pausing time after aspirating or dispensing in the liquid.
- Page 70 © 2021 SPT Labtech Ltd There are two ways to run the loop: Outer Loop and Inner Loop. Outer Loop: user can edit the Loop Cycle and select “Run Loop” from the main menu to run all the protocol lines in loop. During protocol running, the Loop Cycle number will be decreasing simultaneously until Protocol nished.
- Page 71 © 2021 SPT Labtech Ltd...
- Page 72 © 2021 SPT Labtech Ltd Here are some of the detail about the features in Settings Menu. Enabling this function will prompt the user to con rm the maximum volume of the selected head after each initialization.
- Page 73 © 2021 SPT Labtech Ltd Enabling this function will reduce the speed of the Z-axis as the tips exiting the plate wells. This function is useful for cell-culture applications and helps improve CVs by reducing residual drops on the tips. If disabled, the Z speed will run at the default setting throughout the protocol.
- Page 74 © 2021 SPT Labtech Ltd Then press enter to create another line right under Dispense, and paste. Save the change. Open the le from software, and the new changes will be shown. Here’s a brief view of what are the number representing for aspirate.
- Page 75 © 2021 SPT Labtech Ltd Save the Notepad. Then re-open the le using “Open File” under the Protocol tab. The preview and the actual aspirate volume will be changed.
- Page 76 © 2021 SPT Labtech Ltd Enabling this function will allow user to select liquid type. The left gure below shows enable CVTC. The right gure below shows disable CVTC. Refer to 3.7 Accessing the Pipetting Core...
- Page 77 © 2021 SPT Labtech Ltd Edit the parameters from Con guration to change the system default settings. Please consult an SPT representative for any questions about the parameters. Changing parameters without fully understand may cause unexpected results.
- Page 78 © 2021 SPT Labtech Ltd SPT Labtech pipettors are highly accurate and precise systems. However, to achieve optimum results, the end user should practice some speci c programming and pipetting techniques. In some versions of the Software, the end user is responsible for adding plates/reservoirs to the software database.
- Page 79 © 2021 SPT Labtech Ltd The end user us responsible for adding plates/reservoirs to the software. Note to the programmer: Many of the settings discussed are located within the liquid handling commands of a program (aspirate/dispense/empty/mix etc.). These settings are “local” and will be applied only to the speci c program. Any settings that are made within a Con g or Setup le will be “universal”...
- Page 80 © 2021 SPT Labtech Ltd The Post Air-Gap is best utilized when aspirating liquids with a low surface tension (Methanol for example). The post air gap will provide a bu er between the liquid and the tip ori e. This well help slow, or prevent, the liquid from leaking prematurely.
- Page 81 © 2021 SPT Labtech Ltd Located on the bottom panel (front right) of base cover of the instrument is a red emergency stop button. The button doubles as a power indicator light. When pressed, the instrument will stop, and the Z-elevator will move down in case something is pinched.
- Page 82 Caution: mineral oil only. Other types of lubrication may be detrimental to the gasket material and prevent a reliable seal. Yearly maintenance is recommended. Proper maintenance helps ensure the accuracy and performance of your apricot S3.
- Page 83 © 2021 SPT Labtech Ltd Solution: Right click the icon to open Properties, go to Compatibility tab, and check “Run the program as an administrator”, then select “OK” to exit. Program should be able to open now.
- Page 84 Solution 1: Grant security permission for user in Windows 7 and higher Operating Systems. 1. Locate software folder: Usually under C:\Program Files\ SPT Labtech. 2. Right Click the Folder and select Properties. 3. Select Security: Then click Edit 4. Check Allow full control for the Users.
- Page 85 SPT Labtech products are renowned for their industry-leading reliability and e ciency. With our reliance service, you have access to a dedicated support team to safeguard your investment and secure your productivity.
Need help?
Do you have a question about the Apricot S3 and is the answer not in the manual?
Questions and answers