Table of Contents
Advertisement
INSTALLATION & INSTRUCTION
MANUAL
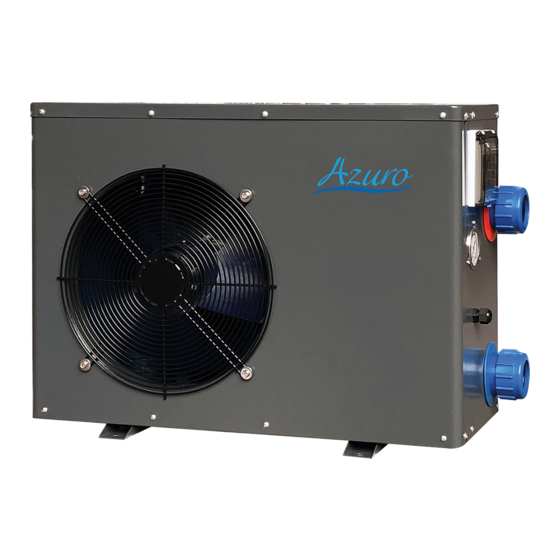
The illustrations shown in this manual may not always correspond to a specific design;
their purpose is to help better understand the text.
The manufacturer and supplier reserve the right to make changes to the product
without obligation update this Installation and Operation Guide.
Advertisement
Table of Contents

Subscribe to Our Youtube Channel
Related Manuals for AZURO 10Kw


Summary of Contents for AZURO 10Kw
- Page 1 INSTALLATION & INSTRUCTION MANUAL The illustrations shown in this manual may not always correspond to a specific design; their purpose is to help better understand the text. The manufacturer and supplier reserve the right to make changes to the product without obligation update this Installation and Operation Guide.
-
Page 2: Table Of Contents
CONTENTS 1. Preface 2. Specifications 2.1 Performance Data of Swimming Pool Heat Pump Unit 2.2 Dimensions for Swimming Pool Heat Pump Unit 3. Installation and Connection 3.1 Installation illustration 3.2 Swimming Pool Heat Pumps Location 3.3 How Close to Your Pool 3.4 Swimming Pool Heat Pumps Plumbing 3.5 Swimming Pool Heat Pumps Electrical Wiring 3.6 Initial Start-up of the Unit... -
Page 3: Preface
1. PREFACE In order to provide our customers with quality, reliability and versatility, this product has been made to strict production standards. This manual in- cludes all the necessary information about installation, debugging, discharg- ing and maintenance. Please read this manual carefully before you open or maintain the unit. - Page 4 1. PREFACE WARNING Do not use means to accelerate the defrosting process or to clean, Other than those recimmended by the manufacturer. The appliance shall be stored in a room without continuous- ly operating ignition sources (for example:open flames, an operating gas appliance or an operating electric heater.) Do not pierce or burn.
- Page 5 Be aware that refrigerants may not contain an odour. The installation of pipe-work shall be kept to a minimum 30 m2 Spaces where refrigerant pipes shall be compliance with national gas reg- ulations. Servicing shall be performed only as recommended by the manufacturer. The appliance shall be stored in a well-ventilated area where the room size corresponds to the room area as specified for operation.
- Page 6 1. PREFACE Caution & Warning The unit can only be repaired by qualified installer centre personnel or an authorised dealer. ( for Europe market ) This appliance is not intended for use by persons (including children) with reduced physical sensory or mental capabilities, or lack of experi- ence and knowledge, unless they have been given supervision or in- struction concerning use of the appliance by a person responsible for their safety.
-
Page 7: Specifications
2.SPECIFICATION 2.1 Performance data of Swimming Pool Heat Pump Unit *** REFRIGERANT : R32 Azuro(R32)10KW Azuro(R32)12KW Azuro(R32)16KW UNIT 2.160-9.100 1.970~11.66 3.25~16.00 Heating capacity 7344-30940 6698-39644 11050-54400 (27/24.3°C) Btu/h 0.160-1.460 0.160 -2.000 0.30-2.91 Heating Power Input 13.50-6.230 12.57-5.840 10.83-5.50 0.9-6.0 1.12~7.69 1.3~12.8... -
Page 8: Dimensions For Swimming Pool Heat Pump Unit
2.SPECIFICATION 2.SPECIFICATION 2.2 The dimensions for Swimming Pool Heat Pump Unit 2.2 The dimensions for Swimming Pool Heat Pump Unit Models: Azuro(R32)10KW / Azuro(R32)12KW unit mm 2.2 The dimensions for Swimming Pool Heat Pump Unit Models: Azuro(R32)10KW / Azuro(R32)12KW unit mm 2.2 The dimensions for Swimming Pool Heat Pump Unit... -
Page 9: Installation And Connection
3.INSTALLATION AND CONNECTION 2.SPECIFICATION 3.1 Installation illustration 3.1 Installation illustration Valve Chlorinator cell Water outlet Water supply Pool Water inlet Sand filter Water pump (or other type filter) Installation items: Installation items: The factory only provides the main unit and the water unit; the other items in the illustration The factory only provides the main unit and the water unit;... -
Page 10: Swimming Pool Heat Pumps Location
3.INSTALLATION AND CONNECTION 3.INSTALLATION AND CONNECTION 3.2 Swimming Pool Heat Pumps Location The unit will perform well in any outdoor location provided that the follow- 3.2 Swimming Pool Heat Pumps Location ing three factors are presented: The unit will perform well in any outdoor location provided that the following three factors are Fresh Air - Electricity - Pool filter piping... -
Page 11: Swimming Pool Heat Pumps Plumbing
3.INSTALLATION AND CONNECTION 3.4 Swimming Pool Heat Pumps Plumbing 3.4 Swimming Pool Heat Pumps Plumbing The Swimming Pool Heat Pumps exclusive rated flow titanium heat exchang- er requires no special plumbing arrangements except bypass(please set the The Swimming Pool Heat Pumps exclusive rated flow titanium heat exchanger requires no special plumbing arrangements except bypass(please set the flow rate according to the flow rate according to the nameplate). -
Page 12: Swimming Pool Heat Pumps Electrical Wiring
3.INSTALLATION AND CONNECTION 3.5 Swimming Pool Heat Pumps Electrical Wiring Although the unit heat exchanger is electrically isolated from the rest NOTE: of the unit, it simply prevents the flow of electricity to or from the pool wa- ter. Grounding the unit is still required to protect you against short circuits inside the unit. - Page 13 Time Delay- The unit is equipped with a 3 minute built-in solid state restart delay included to protect control circuit components and to eliminate restart cycling and contactor chatter. This time delay will automatically restart the unit approximately 3 minutes after each control circuit interruption. Even a brief power interruption will activate the solid state 3 minute restart delay and prevent the unit from starting until the 5 minute countdown is complet-...
-
Page 14: Use And Operation Instruction
4.Use and Operation Instruction 4.USE AND OPERATION INSTRUCTION 4.1.Interface display 4.1.Interface display 4.Use and Op Use and Operation Instruction 2.2.Icon function ins 1.Interface display Icon symbol Des Cooling 4.Use and Operatio nd Operation Instruction symbol Heating 2.2.Icon function instruction symbo ace display Automa Icon symbol Designatio... - Page 15 4.2.2.Icon function instruction 4.Use and Operation Instruction 4.Use and Operation Instruction Icon Designation Function 2.2.Icon function instruction 4.1.Interface display symbol Function Icon symbol Designation It will display during cooling (there is no limit to startup Cooling symbol It will display during cooling (there is no limit to startup & Cooling shutdown, and it is optional when the unit is cooling-on symbol...
- Page 16 Water outlet symbol When the main display area displays the water inlet temperature, temperature, the light is on. When the axillary display area displays the water outlet Water inlet Water outlet symbol Water outlet temperature, the light is on. symbol temperature, the light is on.
-
Page 17: Startup & Shutdown
4.Use and Operation Instruction 3. Startup & shutdown 4.3. Startup & shutdown Keep long press of " "for 0.5 s to enter ON/OFF interface When there is no operation within 1 minute, it will display with half screen off When there is no operation within 15 minutes, it will display with full screen off Notes:... -
Page 18: Mode Switch
4.USE AND OPERATION INSTRUCTION 4.Use and O 4.Use and Operation Instruction 4.Use and Operation Instruction 4.Use and Operation Instru 4.Use and Operation Instruction 4.Use and Operation Instruction 4.Use and Operation Instruction 2.2.Icon function i 4.1.Interface display 4.1.Interface display Icon symbol De 2.2.Icon function instruction 2.2.Icon function instruction 4.1.Interface display... -
Page 19: Temperature Setting
Notes: 1).After completing the defrosting, the unit will be automatically switched to the heating/ automatic mode (keeping consistent with the mode before defrosting). During the defrosting, mode switch is available. And when switching the mode, the unit won t work under a new mode until defrosting is completed. 4.5. - Page 20 4.USE AND OPERATION INSTRUCTION Notes: Under the clock setting interface, if there is no operation for 20 s, the system will 4.6.2 Setting and cancelling the Timer ON/OFF function automatically memorize use s settings, and return to the main interface; if short press " "...
- Page 21 4.Use and Operation Instruction 4.6.2.3 Setting the Timer ON/OFF function While enter into the , or timer setting interface, set the Timer OFF1 6.2.3 Setting the Timer ON/OFF function OFF as below: „ * Take ON1 for example: While enter into the OFF1 timer setting interface, set the Timer ON/OFF as below: "...
-
Page 22: Silent Setting
Dsiplays Timer OFF function on 4.USE AND OPERATION INSTRUCTION Displays the first-stage timing switch on Displays the second-stage timing switch on 4.6.2.4 Cancelling the Timer ON/OFF function Displays Timer ON function on 1) Select , or timer setting interface refers to 6.2.1, cancel the OFF1 Timer ON/OFF as below: 6.2.4 Cancelling the Timer ON/OFF function... - Page 23 1). If one-click silent and timming silentaare stared at the same time, short press " " for canceling one-click silent and quitting the timing silent for this time. 2). At night or the rest time, user can start one-click silent or timing silent function to reduce the noise.
-
Page 24: Keyboard Lock
1). When the silent icon" " is lighten:The timing mute has been set, but it's not under silent 4.Use and Operation Instruction status. 4.USE AND OPERATION INSTRUCTION 2). When the silent icon" " flash:It's under the silent status. Notes: 3). When the silent icon" "disappear: The timingsilent is not set. -
Page 25: Parameter List And Breakdown Table
4.10 . Parameter list and breakdown table 4.10.1 Electronic control fault table Can be judged according to the remote controller failure code and trouble- shooting Protect/fault Fault dis- Reason Elimination methods play Inlet Temp. Sensor The temp. Sensor is Check or change the Fault broken or short circuit temp. - Page 26 4.USE AND OPERATION INSTRUCTION Protect/fault Fault dis- Reason Elimination methods play Low Pressure Prot. Low pressure1 protec- Check the pressure tion switch and cold circuit Flow Switch Prot. No water/little water in Check the pipe water water system flow and water pump Waterway Anti- Water temp.or ambient -freezing Prot.
- Page 27 Protect/fault Fault dis- Reason Elimination methods play EC fan feedback F051 There is something Check whether fan Fault wrong with fan motor motor is broken or loc- and fan motor stops ked or not running Fan Motor1 Fault F031 1. Motor is in locked-ro- 1.Change a new fan tor state motor...
- Page 28 4.USE AND OPERATION INSTRUCTION Frequency conversion board fault table: Protection/fault Fault Reason Elimination methods display Drv1 MOP alarm MOP drive alarm Recovery after the 150s Inverter offline Frequency con- Check the communication co- version board nnection and main board communication failure IPM protection IPM modular...
- Page 29 Protection/fault Fault Reason Elimination methods display Inv. Input Over- The input volt- Check the input voltage mea- volt. age is too high , surement more than out- age protection current RMS Inv. Sampling The input vol- Check and adjust the current Volt.
- Page 30 4.USE AND OPERATION INSTRUCTION Protection/fault Fault Reason Elimination methods display Inverter The transducer is Check and adjust the current Overheating overheat measurement Inv. Overheating Transducer tem- Check and adjust the current Warn perature is too measurement high Comp. OverCur. Compressor The compressor over-current Warn electricity is...
-
Page 31: Main Board
4.Use and Operation Instruction 4.11 . Main board Controller interface diagram and definition 4.11 . Main board Controller interface diagram and definition... - Page 32 4.USE AND OPERATION INSTRUCTION Main board of the input and output interface instructions below Number Sign Meaning PU10-(U) PU10-(V) Compressor (output 220-230V AC) PU10-(W) CN18(EMV) Water pump (output 220-230V AC) CN13(HEAT) 4-way valve (output 220-230V AC) CN96(H) High speed of fan (output 220-230V AC) CN96(L) Low speed of fan (output 220-230V AC) P1(AC-L)
-
Page 33: Maintenance And Inspection
5. MAINTENANCE AND INSPECTION Check the water supply device and the release often. You should avoid the condition of no water or air entering into system, as this will influence unit‘s performance and reliability. You should clear the pool/spa filter reg- ularly to avoid damage to the unit as a result of the dirty of clogged filter. - Page 34 5. MAINTENANCE AND INSPECTION able to hand. Have a dry powder or CO fire extinguisher adjacent to the charging area. No ignition sources No person carrying out work in relation to a refrigeration system which involves exposing any pipe work that contains or has contained flammable refrigerant shall use any sources of ignition in such a manner that it may lead to the risk of fire or explosion.
- Page 35 ty checks and component inspection procedures. If a fault exists that could compromise safety, then no electrical supply shall be connected to the cir- cuit until it is satisfactorily dealt with. If the fault cannot be corrected immediately but it is necessary to continue operation, an adequate tempo- rary solution shall be used.
- Page 36 5. MAINTENANCE AND INSPECTION Replace components only with parts specified by the manufacturer. Other parts may result in the ignition of refrigerant in the atmosphere from a leak. Cabling Check that cabling will not be subject to wear, corrosion, excessive pres- sure, vibration, sharp edges or any other adverse environmental effects.
- Page 37 Open the circuit by cutting or brazing. The refrigerant charge shall be recovered into the correct recovery cylin- ders. The system shall be „flushed“ with OFN to render the unit safe. This process may need to be repeated several times. Compressed air or oxygen shall not be used for this task.
- Page 38 5. MAINTENANCE AND INSPECTION The recovered refrigerant shall be returned to the refrigerant supplier in the correct recovery cylinder, and the relevant Waste Transfer Note ar- ranged. Do not mix refrigerants in recovery units and especially not in cylinders. If compressors or compressor oils are to be removed, ensure that they have been evacuated to an acceptable level to make certain that flammable refrigerant does not remain within the lubricant.
- Page 39 j) When the cylinders have been filled correctly and the process complet- ed, make sure that the cylinders and the equipment are removed from site promptly and all isolation valves on the equipment are closed off. k) Recovered refrigerant shall not be charged into another refrigeration system unless it has been cleaned and checked.
-
Page 40: Appendix
6.APPENDIX 6.1 Cable specification (1) Single phase unit(2) Třífázová jednotka Nameplate Phase line Earth line Creepage protector Signal maximum line current No more 2 x 1.5mm 1.5mm 30mA less than 0.1 sec than 10A 10~16A 2 x 2.5mm 2.5mm 30mA less than 0.1 sec 16~25A 2 x 4mm 30mA less than 0.1 sec... -
Page 41: Comparison Table Of Refrigerant Saturation Temperature
When the unit will be installed at outdoor, please use the cable which can against UV. 6.2 Comparison table of refrigerant saturation temperature Pressure (MPa ) Temperature (R410A) -51.3 24 31 (°C ) Temperature (R32) -52.5 29.5 33.3 38.7 (°C) Pressure (MPa ) Temperature (R410A) 64 70...
Need help?
Do you have a question about the 10Kw and is the answer not in the manual?
Questions and answers