Table of Contents
Advertisement
Quick Links
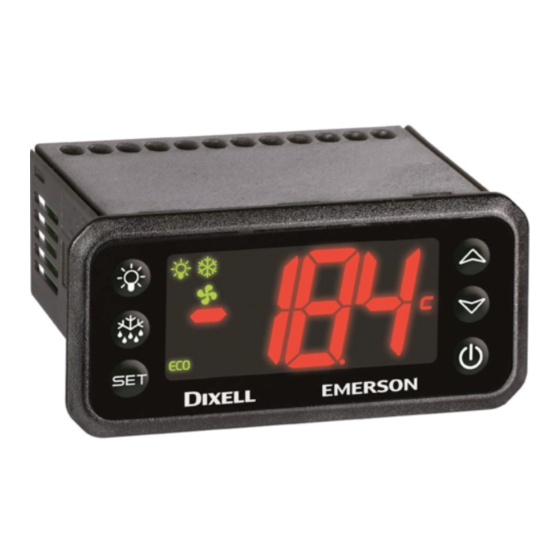
XRi60CH
Digital controller for variable speed drive
1.
GENERAL WARNING ............................................................................................................... 1
2.
GENERAL DESCRIPTION ........................................................................................................ 1
3.
CONTROLLING LOADS ........................................................................................................... 1
4.
EVAPORATOR FAN CONTROL ............................................................................................... 1
5.
CONDENSER FAN CONTROL ................................................................................................. 1
6.
AUXILIARY REGULATOR ........................................................................................................ 2
7.
DUAL MAP FEATURE .............................................................................................................. 2
8.
VARIABLE SPEED COMPRESSOR CONTROL ....................................................................... 2
9.
FRONT PANEL AND COMMANDS .......................................................................................... 2
10. MAX & MIN TEMPERATURE MEMORIZATION ....................................................................... 2
11. MAIN FUNCTIONS ................................................................................................................... 3
12. PARAMETERS ......................................................................................................................... 3
13. DIGITAL INPUTS ...................................................................................................................... 5
14. SERVICE SERIAL PORT .......................................................................................................... 5
15. INSTALLATION AND MOUNTING ............................................................................................ 5
16. ELECTRICAL CONNECTIONS ................................................................................................. 5
17. HOW TO USE THE HOT KEY .................................................................................................. 6
18. ALARM SIGNALING ................................................................................................................. 6
19. WIRING DIAGRAM ................................................................................................................... 6
20. DEFAULT SETTING VALUES .................................................................................................. 6
21. TECHNICAL DATA ................................................................................................................... 9
1. GENERAL WARNING
1.1 PLEASE READ BEFORE USING THIS MANUAL
•
This manual is part of the product and should be kept near the instrument for easy and quick
reference.
•
The instrument shall not be used for purposes different from those described hereunder. It
cannot be used as a safety device.
•
Check the application limits before proceeding.
Dixell Srl reserves the right to change the composition of its products, even without notice,
•
ensuring the same and unchanged functionality
1.2 SAFETY PRECAUTIONS
•
Check the supply voltage is correct before connecting the instrument.
•
Do not expose to water or moisture: use the controller only within the operating limits avoiding
sudden temperature changes with high atmospheric humidity to prevent condensation
•
Warning: disconnect all electrical connections before any kind of maintenance.
•
Fit the probe where it is not accessible by the End User. The instrument must not be opened.
•
In case of failure or faulty operation send the instrument back to the distributor or to "Dixell S.r.l."
(see address) with a detailed description of the fault.
•
Consider the maximum current which can be applied to each relay (see Technical Data).
•
Ensure that the wires for probes, loads and the power supply are separated and far enough
from each other, without crossing or intertwining.
•
In case of applications in industrial environments, the use of mains filters (our mod. FT1) in
parallel with inductive loads could be useful.
2. GENERAL DESCRIPTION
Model XRi60CH, format 32x74mm, is microprocessor-based controller, suitable for applications on
medium or low temperature ventilated refrigerating units with variable speed compressors. It has four
relay outputs to control compressor, fan, defrost, which can be either electrical or reverse cycle (hot
gas) and light (configurable). It could be provided with a Real Time Clock which allows programming
of up to 6 daily defrost cycles, divided into holidays and workdays, or selecting weekly energy saving
intervals. It is also provided with up to four NTC, PTC or PT1000 probe inputs and a frequency output
signal to drive variable speed compressors.
The HOTKEY I/O port allows connecting the unit, by means of the external module XJ485-CX, to a
network line ModBUS-RTU compatible such as an X-WEB monitoring system. With the HOTKEY port
it is possible to modify the configuration of the controller (by using the Wizmate Software).
The instrument is fully configurable, and it can be easily programmed through an external keyboard.
3. CONTROLLING LOADS
3.1 COMPRESSOR
The regulation is performed according to
the temperature measured by the
thermostat probe with a positive
differential (HY) over the set point: if the
temperature increases and reaches set
point plus differential, the compressor
will start. It will turn off as soon as the
temperature reaches the set point value
again.
In case of fault in the thermostat probe the start and stop of the compressor are timed through
parameters Con and CoF.
3.2 DEFROST
Two defrost modes are available through the tdF parameter: defrost through electrical heater
(tdF=EL) and hot gas defrost (tdF=in).
The defrost interval depends on the presence of the RTC (optional). The internal RTC is controlled by
means of the EdF parameter:
EdF=in: the defrost is made every idF time – standard way for controller without RTC.
-
1592020680 XRi60CH EN r2.0 2021.07.14
FW 24.3
.
EdF=rtC: the defrost is real time controlled, depending on the hours set in the parameters
-
Ld1...Ld6 (for workdays).
Other parameters are used to control defrosting cycles: the maximum length (MdF) and defrosting
modes: timed or controlled by the evaporator's probe (P2P).
At the end of defrost dripping time is started, its length is set in the Fdt parameter. With Fdt=0 the
dripping time is disabled.
3.2.1 PRE-DEFROST
The par. dAF enable a pre-defrost phase. During this interval the regulation setpoint will be moved to
the value SET-1°C (or SET-1°F). The defrost phase starts as soon as the regulation temperature reach
the pre-defrost setpoint or when the dAF timer ends. This function is disable when dAF=0.
3.2.2 HOT GAS DEFROST
If tdF=in, the defrost phase will act as follow:
If dSd>0, the compressor output will be deactivated
-
At the end of dSd interval, the defrost output will be activated and timer StC will start
-
At the end of StC interval, the compressor output will be reactivated.
-
If dSd=0 or StC=0, the relative functions will be disabled.
3.3 RELAY CONFIGURATION
The functioning of the configurable relays (terminals 1-2, 1-3 and 1-7-8) can be set by the oA1, oA2
and oA3 parameters, according to the kind of application. In the following paragraph the possible
setting:
3.3.1 LIGHT RELAY
With oAx=LiG the relative relay operates as light output.
3.3.2 AUXILIARY RELAY
Relay activation by digital input 1 or digital input 2 (oAx=AUS, i1F=AUS): with oAx=AUS and i1F=AUS
the AUX relay is switched on and off by digital inputs.
3.3.3 ON/OFF RELAY (OAX = ONF)
When oAx=onF, the relative relay is activated when the controller is turned on and de-activated when
the controller is turned off.
3.3.4 NEUTRAL ZONE REGULATION
With oAx=db the relative relay can control a heater element to perform a neutral zone action.
oAx cut in = SET-HY
-
oAx cut out = SET
-
3.3.5 ALARM RELAY
With oAx=Alr the relative relay operates as alarm relay. It is activated every time an alarm happens.
Its status depends on the tbA parameter: if tbA=Y, the relay is silenced by pressing any key.
If tbA=n, the alarm relay stays on until the alarm condition recovers.
3.3.6 SECOND COMPRESSOR
oAx=CP2 is not supported in this model.
3.3.7 SECOND DEFROST OUTPUT
oAx=dF2 is not supported in this model.
3.3.8 NIGHT BLINDS MANAGEMENT DURING ENERGY SAVING CYCLES
With oAx=HES, the relative relay operates to manage the night blind: the relay is energised when the
energy saving cycle is activated by digital input or frontal button.
3.3.9 HEATER FOR WATER DRIPPING
If oAx=HEt, the relative output will work as heater for water dripping during and after any defrost.
3.3.10 REGULATION OUTPUT
If oAx=inV, the relative output will work as regulation output and will stay active as soon as the
regulation request is running.
4. EVAPORATOR FAN CONTROL
The evaporator fan control mode is selected by means of the FnC parameter:
FnC = C_n: fans will switch ON and OFF with the compressor and not run during defrost
-
FnC = o_n: fans will run even if the compressor is off, and not run during defrost
-
After defrost, there is a timed fan delay allowing for drip time, set by means of the Fnd parameter.
FnC = C_Y: fans will switch ON and OFF with the compressor and run during defrost
-
FnC = o_Y: fans will run continuously also during defrost
-
The par. FAP is used to select which temperature probe will be used from the evaporator fan regulator.
A specific setpoint (par. FSt) provides the temperature value, detected by the evaporator probe, above
which the fans are always OFF. This is used to make sure circulation of air only if his temperature is
lower than set in FSt-HYF.
4.1 FORCED ACTIVATION FOR FANS
This function, managed by the FCt parameter, is designed to avoid short cycles of fans, that could
happen when the controller is switched on or after a defrost, when the room air warms the evaporator.
If the difference between the evaporator temperature and the room temperature is higher than the FCt
value, the controller will activate the fans. This function is disabled if FCt=0.
4.2 CYCLIC ACTIVATION OF THE FANS WHEN THE COMPRESSOR IS
SWITCHED OFF
When FnC=C-n or C-Y (fans in parallel to the compressor), the fans will be able to carry out on and
off cycles even if the compressor is switched off. The on and off interval of time follow the Fon and
FoF parameters. When the compressor is stopped, the fans will go on working for the Fon time. On
the other side, with Fon=0 the fans will stay always off when the compressor is off.
5. CONDENSER FAN CONTROL
The condenser fan control mode is selected by means of the FCC parameter:
FCC = C_n: fans will switch ON and OFF with the compressor and not run during defrost
-
XRi60CH
1/9
Advertisement
Table of Contents

Related Manuals for Emerson Dixell XRi60CH


Summary of Contents for Emerson Dixell XRi60CH
- Page 1 EdF=rtC: the defrost is real time controlled, depending on the hours set in the parameters Ld1...Ld6 (for workdays). XRi60CH Other parameters are used to control defrosting cycles: the maximum length (MdF) and defrosting modes: timed or controlled by the evaporator’s probe (P2P). At the end of defrost dripping time is started, its length is set in the Fdt parameter.
- Page 2 FCC = o_n: fans will run even if the compressor is off, and not run during defrost 2 to 4 1 or 2 FCC = C_Y: fans will switch ON and OFF with the compressor and run during defrost 5 to 10 min 1 to 3 min FCC = o_Y: fans will run continuously also during defrost NOTE:...
- Page 3 11. MAIN FUNCTIONS REGULATION Minimum Set Point: (-100.0°C to SET; -148°F to SET) fix the minimum value for the 11.1 TO SET THE CURRENT TIME AND DAY (ONLY WITH RTC) set point. When the instrument is switched on, it could be required to set the real-time clock. Maximum Set Point: (SET to 150.0°C;...
- Page 4 DISPLAY ALARMS Temperature measurement unit: (°C; °F) °C = Celsius; °F = Fahrenheit. Probe selection for temperature alarms: (nP; P1; P2; P3; P4) nP=no probe; Px=probe “x”. Note: P4=Probe on Hot Key plug. Temperature resolution (°C only): (dE; in) dE = decimal; in = integer. Temperature alarm configuration: (Ab, rE) Ab = absolute;...
-
Page 5: Service Serial Port
13. DIGITAL INPUTS ENERGY SAVING Energy saving mode temperature differential: (-30 to 30°C; -54 to 54°F) sets the The first digital input (terminals 18-20) is enabled with P3P=n. The free voltage digital inputs are programmable by the i1F parameter. increasing value of the set point during the Energy Saving cycle. Energy saving controls the lights (lights OFF when energy saving is active): (n;... -
Page 6: Default Setting Values
Terminal 4 Neutral for high and low voltage power supply 16.1 PROBE CONNECTION Terminal 5 Line for high voltage power supply @[110 or 230VAC] The probes shall be mounted with the bulb upwards to prevent damages due to casual liquid infiltration. It is recommended to place the thermostat probe away from air streams to correctly measure the 20. - Page 7 PI regulator: range for output value calculation (RPM * RPM*10 Condenser fan operating mode PI regulator: delay before range drift Condenser fan deactivation delay PI regulator: divisor for PI response time reduction Probe selection for temperature alarms (acts on both par. tSt and iSt) Sampling time to calculate the average compressor Temperature alarms configuration: relative, absolute speed before any desfrost cycle...
- Page 8 Energy saving cycle duration on working days 00:00 00:00 hh:mm Energy saving cycle starting time on weekends 00:00 00:00 hh:mm Energy saving cycle duration on weekends 00:00 00:00 hh:mm Sunday defrost Monday defrost Tuesday defrost Wednesday defrost Thursday defrost Friday defrost Saturday defrost 1st defrost starting time 00:00...
-
Page 9: 21. Technical Data
21. TECHNICAL DATA FEATURES DESCRIPTION Housing Self-extinguishing PC/PC+ABS Dimensions Frontal 38x80 mm; depth 62mm Mounting Panel mounting device in a 71x29mm panel cut-out NEMA (UL 50e) Indoor use only, type 1 enclosure Degree of Protection IP (IEC/EN 60529) Front panel: IP65; Rear housing: IP00 Power Supply According to the model: 12VAC/DC, ±10%;...
Need help?
Do you have a question about the Dixell XRi60CH and is the answer not in the manual?
Questions and answers