
Summary of Contents for Cerio DT-400 A1
- Page 1 CERIO Corporation DT-400 A1 eXtreme 11n/ac, 2.4/5GHz 2x2 802.1q VLAN Router with Access Point Quick Start Guide V1.0a V1.0a...
-
Page 2: Table Of Contents
Product Outward Appearance ....................... 3 Panel Function Description......................4 LED Explanation..........................5 Software Configuration ........................5 Login DT-400 A1 Web Page ......................9 V1.0a V1.0a... -
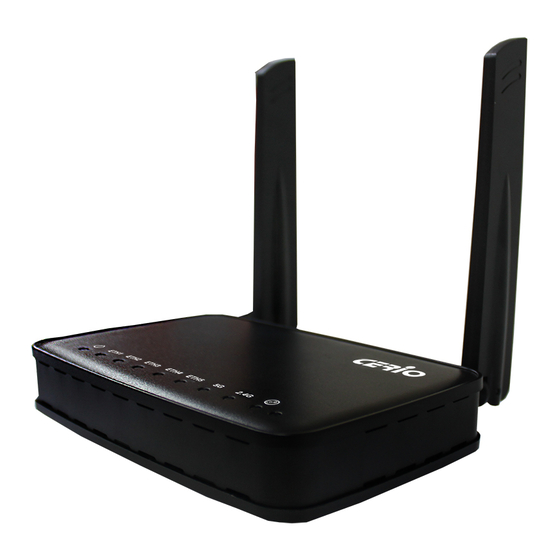
Page 3: Product Outward Appearance
1. Product Outward Appearance Side Product Product Front Reverse side Product V1.0a V1.0a... -
Page 4: Panel Function Description
2. Panel Function Description 1. Reset button (Please press and hold for about 15 seconds and then release) 2. Wireless signal on /off button 3. 5 RJ-45 Ethernet connections Port If select used Router AP mode then Eth1 is WAN Port, other Eth2-5 is LAN Ports. ... -
Page 5: Led Explanation
3. LED Explanation (1) Power LED (2) RJ-45 Ethernet connection LED (3) 5GHz Wi-Fi working LED (4) 2.4GHz Wi-Fi working LED (5) Wireless signal timing on/off LED Software Configuration PC link to device setup by OS Windows7 Please PC link to Device used cat5/6 Ethernet cable. V1.0a V1.0a... - Page 6 Step 1 : Please click on the computer icon in the bottom right window, and click “Open Network and Sharing Center” Step 2 : In the Network and Sharing Center page, Please click on the left side of “Change adapter setting”...
- Page 7 Step 3 : In “Change adapter setting” Page. Please find Local LAN and Click the right button on the mouse and Click “Properties” Step 4 : In “Properties” page, please Click “Properties” button to TCP/IP setting V1.0a V1.0a...
- Page 8 Step 5 : In Properties page to setting IP address, please find “Internet Protocol Version 4 (TCP/IPv4)” and double click or click “Install” button. Double click Or click Install button Step 6 : Select “Use the following IP address”, and fix in IP Address : 192.168.2.# ex.
-
Page 9: Login Dt-400 A1 Web Page
WMI (https://192.168.2.254). There will be a “Certificate Error”, because the browser treats system as an illegal website. 5. Login DT-400 A1 Web Page Launch Web Browser Launch as web browser to access the web management interface of system by entering the default IP Address, http://192.168.2.254, in the URL field, and then press Enter.