Advertisement
Quick Links
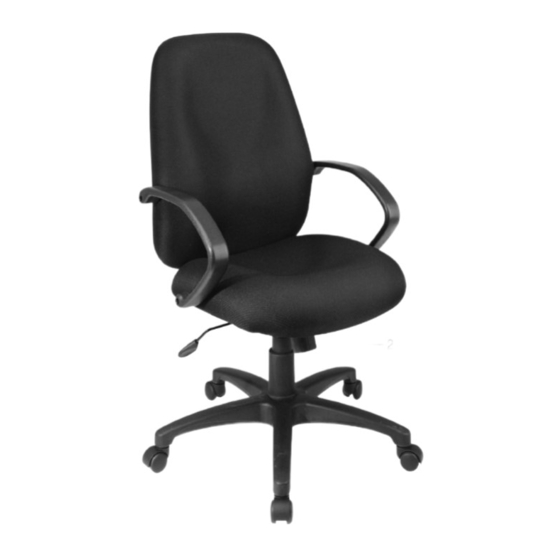
EX2654 - FAUTEUIL PRÉSIDENT À DOSSIER DE HAUTEUR MOYENNE
INSTRUCTIONS DE MONTAGE
6
12,9,10
13
8,11
7
12,9,10
4
2
ÉTAPE 1 Enlever toutes les pièces du carton, les organiser selon les numéros de pièce indiqués sur la liste et s'assurer que les
quantités des pièces reçues sont correctes.
ÉTAPE 2 Insérer les roulettes (1) dans la base (2). Insérer le vérin pneumatique (3) dans la base (2).
ÉTAPE3 Attacher la plaque du siège (4) au coussin du siège (5) avec la flèche orientée vers l'avant du fauteuil à l'aide de quatre
vis courtes (8) et de quatre grandes rondelles (11).
ÉTAPE 4 Attacher le support du dossier (13) sur le coussin du dossier (6) au coussin du siège (5) à l'aide de quatre vis courtes (8)
et de quatre grandes rondelles (11).
NE PAS RESSERRER COMPLÈTEMENT LES VIS. (Voir le dessin détaillé A)
ÉTAPE 5 Aligner les trous inférieurs dans les accoudoirs (7) sur les trous dans le coussin du siège (5) et attacher à l'aide de deux
vis longues (9) et de deux petites rondelles (10). NE PAS RESSERRER COMPLÈTEMENT LES VIS.
ÉTAPE 6 Aligner les trous supérieurs dans les accoudoirs (7) sur les trous dans le coussin du dossier (6) et attacher à l'aide de
deux vis longues (9) et de deux petites rondelles (10). RESSERRER COMPLÈTEMENT TOUTES LES VIS.
ÉTAPE 7 Couvrir les trous dans les accoudoirs à l'aide des couvercles en plastique (12). Placer le siège assemblé sur le dessus
du vérin pneumatique (3) et pousser vers le bas.
ATTENTION: AVANT D'UTILISER LE FAUTEUIL, S'ASSURER D'AVOIR RESSERRÉ COMPLÈTEMENT
TOUTES LES VIS.
DESSIN DÉTAILLÉ A:
Installer le support
du dossier (13) sur la plaque du siège (4).
8,11
13
7
5
Pièce . . . . . . . . . . . . Qté
1. Roulettes . . . . . . . . . . . . 5
8,11
2. Base . . . . . . . . . . . . . . . 1
3. Vérin pneumatique . . . . . . . 1
4. Plaque du siège . . . . . . . . . 1
5. Coussin du siège . . . . . . . . 1
3
6. Coussin du dossier . . . . . . . 1
7. Accoudoirs . . . . . . . . . . . 2
8. Vis courtes . . . . . . . . . . . 8
9. Vis longues . . . . . . . . . . . 4
10. Petites rondelles . . . . . . . . 4
11. Grandes rondelles . . . . . . . 8
1
12. Couvercles en plastique . . . . 4
13. Support du dossier préinstallé . 1
14. Clé Allen (non montré) . . . . . 1
Office Star Products Juillet 2003
EX2654 MID BACK MANAGERS CHAIR
OPERATING INSTRUCTIONS
2
1
Warranty
5 Year limited warranty on all non moving metal parts. Seat plate, pneumatic cylinder, wood, plastic parts, base and casters for 2 years.
Upholstery fabric against wear and deterioration for one year.
All warranties are limited to the original purchaser for non commercial usage by persons weighing 200 lbs. or less.
To make a warranty claim, contact Parts Department. Provide model number and description of the problem and obtain return
authorization. At it's option Office Star Products will: (a) Supply compatible components of current manufacture. (b) Repair the
customer's component. The customer must prepay freight on any components returned to the factory. Return freight on components still
in warranty will be paid by Office Star Products.
Our quality standards are among the highest in the industry. Sometimes, no matter how hard we try, there are times when parts
are damaged or missing. Our Parts Department will do everything possible to promptly remedy the problem. Contact us via email
parts@officestar.net, by Fax 1-909-930-5629, or toll free parts number 1-800-950-7262, Monday through Friday 8:00 a.m. - 5:00
p.m. Pacific Time.
FEATURES
• Height Adjustment
To raise seat height remove pressure and lift lever (1). To
lower seat height sit on chair and left lever (1).
• Locking Tilt Adjustment
For individual comfort, this chair has been equipped with an
adjustment that will allow the user to change the tension of
the tilting feature. Turn knob (2) clockwise to increase tension
and counter-clockwise to decrease or ease the tension.
NOTE: Be careful not to loosen the back tilt adjustment knob
completely.
WARNING
1. Use this product only one person at a time.
2. Do not use this chair unless all bolts, screws, and knobs are
securely tightened.
3. Check that all bolts, screws, and knobs are tight every three
months or as needed.
4. Do not overturn back tilt knob when decreasing tension.
5. Dispose of packing material properly. Do not use plastic
cover as head covering. It may cause suffocation.
6. Do not use this chair as a stepladder.
7. Use this chair for its intended purpose only.
8. Use mild detergent only for cleaning.
Advertisement

Related Manuals for Office Star Products EX2654


Summary of Contents for Office Star Products EX2654
- Page 1 To make a warranty claim, contact Parts Department. Provide model number and description of the problem and obtain return et de quatre grandes rondelles (11). authorization. At it’s option Office Star Products will: (a) Supply compatible components of current manufacture. (b) Repair the NE PAS RESSERRER COMPLÈTEMENT LES VIS. (Voir le dessin détaillé A) customer’s component.
- Page 2 DO NOT FULLY TIGHTEN SCREWS. discrétion, Office Star Products: (a) fournira des pièces compatibles de produits courants (b) réparera la pièce du client. Le client doit payer d’avance STEP 6 Align top holes in Armrests (7) with holes in Back Cushion (6) and attach with two Long Screws (9) and two Small Washers (10).