Table of Contents
Advertisement
Quick Links
Advertisement
Table of Contents

Related Manuals for BIMG Metvisa FTG.150B

Summary of Contents for BIMG Metvisa FTG.150B
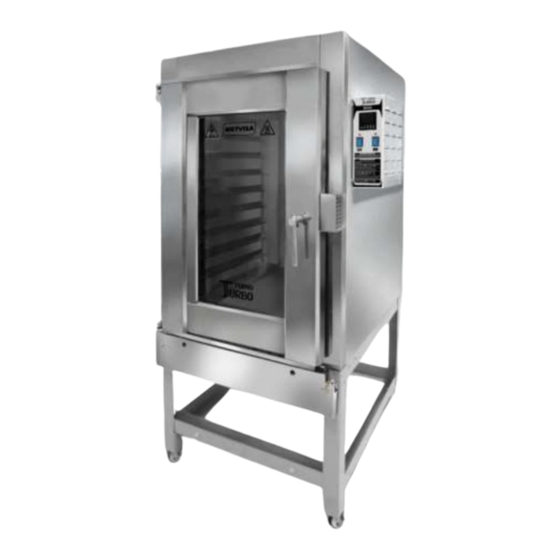
- Page 2 CONGRATULATIONS, You have just purchased a IMG-BRASIL equipment, product of the highest quality, safety and efficiency. Founded in 1989, IMG-BRASIL is a respected company as one of the best and most complete companies in the field of gastronomy equipment manufacturing. Constant innovation and improvement of its products, using top-of-the-line raw materials, ensure superior products consumed in Brazil and in more than 25 countries worldwide.
-
Page 3: Table Of Contents
INDEX 1. Safety Information ......................4 1.1 General Warnings ........................4 1.2 Mechanical Safety ........................5 1.3 Electrical Safety ........................5 2. Technical Features......................6 2.1 Main Components ........................6 2.2 Technical Data ......................... 8 2.3 Supply and Disposal of Equipment Packaging ................9 3. -
Page 4: Safety Information
1. Safety Information 1.1 General Warnings • Cautions / precautions must be observed when installing, using, maintaining and discontinuing use of this equipment; • Before carrying out any operation (assembly, use (use), maintenance and reuse after prolonged use of the equipment), read the manual carefully; •... -
Page 5: Mechanical Safety
1.2 Mechanical Safety • Before operating the equipment, make sure that the gas installation is free of leaks, if the pressure of the hydraulic system is within the permitted levels (see pressure information in item 3.2 Hydraulic Installation) and if the door is locked until the handle stroke limit. •... -
Page 6: Technical Features
• Lay the equipment on a firm, dry, level surface; • Never carry out any maintenance, adjustment or disassembly of the equipment connected to it. For such procedures, make sure that it is turned off by removing the plug from the electrical outlet; •... - Page 7 Garrison Interior Support Oven Model Cabinet Door Burner Drawer (Door Stand Conveyors (Chamber) Seal) Stainless steel Carbon Carbon steel Carbon structure, Carbon steel with steel Stainless FTG.150B / with high Silicone steel with Tempered high temperature with FTG.300B temperature steel paint epoxy epoxy paint...
-
Page 8: Technical Data
2.2 Technical Data Stabdard Rated Net Weight Roasting Dimension Measures Voltage Frequency Capacity Model Current (approx.) pans (unit) Roasting for Operation (Hz) (bread) ** (kg) (unid.) Length x Ht x Width pans (mm) (mm) * FTG150B127M605 127 - MF FTG150B220M605 220 - MF FTG150B110M604 110 - MF... -
Page 9: Supply And Disposal Of Equipment Packaging
2.3 Supply and Disposal of Equipment Packaging The equipment is packed with wood or cardboard to ensure its perfect integrity during transport and is accompanied by the following documents: • Instruction Manual for Installation, Use, Maintenance and Safety; • Warranty Term (for Brazilian market). IMPORTANT The packaging components (cardboard, wood, foam, strips, etc.) are products that can be assimilated to municipal solid waste and can be disposed of without difficulty. - Page 10 Follow the guidelines below to assemble the stand:...
- Page 11 With the stand mounted, position the top rack of the oven (FTG.150) on top of the stand, noting that the swivel casters are positioned in the front of the oven. Mount with washers, bolts and nuts. Make sure all bolts are tight. To ensure correct operation and safety, the equipment should be positioned in a sufficiently wide area, with a well-leveled, dry and stable floor, away from sources of heat and humidity and where there is no heavy traffic.
- Page 12 It is recommended to install a hood or extractor above the oven to collect the vapors, avoiding that they spread in the environment. IMPORTANT To install the hood, follow the manufacturer's instructions, as this item does not accompany the equipment. CAUTION! This equipment uses LPG (liquefied petroleum gas) for heating purposes, and can not be installed indoors where there is no air renewal, as this gas is highly toxic.
-
Page 13: Hydraulic Installation
3.2 Hydraulic Installation To activate the steam function of the oven, it is necessary to install the equipment near a fixed point of cold water. The equipment is supplied with a solenoid water valve for hose coupling or for fitting a 3/8 "water supply hose (hose and pipes not supplied with the equipment) located on the back of the control panel housing. -
Page 14: Electrical Connection
advisable to install a point to drain this water, avoiding that the floor is wet and slippery and can cause accidents. 3.3 Electrical Connection The equipment comes with a power cord to be plugged into an electrical outlet. If the power cord is damaged, it must be replaced with a new one. - Page 15 The Electric Terminal identified in the figure below is an additional rotection for the grounding that is provided in the mains. It must be connected to a grounding terminal bar, regardless of the connection to the mains, and ther products that have accessible metallic parts. And which are stationary, must also be connected to this bus as well as the service bench itself, in case it is of metallic material.
-
Page 16: Installation Of Lpg Gas - Recommendations And Care
3.4 Installation of LPG Gas - Recommendations and Care Verify that the location where the equipment will be installed is aired and in accordance with the Regulations for the Prevention of Risks at Work and Safety at Work in Machinery and Equipment (Regulatory standard NR-12 for Brazil or according to the regulatory standard in force in your country), and periodic inspections of a technician are recommended to ensure that its components are in good condition. - Page 17 IMPORTANT In addition to the instructions given in this manual, it is also recommended to follow the instructions of the cylinder manufacturer, as this item does not accompany the equipment. CAUTION! Replace the regulator every 5 years or when it is defective. Do not attempt to change the pressure regulator.
-
Page 18: Safety Measures And User Instruction
leak, have the technician repeat the installation. If leakage persists, move the canister to a well-ventilated area and notify the dealer or distributor of the canister. IMPORTANT The manufacturer shall not be liable for any direct or indirect damages caused by non- compliance with these standards and other instructions presented in this manual. - Page 19 See description of each command below: • Power button - used to turn the equipment on and off. In position "1" turns on, in position "0" turns off. • Power button Light - used to turn the light located on the oven door on and off. In position "1" turns on, in position "0"...
- Page 20 Led indicating cyclic steam enabled; 10 - Down key: decreases the programmed value and selects the cyclic steam function, which emits steam automatically for 6 seconds and every 2 minutes (factory default program). To reprogram the cyclic steam, follow the instructions below; 11 - Programming access key;...
-
Page 21: Operating Procedures
4.3 Operating Procedures Before operating the equipment, make the perfect cleaning, especially inside the oven. Clean the equipment with the gas inlet valve of the oven and the gas valves of the closed cylinders and the oven is at room temperature and disconnected from the mains. Follow the cleaning instructions in item 5 of this manual (below). - Page 22 Until the oven reaches the set temperature, check the quality of the flame. The ideal flame should be blue. Follow the following instructions for flame regulation: • Remove the front cover by unscrewing the two butterflies; • Do not pull the burner drawer as it is attached to the gas valve connector; •...
- Page 23 CAUTION! For your safety and not to compromise the life of the equipment, the maximum temperature supported by the oven is up to 250°C. Failure to observe this guideline will be considered as unsafe act and abusive use of equipment. After confirming the temperature, the time display will be available for programming.
-
Page 24: Cleaning And Maintenance
CAUTION! Even if there is a safety system (which cuts off the gas in case the flame of a burner goes out), in the event of a failure to ignite and the smell of gas is in the environment, do not ignite. Wait a few minutes for air to renew in the room, and then turn on the unit. -
Page 25: Maintenance And Behavior In Case Of Breakdowns
CAUTION! Do not use water jet to clean the equipment. IMPORTANT This equipment not intended to be fully immersed in water for cleaning. Although it is movable, the burner drawer cannot be immersed in water and never use water jets for cleaning, as this will damage the burners. -
Page 26: Prolonged Interruption In Use Of Equipment
By performing preventive maintenance, you eliminate the inconvenience of getting the equipment stopped when you need it most, reducing the cost of maintenance and reducing the risk of accidents. Follow equipment maintenance and adjustment recommendations: • Replace pressure regulator every 5 years or when defective; •... - Page 27 PROBLEMS POSSIBLE CAUSES SOLUTIONS Check for power in the mains or gas in the cylinders. Check that the power cord is plugged into a wall Lack of electricity or gas. outlet. Voltage different from mains voltage. Miscellaneous electrical problems (motor / capacitor, Send the equipment to the nearest authorized contactor, wiring, fuse, electric service station or contact the factory.
-
Page 28: Appliance Life And Components
Wiring touching the motor fan. Equipment presents Send the equipment to the nearest authorized Unbalanced fan propellers. noises service station or contact the factory. Steam pipe leaning against fan protection grid. Voltage different from mains Send the equipment to the nearest authorized voltage. -
Page 29: Applicable Standards
8. Applicable standards The Brazilian standards applied for the development of the equipment and preparation of this manual are: • IEC 60335-1; • IEC 60335-2-64; • Ordinance 371 of December 29, 2009 of INMETRO; • Applicable Technical Standards (ABNT NBR, ISO IEC). -
Page 30: Annexes
9. ANNEXES Electrical Schematic - Voltage 110 V or 127 V - 60 Hz NOTE: FTG150 oven uses only one Door Light. -
Page 31: Explosion Design
Explosion Design... - Page 32 Explosion Design...
- Page 33 Explosion Design...
- Page 34 Explosion Design...
- Page 35 Explosion Design...
-
Page 36: Replacement Parts
Replacement Parts Position Code Description Qty. Model Application TUC025 Water Outlet Tube FTG.150* / FTG.300* ARL003 Smooth Washer Zinc. FTG.150B ARL002 Smooth Washer Zinc. FTG.300B ARL011 Smooth Washer Stainless Steel FTG150BT ARL012 Smooth Washer Stainless Steel FTG.300BT FTG.150B ARL002 Smooth Washer Zinc. FTG.300B FTG150BT ARL012... - Page 37 Replacement Parts Position Code Description Qty. Model Application CJT206 Electrical Assembly 110/127 V FTG.150B/ FTG.300B CJT207 Electrical Assembly 220 V FTG.150B/ FTG.300B CJT208 Electrical Assembly 110/127 V - Inox FTG.150BT/FTG.300BT CJT209 Electrical Assembly 220 V - Inox FTG.150BT/FTG.300BT Electrical Assembly 220 V – Duplo Giro CJT210 FTG.300BD TAP113...
- Page 38 Replacement Parts Position Code Description Qty. Model Application 13.33 IGN003 Electronic Ignition Plant FTG.150*/ FTG.300* 13.34 TCE013 Terminal FTG.150*/ FTG.300* 13.35 TCE033 Splicing Connector FTG.150*/ FTG.300* 13.36 TMP001 Thermocouple Type "J" FTG.150*/ FTG.300* 110/127 V - FTG.150* Water Solenoid Valve – 110/127 V VAL001 110/127 V - FTG.300* 13.37...
- Page 39 Replacement Parts Position Code Description Qty. Model Application 21.5 PRR015 Mac. Screw Round FTG.150*/ FTG.300* 21.6 ARL005 Smooth Washer FTG.150*/ FTG.300* 21.7 POS006 Hexagonal Nut FTG.150*/ FTG.300* 21.8 CNX013 Brass Nipple Hex. Connection FTG.150*/ FTG.300* VAL002 Solenoid Valve for Gas - 110/127 V FTG.150*/ FTG.300* VAL009 Solenoid Valve for Gas - 220 V...
- Page 40 Replacement Parts Position Code Description Qty. Model Application ETR067 Complete Oven Structure - FTG.150 FTG.150B ETR078 Complete Oven Structure - FTG.300 FTG.300B ETR114 Stainless Steel Complete Oven Structure - FTG.150 FTG150BT ETR106 Stainless Steel Complete Oven Structure - FTG.300 FTG.300BT BCH075 Black Silicone Trim - FT.150 FTG.150*...
- Page 41 Replacement Parts Position Code Description Qty. Model Application TUC026 Inner Water Tube - FT.150 FTG.150* TUC023 Inner Water Tube - FTG.300 FTG.300* POS146 Hexagonal Nut FTG.150* / FTG.300* CNX011 Brass Spigot Connection FTG.150* / FTG.300* POS156 Stainless Steel Self-Locking Hexagonal Nut FTG.150* / FTG.300* EIX233 Stainless Steel Door Pivot Shaft - FT...
-
Page 42: Warranty Term
Warranty Term IMG BRASIL, manufacturer of METVISA products, undertakes to guarantee its products against possible manufacturing defects for 180 days (including 90 days of legal guarantee), counted from the date of issuance of the corresponding Sales invoice. This WARRANTY TERM is limited to replacing defective components, excluding all electrical and / or electronic parts, which, in addition to being not guaranteed by IMG BRASIL, is subject to the conditions and norms of the original manufacturers of the damaged products. - Page 44 IMG BRASIL Gastronomy Machinery Industry Ltda. CNPJ 11.193.347/0001-14 - CREA 131726-3 Road. Antônio Heil - KM 23 Nº 5825 - Neighborhood: Limoeiro ZIP CODE 88352-502 - Brusque - SC - Brazil Phone/fax. +55 47 3251-5555 - Web Site: www.metvisa.com.br Mail: sac@metvisa.com.br - export@metvisa.com.br...
Need help?
Do you have a question about the Metvisa FTG.150B and is the answer not in the manual?
Questions and answers