
Related Manuals for powersoft Deva


Summary of Contents for powersoft Deva
- Page 1 DEVA SYSTEM MANAGER USER GUIDE ©2022 Powersoft Keep this manual for future reference...
-
Page 3: Table Of Contents
Sample configuration � � � � � � � � � � � � � � � � � � � � � � � � � � � � � � � � � � � � � � � � � � � � � � � � � � � � � � � � � � � � � � � � � � � � � � �35 Deva System Manager | 3... -
Page 4: Introduction
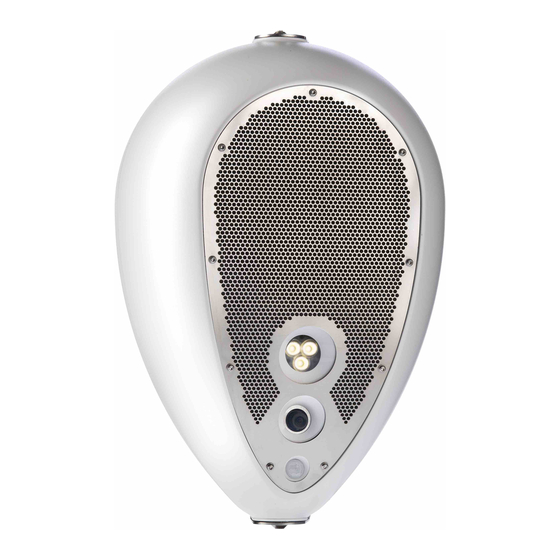
DEVA’s shell is resistant to water and dust (IP65), making it an ideal solution for outdoor installations, for applications ranging from scheduled diffusion of background music, to video surveillance. -
Page 5: System Architecture
System architecture A Deva system consists of the devices, the communication infrastructure, LAN, Wi-Fi, or mobile network, and a management server called PDD (Powersoft Deva Director). DSM (Deva System Manager) management software runs on this server. The DSM provides a web-type user interface that is accessible from any PC on the same subnet or that is able to connect to the PDD via the Internet if it has a static public address. - Page 6 Below is a typical installation structure in the case of a Wi-Fi network: 6 | Deva System Manager...
- Page 7 Below is a typical installation structure in the case of a Mobile network: Deva System Manager | 7...
-
Page 8: Accessing The Web Interface
Open a browser (Chrome is recommended) on any PC that can reach the PDD, then enter the address: http://192.168.1.1:8080 The following page will appear: Select the language and enter Username and Password. The default values are: Username: admin Password: admin The system page is then accessed� 8 | Deva System Manager... -
Page 9: The System Page
Used to remove a Deva from the system. It is activated only by selecting Deva offline (see below). It is not possible to remove a communicating Deva. It must first be disconnected so that it goes offline. -
Page 10: The Grid
Connection: the type of active connection indicated by the icons Wi-Fi (the green arcs indicate signal level) Mobile (green bars indicate signal level) absent Data uploaded: indicates the alignment status between the files on the PDD and those on the Deva. The statuses are: aligned non-aligned... - Page 11 Radio FM volume: percentage value of the volume level of the channel playing FM radio Activity Status: column showing the work in progress on the Deva Guard mode: the presence of the icon indicates that the Deva is in guard mode (see the paragraph on event management)
-
Page 12: The Players Window
Devas, but by streaming it in real time. This means that if the connection between PDD and a Deva is lost, it will stop playing. Once again, playing takes place in sync in this pane. A second possibility is to select a Web Radio from a previously set list, which will be explained later, which can be listened to by all the selected Devas�... -
Page 13: Device Settings
Please note: In the event that the Deva is set as an Access Point, its default IP address is 192.168.0.1 and it will assign to its clients, for up to 5 devices, an address of the type 192.168.0.x with x>1. However, if the Deva is also con- nected to a LAN with 192.168.xxx.yyy address, then an address will be set on the WI-FI network controller... - Page 14 Purple: software update in progress. Yellow: internal communication problem. In some cases, this LED may be kept off, in order to make unclear whether the Deva is active or not. How to set this will be explained later� Events Log: if the icon , is present, then saving event logs is active.
-
Page 15: Device Settings Hot Key Bar
PDD, as well as the second amplifier to connect a Deva Slave to the AUX output, and the RGB LED can be disabled in case the user does not want to show the operating status of the Deva. In the Bluetooth part, the Bluetooth interface can be enabled by defining the PID for pairing with a smartdevice, as well as the maximum volume with which the music can be played�... - Page 16 It also necessary to set the type of binding, that is, the interface with which the server is reached. It can be “lan”, “wlan”, but also both using “*”. As always, the volume of the Deva and where to direct the audio can be defined, whether on the speaker of the Deva or on the AUX audio output, but also on both�...
-
Page 17: System Admin
In this screen the user can store the data of the favourite FM radio stations. After clicking on the icon , the panel where the name of the radio and its frequency can be set will Deva System Manager | 17... -
Page 18: Predefined Web Radio
To be sure that the addresses are valid, it is necessary to verify that entering them a browser on the PC, al- lows direct listening of the radio station, without other interactions. The management is exactly the same as that of FM radios, as explained in the paragraph above. 18 | Deva System Manager... -
Page 19: Known Devas
DSP can contact them thanks to the data entered in this window: After Clicking on the icon , the pane will open and it is possible to set the IP address of a Deva. To delete an address, the user can click on the icon �... -
Page 20: Users Management
SMS Control: it enables the reception of SMS containing commands for the Deva Voice Call: it enables voice calls in and out on mobile network VoIP Call: it enables voice-in and voice-out calls over VoIP-SIP protocol To change or delete a contact, use the usual procedure. -
Page 21: Global Settings
In the first pane the user can set the time, date, and time zone of the PDD. This is useful if one is working on the PDD on board Deva, because it allows to set the exact time in the absence of connectivity with an exter- nal PDD or GPS coverage�... -
Page 22: Maintenance
Linux machine. Finally, the Backup key of the system log allows to save the logs of the entire system in a compressed file to be analysed with appropriate tools� 22 | Deva System Manager... -
Page 23: The Library
Once this is done, a procedure will start that transfers the files within the system by entering the data in the database: file name, title, artist, album, year and duration. To remove a file, simply select it and press the button . With the button the song can be listened to on the PC� Deva System Manager | 23... -
Page 24: The Playlists
To edit a playlist, double click on the grid row or click once to select the row and click on the button . To delete a playlist, simply select it and click on the button � 24 | Deva System Manager... -
Page 25: The Zones
Add button. To remove a Deva from the zone, just select it from the right pane by clicking on the Remove button. -
Page 26: Schedules
Schedules Let us now see how to configure schedules. A distinction must be made in the case of working on a Deva that does not belong to any area or on an area that includes several Devas� It is not possible to individually configure a Deva that belongs to a zone. - Page 27 The related windows are identical, therefore we will explain them only once knowing that in the first case the settings will be sent only to the selected Deva, while in the second case they will be sent to all the Devas belonging to the Zone�...
- Page 28 To access this function, simply click on the button and select the desired schedule from the list that is displayed by selecting the Deva or the Zone that contains the schedule to be cloned from the drop-down menu:...
- Page 29 Multiple selection is allowed to import multiple schedules at the same time. Deva System Manager | 29...
-
Page 30: Events
Events To set the events, select a Deva or a zone and then click on the tab , as seen in the previous paragraph for the schedules. The following window will open: Clicking on the button will open the following window: After entering a description in the relevant field, the user can decide whether the event will be active or inactive based on the status of the “Enabled”... - Page 31 For example, if I set a Raising Edge of 5 seconds and a Falling Edge of 30 seconds, for an event on the presence sensor that must turn on the LED spotlight, it is necessary that a person moves in front of the Deva for at least 5 seconds before the LED spotlight is turned on and when the person has left, the LED spotlight remains on for another 30 seconds�...
-
Page 32: Details
Here is how the window looks after taking a photo: The process of taking the photo is quite long, because it includes both acquisition of the image on board Deva and the subsequent transfer to the PDD. If for some reason the photo does not reach the PDD, the button can be used to force the download on PDD. - Page 33 For example, if using the VLC media player the user must click on the menu item “Media->Open Network Stream”, as shown in the following figure: The video coming from the Deva can be viewed by entering the address copied from the DSM window� Of course, the video camera must have been On for at least thirty seconds.
-
Page 34: Diagnostics
Diagnostics Clicking on the tab allows to access the window that shows all the quantities acquired by the Deva as well as various operating statuses. Below is the window: PTo refresh the data shown in the window, click on the button �... -
Page 35: Sample Configuration
Sample configuration Let us suppose that we want to configure from scratch a small system consisting of 3 Deva HD, an Access Point (hereinafter called AP), and the PDD. The PDD is connected via LAN to the AP that integrates the DHCP server. - Page 36 DRIVING HUMAN AUDIO EXPERIENCE POWERSOFT S.P.A. Via E. Conti, 5 - Scandicci (FI) 50018 - Italy support@powersoft.com +39 055 73 50 230 +39 055 73 56 235 POWERSOFT.COM...
Need help?
Do you have a question about the Deva and is the answer not in the manual?
Questions and answers