Table of Contents
Advertisement
Quick Links
Advertisement
Table of Contents

Related Manuals for iCRco VERTX

Summary of Contents for iCRco VERTX
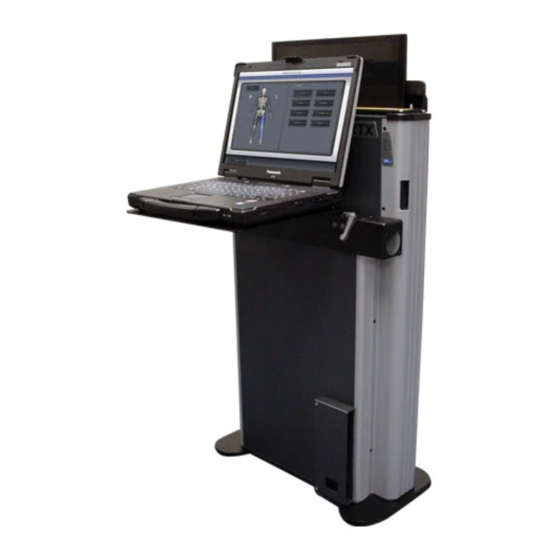
- Page 1 VERTX USER MANUAL...
- Page 2 The information herein disclosed is the property of iCRco, Inc. Information in this docu- ment is subject to change without notice and does not represent a commitment by iCRco to incorporate changes or improvements in units previously sold or shipped.
- Page 3 Inc. Address: 2580 West 237th Street Torrance, CA, 90503 Telephone: 310.921.9559 FAX: 310.776.7960 Email: info@icrcompany.com Web: www.icrcompany.com VERTX Information Please Enter the details of the VERTX system here: CR Model: Serial Number: Date Purchased: Interface Type: USB 2.0 c 2007-2009...
-
Page 4: Table Of Contents
2.2 FCC Notification ....... . . iCRco Warranty ........ - Page 5 VERTX –User Manual 7.4 Power Switch Locations ......27 7.5 Installing AC Power Cord ......27 7.6 International Power Cable .
-
Page 6: Safety Information
The VERTX unit incorporates a Class 3B 658 nm Red 15mw high-power solid-state laser diode. The VERTX covers protect the service person from direct exposure to laser light. These covers will protect a user/service person only if they are properly installed. -
Page 7: Electrical Hazards
The equipment must be serviced by properly trained technicians certified by iCRco Inc. Do not connect the VERTX unit with a damaged or sub-standard power cable. Do not use an extension cord with this device. The VERTX unit should be properly grounded and power connections inspected to ensure safe operation. -
Page 8: Introduction
(1) year from the date of original shipment from iCRco subject to the limitations set forth herein. iCRco phosphor plates sold with and for use in iCRco... -
Page 9: Software Limited Warranty/Support
If a product proves to be defective in material or workmanship during the warranty period, iCRco will, at its sole option, repair or replace the product with a similar product. Repaired and replacement products may be or include refurbished or remanufactured parts. -
Page 10: Warranty Product Technical Requirements
If iCRco determines that the product may be defective, is under warranty and necessitates a return to iCRco for service, an RMA number and instructions for return of the product will be given. iCRco is not responsible for any unauthorized returned product, i.e. -
Page 11: Additional Warranty Limitations And Extent Of Warranty
This limitation applies even if iCRco cannot or does not repair or replace any defective product and your exclusive remedy fails of its essential purpose. - Page 12 This exclusion of damages applies even if the customer advises iCRco or an iCRco dealer of the possibility of such damages.
-
Page 13: Pre-Installation
A 13A/220V power cord is sufficient. 3.2 Environmental The VERTX unit should not be placed in a room with a film processor present. This will void the warranty. The humidity and temperature limits are 20 to 95% non-condensing, and 59 F to 95 F (15 C to 35 C), operating, respectively. The room should have good ventilation. -
Page 14: Physical Requirements
The room needs to have wall power and should not be used with an extension cord. Please use at least a 1500VA (1500W) UPS between the wall power and the VERTX unit. It is also required to have a network connection for fast technical support. Alternatively, the user must have a phone/fax line that can be connected to the PC as a minimum to comply with iCRco warranty terms. -
Page 15: Packing List
4. Packing List WARNING: The UPS CAN NOT ship with the battery connected. Upon unpacking the VERTX and its accessories, the UPS will need to have the battery reconnected. Box 1: Scanning 1. (1) VERTX Scanner with AC cord attached 2. -
Page 16: Unpacking / Setup Instructions
7. Plug one end of the AC adapter into the Toughbook and the other end into UPS surge protector outlet (the Toughbook has its own battery backup). 8. Connect one end of the USB cable into the VERTX USB plug and the other end into the Acquisition Toughbook USB port. -
Page 17: Driver And Software Installation
VERTX –User Manual 6. Driver and Software Installation The computer hardware necessary to interface with the VERTX is shipped to the customer with all needed drivers and software installed. If the need arises, the following section describes how to install the software. - Page 18 VERTX –User Manual 4. Click Yes to agree to the Software License Agreement. 5. Make sure both QPC XSCAN32 Software and Software Key Driver boxes are checked, then click Next. 6. Select Scanning Station or Reading Station depend on the use, then click Next to continue.
- Page 19 VERTX –User Manual 7. Select the appropriate modality, then click Next to continue. 8. The Destination Folder should be set to C:\Xscan32 then click Next to continue. 9. The Program Folder name should be set to QPC XSCAN32, then click Next.
-
Page 20: Initializing The Vertx Driver
Note: This process will need to be repeated for each USB port on the laptop. There are 4 USB ports on each laptop. 1. Make sure the VERTX unit is powered on and has the proper USB cable installed. 2. Plug the USB cable into the laptop. -
Page 21: Installing Ampronix External Monitor Drivers
VERTX –User Manual 4. A driver signing warning will appear. Click Continue Anyway. 5. The installation process is finished. Click Finish to finish the installation. 6.4 Installing Ampronix External Monitor Drivers 1. Insert the installation media into the computer. - Page 22 VERTX –User Manual 4. At the license agreement screen, select the radio dialog box next to I accept the terms in the License Agreement, then click Next. 5. Click Install to begin the installation. 6. Click Finish to complete the installation.
-
Page 23: Monitor Configuration
VERTX –User Manual 6.5 Monitor Configuration 1. Ensure that the external monitor is powered on and is connected to the laptop via the USB cable. 2. Go to Start Control Panel Display. 3. In the Display Properties, click on the Settings tab. - Page 24 VERTX –User Manual 7. Click Apply. 8. To rotate the external monitor to portrait mode, right click on the monitor icon in the system tray, then select Screen Rotation, then click Rotate Right. 9. Select Monitor 1, then uncheck Extend my Windows desktop onto this monitor.
-
Page 25: Network Configuration
VERTX –User Manual 6.6 Network Configuration 1. Go to Start Control Panel Network Connections, then double click Local Area Connection. 2. Select Internet Protocol (TCP/IP), then click Properties. 3. Select the check box Use the following IP address. c 2007-2009... - Page 26 VERTX –User Manual 4. If the laptop is an Acquisition station, enter the following: IP Address: 192.168.0.1 Subnet Mask: 255.255.255.0 Default Gateway: 192.168.0.1 If the laptop is a Viewing station, enter the following: IP Address: 192.168.0.2 Subnet Mask: 255.255.255.0 Default Gateway: 192.168.0.1...
-
Page 27: Hardware Installation
VERTX –User Manual 7. Hardware Installation 7.1 Hardware Setup Diagram c 2007-2009 26 of 81 Document # VTX-01A Rev C Confidential and Proprietary August 3, 2009 Property of iCRco, Inc. -
Page 28: Pc Specifications
7.3 VERTX USB 2.0 Installation The USB 2.0 port is located on the upper, right-hand side of the operator when facing the front of the VERTX unit. Plug a standard USB 2.0 cable into the VERTX USB port and then into the PC. -
Page 29: International Power Cable
6. Turn the VERTX unit switch to the on position. 7.6 International Power Cable The VERTX unit utilizes an international IEC grade connector for the power cable. Systems are shipped with a standard NEMA 5-15 hospital grade cable. The cable needs to be changed depending on the male end, which varies from country to country. - Page 30 VERTX –User Manual c 2007-2009 29 of 81 Document # VTX-01A Rev C Confidential and Proprietary August 3, 2009 Property of iCRco, Inc.
- Page 31 VERTX –User Manual c 2007-2009 30 of 81 Document # VTX-01A Rev C Confidential and Proprietary August 3, 2009 Property of iCRco, Inc.
- Page 32 VERTX –User Manual c 2007-2009 31 of 81 Document # VTX-01A Rev C Confidential and Proprietary August 3, 2009 Property of iCRco, Inc.
- Page 33 VERTX –User Manual c 2007-2009 32 of 81 Document # VTX-01A Rev C Confidential and Proprietary August 3, 2009 Property of iCRco, Inc.
- Page 34 VERTX –User Manual c 2007-2009 33 of 81 Document # VTX-01A Rev C Confidential and Proprietary August 3, 2009 Property of iCRco, Inc.
- Page 35 VERTX –User Manual c 2007-2009 34 of 81 Document # VTX-01A Rev C Confidential and Proprietary August 3, 2009 Property of iCRco, Inc.
- Page 36 VERTX –User Manual c 2007-2009 35 of 81 Document # VTX-01A Rev C Confidential and Proprietary August 3, 2009 Property of iCRco, Inc.
-
Page 37: Acquiring An Image
2. Choose the cassette size (10x12” or 14x17”) by moving the metal rod on the right side of the scan slot to the appropriate position. Position the metal rod towards the inside of the VERTX for a 10x12” cassette. Position towards the outside of the VERTX for a 14x17” cassette. - Page 38 VERTX –User Manual 3. Load the cassette into the VERTX. The black, carbon fiber side of the cassette faces towards the front of the VERTX unit. CAUTION: Do not use excessive force when loading the cassette! The cassette will not fit if the orientation is incorrect.
- Page 39 VERTX –User Manual 6. If creating a new patient, enter the relevant patient info, or if editing a patient, change the information accordingly, then click Save and View. 7. Click on Scan to bring up the Quality Processing Center Scan dialog. (if it is a patient with no images the scan dialog will automatically appear).
- Page 40 VERTX –User Manual 9. Select the anatomy by mousing over the skeleton on the left hand side of the Quality Processing Center dialog. 10. To begin scanning, select the cassette size by clicking the correct button (i.e. 14x17 in, 10x12 in).
- Page 41 VERTX –User Manual 15. Process using ICE2 (located in the Image Processing dialog). 16. Window/Level(W/L) the image using the Window/Level or Smart Box tools. c 2007-2009 40 of 81 Document # VTX-01A Rev C Confidential and Proprietary August 3, 2009...
- Page 42 VERTX –User Manual 17. Accept and Save the image to save the processing and W/L settings by clicking the Save and Accept button in the upper left hand corner of the image. c 2007-2009 41 of 81 Document # VTX-01A Rev C Confidential and Proprietary...
- Page 43 VERTX –User Manual 18. Return to the Patient Information window. Select the patient(s) to send to a PACS or viewing station. If you wish to send more than one patient, hold the Ctrl key down and left mouse click to select multiple patients.
-
Page 44: Qpc Xscan32 Software Functions
VERTX –User Manual 9. QPC XSCAN32 Software Functions 9.1 Creating/Editing Patients 1. Open the QPC XScan32 software and click the New button on the Patient Informa- tion dialog under Patient. Alternatively, if the patient is already in the patient list then select the patient and click the Edit button on the Patient information dialog. -
Page 45: Image Processing Dialog Box
VERTX –User Manual Similarly, on a laptop the user may right click and drag along the touch pad interface to zoom. Panning (Moving) Images Hold down the Left mouse button and move the mouse around the screen. This is useful when the image is magnified. - Page 46 VERTX –User Manual The middle scroll button is used to window and level images. To window and level through more gray values at a tie, hold down the Ctrl key and use the Middle Scroll button. This will perform a faster window and level on images with a large histogram (i.e.
- Page 47 VERTX –User Manual 2. Select the Left/Right Markers button to apply a Left or Right marker to the image. 3. Select either the Left or Right marker. When the user clicks on the Left/Right Marker button the Left marker icon will appear. If the user clicks the Left/Right Marker button again the Right marker icon will appear.
- Page 48 VERTX –User Manual Cropping Example: After Before CR Masking 1. Open an image for viewing. 2. Click the User Mask button. 3. To remove the collimation mask select the Mask button again. CR Masking Example Before User Masking After User Masking CR User Masking 1.
- Page 49 VERTX –User Manual 4. Hold the left mouse button down on the start region and move the mouse to the end of the crop region. 5. Repeat step 4 for each exposure. After the user has completed selecting the number of exposures, the masks will appear on the image.
- Page 50 VERTX –User Manual highlighted icon is higher than the moving icon) then all icons between its original position and its new position will move backwards and each image number decreases by one. If an icon is dragged backwards in position (i.e. the image number of the highlighted icon is less than the moving icon) then all icons between its original position and its new position will move forward and each image number increases by one.
-
Page 51: Annotations
VERTX –User Manual ICE2 Example: Lateral Lumber Spine Conventional Processing ICE-2 Processing Clicking the drop down menu button located below the “sharp” option gives the user the ability to refine the image further. After the user clicks on the drop down menu an interface appears showing two sliders. - Page 52 VERTX –User Manual Embed Annotations in Image Clicking on the Embed Annotations in Image button will save all the annotations into the image, enabling the user to DICOM send images with annotations. If the annotations are not embedded, they will not be sent with the image when doing a DICOM send.
- Page 53 VERTX –User Manual Cross Hair Annotation Creates a cross hair on the image. 1. Select the Cross Hair button from the annotations toolbar. 2. Left mouse click on the area of the image to set the start point of the cross hair.
- Page 54 VERTX –User Manual Text Annotation Creates a text annotation on the image. 1. Select the Text button from the annotations toolbar. 2. Left mouse click on the area of the image to set the upper left corner of the text box.
- Page 55 VERTX –User Manual Angle Measurement Annotation Used to draw an angle on the image. 1. Select the Angle Measurement button on the annotations toolbar. 2. Left mouse click on the image to set the vertex (center point) of the angle.
- Page 56 VERTX –User Manual Heart to Lung Ratio Annotation Used to find the heart to lung ratio. 1. Select the Heart to Lung Ratio button on the annotations toolbar. 2. Left mouse click on the area of the image to set the first endpoint of the first line.
- Page 57 VERTX –User Manual Probe Used to view the X & Y pixel coordinates and the gray scale value for the point. 1. Select the Probe button on the annotations toolbar. 2. Move the mouse to the desired point. 3. Left mouse click and hold, and the X & Y coordinates and gray scale value will be displayed.
- Page 58 VERTX –User Manual Deleting Annotations Individually 1. Select the annotation. 2. Right mouse click on the annotation. 3. Select Delete from the pop up menu. Selecting Annotations 1. Move the mouse over the annotation. The mouse pointer will become a pointing hand.
-
Page 59: Patient Cd/Dvd Creator
VERTX –User Manual 9.5 Patient CD/DVD Creator 1. In the patient information window select the patient(s) to be placed on the CD/DVD. To select multiple patients hold down your Ctrl key on the keyboard and using your left mouse button select each patient. -
Page 60: Associating A Barcode With A Study
VERTX –User Manual 9.6 Associating a Barcode with a Study 1. In the patient information window enter patient and study infor- mation. 2. Select patient and study. 3. Select Add Barcode button. 4. Using a barcode reader, scan the barcode of an unexposed cassette. -
Page 61: Finding Barcodes And Scanning Images
3. Select the anatomy information for the study. Note: This can be corrected later in QPC XSCAN32 when viewing the images. 4. Load cassette into the VERTX unit. 5. Select the appropriate scan button. QPC XSCAN32 will automatically open the study that the cassette is associated with. -
Page 62: Archiving Qpc Xscan32 Database
VERTX –User Manual There is an option in the scan interface settings that requires the user to scan the barcode before they are able to scan cassettes into the interface. In other words they have to tell the scan interface which barcode they are scanning. If no barcode has been selected for scanning the user will be prompted to find a barcode. -
Page 63: Restoring Archived Database
VERTX –User Manual 9.9 Restoring Archived Database WARNING: iCRco strongly recommends backing up data to non-spinning media CD/DVD or an archive (PACS) with RAID capability to ensure no loss of data. 1. To restore an Archive click on Restore Archive in the File menu. -
Page 64: Qpc Xscan32 Keyboard Shortcuts
VERTX –User Manual (b) Enter search values into the patient information fields. If the database contains a patient or multiple patients that match the criteria the database will be opened with the patient(s) selected. If the patient(s) could not be found you will be returned to the search dialog. -
Page 65: Modality Worklist Query
VERTX –User Manual Selects and deselects all image icons. Ctrl + A Selects and deselects all image icons. Ctrl + D Deletes the selected image icons. Shift + P Opens preferences. Shift + S Adds images to the send queue. - Page 66 VERTX –User Manual Search fields. For example, to search The user can also specify query options such as: patients with the last name querying automatically when worklist Click here to Smith - select the query dialog is opened. select the tar- Last Name field in...
-
Page 67: Report Writer
VERTX –User Manual 4. The patients will appear in the QPC XSCAN32 patient information window within seconds of being retrieved from the Modality Worklist Query dialog. 9.13 Report Writer 1. Open a patient study. Select the desired images to report. The user can have up to four images... -
Page 68: Setting Up Dicom Send
VERTX –User Manual Findings and Impressions Code field Facility field Patient specific findings and impressions field. Signature Name field Image Report button View Button To include color for US images Select Include color option. 9.14 Setting Up DICOM Send 1. -
Page 69: Dicom Send
VERTX –User Manual 9.15 DICOM Send 1. Open a patient study for viewing and select the image icons to send. 2. Click on the DICOM Send button in the toolbar. Note: This will only appear in the toolbar when the “Use DICOM to transfer images” option is selected in the image Transfer preferences tab. -
Page 70: Dicom Retrieve
VERTX –User Manual 5. The status of the send will appear in the Event Log of the DICOM Controller window. Note: If sending to another XSCAN32 application the user can turn compression on and select a compression type (low, medium, high). - Page 71 VERTX –User Manual 5. If the user has selected the Search Parameters option, then enter any relevant patient or study information. For example, to search on all patients with the name John Smith, type John Smith into the Patient Name field. To search on all patients with the last name Smith, type *Smith* into the Patient Name field.
-
Page 72: Advanced Dicom Printer
VERTX –User Manual 9.17 Advanced DICOM Printer Select images for printing In QPC XSCAN32 select the images to print in the image icon view and select DICOM Print from the tool- bar. The Advanced DICOM Printer application will open with the se- lected images imported into the right hand side. - Page 73 VERTX –User Manual Split the preview window into regions To split the preview window the user needs to first select the region to split. For example, if there are currently no divisions in the pre- view window then click anywhere in the pre- view window and a green line will appear around the window.
- Page 74 VERTX –User Manual Manipulate Images in the preview window The Advanced DICOM Printer allows the user to flip, rotate, zoom, pan, invert and window/level images. To manipulate the images select the image in the preview window (the se- lection will be shown by the green box surrounding the image).
- Page 75 VERTX –User Manual Change margins The margin tab permits the user to specify, in English or metric units, the size of the borders on the printed image. The top and bottom borders on the page can be adjusted independently of the borders for the left and the right hand side of the page.
- Page 76 VERTX –User Manual Adding patient demographics Select the overlay tab to bring up the patient demographic layout options. From here the user can select: Text position (includes top left, top center, top right, bot- tom left, bottom center, bottom right), Text size (includes: small, medium, large), Text color (includes: white on black, black on white).
- Page 77 VERTX –User Manual By selecting the Enable Overlay check box the user can turn patient demographics overlay on and off for all images. The user can also edit the fields that are available on patient demographics overlay by clicking on the Edit Fields button.
- Page 78 VERTX –User Manual button in the bottom left hand corner of the DICOM Printer dialog. Please ensure all the printer settings are correct first. Patient Demographics for icons When the cursor is over the icon bank Advanced DI- COM Print will display the demographics for the image.
-
Page 79: Printing To A Windows Printer
VERTX –User Manual 9.18 Printing to a Windows Printer 1. To setup QPC to open the DICOM Application Print Server go to Options Preferences Image Transfer Tab. Select the option Use Windows to DICOM Printer. DICOM Print must also be selected. - Page 80 VERTX –User Manual 2. Check target information for both applications (Advanced DICOM Print and DI- COM Application Printer Server). Select Advanced DICOM Print and click on Configure DICOM button. The DICOM Configuration dialog will appear. The tar- get details for this application are usually: AET: ADV PRINT DICOM, PORT: 4008, IP: 127.0.0.1, Click on Select to see full details of this target.
-
Page 81: Dicom Store And Forward Utility
VERTX –User Manual 9.20 DICOM Store and Forward Utility Setting up targets for forwarding 1. Under the All Targets list select the tar- get(s) to forward. 2. Select the Add button. 3. To remove target(s) from the forward to list. Select the target under the For-... - Page 82 VERTX –User Manual compressed to the PACS system then deselect the option Receive compressed image, forward uncompressed. Note: The Store and Forward Utility may report the status as complete but the PACS system may still reject the image. If the image has an incorrect DICOM tag or it is a duplicate study, series or image UID.
Need help?
Do you have a question about the VERTX and is the answer not in the manual?
Questions and answers