Table of Contents
Advertisement
Quick Links
Advertisement
Table of Contents

Related Manuals for AVM B1 v3.0


Summary of Contents for AVM B1 v3.0
- Page 1 A V M I S D N - C O N T R O L L E R M a n u a l High-Performance ISDN by . . .
- Page 2 AVM will not be liable for damages arising directly or indirectly from the use of the manual or related software, nor for incidental or consequential dama- ges, except in case of intent or gross negligence. AVM expressly disclaims...
-
Page 3: Table Of Contents
Introduction The AVM ISDN-Controller B1 v3.0 ..... . 9 The Driver Software of the Controller B1 v3.0 ... 10 System Requirements . - Page 4 Installing Additional Controllers ..... . 40 Removing the ISDN-Controller B1 v3.0 ....41 Installation in Windows 95 Installing the New Hardware Device .
- Page 5 AVM Support ........89...
- Page 6 Using MSN.EXE ........105 Controller B1 v3.0 – Contents...
- Page 7 This symbol indicates useful tips and supplementary infor- mation. The exclamation point designates sections which contain important information. Indicates especially important instructions that absolutely must be observed to ensure correct functioning. Controller B1 v3.0 – Typographical Conventions...
-
Page 8: Introduction
Data are transmitted on each of the two available B channels at a speed of 64Kbit/s. In practice, this provides for quick connections and short transmission times. The AVM ISDN- Controller B1 v3.0 also allows the two B channels to be bun- dled to double transmission speeds. Integration of Services... -
Page 9: The Avm Isdn-Controller B1 V3.0
ISDN access using the cable included in the controller package. The Active Operating Principle of the Controller The AVM ISDN-Controller B1 v3.0 is an active controller and simultaneously processes both B channels of an ISDN basic access (2 x 64,000 bit/s). It owes its extraordinary capacity to the high-power processor (Transputer IMS T400) located on the controller. -
Page 10: The Driver Software Of The Controller B1 V3.0
ISDN services data trans- fer, fax and speech transmission. This interface allows the Controller B1 v3.0 to be used with a wide range of CAPI 2.0- based ISDN applications. For more information about CAPI 2.0, see the section “The Applications Interface CAPI 2.0”... - Page 11 Applications without CAPI support The controller package includes three AVM system drivers: the AVM ISDN CAPI Port Driver, the AVM NDIS WAN Driver and the TAPI Services for CAPI. These system drivers allow you to use applications without CAPI support in parallel operation with ISDN applications based on CAPI.
-
Page 12: System Requirements
System Requirements 1.3 System Requirements The following hardware and software requirements must be met in order to use the Controller B1 v3.0: computer with a free ISA slot operating system: Windows 2000, Windows NT, Win- dows Millennium, Windows 98, Windows 95, Windows 3.x, DOS, Novell NetWare 5.x, 4.x or 3.x, OS/2 or Linux... - Page 13 To install the driver software from diskette, copy the installa- tion programs from the CD or request the installation disk- ettes from AVM (for the address, see the inside cover). Be sure to specify the operating system used. The diskettes will be delivered to you free of charge.
-
Page 14: Installing The Hardware
Installing the Hardware 2 Installing the Hardware The AVM ISDN-Controller B1 v3.0 can be operated on a num- ber of platforms. The exact procedure for installing the ISDN- Controller differs for the various operating systems. 2.1 Instructions for the Different Operating Systems Windows 2000/NT/3.x/MS-DOS/OS/2/Novell NetWare... -
Page 15: Installing The Isdn-Controller B1 V3.0 In The Computer
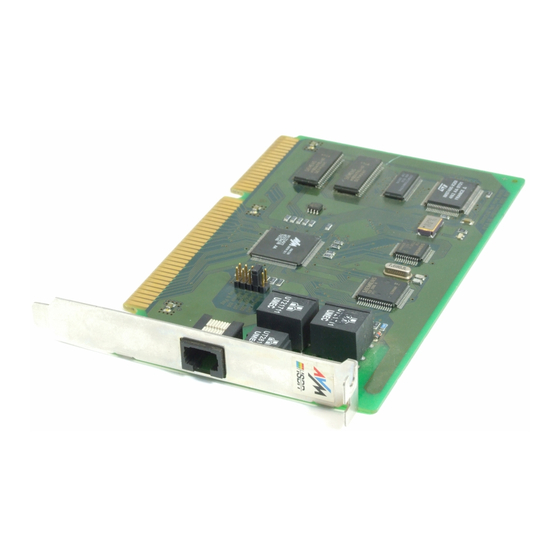
The figure below illustrates how the jumpers are arranged on the ISDN-Controller B1 v3.0, showing the various jumper po- sitions and their corresponding I/O addresses. These data are also listed as a label on the circuit board of the AVM IS- DN-Controller B1 v3.0. Slot back plate Controller B1 v3.0... - Page 16 Installing the ISDN-Controller B1 v3.0 in the Computer Open the cover of the PC. Touch the metal of the PC housing to discharge any static electricity. Select a suitable slot, remove the housing and insert the ISDN-Controller in the slot.
-
Page 17: Installation In Windows 2000
Windows 2000. Proceed as follows: Start Windows 2000. Insert the “AVM ISDN-Controller B1 v3.0” CD in your CD- ROM drive. Open the Windows 2000 Start menu and select the “Run” command. In the command line, enter the path to the installation program: ISDN-Controller B1 v3.0 –... - Page 18 Click “Next”. In the next window, activate the “Installation” option. If the ISDN-Controller B1 v3.0 is already installed with the drivers included on the Windows 2000 CD, select the “Update” option here to install the latest version of the driver software.
-
Page 19: Changing The Settings
CAPI 2.0 and the AVM NDIS WAN CAPI Driver are available. For detailed information about the AVM NDIS WAN CAPI Driver and the two other AVM system drivers, see the section “The AVM System Drivers” on page 81. -
Page 20: Installing Additional Controllers
Installing Additional Controllers Click with the right mouse button on the entry “AVM ISDN-Controller B1”. Select “Properties” and activate the “ISDN” settings page. On this page, select the D-channel protocol. Click the “Configure” button to specify the multiple sub- scriber numbers for the NDIS WAN CAPI Driver. - Page 21 Only one ISDN-Controller can be removed at a time. If your system has multiple ISDN-Controller installed and all are to be removed, perform the described procedure several times (without restarting Windows between the individual unin- stallation tasks). ISDN-Controller B1 v3.0 – 3 Installation in Windows 2000...
-
Page 22: Installation In Windows Nt
Windows NT. Proceed as follows to install the driver software in Windows Start Windows NT. Insert the “AVM ISDN-Controller B1 v3.0” CD in your CD- ROM drive. Open the Windows NT Start menu and select the “Run” command. Enter the path to the installation program in the command line: <CD-ROM DRIVE>:\CARDWARE\ B1_v30\... - Page 23 This concludes the driver software installation in Windows NT. Now the ISDN-Controller can be put into operation. A new program group called “AVM” is created in the Program Manager/Start menu. This program group contains the files “AVM Internet Home Page”, “B1 Unload”, “B1 Load”, “B1 Readme”, “B1 Setup”...
-
Page 24: Starting Operation Of The Isdn-Controller B1 V3.0
“Startup” program group, it is no problem to include communications programs based on CAPI in the “Startup” group. If the ISDN-Controller B1 v3.0 is not to be loaded at all times, use the options for manual loading and unloading. Unloading the ISDN-Controller To unload the ISDN-Controller B1 v3.0, click “B1 Unload”. -
Page 25: Changing The Settings
The drivers of all ISDN-Controllers installed are loaded auto- matically when Windows is started. 4.5 Removing the ISDN-Controller B1 v3.0 To remove the AVM ISDN-Controller B1 v3.0 in Windows NT, proceed as follows: Open the Windows NT Control Panel with “Start / Settings”. - Page 26 Only one ISDN-Controller may be removed at a time. If mul- tiple ISDN-Controllers are installed and all are to be re- moved, perform the above procedure several times (without restarting Windows between the individual uninstallation procedures). ISDN-Controller B1 v3.0 – 4 Installation in Windows NT...
-
Page 27: Installation In Windows Millennium
DOS windows. For more information about CAPI, see the section “The Applications Interface CAPI 2.0” on page 78. The AVM ISDN-Controller B1 v3.0 is installed in Windows Me in four main steps: Installing a new hardware device using the Windows Me... - Page 28 The Add New Hardware Wizard shows in the next win- dow a free I/O address and a free interrupt. Make a note of the I/O address displayed; the values cannot be changed here. Click “Next”. ISDN-Controller B1 v3.0 – 5 Installation in Windows Millennium...
-
Page 29: Configuring The Isdn-Controller B1 V3.0
B1 v3.0 In the second step of installation, change the jumper posi- tion on the AVM ISDN-Controller B1 v3.0 if necessary. Use the value suggested by the Add New Hardware Wizard. Upon de- livery, the jumper is set to the I/O address 150 (see the sec- tion “Setting the I/O Address”... -
Page 30: Installing The Driver Software
Click “Next”. In the next window, enter the folder in which the driver software of the AVM ISDN-Controller B1 v3.0 is to be in- stalled. When your entries are complete, click “Next”. The next step is to specify the protocol of your ISDN line. -
Page 31: Starting Operation Of The Isdn-Controller B1 V3.0
“Startup” program group, it is no prob- lem to include communications programs based on CAPI in the “Startup” group. If the ISDN-Controller B1 v3.0 is not to be loaded at all times, use the options for manual loading and unloading. Unloading the ISDN-Controller To unload the ISDN-Controller B1 v3.0, click “B1 Unload”. -
Page 32: Changing The Settings
Changing the Settings Loading the ISDN-Controller The ISDN-Controller can be loaded manually by clicking the “B1 Load” icon in the “AVM” program group. After loading the following message appears: Message after loading in Windows Me 5.6 Changing the Settings After installation has been concluded, you have the option of changing the following settings of the ISDN-Controller B1 v3.0:... -
Page 33: Installing Additional Controllers
The drivers of all installed ISDN-Controllers are loaded auto- matically when Windows is started. 5.8 Removing the ISDN-Controller B1 v3.0 To remove the AVM ISDN-Controller B1 v3.0 in Windows Me, proceed as follows: Open the Windows Me Control Panel with “Start / Settings”. - Page 34 Only one ISDN-Controller may be removed at a time. If mul- tiple ISDN-Controllers are installed and all are to be re- moved, perform the above procedure several times (without restarting Windows between the individual uninstallation procedures). ISDN-Controller B1 v3.0 – 5 Installation in Windows Millennium...
-
Page 35: Installation In Windows 98
DOS windows. For more information about CAPI, see the section “The Applications Interface CAPI 2.0” on page 78. The AVM ISDN-Controller B1 v3.0 is installed in Windows 98 in four main steps: Installing a new hardware device using the Windows Me... - Page 36 Windows and enter the desired values there. Now the driver software is copied to your computer. A message appears announcing that the software for the new hardware device has been installed. Click “Finish”. ISDN-Controller B1 v3.0 – 6 Installation in Windows 98...
-
Page 37: Configuring The Isdn-Controller B1 V3.0
B1 v3.0 In the second step of installation, change the jumper posi- tion on the AVM ISDN-Controller B1 v3.0 if necessary. Use the value suggested by the Add New Hardware Wizard. Upon de- livery, the jumper is set to the I/O address 150 (see the sec- tion “Setting the I/O Address”... - Page 38 Click “Next”. In the next window, enter the folder in which the driver software of the AVM ISDN-Controller B1 v3.0 is to be in- stalled. When your entries are complete, click “Next”. The next step is to specify the D-channel protocol of your ISDN line.
-
Page 39: Starting Operation Of The Isdn-Controller B1 V3.0
“Startup” program group, it is no prob- lem to include communications programs based on CAPI in the “Startup” group. If the ISDN-Controller B1 v3.0 is not to be loaded at all times, use the options for manual loading and unloading. Unloading the ISDN-Controller To unload the ISDN-Controller B1 v3.0, click “B1 Unload”. -
Page 40: Changing The Settings
“CAPI SoftCompression X75/V42bis” on page 83. 6.7 Installing Additional Controllers Up to four active AVM ISDN-Controllers may be installed in your computer at the same time. It is also possible to com- bine active AVM ISDN-Controllers for ISA, PCI and USB buses in one computer. -
Page 41: Removing The Isdn-Controller B1 V3.0
Removing the ISDN-Controller B1 v3.0 6.8 Removing the ISDN-Controller B1 v3.0 To remove the AVM ISDN-Controller B1 v3.0 from Windows 98, proceed as follows: Open the Windows 98 Control Panel with “Start / Settings”. Double-click the “Add/Remove Software” icon. The list of software installed includes an entry for the “AVM ISDN-Controller B1 Family”... -
Page 42: Installation In Windows 95
DOS windows at the same time. For more information about CAPI, see the section “The Applications Interface CAPI 2.0” on page 78. The AVM ISDN-Controller B1 v3.0 is installed in Windows 95 in four main steps: Installing a new hardware device using the Hardware... - Page 43 ISDN-Controller hardware is physically installed so that all settings made can be activated. 10. Turn off the computer and any other connected devices and pull the power plug. ISDN-Controller B1 v3.0 – 7 Installation in Windows 95...
-
Page 44: Configuring The Isdn-Controller B1 V3.0
B1 v3.0 In the second step of installation, change the jumper posi- tion on the AVM ISDN-Controller B1 v3.0 if necessary. Use the value suggested by the Add New Hardware Wizard. Upon de- livery, the jumper is set to the I/O address 150 (see the sec- tion “Setting the I/O Address”... -
Page 45: Starting Operation Of The Isdn-Controller B1 V3.0
CAPI in the “Startup” group. If the ISDN-Controller B1 v3.0 is not to be loaded at all times, use the options for manual loading and unloading. ISDN-Controller B1 v3.0 – 7 Installation in Windows 95... -
Page 46: Changing The Settings
Changing the Settings Unloading the ISDN-Controller To unload the ISDN-Controller B1 v3.0, click “B1 Unload”. Af- ter unloading, a message appears reporting that the AVM IS- DN-Service is no longer available. Confirm this message by clicking “OK”. Loading the ISDN-Controller The ISDN-Controller can be loaded manually by clicking the “B1 Load”... -
Page 47: Installing Additional Controllers
Installing Additional Controllers 7.7 Installing Additional Controllers Up to four active AVM ISDN-Controllers may be installed in your computer at the same time. It is also possible to com- bine active AVM ISDN-Controllers for ISA and PCI buses in one computer. - Page 48 Only one ISDN-Controller may be removed at a time. If mul- tiple ISDN-Controllers are installed and all are to be re- moved, perform the above procedure several times (without restarting Windows between the individual uninstallation procedures). ISDN-Controller B1 v3.0 – 7 Installation in Windows 95...
-
Page 49: Installation In Windows 3
Proceed as follows to install the driver software in Windows 3.x: Start Windows. Insert the “AVM ISDN-Controller B1 v3.0” CD in your CD- ROM drive. From the “File” menu of the Program Manager, select the “Run” command and enter the path to the installa- tion program in the command line: <... - Page 50 Confirm by clicking “Next”. Now the installation program copies all files to the specified directory. A new program group called “AVM” is created in the Program Manager. This group contains the programs “B1 Unload”, “B1 Load”, “B1 Readme”, “B1 Setup” and “B1 Test”.
-
Page 51: Configuring The Isdn-Controller B1 V3.0
“B1 Setup” program changes only the configuration of the first ISDN-Controller. Changes to the I/O address and inter- rupts of all other ISDN-Controllers must be made manually in the SYSTEM.INI and the ISDNLOAD.CFG files. ISDN-Controller B1 v3.0 – 8 Installation in Windows 3.x... -
Page 52: Starting Operation Of The Isdn-Controller B1 V3.0
Controller B1 v3.0 By default the ISDN-Controller is loaded automatically every time Windows is started. If the ISDN-Controller B1 v3.0 is not to be loaded at all times, use the options for manual loading and unloading. Unloading the ISDN-Controller To unload the ISDN-Controller B1 v3.0, click “B1 Unload”. -
Page 53: Changing The Settings
8.5 Installing Additional Controllers Up to four active AVM ISDN-Controllers may be installed in your computer at the same time. It is also possible to com- bine active AVM ISDN-Controllers for ISA and PCI buses in one computer. - Page 54 Base Module = b1tr6.t4 :PROTOCOL = \x06 Also note the following: When an AVM ISDN-Controller for a different type of bus is added, the paragraphs above must also include the line Type=XX to specify the bus type. If a PC controller is already installed and an ISA control-...
-
Page 55: Removing The Isdn-Controller B1 V3.0
Use the “B1 Load” command to load all ISDN-Controllers in- stalled. 8.6 Removing the ISDN-Controller B1 v3.0 To remove the AVM ISDN-Controller B1 v3.0 in Windows 3.x, proceed as follows: Start the installation program from the “AVM ISDN-Con- troller B1 v3.0” driver CD. -
Page 56: Installation In Ms-Dos
Installation in MS-DOS 9 Installation in MS-DOS For the use of the AVM ISDN-Controller B1 v3.0 in MS-DOS, special drivers are included with delivery. Once installed, the driver software makes the programming interface CAPI 2.0 available to the entire system. For more information about CAPI, see the section “The Applications Interface CAPI 2.0”... - Page 57 If the default settings of the ISDN-Controller were used (I/O address 150, interrupt 5), skip the section “Configuring the ISDN-Controller B1 v3.0” on page 58. ISDN-Controller B1 v3.0 – 9 Installation in MS-DOS...
-
Page 58: Configuring The Isdn-Controller B1 V3.0
Press the space bar or the “Tab” key to select another value. The interrupts 10, 11, 12 and 15 can be used only if the ISDN-Controller was inserted in a 16-bit slot. Save your entries by pressing “Ctrl+Home” or “Return”. ISDN-Controller B1 v3.0 – 9 Installation in MS-DOS... -
Page 59: Starting Operation Of The Isdn-Controller B1 V3.0
Add. Service: Telefax G3, Fax Polling, DTMF, V.110, V.120, GSM, CAPI 1.1 Now you may begin working with CAPI applications. The AVM ISDN-Controller B1 v3.0 driver for the support of the D-chan- nel protocols and CAPI occupies about 18 KB in your PC’s memory. -
Page 60: Changing The Settings
Changing the Settings To load the driver for the AVM ISDN-Controller B1 v3.0 auto- matically each time the computer is started, add the call for the IBASE.BAT batch procedure to the AUTOEXEC.BAT file. (Remember to include the path!). 9.4 Changing the Settings... - Page 61 Base Module = b1tr6.t4 :PROTOCOL = \x06 Also note the following: When an AVM ISDN-Controller for a different type of bus is added, the paragraphs of the ISDNLOAD.CFG file list- ed above also must include the line Type=XX to spec- ify the bus type.
-
Page 62: Removing The Isdn-Controller B1 V3.0
Removing the ISDN-Controller B1 v3.0 The ibase command loads all ISDN-Controllers installed. 9.6 Removing the ISDN-Controller B1 v3.0 To remove the AVM ISDN-Controller B1 v3.0 in MS-DOS, pro- ceed as follows: First unload the driver with the command ibase - Then use the relevant DOS commands to delete the di- rectory in which the drive software is located. -
Page 63: Installation In Novell Netware
Installation in Novell NetWare 10 Installation in Novell NetWare The driver software for the AVM ISDN-Controller B1 v3.0 in Novell NetWare can be installed in the Novell NetWare ver- sions 5.x, 4.x and 3.x. Two installation variants are supplied for Novell NetWare 4.x and 5.x: Stand-Alone CAPI and CAPI Manager. - Page 64 Installing the Driver Software Start your computer. Insert the “AVM ISDN-Controller B1 v3.0” CD in your CD drive. Enter the following command: load nwconfig to load the installation menu of the Novell NetWare server. The “Configuration Options” menu of the instal- lation program appears.
-
Page 65: Isdn-Controller B1 V3.0 Configuration With Stand-Alone Capi
To perform the installa- tion with CAPI for the CAPI Manager, proceed as described in the section “ISDN-Controller B1 v3.0 with CAPI for the CAPI Manager” on page 67. 10.2 ISDN-Controller B1 v3.0 Configuration with Stand-Alone CAPI To configure the AVM ISDN-Controller B1 v3.0 with Stand-... -
Page 66: Starting Isdn-Controller B1 V3.0 Operation With Stand-Alone Capi
Starting ISDN-Controller B1 v3.0 Operation with Stand-Alone CAPI Leave the configuration by pressing “Esc”. Select “Yes” to confirm that you want to save the new settings. The ISDN-Controller B1 v3.0 settings can be changed at any time using this method. 10.3 Starting ISDN-Controller B1 v3.0... -
Page 67: Isdn-Controller B1 V3.0 With Capi For The Capi Manager
10.5 ISDN-Controller B1 v3.0 with CAPI for the CAPI Manager Proceed as follows to configure and start operation of the AVM ISDN-Controller B1 v3.0 with CAPI for the CAPI Manager: Enter the following command at the system console: load inetcfg The “Internetworking Configuration”... -
Page 68: Capi Manager
“Yes” to have your settings saved. This concludes the configuration and loading processes for the ISDN-Controller B1 v3.0 with the CAPI Manager. The ISDN-Controller B1 v3.0 settings can be changed at any time using this method. 10.6 Installing Additional ISDN-Controllers... - Page 69 “Return”. A list of the pro- grams already installed is displayed. Move the highlight to the AVM ISDN-Controller B1 v3.0 and press “Del”. Confirm with “Yes”. Press “Esc” as often as necessary to close all sub- menus and return to the “Configuration Options”...
-
Page 70: Installation In
Installation can be aborted at any time by pressing “Ctrl+x”. The next dialog asks whether the AVM ISDN-Controller B1 v3.0 is to be loaded automatically each time OS/2 is started. Activate the desired option and confirm it with “Return”. Controller B1 v3.0 – 11 Installation in OS/2... - Page 71 Confirm by selecting “OK”. Restarting the computer concludes the installation of the driver software for OS/2. A new program group called “AVM” is created in the Program Manager/Start menu. This program group contains the pro- grams “B1 Unload”, “B1 Load” and “B1 Readme”.
-
Page 72: Starting Operation Of The Controller B1 V3.0
AVM ISDN-Controller B1 v3.0 installed”. Loading the ISDN-Controller The ISDN-Controller is installed manually by double-clicking the “B1 Load” icon in the “AVM” folder. An OS/2 window is opened. Once the controller has been loaded successfully, the following message appears on the screen:... -
Page 73: Changing The Settings
Up to four active AVM ISDN-Controllers and ISDN-Controllers for the ISA and PCI bus may be combined in one computer. To install an additional AVM ISDN-Controller B1 v3.0, proceed as follows: Open the ISDNLOAD.CFG file from the directory of the driver software, e.g. - Page 74 ISDN-Controller corresponds to the I/O address entered in the file. Also note the following: When an AVM ISDN-Controller for a different type of bus is added, the paragraphs of the ISDNLOAD.CFG file list- ed above also must include the line Type=XX to spec- ify the bus type.
-
Page 75: Removing The Controller B1 V3.0
Removing the Controller B1 v3.0 11.5 Removing the Controller B1 v3.0 To remove the AVM ISDN-Controller B1 v3.0 from OS/2, pro- ceed as follows: Start the installation program from the CD. The program reports that an installed ISDN-Controller was found. -
Page 76: The Avm Isdn-Controller B1 V3.0 On Point-To-Point Isdn Lines
On this settings page, activate the option “Support for Point-to-Point ISDN lines (with DDI capability)”. Save your entries with “OK”. The computer must be restarted for this setting to take effect. Controller B1 v3.0 – 12 The AVM ISDN-Controller B1 v3.0 on Point-to-Point ISDN Lines... - Page 77 Novell NetWare 3.x, 4.x and 5.x Activate the “P2P” option in the menu for setting the D-chan- nel protocol and restart NetWare. Controller B1 v3.0 – 12 The AVM ISDN-Controller B1 v3.0 on Point-to-Point ISDN Lines...
-
Page 78: Avm System Architecture
AVM ISDN-Controller B1 v3.0. 13.1 The Applications Interface CAPI 2.0 After the ISDN-Controller B1 v3.0 has been installed, the IS- DN interface CAPI 2.0 is available in the computer. This inter- face allows you to use all features of ISDN. - Page 79 Support for multiple logical data connections within a single physical channel Selection of specific services and protocols on dialing and in answering incoming calls Transparent interface for protocols above OSI Layer 3 ISDN-Controller B1 v3.0 – 13 AVM System Architecture...
-
Page 80: Idm Architecture
An asynchronous, event-driven mechanism for high throughput 13.2 IDM Architecture The ISDN Driver Model (IDM) illustrated below shows how ISDN is integrated in Microsoft operating systems. IDM Architecture ISDN-Controller B1 v3.0 – 13 AVM System Architecture... -
Page 81: The Avm System Drivers
(such as RAS) with CAPI-based hardware. This connection is real- ized by the AVM system drivers such as the AVM CAPI Port Driver or the NDIS WAN CAPI Driver. This architecture permits the simultaneous use of CAPI, mo- dem and networking applications over ISDN. - Page 82 AVM ISDN CAPI Port Driver The AVM ISDN CAPI Port Driver allows your application to use an ISDN-Controller as if it were an analog modem. The AVM ISDN CAPI Port Driver makes it possible for even programs designed for analog modems to communicate over the ISDN interface.
-
Page 83: Capi Softcompression X75/V42Bis
AVM ISDN TAPI Services for CAPI Unlike the AVM ISDN CAPI Port Driver, the AVM NDIS WAN CAPI driver cannot be controlled by AT commands. It uses the standard protocols for network connections over ISDN (“HDLC” and “PPP over ISDN”). -
Page 84: Capi Softfax
B channels simultaneously at up to 14.4 Kbit/s, or to receive a fax one one channel at up to 9.6 Kbit/s. The ISDN- Controller B1 v3.0 acts as a standard Group 3 fax device. The following fax protocols are supported: V.17 (14.4 Kbit/s) -
Page 85: Technical Summary
RJ 45 TAE plug Function - 5 (b1) - 4 (b1) transmit - 4 (a1) - 3 (a1) transmit - 3 (a2) - 6 (a2) receive - 6 (b2) - 5 (b2) receive Controller B1 v3.0 – 14 Technical Summary... -
Page 86: Features At A Glance
AVM ISDN Tools included with delivery: Connect2 (MS- DOS) and Connect32 (Windows 2000/NT/Me/98/95) compatible with FRITZ!data and IDtrans, AVM NDIS WAN CAPI Driver and AVM ISDN CAPI Port Driver for Windows 2000/NT/98/95 and AVM TAPI Services for CAPI (Win- dows 2000/NT/Me/98) Extensive CAPI 2.0 applications available... -
Page 87: Technical Specifications At A Glance
95, Windows 3.x, MS-DOS and OS/2) Power consumption approx. 1 Watt. EMV tested in accordance with EN41003, VDE 0878 Security tested in accordance with IEC 950, EN 41003, EN 60950, VDE 0804, VDE 0805 CE certification 0170 X Controller B1 v3.0 – 14 Technical Summary... -
Page 88: Technical Assistance From Avm Support
AVM provides numerous sources of information to assist you in your day-to-day work with the AVM ISDN-Controller B1 v3.0. New drivers and software updates for your ISDN- Controller B1 v3.0 are available for downloading free of charge from AVM’s Internet site or the AVM Data Call Center (ADC). -
Page 89: Avm Support
You may send support requests to AVM by e-mail. Please do so using our e-mail request form, which you can find at http://www.avm.de/support/english Fill out the form and click “Send” to send it to AVM Support. ISDN-Controller B1 v3.0 – 15 Technical Assistance from AVM Support... - Page 90 Is the error reproducible? Does the “B1 Test” program in the “AVM” group detect problems with your ISDN-Controller? Are you able to dial up a data connection to the AVM Data Call Center (ADC) with your AVM ISDN-Controller B1 v3.0?
- Page 91 Describe your PC configuration in as much detail as possible, including the system type, sound card type, any other components installed, and the allocated re- sources (interrupts and I/O addresses). ISDN-Controller B1 v3.0 – 15 Technical Assistance from AVM Support...
-
Page 92: Troubleshooting
Is the ISDN-Controller firmly inserted in the computer slot? Is its slot plate screwed down? Is the ISDN cable firmly inserted in the AVM ISDN-Con- troller and connected to your ISDN socket? Controller B1 v3.0 – 16 Troubleshooting... - Page 93 Problems arise during ISDN-Controller operation: If problems occur regularly during operation, run the pro- gram “B1 Test”, located in the “AVM” program group or in the installation folder of the driver software. This program per- forms functional tests of the ISDN-Controller’s components and displays the results.
- Page 94 CAPI-based DOS applications in DOS win- dows. No connection charge information is displayed. The drivers for the AVM ISDN-Controller B1 v3.0 allow CAPI- based applications to display charge information. This infor- mation is only available if the corresponding ISDN service has been enabled by your ISDN service provider.
-
Page 95: Error Messages
(see the section “Setting the I/O Address” on page 14). Then enter the new I/O address in the driver software by starting the “B1 Setup” program from the “AVM” program group. Win- dows NT must be restarted for this setting to take effect. - Page 96 Remedy: Open the Device Manager by clicking through “Set- tings / Control Panel / System” and select the AVM ISDN- Controller B1 v3.0. Click “Properties” there and then the “Re- sources” settings page. Select the resource type “Interrupt”.
- Page 97 Possible cause: You tried to use another manufacturer’s CAPI with the AVM ISDN-Controller B1 v3.0. Remedy: Repeat the complete installation of the driver soft- ware and use the CAPI driver supplied by AVM to operate the ISDN-Controller. Controller B1 v3.0 – 16 Troubleshooting...
- Page 98 Error message: “Passive and active controllers cannot be installed simultaneously.” Possible cause: You tried to install a passive ISDN-Controller (such as the A1) in a system which already has an active AVM ISDN-Controller B1 v3.0 installed. Remedy: You may install up to four active AVM-ISDN Control- lers in one PC.
- Page 99 Remedy: Check which interrupts (IRQs) are available in your system by using the MSD.EXE program in the Windows direc- tory. Then start the “B1 Setup” program from the “AVM” pro- gram group and define another interrupt for the ISDN-Con- troller. Windows must be restarted for these settings to take effect.
- Page 100 Remedy: Check which interrupts (IRQs) are available in your system by using the MSD.EXE program in the Windows direc- tory. Then start the “B1 Setup” program from the “AVM” pro- gram group and define another interrupt for the ISDN-Con- troller. Then reload the ISDN-Controller with “ibase.bat”.
- Page 101 Remedy: Note the instructions for installing additional con- trollers in the section “Installing Additional Controllers” on page 60. When adding an AVM ISDN-Controller for a different bus type, the line Type=XX must be added in the ISDN- LOAD.CFG file (“B1at” for ISA controller, “B1pci” for PCI con- troller).
- Page 102 Error message: “CAPI not loaded.” Possible cause: You tried to start an ISDN application with- out loading the AVM ISDN-Controller B1 v3.0 first. Remedy: Load the Controller B1 v3.0 by entering load capi20 at the system console and then start your ISDN ap- plication.
- Page 103 Error message: “... at least one application is registered.” Possible cause: You attempted to unload or uninstall the AVM ISDN-Controller B1 v3.0 while an application (such as a file transfer or fax program) was still using it. Controller B1 v3.0 – 16 Troubleshooting 103...
- Page 104 Error message: “Installation error, Interrupt <xx> not available.”) Possible cause: The interrupt set for the AVM ISDN-Controller B1 v3.0 during installation is not available. Remedy: Check which interrupts (IRQs) are available in your system.
-
Page 105: Support For Multiple Subscriber Numbers
Support for Multiple Subscriber Numbers (MSNs) 17 Support for Multiple Subscriber Numbers (MSNs) 17.1 Introduction What are MSNs? Deutsche Telekom provides new ISDN subscribers with Euro- ISDN lines. Several terminal devices may be operated at a single ISDN access. A given terminal device on the Euro-ISDN connection is selected by dialing the MSN (Multiple Subscriber Number) assigned to it. - Page 106 Mapping an MSN to an EAZ Mapping an MSN to an EAZ To map an MSN to an EAZ, proceed as follows: Configure your application for a certain EAZ (from 1 to 9). Refer to the application’s manual for instructions. If the application is configured for the EAZ 0 (zero), it will respond to all MSNs configured in the system by MSN.EXE.
- Page 107 Canceling/Resetting MSN–EAZ Mapping Canceling/Resetting MSN–EAZ Mapping The following commands can be used to cancel an MSN as- signment or to reset the MSN mapping: Cancels the MSN assignment to the given EAZ so that a new MSN may be mapped to it. msn -f<EAZ>...
- Page 108 Windows 95 Windows 98 Windows 98 Windows Me Windows Me Windows NT Windows NT combining controllers connecting cable controller configuration error messages MS-DOS MS-DOS Novell NetWare with CAPI for the CAPI Novell NetWare Manager OS/2 108 Controller B1 v3.0 – Index...
- Page 109 Novell NetWare MS-DOS configuring the controller with Stand- OS/2 Alone CAPI Windows 2000 controller with CAPI for the CAPI Windows 3.x Manager Windows 95 error messages Windows 98 installing additional controllers with Windows Me Stand-Alone CAPI Controller B1 v3.0 – Index...
- Page 110 Windows NT controller configuration driver software installation error messages installing additional controllers S0 interface physically installing the starting operation controller MS-DOS removing the controller Novell NetWare with Stand-Alone starting operation CAPI 110 Controller B1 v3.0 – Index...
- Page 111 Windows NT changing the settings configuring the controller error messages installing additional controllers installing the driver software physically installing the controller removing the controller Controller B1 v3.0 – Index...
Need help?
Do you have a question about the B1 v3.0 and is the answer not in the manual?
Questions and answers