Table of Contents
Advertisement
WARRANTY
NESLAB Instruments, Inc. warrants for 12 months from date of shipment any NESLAB unit according to the
following terms.
Any part of the unit manufactured or supplied by NESLAB and found in the reasonable judgment of NESLAB
to be defective in material or workmanship will be repaired at an authorized NESLAB Repair Depot without
charge for parts or labor. The unit, including any defective part must be returned to an authorized NESLAB
Repair Depot within the warranty period. The expense of returning the unit to the authorized NESLAB Repair
Depot for warranty service will be paid for by the buyer. NESLAB's responsibility in respect to warranty claims
is limited to performing the required repairs or replacements, and no claim of breach of warranty shall be
cause for cancellation or recision of the contract of sales of any unit.With respect to units that qualify for field
service repairs, NESLAB's responsibility is limited to the component parts necessary for the repair and the
labor that is required on site to perform the repair. Any travel labor or mileage charges are the financial respon-
sibility of the buyer.
The buyer shall be responsible for any evaluation or warranty service call (including labor charges) if no
defects are found with the NESLAB product.
This warranty does not cover any unit that has been subject to misuse, neglect, or accident. This warranty
does not apply to any damage to the unit that is the result of improper installation or maintenance, or to any
unit that has been operated or maintained in any way contrary to the operating or maintenance instructions
specified in NESLAB's Instruction and Operation Manual. This warranty does not cover any unit that has been
altered or modified so as to change its intended use.
In addition, this warranty does not extend to repairs made by the use of parts, accessories, or fluids which are
either incompatible with the unit or adversely affect its operation, performance, or durability.
NESLAB reserves the right to change or improve the design of any unit without assuming any obligation to
modify any unit previously manufactured.
THE FOREGOING EXPRESS WARRANTY IS IN LIEU OF ALL OTHER WARRANTIES, EXPRESSED OR
IMPLIED, INCLUDING BUT NOT LIMITED TO WARRANTIES OR MERCHANTABILITY AND FITNESS FOR
A PARTICULAR PURPOSE.
NESLAB'S OBLIGATION UNDER THIS WARRANTY IS STRICTLY AND EXCLUSIVELY LIMITED TO THE
REPAIR OR REPLACEMENT OF DEFECTIVE COMPONENT PARTS AND NESLAB DOES NOT ASSUME
OR AUTHORIZE ANYONE TO ASSUME FOR IT ANY OTHER OBLIGATION.
NESLAB ASSUMES NO RESPONSIBILITY FOR INCIDENTAL, CONSEQUENTIAL, OR OTHER DAMAGES
INCLUDING, BUT NOT LIMITED TO LOSS OR DAMAGE TO PROPERTY, LOSS OF PROFITS OR REV-
ENUE, LOSS OF THE UNIT, LOSS OF TIME, OR INCONVENIENCE.
This warranty applies to units sold in the United States. Any units sold elsewhere are warranted by the affiliated
marketing company of NESLAB Instruments, Inc. This warranty and all matters arising pursuant to it shall be
governed by the law of the State of New Hampshire, United States. All legal actions brought in relation hereto
shall be filed in the appropriate state or federal courts in New Hampshire, unless waived by NESLAB.
Advertisement
Table of Contents

Summary of Contents for Neslab RTE-Series
- Page 1 NESLAB Instruments, Inc. warrants for 12 months from date of shipment any NESLAB unit according to the following terms. Any part of the unit manufactured or supplied by NESLAB and found in the reasonable judgment of NESLAB to be defective in material or workmanship will be repaired at an authorized NESLAB Repair Depot without charge for parts or labor.
-
Page 2: Table Of Contents
RTE-Series Refrigerated Bath/Circulator Table of Contents PREFACE Compliance ..................... 2 Unpacking ....................2 Warranty ....................2 After-sale Support ................... 2 SECTION I Safety Warnings ....................3 SECTION II General Information Description ....................4 Specifications ..................4 SECTION III Installation Site ......................5 Electrical Requirements ................ -
Page 3: Preface
See back page for more details. After-sale Support NESLAB is committed to customer service both during and after the sale. If you have questions concerning the operation of your unit, contact our Sales Department. If your unit fails to operate properly, or if you have questions concerning spare parts or Service Contracts, contact our Customer Service Department. -
Page 4: Warnings
Section I Safety Warnings Make sure you read and understand all instructions and safety precautions listed in this manual before installing or operating your unit. If you have any questions concerning the operation of your unit or the information in this manual, contact our Sales Department. -
Page 5: General Information
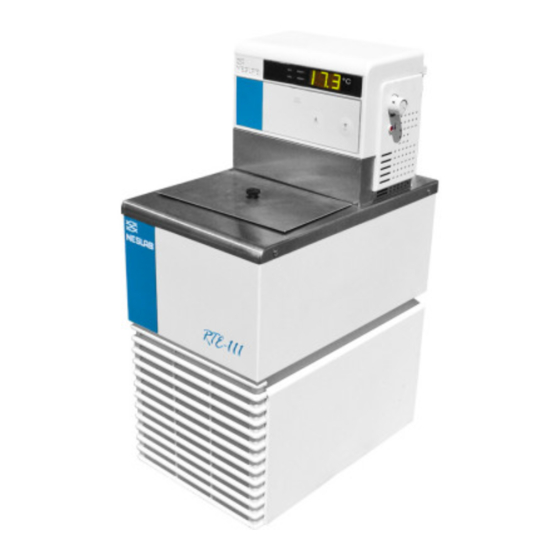
Section II General Information Description The RTE-Series Refrigerated Bath/Circulators are designed to provide temperature control for applications requiring a fluid work area or pumping to an external system. Units consists of a non-CFC air-cooled refrigeration system, circulation pump, seamless stainless steel bath, work area cover, and a temperature controller. -
Page 6: Site
Section III Installation Site The indentations on the unit's sides are designed to function as handles. Lift the unit by the handles and locate it on a sturdy work area. Ambient tempera- tures should be inside the range of +50°F to +80°F (+10°C to +27°C). Never place the unit in a location where excessive heat, moisture, or corrosive materials are present. -
Page 7: Plumbing Requirements
If substantial lengths of tubing are necessary, insulation may be required to prevent loss of cooling capacity. Tubing and insulation are available from NESLAB. Contact our Sales Department for more information (see Preface, After-sale Support). - Page 8 Circulating to an open container Levelling Device Outlet Inlet Bath (Rear View) Open Container A stainless steel leveling device is available to aid circulation to an open vessel. Contact our Sales Department for more information (see Preface). Support the leveling device over the open container with a ringstand. Stagger the tubes in the leveling device so one tube is submerged in the vessel fluid, and the other tube is level with the fluid surface.
-
Page 9: Fluids
Drain Ensure the temperature of the bath fluid is safe before draining the unit. The unit is equipped with a drain located at the back of the unit at the base of the bath. The drain has ¼" MPT and is capped with a stainless steel plug. To drain the reservoir simply remove the cap. -
Page 10: Water Quality Standards And Recommendations
Water Quality Standards and Recommendations Permissible (PPM) Desirable (PPM) Microbiologicals (algae, bacteria, fungi) Inorganic Chemicals Calcium <40 Chloride <25 Copper Iron <0.1 Lead 0.015 Magnesium <12 Manganese 0.05 <0.03 Nitrates\Nitrites 10 as N Potassium <20 Silicate <1.0 Sodium <20 Sulfate <50 Hardness <0.05... -
Page 11: Temperature Controller
Section IV Temperature Controller Start Up Before starting the unit, check all electrical and plumbing connections and make sure the work area has been properly filled with bath fluid. To start the bath press the I/O circuit breaker on the side of the control box to the I (power on) position. -
Page 12: Changing A Value
This dual purpose key is used to answer No to Y/N questions or to decrement numerical values downward for setting numeric values. Changing a Value The YES key increments the value. The NO key decrements the value. The display will flash as soon as either key is depressed, and will continue to flash until the NEXT ENTER key is pressed twice to accept the new value. -
Page 13: Operator's Loop
Operator's Loop When the controller is first powered up it enters the Operator's Loop, displaying reservoir fluid temperature. Press the NEXT ENTER key to view the setpoint. SP displays the controller setpoint. The display will flash between SP and the actual setpoint number. -
Page 14: Setup Loop
Setup Loop The Setup Loop is used to adjust the controller's PID parameters, select the internal (1) or remote (2) sensor, and set the high/low temperature limits, and to select RS232 operation. Enter the Setup Loop from the Operator's Loop by pressing and holding the NO key, then press the NEXT ENTER key. - Page 15 Hit = High Temperature Limit Lot = Low Temperature Limit r232 = RS232 Protocol bAUd = BAUD rate (factory value 9600) dAtA = Data Bits (factory value 8) StoP = Stop Bit (factory value 1) PAr = Parity (factory value NONE) Stor = Store Figure 2 Setup Loop (2 of 2) - 14 -...
-
Page 16: Error Messages
Error Messages Error Action Er00: ROM Checksum Er01: RAM Test Failed Er03 Keypad Test Failed Er04-13: Interrupt Error Er14: Synchronous Error Er15: Asychronous Error Er16: Bad Calibration Er19: Low Temp Limit Er21: High Temp Limit Er23: RTD2 Shorted Er24: RTD2 Open/Not Installed Er25: RTD1 Shorted Er26:... -
Page 17: Autorefill (Optional)
Remove the nut and install the tubing from your make-up fluid source. Reinstall the nut and tubing on to the connection. Tubing is available from NESLAB. Contact our Sales Department for more information (see Preface, After-sale Support). The autorefill device requires its own source of electrical power. The connec- tor for the line cord (provided with the assembly) is also located on the rear of the autorefill device. -
Page 18: High Temperature/Low Liquid Level Safety
High Temperature/ Low Liquid Level Safety To protect your application, the adjustable High Temperature/Low Liquid Level Safety (HIGH TEMP/LOW LEVEL) ensures the heater will not exceed temperatures which can cause serious damage to your unit. A single tem- perature sensor, located on the heater coils in the bath, monitors both condi- tions. -
Page 19: 9-Pin Accessory Connectors
9-Pin Accessory Connector The unit is equipped with two female 9-pin D-connectors located on the rear of the control box. One is used for RS232 communication, the other is used with an optional remote sensor. REMOTE RS-232 SENSOR RS232 Pin Connections Pin # Function No connection. -
Page 20: Service Contracts
To avoid electrical shock, disconnect the mains cord prior to removing any access panels or covers. Service Contracts NESLAB offers on-site Service Contracts that are designed to provide extended life and minimal down-time for your unit. For more information, contact our Service Department (see Preface, After-sale Support). -
Page 21: Reservoir Cleaning
To restrict the growth of algae in the bath, we recommend the bath cover be kept in place and that all circulation lines be opaque. This will eliminate the entrance of light required for the growth of most common algae. NESLAB recommends the use of Chloramine-T, 1 gram per 3½ liters. - 20 -... -
Page 22: Additional Loops
Additional Loops N E X T E N T E R Y E S Y E S Y E S N E X T E N T E R N E X T E N T E R N E X T E N T E R N E X T E N T E R... -
Page 23: Calibration Loop
Calibration Loop The Calibration Loop is used to calibrate the RTD high and low temperature. The controller's internal temperature sensor is factory calibrated. We recom- mend calibrating any remote sensor. Enter the Calibration Loop from the Operator's Loop by pressing and holding the NO key while pressing the YES key three times. - Page 24 rtd1 = Internal sensor rtd2 = remote sensor r1H = High temperature r1L = Low temperature Ain = NA for this unit Aout = NA for this unit Stor = Store Figure 4 Calibration Loop - 23 -...
-
Page 25: Troubleshooting
Section VI Troubleshooting Checklist Unit will not start Make sure the voltage of the power source meets the specified voltage, ±10%. Refer to the serial number label on the rear of the unit to identify the specific electrical requirements of your unit. Check the High Temperature/Low Liquid Level Safety. -
Page 26: Software/Rs232 Communication
Section VII Programming Software NEScom Software/ RS232 Communication The NESLAB Communications Software is a user friendly software that allows you to automate your temperature control process. The software includes a 3½" disk, Comprehensive Operator’s Manual and a toll-free number to a trained technical staff. - Page 27 MANTENIMIENTO PERIODICO Inspeccione periódicamente el fluido del reservorio. Si es necesaria una limpieza, rocíe el reservorio con un fluido de limpieza compatible con el sistema de circulación y el fluido refrigerante. Antes de cambiar el fluido refrigerante, suba la temperatura de operación de la unidad para descongelar los serpentines de refrigeración.
Need help?
Do you have a question about the RTE-Series and is the answer not in the manual?
Questions and answers