
Related Manuals for Spowdi Mobile Pro MKII


Summary of Contents for Spowdi Mobile Pro MKII
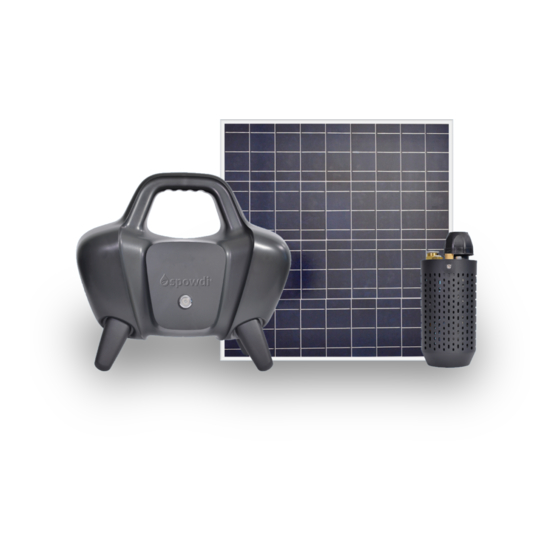
- Page 1 Solar-powered water pump Mobile Pro MKII Installation manual Doc number: 001 English language (original) Revision: PA18...
-
Page 2: Table Of Contents
Table of Content How to read this manual ................4 Safety ......................5 2.1 Safety information ..................5 2.2 Markings ......................5 Packaging ..................... 5 System overview..................6 4.1 System components ..................6 4.2 Extension components ...................6 4.3 Maintenance parts ..................6 4.4 PMB Overview ....................7 4.5 Pump unit Overview ..................7 Unpack items .................... - Page 3 11 Product features ..................18 12 Technical specifications (Free flow) ............19 13 Storage ......................19 14 Transport ....................19 Doc number: 001 Revision: PA18...
-
Page 4: How To Read This Manual
The manual describes a general installation. For the system to work properly it needs to fullfil different requirements. In order to better understand the requirements the Spowdi figure helps the reader: Spowdi figure is happy when it is correct. Spowdi figure is sad when something is NOT correct. -
Page 5: Safety
2 Safety 2.1 Safety information Weight The table below present weight of the three different delivered boxes. MOBILE PRO MK II SOLAR PANEL DRIP KIT 7.0 kg 12.2 kg 45.0 kg Electrical hazard Electrical hazard. Solar cell system contains live parts. Do not short circuit solar panel contacts. -
Page 6: System Overview
F - Water extraction tube G - Air tube Ø25mm, 1 meter Ø25mm, 30cm Ø16mm, 0.8 meter H - Straight connector I - Quick connector J - Quick connector Ø25mm Ø16mm Ø8mm 4.3 Maintenance parts Membrane Spowdi tool Doc number: 001 Revision: PA18... -
Page 7: Pmb Overview
4.4 PMB overview Front side Back side K - Power button L - Air out N - Main switch M - 12V Solar cable input 4.5 Pump unit overview Top view O - Straight connector Ø25mm P - Quick connector Q - Ø8mm Air hose hole Ø16mm 5 Unpack items... -
Page 8: How It Should Look After Setting Up
6 How it should look after setting up Solar panel must Solar panel facing sun PMB behind Solar panel not be shadowed Max 5 m Pressure vessel max 5m 30cm 16mm air hose above Pump unit 30cm below Straight and tied up at water surface water surface three points... -
Page 9: How To Install
7 How to install 7.1 Solar panel and PMB Connection of solar panel and PMB 1 Connect positive and negative wires of solar panel to back of PMB (M). 2 Switch on main switch (N) on back of PMB. Doc number: 001 Revision: PA18... - Page 10 3 If connection is right and there is power from solar panel or battery inside PMB, power button (K) will light up blue. If power button does not light up, see Service Manual Troubleshooting, chapter 3.1 in the service manual. 4 Test PMB boot up by pressing down power button and feel air pressure at air outlet (L) on back of PMB.
-
Page 11: Pmb And Pump Unit
7.2 PMB and pump unit Connection of Ø8mm air hose from pump unit to PMB 1 Connect Ø8mm air hose (Orange colour) from pump unit to air outlet (L) at back of the PMB. 15 cm 2 Cut a 15cm section of Ø8mm air hose from air outlet connection point at back of PMB. -
Page 12: Piping
Note! 1. When you want to disconnect PMB from Pump unit, disconnect Ø8mm air hose that belongs to pump unit from quick connector. Bring back home PMB with fixed 15cm section and quick connector attached. 2. To disconnect the Ø8mm quick connector press down ring on the connector (J) and press in tube to release tube as there will be some... - Page 13 2 Install Ø25mm water tube (E) into Ø25mm straight connector (O) on pump unit according to picture below. Push down and tighten Remove top cap Put all four parts Make sure there are four top cap with pump unit onto water tube parts in the top cap Note! Take note of the arrangements of the four parts.
-
Page 14: How To Test System
8 How to test system 8.1 Test procedure 1 Put pump unit into the water. Pump unit must be completely submerged in water and 30cm below water surface. 2 Make sure Ø16mm air tube is above the water surface. 3 Turn on the main switch then press power button (K) on the front of the PMB and observe the free flowing water from water extraction tube (F). -
Page 15: If Water Does Not Flow
8.2 If water does not flow 1 Grip Ø25mm water tube and shake pump unit up and down a few times. Only do following steps if still no water is flowing out. 2 Block Ø16mm air tube outlet with your thumb for 2 seconds and repeat a few time until you see it pumping. -
Page 16: How To Complete Installation
9 How to complete installation 1 Fix Ø16mm air tube to Ø25mm water tube by attaching a cable ties or tape. Attach it 30cm above top of pump unit. 2 Submerge pump unit in water until cable tie/tape is at water level surface. 30 cm 3 Fix pressure vessel to a tree or a pole fixed into ground. -
Page 17: Final Check
10 Final check Solar panel must PMB behind Solar panel not be shadowed Solar panel facing sun Max 5 m Pressure vessel max 5m 30cm 16mm air hose above Pump unit 30cm below Straight and tied up at water surface water surface three points Doc number: 001... - Page 18 Pump head over 15 m? Not recommended. Connect to grid? Yes, by using the Spowdi adapter. Connect to an external battery? Yes, any 10 – 20 V external source can be used with the Spowdi adapter. Compatible with drip irrigation? Yes, drip irrigation is recommended.
- Page 19 35 (2) 21 000 (3) (1) Head more then 5m not recommended when used for drip irrigation. (2) Solar panel, tubes, hoses, fittings and instructions recommended by Spowdi. (3) Sun radiation is more than 750 Watt per square meter. 13 Storage Fullfill this requirements for safe storage: •...
- Page 20 Spowdi AB Registration number: 559098-2954 Augustendalsvägen 7 (11 fl), 131 52 Nacka Strand, Sweden www.spowdi.com | info@spowdi.com...
Need help?
Do you have a question about the Mobile Pro MKII and is the answer not in the manual?
Questions and answers