Table of Contents
Advertisement
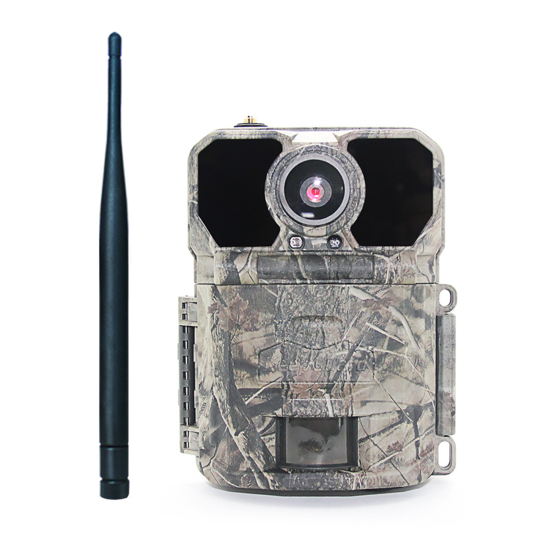
Highly Recommended by Outdoor Explorers - KeepGuard 4G Wildlife Scouting Cam
This KeepGuard cam is the best-selling scouting camera which is designed for activity and is resistant against water and snow. It
is equipped with built-in infrared sensor, so that it can be triggered accurately by heat sources, then take high quality pictures or
videos. Please refer to the notes below to ensure that you are completely satisfied with this product.
Contents
KEEPTIME
Instruction Book
2
3
4
5
6
7
7
8
9-16
17-23
24
25
26
1
Advertisement
Table of Contents

Subscribe to Our Youtube Channel
Related Manuals for KeepGuard KG895


Summary of Contents for KeepGuard KG895
-
Page 1: Table Of Contents
Instruction Book This KeepGuard cam is the best-selling scouting camera which is designed for activity and is resistant against water and snow. It is equipped with built-in infrared sensor, so that it can be triggered accurately by heat sources, then take high quality pictures or videos. -
Page 2: Prepar Before Start Wireless Setting/Quick Start
Quick Start Prepar Before Start Wireless Setting 1.Pen and paper: record relevant information ※ Move the latch and open the camera case such as APN and ICCID. ※ Load 12 lithium AA(non-rechargeable) or alkaline AA batteries 2.Mobile phone: the operator's APN ※... -
Page 3: Notes Before Use
Notes Before Use 1. When setting camera parameters, please put camera in Setup mode. 2. Do not set the camera directly from ON to Setup. 3. To replace the battery, SD card, and SIM card, firstly turn camera to OFF mode. 4. -
Page 4: View Drawings
View Drawings KEEPTIME... -
Page 5: Camera Overview
Camera Overview KEEPTIME... -
Page 6: Standard Accessories
Standard Accessories 1×Belt 1×USB 1×Case 1×Manual Other Accessories (not included) 1× Security Case 1×External battery 1×Micro-Lens 1×5M Antenna 1×Cradle Head 1×solar panel 1×Wide-angel Lens connection wire KEEPTIME... -
Page 7: Power Supply
Power Supply After opening the latch on the right side of the camera, you will see that it has 12 battery slots. For maximum battery life, we recommend using 12 lithium AA or alkaline AA batteries. Please be sure to insert each battery with correct polarity (negative or“flat”end against the long spring of each battery slot). -
Page 8: Operational Modes
Operational Modes The cam has three basic operational modes: 「OFF」, 「ON」 and 「SETUP」 「OFF 」Mode ● When cam in OFF mode, you can do the following: • replacing the SD card or batteries • connecting cam with other device via USB port ●... -
Page 9: Settings
Settings Set Clock Press OK and use UP/DOWN keys ( to change the setting ) and LEFT/RIGHT keys ( to move to the next field ) to set the Set Clock hour ( 24-hr format only, “00”=midnight,“12”=noon) and minute, and then (on the lower row ),the year,month and date. - Page 10 Settings Capture Number Selects how many photos are taken in sequence per trigger in Camera mode.This setting affects photos taken in Field Capture Number Scan mode as well. Exit MENU Video Size 640*360 Selects video resolution (in pixels per frame). Higher resolution produces better quality videos, but creates larger Video Size 1280*720...
- Page 11 Settings Camera Name Allows the user to set a custom name for the camera. Useful for ID purposes when multiple cameras are setup, since each Camera Name Input camera will imprint its name on all photos (but not videos) it captures.
- Page 12 Settings Press OK and use UP/DOWN keys ( to change the setting ) and Work Period Set LEFT/RIGHT keys ( to move to the next field ) to set time. Once all settings are made, press OK to save. Only during the set work Work Period Set period camera will be triggered to take images/videos.
- Page 13 Settings Password Select”ON”If you want to protect your camera with a password. Once password is set, whenever you turn on the Password camera, you will need to enter a four-digit password. Select “OFF” for no protect with a password.(Please remember your password.) Once all settings are made, press OK to save.
- Page 14 Settings Video Sound Select “On” to record audio along with the video when the camera is set to video mode (saved file sizes will be slightly Video Sound larger). Press OK to save. MENU Exit Wireless This choice is about wireless function ON/OFF. If you want to send photo to you mobile phone's APP or email, please Wireless turn it on.
- Page 15 Settings Language Selects user's preferred language from all ten languages. English Language English,French,German,Italian,Russian,Finnish,Spanish,Slo vak,simplified Chinese,Chinese Traditional. Exit MENU Format Deletes (erases) all files stored on a card to prepare it for reuse. Always format a card that has been previously used in other devices.
- Page 16 Settings FirmwareVersion This Page shows Modem, Sim card , and camera ICCID: firmware information. 123456789123456789 Firmware IMEI:123456789123456 Version Version:KG895XXXX Exit MENU KEEPTIME...
-
Page 17: Software In App
Settings in APP 1)SETUP APP 2)Account registration Search GUARDPOINT in APP store, or scan below the code,then ADD A CAMERA install the APP ISO APP Android APP KEEPTIME... - Page 18 Settings in APP 3)ADD A CAMERA FirmwareVersion Serial Number: IMEI:123456789123456 Find it on the camera Version:KG895XXXX ICCID: Exit MENU Find it in camera's MENU IMEI: Find it on the camera Firmware Version: Find it in camera's MENU KEEPTIME...
- Page 19 Settings in APP 4)Camera Settings Please remember to SAVE the Settings after each modification. KEEPTIME...
- Page 20 Settings in APP Camera Settings\ Please select the time zone of your country. Please remember to SAVE the Settings after each modification. KEEPTIME...
- Page 21 Settings in APP 5)Main Page More Cameras ON is not valid ON is valid KEEPTIME...
- Page 22 Settings in APP When you change 6)My Camera List your phone or account, be sure to remove the unwanted camera here. Before removing the camera, please don’t forget to download the required pictures. Otherwise, you will lose those pictures forever. KEEPTIME...
- Page 23 Settings in APP 7)Camera APN Settings If you need to add more cameras, you can quickly make a NETWORK file here, the file will be sent to your registration email, you download the file and put it on the SD card, put the SD card in the camera, you can complete the...
-
Page 24: Mounting And Positioning
MOUNTING and POSITIONING Mounting Optimum height:5-6.5 inch(1.5-2 m) Optimum distance:60inch(9m)- 10inch(3m) There are two ways to mount cam: using the provided adjustable web belt, or the tripod socket. Using the adjustable web belt: Push one end of the belt through the two brackets on the back of cam. Thread the end of the strap through the •... -
Page 25: Specification
Specification Model KG895 Lens f=7.36mm F/NO:2.8 FOV=55°; Auto IR-Cut-Remove (at night);Support micro lens: 450mm Trigger Time <0.25s Mode Camera; Video; Dual Image Size 5MP;16MP;30MP Capture Number Video Size 640*360; 1280*720;1920*1080 Video Length 5s-60s Camera Name Input Interval 1s-60m Coordinate Input... -
Page 26: Warranty Card
Warranty Card Warranty Warranty State Model During warranty, hardware failure occurring, which Serial No. caused by product itself, we will provide free maintenance service for the customer. Free warranty Date of Purchase is for the first year. If there is a need for repair, you Your Name should offer this warranty card, please take care of this card.
Need help?
Do you have a question about the KG895 and is the answer not in the manual?
Questions and answers