Sonos Beam Manual
- Quick start manual (52 pages) ,
- Product manual (23 pages) ,
- User manual (14 pages)
Advertisement
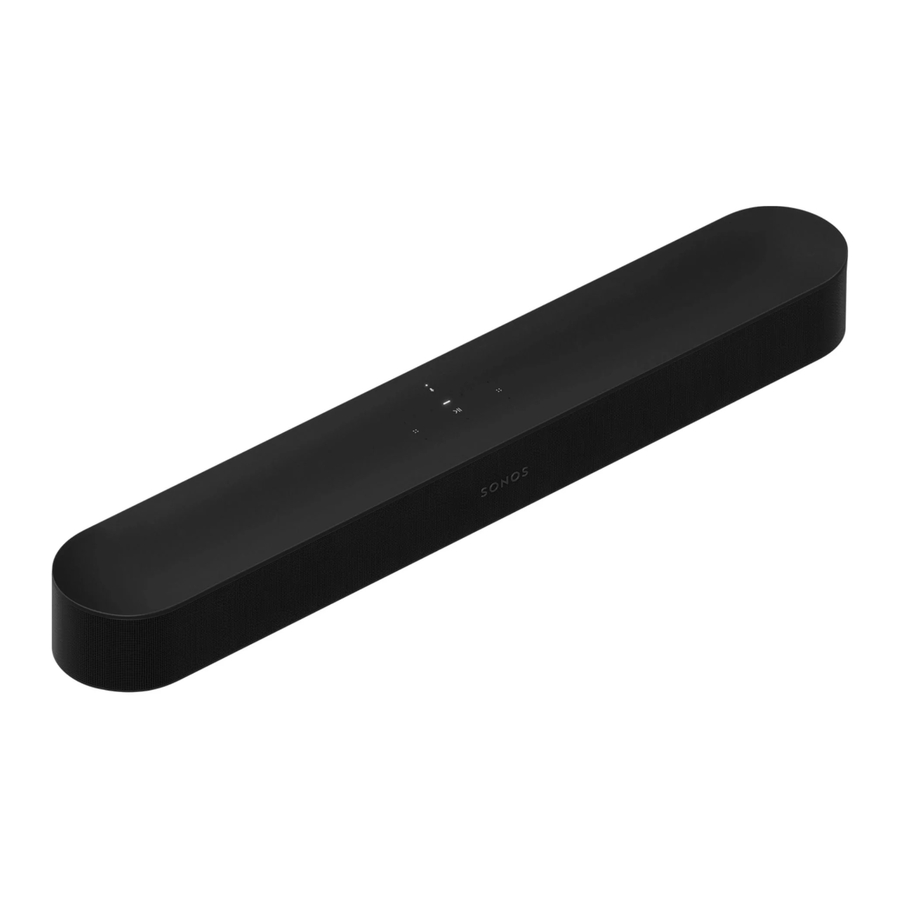
Beam
The smart, compact soundbar for your TV—
- Play anything—music, TV, movies, podcasts, radio, audiobooks, and video games.
- Perfect size to wall-mount above or below your TV, or place on a credenza.
- Great for small to medium-sized rooms.
- Microphone on/off so you can use it hands-free.
- Quick and easy setup, with only one cable to connect to your TV.
- Expandable. Add a Sub and two Sonos speakers, like Play: 1s, for 5.1 surround sound. For more information, see Sonos home theater.
- Works with either Sonos S2
![]() or Sonos S1
or Sonos S1 ![]() (for Android and iOS).
(for Android and iOS). - See Getting started when you're ready to add a Beam to your Sonos system.
 or Sonos S1
  (for Android and iOS).
Controls and lights
Swipe, touch, tap, or ask—with Beam you've got choices on how to control sound.
- Use the touch controls—touch or swipe across the controls.
- Voice control—set it up and use your voice to turn the TV on or off, adjust the volume, or play music.
- Use the app.
- Use your TV remote control.

 | Volume control | Touch for small adjustments or touch and hold to quickly change the volume:
|
 | Play/Pause | Touch to play or pause sound. |
 | Next/Previous (Music only) |
|
 | Microphone indicator |
|
| Status light | Indicates the status. Learn more If the light is distracting, you can turn it off in your room's settings. |
Note: If you don't want anyone (like a child) to control playback or change the volume using the speaker touch controls, you can disable them in the room's settings.
Connector panel

| AC power (mains) input | Use only the supplied power cord (using a third-party power cord will void your warranty). Note: Insert the power cord firmly until it is flush with the speaker. |
| Join button | Press to connect during setup. |
| Ethernet port | Use an Ethernet cable if you want to connect to a router, computer, or network-attached storage (NAS) device (optional). |
| HDMI port | Use to connect the soundbar to your TV. |
Select a location
You can mount Beam to a wall above or below your TV or place it on a credenza.
Place on a credenza
- Place horizontally on a stable and level surface at least 2" (50mm) from the TV.
- Don't place vertically or on its side.
- Don't block the TV's IR sensor.
- If put on a shelf, place at the front and keep 2" (minimum) clearance on both sides for best sound quality.
- Keep 1" (25mm) space (minimum) above Beam so you can reach the touch controls.
- For best sound quality, keep both ends of Beam at least 1' (30cm) from a wall or other obstruction.
Wall mount
To put Beam on a wall, see Wall mount.
Connect the cables
Before you start
- Disconnect existing home theater or surround sound equipment from your TV.
- Connect any external devices, like a cable box or DVD player, directly to your TV.
Connect the power cord
- Insert the power cord firmly into Beam's AC (mains) power port until it is fully connected.
- Plug the other end of the power cord into an AC (mains) power source.

Use only the supplied power cord (using a third-party power cord will void your warranty).
Connect Beam to your TV
Use the HDMI cable to connect the soundbar to your TV. You may need the optical adapter too (the app lets you know).
- Fully insert the HDMI cable into Beam's HDMI port.

- Connect the HDMI cable to your TV. You have two choices:
- If your TV has an HDMI ARC port, connect the HDMI cable directly to the TV's HDMI ARC port.
- If your TV doesn't have an HDMI ARC port, attach the optical adapter to the HDMI cable and connect it to the TV's optical digital OUT port.

If your TV has an HDMI ARC port
HDMI ARC is a special port that looks like a standard HDMI port. Although they look the same, if you connect to a standard HDMI port, you won't hear sound.
- On your TV's audio OUT panel, look for an HDMI ARC port.
It may be on the back or side of your TV.
You'll know it's an ARC port if you see the word "ARC" on the label. - Connect the HDMI cable to the TV's HDMI ARC port.


Note: If you can't find the word "ARC" on the label, it isn't the correct port. See If your TV doesn't have an HDMI ARC port.
If your TV doesn't have an HDMI ARC port
You'll need the optical audio adapter.
- Remove the protective cap from the optical adapter.
- Attach the optical adapter to the HDMI cable.

- Connect the optical adapter to the TV's optical digital OUT port.

Note: The optical adapter's port is "D-shaped"—make sure the connector aligns correctly into the port. Inserting the adapter incorrectly may damage the cable.


If you don't have the app, download it from the app store. You'll use it to set up and control your Sonos system. See Getting started.
Microphone on/off
Touch  to turn the microphone on and off. (If you don't have a voice service installed, the microphone is inactive.)
When the microphone light is on, voice control is on and your voice assistant is ready to respond. When the microphone light is off, voice control is off.
Note: If you've installed a voice service and the microphone is off, you can still use voice commands. Just press and hold  —no need to start with a wake word. When you release the microphone button, voice control turns off again.
Wall mount
Guidelines
- Use the Beam wall mount kit. You can buy it on www.sonos.com. Follow the instructions in the kit.
- Keep 1" (25mm) space (minimum) above Beam so you can reach the touch controls.
- If you're mounting above the TV, make sure you can reach the touch controls.
- For best sound quality, keep both ends of Beam at least 1' (30cm) from a wall or other obstruction.
Mount kit contents
- Wall mount bracket
- 4 wall anchors
- 4 wall screws
- 2 screws
Note: Don't discard the template. It may look like packing material.

- Tape the cardboard template to the wall above or below your TV. Use a level. Keep 1" (25mm) space (minimum) for access to Beam's touch controls. (Don't install Beam vertically.)
- Mark the center of the mounting holes and remove the template.

- Use a 5/16" drill bit to drill pilot holes (see Wall mounting information)

- Insert and secure the wall anchors (don't use the anchors if drilling into wood).

- Place the bracket on the wall and loosely tighten the wall screws to secure the bracket. Check with a level and then tighten the screws.

- Connect the power and HDMI cables to Beam.

- Place Beam on the bracket.

- Insert and tighten Beam to the bracket using the mounting screws.


Wall mounting information
| Wall Material | Pre Drill | Use Wall Anchors | Use Screws |
| Wood Stud | 1/8" / 3 mm bit | No | Yes |
| Drywall (no stud) | 5/16" / 8 mm bit | Yes | Yes |
| Hard wallboard or double board | 5/16" / 8 mm bit | Yes | Yes |
| Plaster | 5/16" / 8 mm bit | No, requires toggle bolt | Yes |
| Concrete or Brick | 5/16" / 8 mm bit | Yes | Yes |
Specifications
| Feature | Description |
| Audio | |
| Amplifier | Five Class-D digital amplifiers. |
| Elliptical Woofer | Four full-range woofers ensures you'll hear the faithful playback of midrange vocal frequencies plus deep, rich bass. |
| Tweeter | One tweeter creates a crisp and clear high-frequency response. |
| Microphones |
|
| Voice Control | Integrated voice control. |
| System Requirements | TV with HDMI ARC or optical digital audio output, broadband internet, and the Sonos app. |
| Networking* | |
| Wireless Connectivity | Using Sonos S2: Connects to WiFi network with any 802.11 b/g/n, 2.4 GHz broadcast-capable router. Using Sonos S1: Connects to WiFi network with any 802.11b/g 2.4 GHz broadcast-capable router. 802.11n only network configurations are not supported—you can either change the router settings to 802.11b/g/n or connect a Sonos product to your router. |
| Ethernet Port | One 10/100 Mbps Ethernet port. You can plug a Sonos product directly into your router if your WiFi is unstable. |
| General | |
| Power Supply | Auto-switching 100-240 V, 50-60 Hz 2.5A AC universal input. |
| Dimensions (H x W x D) | 2.68 x 25.63 x 3.94 in. (68 x 651 x 100 mm) |
| Weight | 6.2 lb (2.8 kg) |
| Operating Temperature | 32°F to 104°F (0°C to 40°C) |
| Storage Temperature | -4°F to 122°F (-20°C to 50°C) |
| Control | Use your remote control, voice, touch controls or the Sonos app. |
| Supported Devices | Connects to TV with HDMI cable (with or without an attached optical adapter). Plays sources connected to the TV, including cable boxes and game consoles. |
| Package Contents | Beam, AC power cord, HDMI cable, optical adapter, Quickstart Guide. |
* Specifications subject to change without notice.

VideosHow to connect Sonos Beam to TV (video)
Documents / Resources
References
Download manual
Here you can download full pdf version of manual, it may contain additional safety instructions, warranty information, FCC rules, etc.
Advertisement


Need help?
Do you have a question about the Beam and is the answer not in the manual?
Questions and answers