Advertisement
Quick Links
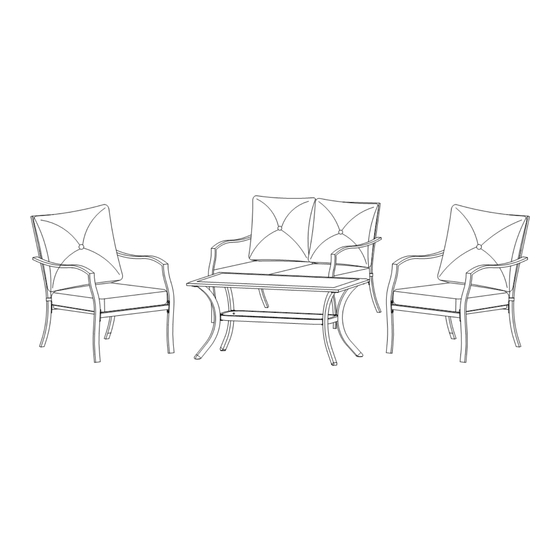
Hanover Outdoor Furniture
IMPORTANT
If you have any problems with this product (missing or damaged parts, assembly issues, etc.),
PLEASE DO NOT RETURN TO THE RETAILER/STORE
from where you purchased the product.
1‐866-988-3300
Please call our Toll‐Free Customer Service Hotline at:
Between 9:00 AM and 5:00 PM Eastern Time, Monday through Friday
www.hanover‐products.com
Or visit our website at:
To expedite any future warranty claims, please retain the Instruction Sheet, Warranty
Card and receipt for future use.
For additional on‐line support on assembly, troubleshooting and care & maintenance of your outdoor
furniture, please visit our website at: www.hanover‐products.com.
6/1/2015 (b)
Advertisement

Related Manuals for Hanover FSS60471AST


Summary of Contents for Hanover FSS60471AST
- Page 1 Hanover Outdoor Furniture IMPORTANT If you have any problems with this product (missing or damaged parts, assembly issues, etc.), PLEASE DO NOT RETURN TO THE RETAILER/STORE from where you purchased the product. 1‐866-988-3300 Please call our Toll‐Free Customer Service Hotline at: Between 9:00 AM and 5:00 PM Eastern Time, Monday through Friday www.hanover‐products.com Or visit our website at: To expedite any future warranty claims, please retain the Instruction Sheet, Warranty Card and receipt for future use. For additional on‐line support on assembly, troubleshooting and care & maintenance of your outdoor furniture, please visit our website at: www.hanover‐products.com. 6/1/2015 (b) ...
- Page 2 FSS60471AST Outdoor Furniture 1-Year Limited Warranty Program For a period of one (1) year after date of purchase, the Manufacturer will either repair or replace defective components in accordance with this Limited Warranty. This warranty is between the Manufacturer and the original purchaser and is valid only when accompanied by the original purchaser’s sales receipt showing original date of purchase and location of purchase.
- Page 3 Assembly Instructions FSS60471AST 4PC Deep Seating Set Questions, problems, or missing parts? Before returning to the store, call Customer Service. 1-866-988-3300 8 a.m. - 5 p.m., PST Monday - Friday Retain this manual for future use.
- Page 4 FSS60471AST Chair Parts & Tools PART PICTURE & DESCRIPTION PART PICTURE & DESCRIPTION M6X40 combination bolt & Right Arm washer M6X20 combination bolt & Left Arm washer M6X30 combination bolt & washer Back Frame Allen Wrench Seat Frame Back Cushion...
-
Page 5: Chair Assembly
FSS60471AST Chair Assembly Step 1: • Attach the seat frame (D) to the back frame (C) by lining up the bolt holes on the seat frame (D) with the corresponding bolt holes on the back frame (C). Insert M6X20 combination bolt & washer (BB) loosely tighten using the Allen wrench (DD). - Page 6 FSS60471AST Chair Assembly Step 4 • Ensure all connections are secure before use. • Turn the chair in an upright position. • Place seat cushion (F) and back cushion (E) on the chair as shown.
- Page 7 FSS60471AST Loveseat Parts & Tools PART PICTURE & DESCRIPTION PART PICTURE & DESCRIPTION Right Arm Left Arm Back Frame Seat Frame Back Cushion Seat Cushion WARNING: To avoid damaging this product, assemble it on a soft, non-abrasive surface such as carpet or cardboard.
- Page 8 FSS60471AST Loveseat Assembly Step 1: • Attach the seat frame (H) to the back frame (G) by lining up the bolt holes on the seat frame (H) with the corresponding bolt holes on the back frame (G). • In the middle insert M6X40 combination bolt &...
- Page 9 FSS60471AST Loveseat Assembly Step 4 • Ensure all connections are secure before use. • Turn the loveseat in an upright position • Place seat cushions (F) and back cushions (E) on the loveseat as shown.
- Page 10 FSS60471AST Table Parts & Tools PART PICTURE & DESCRIPTION PART PICTURE & DESCRIPTION Table Rim Glass Connector Bracket Table Leg WARNING: To avoid damaging this product, assemble it on a soft, non-abrasive surface such as carpet or cardboard.
- Page 11 FSS60471AST Table Assembly Step 1: • Place the table rim (I) on a soft surface. Line up the holes on the table legs (L) and table rim (I). Insert M6x20 combination bolt & washer (BB), loosely tighten using Allen wrench (DD).
- Page 12 FSS60471AST Table Assembly Step 4: • You can now enjoy your new table.
Need help?
Do you have a question about the FSS60471AST and is the answer not in the manual?
Questions and answers