Table of Contents
Advertisement
Quick Links
RL114W.E
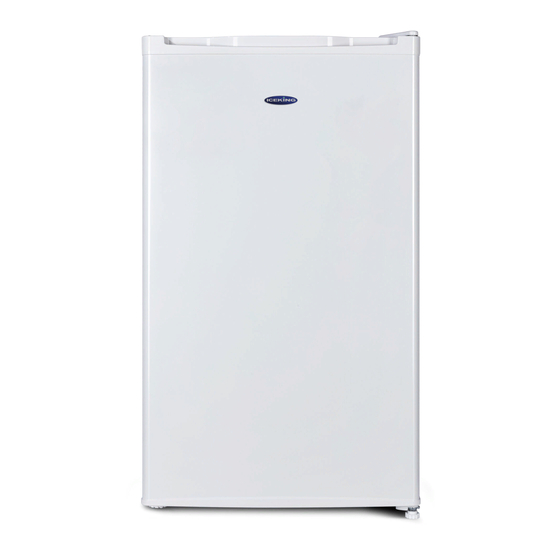
Under Counter larder Fridge - White
Installation and Operating Manual
Please read these instructions carefully before attempting to install
or use this appliance. It is advisable to keep these instructions
in a safe place for future reference.
Iceking: Henry John House, Northway Industrial Estate, Northway Lane, Ashchurch , Tewkesbury, Gloucestershire, GL20 8JH
01527 888133 | enquiries@ice-king.co.uk | www.ice-king.co.uk
Advertisement
Table of Contents

Subscribe to Our Youtube Channel
Summary of Contents for Iceking RL114W.E
- Page 1 Please read these instructions carefully before attempting to install or use this appliance. It is advisable to keep these instructions in a safe place for future reference. Iceking: Henry John House, Northway Industrial Estate, Northway Lane, Ashchurch , Tewkesbury, Gloucestershire, GL20 8JH 01527 888133 | enquiries@ice-king.co.uk | www.ice-king.co.uk...
-
Page 2: Refrigerator Safety
REFRIGERATOR SAFETY Your safety and the safety of others is very important. We have provided many important safety messages in this manual. Always read and obey all safety instructions. Danger means that failure to heed this safety statement may result in severe personal injury or death. -
Page 3: Important Information
IMPORTANT INFORMATION Before the refrigerator is used, it must be properly installed as described in this manual, so please read the manual carefully. To reduce risk of fire, electric shock or injury when using the appliance, follow basic precautions as follows: Plug into an earthed 3-pin socket ONLY, DO NOT remove the earth pin or wire, DO NOT use an adaptor and DO NOT use an extension cable. -
Page 4: Parts & Features
THAT THEY CAN USE THE APPLIANCE SAFELY. YOUNG CHILDREN MUST BE SUPERVISED TO ENSURE THAT THEY DO NOT PLAY WITH THE APPLIANCE. PARTS & FEATURES 2. Glass Shelf 3. Levelling Legs 6. Dairy Compartment 7. Bottle Rack... -
Page 5: Table Of Contents
TABLE OF CONTENTS REFRIGERATOR SAFETY............................2 IMPORTANT INFORMATION........................... 3 PARTS & FEATURES..............................4 IMPORTANT SAFETY INSTRUCTIONS........................6 INSTALLATION INSTRUCTIONS..........................6 Before Using The Appliance..........................6 Installing The Appliance............................6 Electrical Connection............................7 Extension Cable..............................7 Reversing the Door...............................7 OPERATING THE UNIT............................. 8 Setting the Temperature Control.........................8 CARE AND MAINTENANCE............................ -
Page 6: Important Safety Instructions
IMPORTANT SAFETY INSTRUCTIONS TO REDUCE THE RISK OF FIRE, ELECTRICAL SHOCK OR INJURY WHEN USING APPLIANCE FOLLOW THESE BASIC PRECAUTIONS: Read all instructions before using the refrigerator. WARNING: Child entrapment and suffocation are still a danger. Old or abandoned refrigerators are still dangerous even though they are not being used. -
Page 7: Electrical Connection
Electrical Connection IMPROPER USE OF THE EARTHED PLUG CAN RESULT IN THE RISK OF AN ELECTRIC SHOCK. IF THE POWER CABLE IS DAMAGED, HAVE IT REPLACED BY AN AUTHORISED SERVICE CMPANY OR A QUALIFIED ELECTRICIAN. This unit should be properly earthed for safety reasons. The power cable is fitted with a 3-pin plug, which is correct for UK wall sockets, to minimise the risk of electric shock. -
Page 8: Operating The Unit
FIGURE 2 FIGURE 1 Door opening from the right side Door opening from the l side 1. Screws 2. Lower hinge 3. – 4. Levelling legs 5. Upper hinge 6. Upper hinge cover 7. Hole cover plate 8. Screws OPERATING THE UNIT Se ng the Temperature Control The unit only has one control for regulating the temperature of the refrigerator. -
Page 9: Care And Maintenance
CARE AND MAINTENANCE DO NOT USE BOILING WATER BECAUSE IT MAY DAMAGE THE PLASTIC PARTS. IN ADDITION, NEVER USE A SHARP OR METALLIC INSTRUMENT TO REMOVE FROST AS IT MAY DAMAGE THE COOLING SYSTEM AND WILL VOID THE WARRANTY. IF NECESSARY, USE A PLASTIC SCRAPER. -
Page 10: Energy Saving Tips
Turn the levelling legs up to the base to avoid damage. Tape the door shut. Make sure the unit stays secure in the upright position during transportation. Ensure to protect the outside of the unit with a blanket or a similar item. Energy Saving Tips The unit should be located in the coolest area of the room, away from heat producing appliances and out of direct sunlight. -
Page 11: Wiring Diagram
WIRING DIAGRAM... - Page 12 Precautions: If the appliance is to be discard/recycled, you must remove the lid/door. This will reduce the possibility of danger to children. The flammable foaming needs to be disposed of by a professional company/person or your local council. Declaration of Conformity: The manufacturers of the product(s) described herein, to which this description refers, declares on its sole responsibility that the product(s) meet the relevant fundamental safety, health and protection requirements of the relevant UK,...
- Page 13 THIS DOES NOT AFFECT YOUR STATUTORY RIGHTS Your new ICEKING appliance carries a free guarantee which protects you against the cost of repairs during the first 24 months from date of purchase provided that any claim is accompanied by evidence of the model reference,...
- Page 14 Guarantee • Cost of callout where a fault cannot be found with the appliance. • Cost of callout for work covering routine maintenance, such as, but not exclusively, cleaning of filters or defrosting. • Cost of callout for work required to correct the alignment of doors following door reversal procedures carried out by you.
- Page 15 Special for new European standard The ordered parts in the following table can be acquired from customer services. Provided By Ordered Parted Minimum Time Required For provision. Professional maintenance At least 7 years after the last model is Thermostats personnel launched on the market Professional maintenance At least 7 years after the last model is...


Need help?
Do you have a question about the RL114W.E and is the answer not in the manual?
Questions and answers