Table of Contents
Advertisement
Quick Links
Advertisement
Table of Contents

Related Manuals for Promovec MK FIVE

Summary of Contents for Promovec MK FIVE
- Page 1 April 2020...
-
Page 3: Table Of Contents
Tabel of contents Introduction ........................Product description ....................How to get started ...................... Display – LCD Mini Display w/buttons ............Display ..........................Turn display on and off ..................... Light ............................Battery indicator ......................Assist functions ......................Trip counter/Odometer ................... Troubleshooting ......................Battery - mounting/dismounting .............. -
Page 4: Introduction
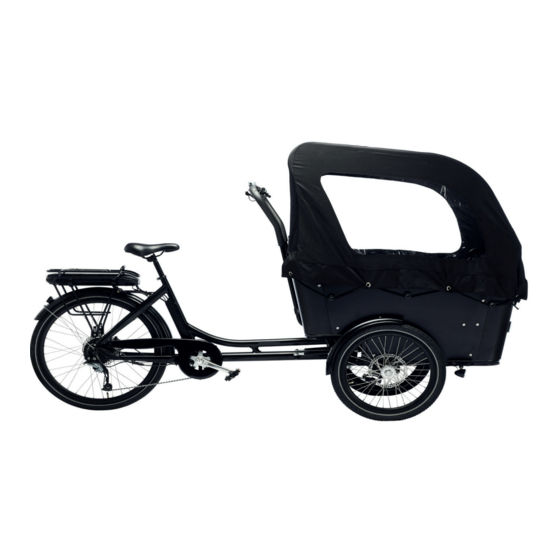
Machinery directive 2006/42/EC and the electric components according to EN 15194:2017 EPAC Bicycles. Ridgeback MK FIVE is the perfect choice if you want an electric bike that can be used for transportation of children, dogs or luggage. The bike is equipped with to seats and four seatbelts. -
Page 5: How To Get Started
To ride the bike it is necessary to be aware of how the weight is distributed. Make sure of the control of the bike when you make turns. Info * Place the weight in the box as close to the handlebare as possible to increase the stability of the bike. -
Page 6: Display - Lcd Mini Display W/Buttons
Display - LCD Mini Display with buttons The display is mounted on the handlebar and function both as battery indicator and assist level function. Use the 3 buttons on left side to navigate. Display Speed Level up On/Off Assist level Level down Trip counter Battery indicator... -
Page 7: Light
Light Turn on/off the light by pressing the "level up" button for 1-2 seconds. Level up Battery indicator The battery indicator is shown on the left side of the display and allows you to see the approximate battery level using 4 segments. When reaching the lowest level, it will start flashing. -
Page 8: Assist Functions
Trip counter / Odometer This display can change between trip counter and odometer (total distance): Change between trip counter and odometer by pressing the "power button" shortly. The odometer cannot be reset. Resetting the trip counter: Keep "On/Off" and "Level down" pressed simultaneously for 2-3 seconds. On/Off Level down Trip counter... - Page 9 Assist functions The display has 2 different assist functions: * Assist levels (1-4) - selectable by using the "level up" and "level down" buttons. Level 4: Highest level Level 1: Lowest level Level 0: Assist function disabled * Walk assist: If the bike support this, it is activated by holding down the "level down"...
-
Page 10: Troubleshooting
Troubleshooting An error code appears on the display in case of any system errors. The error is indicated by a number, which will be displayed. Error codes from E0 to E0 indicate the type of error. The final diagnosis of errors requires professionals. Contact your dealer for assistance. Error code The error indicator has the following error codes Error codes Description... -
Page 11: Battery - Mounting/Dismounting
Battery - Mounting/Dismounting * The battery is mounted under the carrier of the bike. * Connect the battery by sliding the battery across the rail. * When the battery is inserted, the electrical system is turned on automatically. * Turn the key to the right, to lock the battery in. * Turn the key to the left to release the battery. -
Page 12: Charger/Charging
Charger/Charging CAUTION: - Only allow children at least 8 years old to use the battery charger. Give suffiecient instruction so that the child is able to use the battery charger in a safe way and explain that it is not a toy and must nut be played with. - Instuct the child not to try and recharge non-rechargeable batteries because of the danger of eruption. -
Page 13: Canopy/Mounting Canopy
Canopy/Mounting canopy The Canopy is easy to mount. It consists of: 2 hangers 1 cross brace 1 canopy Step 1 Unpack the canopy and zip up both sides. Place the canopy on a level surface. - Page 14 Step 2 Insert the hangers in the threads along the zipper as shown in the pictures. Step 3 Insert the hangers in the cross brace below the top shown in the pictures. The cross brace must be visible on both sides of the aisle.
- Page 15 Step 4 Raise the canopy with the outside facing out. Step 5 Eassiest to mount if you are two people.
- Page 16 Step 6 Velcro, at the ends of cross brace, folds around the hoop and tightens well. Step 7 Tighten the canopy with the elastic bands. Use all 10 buds...
- Page 17 Step 8 The elastics by the handlebar, are mounted as shown in the picture. Step 9 Open door/Closed door Use the velcro to keep the door open.
-
Page 18: Storage
Storage If the e-bike is set aside for storage (more than one month), it will be enough to recharge one time per month. If your e-bike is stored outdoors or in an unheated room, we recommend removing the battery and storing / charging it at room temperature. -
Page 19: Disposal Of Battery
Register your battery via Promovecs website and obtain 2-year capacity waranty. In addition to the prevailing sale of goods 2-year warranty provided, Promovec A/S offer a 2-year capacity warranty on all batteries for electric bikes equipped with Promovecs electrical system and intended for private use. -
Page 20: Maintenance
Maintenance The bike and the electrical system does not require any special maintenance. It is recommended to clean the bike and lubricate moving parts at regular intervals. Be aware, that wearing parts such as tire, chain, brake pads are replaced as needed. Models equipped with v-brake has a wear indicator engraved as a line or dot indicating the wearing time. -
Page 21: Road Traffic Law
Road traffic law The electric bicycle is part of the road traffic laws, such as regular bicycles. According to the “Order on traffic law” under section § 49. You can read more about this. You are therefore considered a cyclist in traffic with the same driving conditions. It is recommended to wear helmets and having the right lights equipped for your bicycle. -
Page 22: Technical Data
Technical data Frame Alloy Fork Unicrown Frame size One size Kalloy - oversize Handlebar Handlebar stem Zoom, adjustable Motor Rear w/cassette - 250W/36V Assist 5 levels Battery Carrier 5 Range Up to 100 km Display Connect+ Wheel 20” front and 26" rear Tyre Schwalbe Delta 9 speed Shimano... -
Page 23: Battery Specifications
Battery specifications Battery 8,8AH 36V 11,0AH 36V 13,0AH 36V Li-Ion Li-Ion Li-Ion 468Wh 316Wh 396Wh Removeable Removeable Removeable Weight: 2,65 kg Weight: 3,0 kg Weight: 3,68 kg Range: Range: Range: Up to 70 km Up to 90 km Up to 100 km Carrier 5 Charger Swift mode, Splash proof...
Need help?
Do you have a question about the MK FIVE and is the answer not in the manual?
Questions and answers