Table of Contents
Advertisement
Available languages
Available languages
Quick Links
[TIPE]
KD-X182BT
[RADIO TAPE MOBIL]
DIGITAL MEDIA RECEIVER
INSTRUCTION MANUAL
PENERIMA MEDIA DIGITAL
BUKU PETUNJUK
Notice: Keep ID card provided in this product in a safe and accessible place.
Pemberitahuan: Simpan kartu ID yang disediakan di produk ini di tempat
yang aman dan mudah diakses.
KD-X182BT
Simpanlah kartu ini di tempat yang aman dan mudah dijangkau.
Saat menelepon dealer JVC untuk melakukan servis, beri tahukan
nomor model yang tertera pada kartu ini.
Informasi yang telah diperbarui (Buku Petunjuk
terbaru, pembaruan sistem, fungsi baru, dll.) tersedia
di <https://www.jvc.net/cs/car/>.
B4G-0251-00
ENGLISH
INDONESIA
B5A-4093-10 [A9]
Advertisement
Chapters
Table of Contents

Related Manuals for JVC KD-X182BT


Summary of Contents for JVC KD-X182BT
- Page 1 Pemberitahuan: Simpan kartu ID yang disediakan di produk ini di tempat yang aman dan mudah diakses. Simpanlah kartu ini di tempat yang aman dan mudah dijangkau. Saat menelepon dealer JVC untuk melakukan servis, beri tahukan nomor model yang tertera pada kartu ini. Informasi yang telah diperbarui (Buku Petunjuk KD-X182BT terbaru, pembaruan sistem, fungsi baru, dll.) tersedia...
- Page 2 SOFTWARE LICENSE AGREEMENT Article 4 Right pertaining to the Licensed Software Any and all copyrights and other rights pertaining to the Licensed Software and related documents The software embedded in the Product (hereinafter the "Licensed Software") provided by Licensor is shall belong to the Licensor or the original holder of the right who granted to the Licensor the license or copyrighted to or sublicensable by the Licensor, and this Agreement provides for the terms and conditions sublicense for the Licensed Software (hereinafter the "Original Rightholder"), and the User shall not be...
- Page 3 Important Notice concerning the Software Article 9 Destruction of the Licensed Software If this Agreement is terminated pursuant to the provision of Article 8, the User shall destroy the Licensed -jansson Software, any related documents and copies thereof within two (2) weeks from such date of termination. Copyright (c) 2009-2012 Petri Lehtinen <petri@digip.org>...
- Page 4 -CMP sha2 AUTHOR: Aaron D. Gifford - http://www.aarongifford.com/ The MIT License (MIT) Copyright (c) 2014 Charles Gunyon Copyright (c) 2000-2001, Aaron D. Gifford All rights reserved. Permission is hereby granted, free of charge, to any person obtaining a copy of this software and associated documentation files (the "Software"), to deal in the Software without restriction, including without You may obtain a copy of the license at limitation the rights to use, copy, modify, merge, publish, distribute, sublicense, and/or sell copies of the...
- Page 5 Copyright (c) 1995, 1996 Carnegie-Mellon University. All rights reserved. T-Kernel 2.0 Author: Chris G. Demetriou This product uses the source code of T-Kernel 2.0 under T-License 2.0 granted by T-Engine Forum (www.tron.org) Permission to use, copy, modify and distribute this software and its documentation is hereby granted, provided that both the copyright notice and this permission notice appear in all copies of the software, BSD-3-Clause derivative works or modified versions, and any portions thereof, and that both notices appear in supporting...
-
Page 6: Table Of Contents
Radio ......................7 • (Page XX) indicates references are available on the stated page. USB ......................8 JVC Remote Application ............... 10 This symbol on the product means there are important operating and maintenance instructions in this manual. Bluetooth® ....................11 Be sure to carefully read instructions in this manual. -
Page 7: Before Use
Before Use • Depending on the types of cars, the antenna will automatically extend IMPORTANT • To ensure proper use, please read through this manual before using this when you turn on the unit with the antenna control wire connected. Turn off the unit when parking at a low ceiling area. -
Page 8: Basics
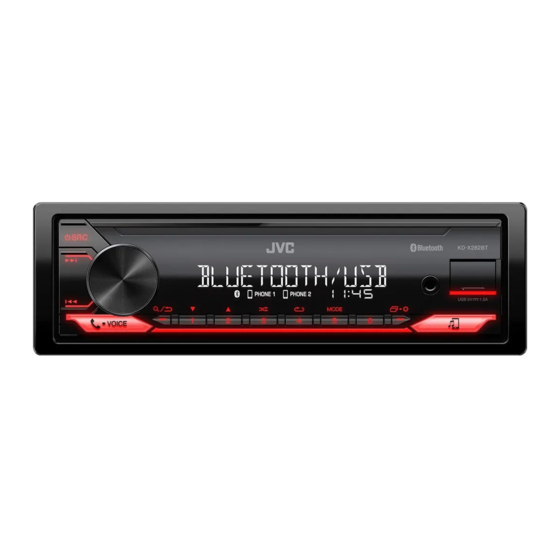
Basics Faceplate How to reset Your preset adjustments will be erased except stored radio stations. Volume knob Display window* Detach button Built-in microphone * Only for illustration purpose. On the faceplate Turn on the power Press B SRC. • Press and hold to turn off the power. Adjust the volume Turn the volume knob. -
Page 9: Getting Started
Getting Started Basics Remote control (RM-RK52) This unit can be remotely controlled with an optionally purchased remote control. Remote sensor (Do not expose to bright sunlight.) Acknowledge the crossover type When you turn on the power for the first time (or [FACTORY RESET] is set to [YES], see page 6), the display shows: “2-WAY X’OVER”... -
Page 10: Set The Basic Settings
For details on how to update the firmware, visit To return to the previous setting item, press <https://www.jvc.net/cs/car/>. [FACTORY RESET] [YES]: Resets the settings to default (except the stored station). ; Set the basic settings [NO]: Cancels. -
Page 11: Radio
Radio Select a stored station Press one of the number buttons (1 to 6). (or) Press Turn the volume knob to select a preset number, then press the knob. Other settings The unit switches to FM alarm automatically when receiving an alarm signal from FM broadcast. -
Page 12: Usb
Radio Connect a USB device [MONO SET] [ON]: Improves the FM reception, but the stereo effect will be lost. ; [OFF]: Cancels. USB input terminal USB 2.0 cable* [NEWS SET]* [ON]: The unit will temporarily switch to News Programme if available. ; (commercially available) [OFF]: Cancels. - Page 13 Select a file to play On the faceplate On the remote control Reverse/ Press and hold S / T. Press and hold H / I. From a folder or list Fast-forward Select a file Press S / T. Press H / I. Press Turn the volume knob to select a folder/list, then press the knob.
-
Page 14: Jvc Remote Application
JVC Remote Application You can control the JVC car receiver from Android device (via Bluetooth) Default: [XX] using JVC Remote application. [REMOTE APP] • For more information, visit <https://www.jvc.net/cs/car/>. [ANDROID Selects the Android device to use from the list. LIST]... -
Page 15: Bluetooth
Press B SRC to turn on the unit. work with this unit. Search and select the name of your receiver (“KD-X182BT”) on the • Be sure to turn on the Bluetooth function of the device to make the Bluetooth device. -
Page 16: Bluetooth - Mobile Phone
Bluetooth® • This unit supports Secure Simple Pairing (SSP). Bluetooth — Mobile phone • Up to five devices can be registered (paired) in total. • Once the pairing is completed, the Bluetooth device will remain registered in the unit even if you reset the unit. To delete the paired device, see [DEVICE DELETE] on page 15. - Page 17 Bluetooth® The following operations may differ or be unavailable depending on the *1 This adjustment will not affect the volume of the other sources. connected phone. *2 Press and hold VOL + to continuously increase the volume to 15. *3 Operations may vary according to the connected Bluetooth device. On the faceplate On the remote control Improve the voice quality...
- Page 18 Bluetooth® Default: [XX] [RECENT CALL] (Applicable only if the phone supports PBAP.) 1 Press the volume knob to select a name or a phone number. [SETTINGS] • “<” indicates call received, “>“ indicates call made, “M” indicates call [AUTO ANSWER] [01 SEC] to [30 SEC]: Answers an incoming call automatically in the selected missed.
- Page 19 ; [NO]: Cancels. Press the volume knob to call. [INFORMATION] [MY BT NAME]: Displays the name of your receiver (“KD-X182BT”). ; “NO PRESET” appears if there is no contact stored. [MY ADDRESS]: Shows address of this unit. Bluetooth mode settings...
- Page 20 “PIN IS 0000” scrolls on the display. been deleted, and the unit exits check mode. Search and select the name of your receiver (“KD-X182BT”) on the • To cancel, press and hold B SRC to turn off the power, then turn on the Bluetooth device within 3 minutes.
-
Page 21: Bluetooth - Audio
Bluetooth® Bluetooth — Audio On the faceplate • Operations and display indications may differ according to their availability Repeat play Press 4 B repeatedly. on the connected device. • Depending on the connected device, some features may not work with [TRACK REPEAT], [ALL REPEAT], [GROUP REPEAT], [REPEAT OFF] your device. -
Page 22: Audio Settings
Audio Settings [PRO EQ] Adjusts your own sound settings for each source. • The settings are stored to [USER] in [PRESET EQ]. • The settings made may affect the current settings of [EASY EQ]. [62.5HZ] [LEVEL –09] to [LEVEL +09] ([LEVEL +05]): Adjusts the level to memorize for each source. (Before making an adjustment, select the source you want to adjust.) [ON]: Turns on the extended bass. - Page 23 Audio Settings [SUBWOOFER [ON]: Turns on the subwoofer output. ; [OFF]: Cancels. [X ‘ OVER TYPE] Caution: Adjusts the volume before changing the [X ‘ OVER TYPE] to avoid SET]*3 the sudden increase or decrease of the output level. • Once you have changed the crossover type, the next time when you turn [FADER] (Not applicable when 3-way crossover is selected.) on the power, the display shows:...
- Page 24 Audio Settings Connection via speaker leads Speaker output settings [SPK/PRE OUT] You can also connect the speakers without using an external amplifier but (Applicable only if [X ' OVER TYPE ] is set to [2-WAY]) (page 19) still being able to enjoy the subwoofer output with these settings. Select the output setting for the speakers [SPK/PRE OUT], based on the speaker connection method.
- Page 25 Audio Settings 2-way crossover setting items Crossover settings Below are the available setting items for 2-way crossover and 3-way [SPEAKER SIZE] crossover. [FRONT] [SIZE] [8CM]/[10CM]/[12CM]/[13CM]/[16CM]/ CAUTION [17CM]/[18CM]/[4×6]/[5×7]/[6×8]/[6×9]/ Select a crossover type according to how the speakers are connected. [7×10] If you select a wrong type: [TWEETER] [SMALL]/[MIDDLE]/[LARGE]/[NONE] (not •...
- Page 26 Audio Settings [SUBWOOFER [SW LPF FRQ] [30HZ]/[40HZ]/[50HZ]/[60HZ]/[70HZ]/[80HZ]/ [MID RANGE] [HPF FRQ] [30HZ]/[40HZ]/[50HZ]/[60HZ]/[70HZ]/[80HZ]/[90HZ]/ LPF]*2*3 [90HZ]/[100HZ]/[120HZ]/[150HZ]/[180HZ]/ [100HZ]/[120HZ]/[150HZ]/[180HZ]/[220HZ]/[250HZ]/ [220HZ]/[250HZ]/[THROUGH] [THROUGH] [SW LPF SLOPE] [–06DB]/[–12DB]/[–18DB]/[–24DB] [HPF SLOPE] [–06DB]/[–12DB] [SW LPF PHASE] [REVERSE] (180°)/ [NORMAL] (0°) [LPF FRQ] [1KHZ]/[1.6KHZ]/[2.5KHZ]/[4KHZ]/[5KHZ]/[6.3KHZ]/ [8KHZ]/[10KHZ]/[12.5KHZ]/[THROUGH] [SW LPF GAIN] [–08DB] to [00DB] [LPF SLOPE] [–06DB]/[–12DB] [PHASE] [REVERSE] (180°)/[NORMAL] (0°)
- Page 27 Audio Settings Digital Time Alignment settings Determining the delay time automatically If you specify the distance from the currently set Digital Time Alignment sets the delay time of the speaker output to create a listening position to every speaker, the delay time more suitable environment for your vehicle.
-
Page 28: Display Settings
Display Settings Zone identification for brightness settings Default: [XX] [DISPLAY] [DIMMER] Dims the illumination. [OFF]: Dimmer is turned off. Brightness changes to [DAY] setting. [ON]: Dimmer is turned on. Brightness changes to [NIGHT] setting. (See the following “[BRIGHTNESS]” settings.) [DIMMER TIME]: Set the time to turn on dimmer and to turn off dimmer. 1 Turn the volume knob to adjust the [ON] time, then press the knob. -
Page 29: References
For: – Latest firmware updates and latest compatible item list FM/AM/SW1/SW2 Frequency Frequency with Music Synchronization Effect* Date – JVC original application back to the beginning – Any other latest information For FM Radio Data System stations only: Visit <https://www.jvc.net/cs/car/>. -
Page 30: Troubleshooting
Troubleshooting Symptom Remedy Symptom Remedy Sound cannot be heard. • Adjust the volume to the optimum level. “UNSUPPORTED DEVICE” • Check whether the connected USB device is compatible • Check the cords and connections. appears. with this unit and ensure the file systems are in supported formats. - Page 31 Troubleshooting Symptom Remedy Symptom Remedy Phone sound quality • Reduce the distance between the unit and the Bluetooth “NO ENTRY” There is no registered device connected/found via is poor. device. Bluetooth. • Move the car to a place where you can get a better signal “ERROR”...
-
Page 32: Specifications
Specifications FM Frequency Range 87.5 MHz — 108.0 MHz (50 kHz step) MP3 Decode Compliant with MPEG-1/2 Audio Layer-3 Usable Sensitivity (S/N = 30 dB) 8.2 dBf (0.71 μV/75 Ω) WMA Decode Compliant with Windows Media Audio Quieting Sensitivity 17.2 dBf (2.0 μV/75 Ω) WAV Decode Linear-PCM (DIN S/N = 46 dB) - Page 33 Specifications Band 13 Band Frequency 62.5/ 100/ 160/ 250/ 400/ 630/ 1k/ 1.6k/ 2.5k/ 4k/ 6.3k/ 10k/ 16k Hz Level -09 — +09 (-9 dB — +9 dB) 1.35/ 1.5/ 2.0 Frequency THROUGH/ 30/ 40/ 50/ 60/ 70/ 80/ 90/ 100/ 120/ 150/ 180/ 220/ 250 Hz Level -6/ -12/ -18/ -24 dB/Oct.
- Page 34 • [XX] menunjukkan item yang dipilih. • (Halaman XX) menunjukkan referensi yang terletak di halaman yang USB ......................8 ditunjukkan. Aplikasi JVC Remote ................10 Bluetooth® ....................11 Simbol pada produk ini menandakan bahwa ada petunjuk pengoperasian dan perawatan yang penting dalam buku Bluetooth - Koneksi petunjuk ini.
-
Page 35: Sebelum Menggunakan
Sebelum Menggunakan PENTING • Jangan pernah meletakkan atau meninggalkan benda logam (misalnya koin atau perkakas logam) di dalam unit, untuk mencegah terjadinya • Untuk memastikan penggunaan yang benar, harap baca dengan saksama korslet. panduan ini sebelum menggunakan produk. Anda sangat perlu membaca dan memperhatikan Peringatan dan Perhatian dalam panduan ini. -
Page 36: Dasar-Dasar
Dasar-dasar Pelat depan Cara mengatur ulang Penyesuaian pra-atur juga akan dihapus kecuali stasiun radio sudah disimpan. Kenop volume Jendela tampilan* Tombol untuk melepas Mikrofon bawaan * Hanya untuk tujuan ilustrasi. Untuk Pada pelat depan Menghidupkan daya Tekan B SRC. • Tekan dan tahan untuk mematikan daya. Setel volume Putar kenop volume. -
Page 37: Memulai
Memulai Dasar-dasar Remote control (RM-RK52) Unit ini bisa dikendalikan secara jarak jauh dengan remote control yang bisa dibeli sesuai pilihan. Sensor Remote (Jangan arahkan ke sinar matahari). Mengakui tipe saling silang Bila Anda menyalakan perangkat untuk pertama kali (atau [FACTORY RESET] diatur ke [YES], lihat halaman 6), tampilannya akan menunjukkan: Tarik keluar lembaran plastik “2-WAY X’OVER”... -
Page 38: Menetapkan Pengaturan Dasar
“Tahun”. (pemutakhiran tidak diaktifkan). Tekan untuk keluar. Untuk perincian tentang cara memutakhirkan firmware, kunjungi <https://www.jvc.net/cs/car/>. Untuk kembali ke item pengaturan sebelumnya, tekan [FACTORY RESET] [YES]: Mengembalikan pengaturan ke default (selain stasiun yang telah disimpan). ; [NO]: Pembatalan. Menetapkan pengaturan dasar... -
Page 39: Radio
Radio Memilih stasiun yang disimpan Tekan salah satu tombol angka (1 hingga 6). (atau) Tekan Putar kenop volume untuk memilih nomor terprogram, kemudian tekan kenop. Unit beralih ke alarm FM secara otomatis ketika menerima sinyal alarm dari Pengaturan lainnya siaran FM. Tekan dan tahan Putar kenop volume untuk memilih item (lihat tabel berikut), Cari stasiun kemudian tekan kenop. -
Page 40: Usb
Radio Terhubung ke perangkat USB [MONO SET] [ON]: Memperbaiki penerimaan FM, tetapi efek stereo mungkin akan hilang. ; [OFF]: Pembatalan. Terminal masukan USB Kabel USB 2.0* [NEWS SET]* [ON]: Unit akan beralih sementara ke News Program jika tersedia. ; (dijual bebas) [OFF]: Pembatalan. - Page 41 Memilih file yang akan diputar Untuk Pada pelat depan Pada remote control Tekan dan tahan H / I. Trek mundur/ Tekan dan tahan Dari folder atau daftar S / T. maju-cepat Tekan Pilih file Tekan S / T. Tekan H / I. Putar kenop volume untuk memilih folder/daftar, kemudian tekan Pilih folder Tekan 2 J / 1 K.
-
Page 42: Aplikasi Jvc Remote
Aplikasi JVC Remote Anda dapat mengontrol alat penerima JVC di mobil dari perangkat Android Default: [XX] (lewat Bluetooth) menggunakan aplikasi JVC Remote. [REMOTE APP] • Untuk informasi lebih lanjut, kunjungi <https://www.jvc.net/cs/car/>. [ANDROID Memilih perangkat Android yang akan digunakan dari daftar. -
Page 43: Bluetooth
Tekan B SRC untuk menyalakan unit. • Pastikan untuk mengaktifkan fungsi Bluetooth perangkat untuk Cari dan pilih nama alat penerima Anda (“KD-X182BT”) pada melakukan operasi berikut ini. perangkat Bluetooth. • Kondisi sinyal berbeda-beda, bergantung pada lingkungan sekitar. -
Page 44: Bluetooth - Ponsel Bluetooth
Bluetooth® • Unit ini mendukung Secure Simple Pairing (SSP). Bluetooth — Ponsel Bluetooth • Total hingga lima perangkat dapat didaftarkan (dipasangkan). • Setelah selesai dipasangkan, perangkat Bluetooth akan tetap terdaftar di unit sekalipun Anda me-reset unit. Untuk menghapus perangkat yang telah dipasangkan, lihat [DEVICE DELETE] di halaman 15. - Page 45 Bluetooth® Operasi berikut mungkin berbeda atau tidak tersedia, bergantung pada *1 Penyesuaian ini tidak akan memengaruhi volume sumber lainnya. ponsel yang dihubungkan. *2 Tekan dan tahan VOL + untuk terus menambah volume hingga 15. *3 Pengoperasian mungkin berbeda sesuai dengan perangkat Bluetooth yang dihubungkan. Untuk Pada pelat depan Pada remote control...
- Page 46 Bluetooth® Default: [XX] [RECENT CALL] (Hanya berlaku jika ponsel mendukung PBAP.) 1 Tekan kenop volume untuk memilih nama atau nomor telepon. [SETTINGS] • “<” menunjukkan panggilan diterima, “>” menunjukkan panggilan dibuat, “M” [AUTO ANSWER] [01 SEC] hingga [30 SEC]: Menjawab panggilan masuk menunjukkan panggilan tidak terjawab.
- Page 47 Tekan kenop volume untuk memanggil. pemasangan yang tersimpan, buku telepon, dll.). ; [NO]: Pembatalan. “NO PRESET” akan muncul jika tidak ada kontak yang disimpan. [INFORMATION] [MY BT NAME]: Menampilkan nama penerima Anda (“KD-X182BT”). ; [MY ADDRESS]: Menampilkan alamat unit ini. Pengaturan mode Bluetooth Tekan dan tahan Putar kenop volume untuk memilih item (lihat tabel berikut), kemudian tekan kenop.
- Page 48 PHONE” “PIN IS 0000” gulir layar. bahwa pemasangan telah dihapus, dan unit akan keluar dari mode Cari dan pilih nama alat penerima Anda (“KD-X182BT”) pada pemeriksaan. perangkat Bluetooth dalam 3 menit. • Untuk membatalkan, tekan dan tahan B SRC untuk mematikan daya, Lakukan (A), (B) atau (C) bergantung pada apa yang bergulir pada kemudian nyalakan lagi.
-
Page 49: Bluetooth - Audio
Bluetooth® Bluetooth — Audio Untuk Pada pelat depan • Indikasi operasi dan tampilan mungkin berbeda sesuai dengan Tekan 4 B secara berulang. Ulangi pemutaran ketersediaannya pada perangkat yang dihubungkan. [TRACK REPEAT], [ALL REPEAT], [GROUP REPEAT], [REPEAT OFF] • Bergantung pada perangkat yang dihubungkan, beberapa fitur mungkin tidak berfungsi pada perangkat Anda. -
Page 50: Pengaturan Audio
Pengaturan Audio [PRO EQ] Menyesuaikan pengaturan suara Anda sendiri untuk setiap sumber. • Pengaturan ini akan disimpan ke [USER] di [PRESET EQ]. • Pengaturan yang dibuat dapat memengaruhi pengaturan [EASY EQ] saat ini. [62.5HZ] [LEVEL –09] hingga [LEVEL +09] ([LEVEL +05]): Menyetel tingkat memori untuk setiap sumber. - Page 51 Pengaturan Audio [SUBWOOFER [ON]: Nyalakan keluaran subwoofer. ; [OFF]: Pembatalan. [X ‘ OVER TYPE] Perhatian: Sesuaikan volume sebelum mengubah [X ‘ OVER TYPE] agar SET]*3 tingkat output tidak naik atau turun secara tiba-tiba. • Setelah Anda mengubah tipe saling silang, saat berikutnya Anda [FADER] (Tidak berlaku bila saling silang 3 arah telah dipilih) menyalakan unit, tampilan akan menunjukkan:...
- Page 52 Pengaturan Audio Koneksi melalui titik sambung speaker Pengaturan output speaker [SPK/PRE OUT] Anda juga dapat menyambungkan speaker tanpa menggunakan amplifier (Hanya berlaku jika [X ' OVER TYPE ] diatur ke [2-WAY]) (halaman 19) eksternal tetapi masih dapat menikmati output subwoofer dengan Pilih pengaturan output untuk speaker [SPK/PRE OUT], berdasarkan metode pengaturan ini.
- Page 53 Pengaturan Audio Item pengaturan saling silang 2 arah Pengaturan saling silang Di bawah ini adalah item pengaturan yang tersedia untuk saling silang [SPEAKER SIZE] 2 arah dan saling silang 3 arah. [FRONT] [SIZE] [8CM]/[10CM]/[12CM]/[13CM]/[16CM]/ PERHATIAN [17CM]/[18CM]/[4×6]/[5×7]/[6×8]/[6×9]/ Pilih tipe saling silang sesuai dengan cara menghubungkan speaker. [7×10] Jika Anda memilih tipe yang salah: [TWEETER]...
- Page 54 Pengaturan Audio [SUBWOOFER [SW LPF FRQ] [30HZ]/[40HZ]/[50HZ]/[60HZ]/[70HZ]/[80HZ]/ [MID RANGE] [HPF FRQ] [30HZ]/[40HZ]/[50HZ]/[60HZ]/[70HZ]/[80HZ]/[90HZ]/ LPF]*2*3 [90HZ]/[100HZ]/[120HZ]/[150HZ]/[180HZ]/ [100HZ]/[120HZ]/[150HZ]/[180HZ]/[220HZ]/[250HZ]/ [220HZ]/[250HZ]/[THROUGH] [THROUGH] [SW LPF SLOPE] [–06DB]/[–12DB]/[–18DB]/[–24DB] [HPF SLOPE] [–06DB]/[–12DB] [SW LPF PHASE] [REVERSE] (180°)/ [NORMAL] (0°) [LPF FRQ] [1KHZ]/[1.6KHZ]/[2.5KHZ]/[4KHZ]/[5KHZ]/[6.3KHZ]/ [8KHZ]/[10KHZ]/[12.5KHZ]/[THROUGH] [SW LPF GAIN] [–08DB] hingga [00DB] [LPF SLOPE] [–06DB]/[–12DB] [PHASE] [REVERSE] (180°)/[NORMAL] (0°)
- Page 55 Pengaturan Audio Pengaturan Digital Time Alignment Menentukan waktu tunda secara otomatis Jika Anda menentukan jarak dari posisi Pengaturan Digital Time Alignment mengatur waktu tunda output speaker mendengarkan yang telah diatur saat ini ke untuk menghasilkan lingkungan yang lebih cocok bagi mobil Anda. setiap speaker, waktu tunda secara otomatis akan •...
-
Page 56: Pengaturan Tampilan
Pengaturan Tampilan Identifikasi zona untuk pengaturan kecerahan Default: [XX] [DISPLAY] [DIMMER] Meredupkan cahaya. [OFF]: Dimmer dimatikan. Kecerahan berubah ke pengaturan [DAY]. [ON]: Dimmer diaktifkan. Kecerahan berubah ke pengaturan [NIGHT]. (Lihat berikut pengaturan “[BRIGHTNESS]”.) [DIMMER TIME]: Atur waktu untuk menyalakan dan mematikan dimmer. 1 Putar kenop volume untuk memilih waktu [ON], kemudian tekan kenop. -
Page 57: Referensi
Untuk: – Pembaruan firmware terbaru dan daftar item terbaru yang kompatibel FM/AM/SW1/SW2 Frekuensi Frekuensi dengan Efek Sinkronisasi Musik* Tanggal – Aplikasi asli JVC kembali ke awal – Informasi terbaru lainnya Hanya untuk stasiun FM Radio Data System: Kunjungi <https://www.jvc.net/cs/car/>. Nama stasiun/Jenis program... -
Page 58: Pemecahan Masalah
Pemecahan Masalah Gejala Perbaikan Gejala Perbaikan Suara tidak terdengar. • Sesuaikan volume ke tingkat optimum. “UNSUPPORTED DEVICE” • Periksa apakah perangkat USB yang dihubungkan tersebut • Periksa kabel-kabel dan penyambungan-penyambungan. muncul. kompatibel dengan unit ini dan pastikan sistem file dalam format yang didukung. - Page 59 Pemecahan Masalah Gejala Perbaikan Gejala Perbaikan Kualitas suara telepon • Kurangi jarak antara unit dan perangkat Bluetooth. “NO ENTRY” Tidak ada perangkat terdaftar yang terhubung/ditemukan buruk. • Pindahkan mobil ke tempat Anda bisa menerima sinyal lewat Bluetooth. yang lebih baik. “ERROR”...
-
Page 60: Spesifikasi
Spesifikasi FM Kisaran frekuensi 87,5 MHz — 108,0 MHz (interval 50 kHz) Dekode MP3 Sesuai dengan MPEG-1/2 Audio Layer-3 Sensitivitas yang dapat digunakan 8,2 dBf (0,71 μV/75 Ω) Dekode WMA Sesuai dengan Windows Media Audio (S/N= 30 dB) Dekode WAV Linear-PCM Sensitivitas pendiaman 17,2 dBf (2,0 μV/75 Ω) - Page 61 Spesifikasi Band 13 Band Frekuensi 62.5/ 100/ 160/ 250/ 400/ 630/ 1k/ 1.6k/ 2.5k/ 4k/ 6.3k/ 10k/ 16k Hz Tingkat -09 — +09 (-9 dB — +9 dB) 1,35/ 1,5/ 2,0 Frekuensi THROUGH/ 30/ 40/ 50/ 60/ 70/ 80/ 90/ 100/ 120/ 150/ 180/ 220/ 250 Hz Tingkat -6/ -12/ -18/ -24 dB/Oct.
- Page 64 • Windows Media is a registered trademark or trademark of Microsoft Corporation in the United States and/or other countries. This product is protected by certain intellectual property rights of Microsoft. Use or distribution of such technology outside of this product is prohibited without a license from Microsoft. •...
Need help?
Do you have a question about the KD-X182BT and is the answer not in the manual?
Questions and answers