Table of Contents
Advertisement
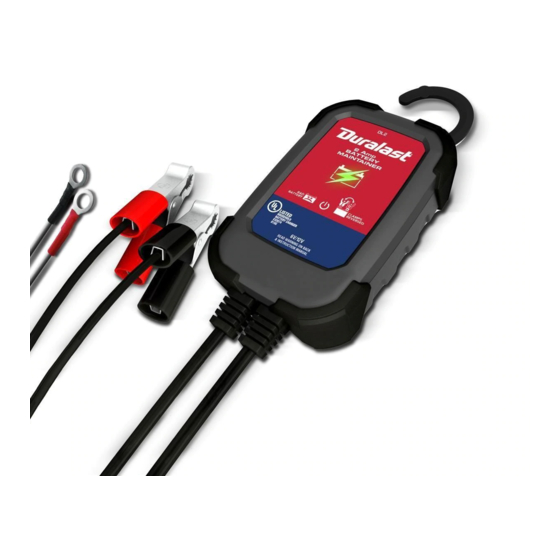
MODEL / MODELO:
DL-2D
Battery Maintainer
Mantenedor de baterías
OWNERS MANUAL
MANUAL DEL USUARIO
PLEASE SAVE THIS OWNERS MANUAL AND READ BEFORE EACH USE.
This manual will explain how to use the charger safely and effectively. Please read
and follow these instructions and precautions carefully.
POR FAVOR CONSERVE ESTE MANUAL DEL USUARIO Y LEALO ANTES
DE CADA USO. En este manual le explica cómo utilizar el cargador de manera
segura y confiable. Por favor, lea y siga las siguientes instrucciones y precauciones.
0099001795-01
Advertisement
Table of Contents

Related Manuals for Duralast DL-2D

Summary of Contents for Duralast DL-2D
- Page 1 MODEL / MODELO: DL-2D Battery Maintainer Mantenedor de baterías OWNERS MANUAL MANUAL DEL USUARIO PLEASE SAVE THIS OWNERS MANUAL AND READ BEFORE EACH USE. This manual will explain how to use the charger safely and effectively. Please read and follow these instructions and precautions carefully.
-
Page 2: Table Of Contents
CONTENTS IMPORTANT SAFETY INSTRUCTIONS ...................4 PERSONAL SAFETY PRECAUTIONS ....................5 PREPARING TO CHARGE .........................5 CHARGER LOCATION ........................6 DC CONNECTION PRECAUTIONS ....................6 FOLLOW THESE STEPS WHEN BATTERY IS INSTALLED IN VEHICLE ........6 FOLLOW THESE STEPS WHEN BATTERY IS OUTSIDE VEHICLE ..........7 GROUNDING AND AC POWER CORD CONNECTIONS ..............7 ASSEMBLY INSTRUCTIONS ......................8 FEATURES ............................8 CONTROL PANEL ..........................8... - Page 3 CONTENIDOS INSTRUCCIONES IMPORTANTES DE SEGURIDAD ..............16 PRECAUCIONES DE SEGURIDAD PERSONAL ................17 PREPARACIÓN PARA LA CARGA ....................18 UBICACIÓN DEL CARGADOR ....................... 18 PRECAUCIONES DE CONEXIÓN EN CC ..................18 SIGA ESTOS PASOS CUANDO LA BATERÍA ESTÉ COLOCADA EN EL VEHÍCULO ....19 SIGA ESTOS PASOS CUANDO LA BATERÍA SE ENCUENTRE FUERA DEL VEHÍCULO ..
-
Page 4: Important Safety Instructions
1. IMPORTANT SAFETY INSTRUCTIONS SAVE THESE INSTRUCTIONS. 1.1 SAVE THESE INSTRUCTIONS – This manual contains important safety and operating instructions. 1.2 This charger is not intended for use by children. 1.3 Do not expose the charger to rain or snow. 1.4 Use of an attachment not recommended or sold bythe battery charger manufacturer may result in a risk of fire, electric shock or injury to persons. -
Page 5: Personal Safety Precautions
2. PERSONAL SAFETY PRECAUTIONS 2.1 Consider having someone close enough by to come to your aid when you work near a lead-acid battery. 2.2 Have plenty of fresh water and soap nearby in case battery acid contacts skin, clothing, or eyes. 2.3 Wear complete eye protection and clothing protection. -
Page 6: Charger Location
4. CHARGER LOCATION 4.1 Locate charger as far away from battery as DC cables permit. 4.2 Never place charger directly above battery being charged; gases from battery will corrode and damage charger. 4.3 Never allow battery acid to drip on charger when reading electrolyte specific gravity or filling battery. -
Page 7: Follow These Steps When Battery Is Outside Vehicle
6.7 When disconnecting charger, turn switches to off, disconnect AC cord, remove clip from vehicle chassis, and then remove clip from battery terminal. 6.8 See Operating Instructions for length of charge information. 7. FOLLOW THESE STEPS WHEN BATTERY IS OUTSIDE VEHICLE WARNING: A SPARK NEAR THE BATTERY MAY CAUSE A BATTERY EXPLOSION. -
Page 8: Assembly Instructions
• Wire size must be large enough for the AC ampere rating of charger, as specified: Length of cord (feet) AWG* size of cord *AWG-American Wire Gauge 9. ASSEMBLY INSTRUCTIONS 9.1 Remove all cord wraps and uncoil the cables prior to using the battery charger. 10. - Page 9 CHARGING A BATTERY IN THE VEHICLE 1. Turn off all the vehicle’s accessories. 2. Keep the hood open. 3. Clean the battery terminals. 4. Place the charger on a dry, non-flammable surface, or use the convenient hook attachment to hang the unit safely outside the work area. 5.
- Page 10 USING THE RING CONNECTORS 1. To permanently attach to a battery, loosen and remove each nut from the bolt at the battery terminal. 2. Connect the red POSITIVE connector ring to the POSITIVE battery terminal. 3. Connect the black NEGATIVE connector ring to the NEGATIVE battery terminal. 4.
-
Page 11: Maintenance And Care
MAINTAINING A BATTERY The DL-2D maintains both 6 and 12 volt batteries, keeping them at full charge. NOTE: The maintain mode technology allows you to safely charge and maintain a healthy battery for extended periods of time. However, problems with the battery, electrical problems in the vehicle, improper connections or other unanticipated conditions could cause excessive current draws. -
Page 12: Troubleshooting
14. TROUBLESHOOTING PROBLEM POSSIBLE CAUSE SOLUTION All five LEDs come on The charger is plugged into an AC No problem; this is normal. for 2 seconds, then outlet. turn off. I cannot select a 6V or The charger is equipped with No problem;... -
Page 13: Before Returning For Repairs
PROBLEM POSSIBLE CAUSE SOLUTION The battery is sulfated. The charger is in desulfation The red mode. Continue charging for BATTERY LED is lit. several hours. If not successful, have the battery checked. Lack of progress is detected and The battery may be overheated. battery voltage is below 14.2V (for If so, allow the battery to cool. -
Page 14: Specifications
16. SPECIFICATIONS Input Voltage ..............120V AC @ 60Hz, 0.5A Output Voltage .........6V or 12V, with Auto Voltage Detection Output Current Rating ...............2A @ 6V and 12V 17. REPLACEMENT PARTS Ring connectors (quick-connect) ............ 2299001950Z Battery clamps (quick-connect) ............3899001404Z 18. LIMITED WARRANTY SCHUMACHER ELECTRIC CORPORATION, 801 E. - Page 15 Manufacturer makes no other warranties, including, but not limited to, express, implied or statutory warranties, including without limitation, any implied warranty of merchantability or implied warranty of fitness for a particular purpose. Further, Manufacturer shall not be liable for any incidental, special or consequential damage claims incurred by purchasers, users or others associated with this product, including, but not limited to, lost profits, revenues, anticipated sales, business opportunities, goodwill, business interruption and any other injury or damage.
-
Page 16: Instrucciones Importantes De Seguridad
1. INSTRUCCIONES IMPORTANTES DE SEGURIDAD GUARDE ESTAS INSTRUCCIONES. 1.1 GUARDE ESTAS INSTRUCCIONES – Este manual contiene instrucciones operativas y de seguridad de importancia. 1.2 Este cargador no está destinado para ser usado por niños. 1.3 No exponga el cargador a la lluvia o a la nieve. 1.4 El uso de un accesorio no recomendado o suministrado por el fabricante del cargador de baterías puede provocar riesgo de incendio, descarga eléctrica o lesiones a personas. -
Page 17: Precauciones De Seguridad Personal
b. Para reducir el riesgo de explosión de una batería, siga estas instrucciones y aquellas publicadas por el fabricante de la batería y por el fabricante de cualquier equipo que intente utilizar en la proximidad de la batería. Revise las pautas de precaución en estos productos y en el motor. -
Page 18: Preparación Para La Carga
3. PREPARACIÓN PARA LA CARGA 3.1 Si resulta necesario extraer la batería del vehículo para cargarla, siempre retire el terminal con descarga a tierra en primer lugar. Asegúrese de que todos los accesorios en el vehículo se encuentren apagados para evitar la formación de arcos eléctricos. 3.2 Asegúrese de que el área que rodea a la batería se encuentre bien ventilada mientras se carga la batería. -
Page 19: Siga Estos Pasos Cuando La Batería Esté Colocada En El Vehículo
6. SIGA ESTOS PASOS CUANDO LA BATERÍA ESTÉ COLOCADA EN EL VEHÍCULO ADVERTENCIA: UNA CHISPA PROVOCADA CERCA DE LA BATERÍA PUEDE CAUSAR LA EXPLOSIÓN DE LA BATERÍA. PARA REDUCIR EL RIESGO DE PROVOCAR CHISPAS CERCA DE LA BATERÍA: 6.1 Ubique los cables de C.A. y C.C. para reducir el riesgo de daños a la cubierta, a la puerta y a las piezas móviles o calientes del motor. -
Page 20: Conexiones A Tierra Y Energía De Ca
7.2 Sujete al menos un cable aislado de batería de 24 pulgadas (61 cm) de largo con calibre 6 según el Calibre americano de cables (AWG, por sus siglas en inglés) al borne NEGATIVO (NEG, N, -) de la batería. 7.3 Conecte el gancho POSITIVO (ROJO) del cargador al borne POSITIVO (POS, P, +) de la batería.
Need help?
Do you have a question about the DL-2D and is the answer not in the manual?
Questions and answers