Table of Contents
Advertisement
Available languages
Available languages
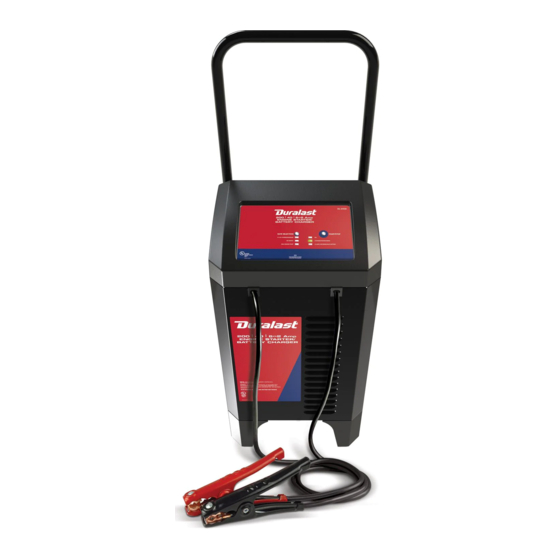
MODEL / MODELO:
DL-200D
Engine Starter/
Battery Charger
Arrancador del motor /
Cargador de baterías
OWNERS MANUAL
MANUAL DEL USUARIO
PLEASE SAVE THIS OWNERS MANUAL AND READ BEFORE EACH USE.
This manual will explain how to use the battery charger safely and effectively.
Please read and follow these instructions and precautions carefully.
POR FAVOR CONSERVE ESTE MANUAL DEL USUARIO Y LEALO ANTES DE
CADA USO. En este manual le explica cómo utilizar el cargador de batería de
manera segura y confiable. Por favor, lea y siga las siguientes instrucciones y
precauciones.
0099002220-00
Advertisement
Table of Contents

Related Manuals for Duralast DL-200D

Summary of Contents for Duralast DL-200D
- Page 1 MODEL / MODELO: DL-200D Engine Starter/ Battery Charger Arrancador del motor / Cargador de baterías OWNERS MANUAL MANUAL DEL USUARIO PLEASE SAVE THIS OWNERS MANUAL AND READ BEFORE EACH USE. This manual will explain how to use the battery charger safely and effectively.
-
Page 2: Table Of Contents
CONTENTS IMPORTANT SAFETY INSTRUCTIONS ....................4 PERSONAL SAFETY PRECAUTIONS ....................4 PREPARING TO CHARGE ........................5 CHARGER LOCATION ..........................5 DC CONNECTION PRECAUTIONS .....................5 FOLLOW THESE STEPS WHEN BATTERY IS INSTALLED IN VEHICLE .........5 FOLLOW THESE STEPS WHEN BATTERY IS OUTSIDE VEHICLE ..........6 GROUNDING AND AC POWER CORD CONNECTIONS ..............6 ASSEMBLY INSTRUCTIONS ........................6 CONTROL PANEL ..........................6 OPERATING INSTRUCTIONS ......................7... - Page 3 CONTENIDOS INSTRUCCIONES IMPORTANTES DE SEGURIDAD ...............12 PRECAUCIONES DE SEGURIDAD PERSONAL ................12 PREPARACIÓN PARA LA CARGA .....................13 UBICACIÓN DEL CARGADOR ......................13 PRECAUCIONES DE CONEXIÓN EN CC ..................13 SIGA ESTOS PASOS CUANDO LA BATERÍA ESTÉ COLOCADA EN EL VEHÍCULO ....14 SIGA ESTOS PASOS CUANDO LA BATERÍA SE ENCUENTRE FUERA DEL VEHÍCULO ...14 CONEXIONES A TIERRA Y ENERGÍA DE CA ...................15 INSTRUCCIONES DE MONTAJE .......................15 PANEL DE CONTROL ..........................15...
-
Page 4: Important Safety Instructions
1. IMPORTANT SAFETY INSTRUCTIONS SAVE THESE INSTRUCTIONS. 1.1 SAVE THESE INSTRUCTIONS – 1.8 Do not operate charger if it has received This manual contains important safety a sharp blow, been dropped, or otherwise and operating instructions. damaged in any way; take it to a qualified serviceman. -
Page 5: Preparing To Charge
3. PREPARING TO CHARGE 3.1 If necessary to remove battery from battery without removable cell caps, such vehicle to charge, always remove as valve regulated lead acid batteries, grounded terminal from battery first. Make carefully follow manufacturer’s recharging sure all accessories in the vehicle are off, instructions. -
Page 6: Follow These Steps When Battery Is Outside Vehicle
7. FOLLOW THESE STEPS WHEN BATTERY IS OUTSIDE VEHICLE WARNING: A SPARK NEAR THE 7.4 Position yourself and free end of cable as BATTERY MAY CAUSE A BATTERY far away from battery as possible – then EXPLOSION. TO REDUCE THE RISK OF connect NEGATIVE (BLACK) charger clip A SPARK NEAR THE BATTERY: to free end of cable. -
Page 7: Operating Instructions
LED INDICATORS CLAMPS REVERSED/BAD BATTERY (red) LED lit: The charger has detected a ON (yellow/orange) LED lit: problem with the battery. The charger is charging the battery. See Troubleshooting for more information. CHARGED/MAINTAINING (green) NOTE: See Operating Instructions for a LED lit: The battery is fully charged complete description of the charger modes. - Page 8 Bad Battery (red) LED will light. Do not battery following the instructions given continue attempting to charge this battery. in Follow These Steps When Battery Have it checked or replaced. is Installed in Vehicle. 2. Connect the charger to a live grounded DESULFATION MODE 120V AC outlet.
-
Page 9: Maintenance And Care
Engine Starting, the unit will automatically the unit will set the rate to Boost, and it will exit from the charging mode, just as if the automatically start the charge process. The STOP button had been pressed; the ON On (yellow/orange) LED will light. LED will not be lit. -
Page 10: Before Returning For Repairs
PROBLEM POSSIBLE CAUSE SOLUTION The red Clamps Reversed/ The battery voltage is still The battery could be bad. Bad Battery LED is lit. under 10V (for a 12V battery) Have it checked or replaced. or 5V (for a 6V battery) after 2 hours of charging. -
Page 11: Limited Warranty
16. LIMITED WARRANTY WARRANTY NOT VALID IN MEXICO. SCHUMACHER ELECTRIC CORPORATION, 801 BUSINESS CENTER DRIVE, MOUNT PROSPECT, IL 60056-2179, MAKES THIS LIMITED WARRANTY TO THE ORIGINAL RETAIL PURCHASER OF THIS PRODUCT. THIS LIMITED WARRANTY IS NOT TRANSFERABLE OR ASSIGNABLE. Schumacher Electric Corporation (the “Manufacturer”) warrants this battery charger for two (2) years from the date of purchase at retail against defective material or workmanship that may occur under normal use and care. -
Page 12: Instrucciones Importantes De Seguridad
1. INSTRUCCIONES IMPORTANTES DE SEGURIDAD GUARDE ESTAS INSTRUCCIONES. 1.1 GUARDE ESTAS INSTRUCCIONES – 1.8 No utilice el cargador si el mismo recibió Este manual contiene instrucciones un golpe fuerte, si se cayó o si sufrió operativas y de seguridad de importancia. daños de cualquier otra forma;... -
Page 13: Preparación Para La Carga
ácido puede producir una corriente de suministrar energía a sistemas eléctricos cortocircuito lo suficientemente elevada de baja tensión más que en una aplicación como para soldar un anillo o provocar de un motor de arranque. No utilice este efectos similares sobre el metal, cargador de batería para cargar baterías causando una quemadura de gravedad. -
Page 14: Siga Estos Pasos Cuando La Batería Esté Colocada En El Vehículo
6. SIGA ESTOS PASOS CUANDO LA BATERÍA ESTÉ COLOCADA EN EL VEHÍCULO ADVERTENCIA: POSITIVO (ROJO) del cargador de UNA CHISPA PROVOCADA CERCA batería al borne POSITIVO (POS, P, +) sin DE LA BATERÍA PUEDE CAUSAR LA descarga a tierra de la batería. Conecte EXPLOSIÓN DE LA BATERÍA. -
Page 15: Conexiones A Tierra Y Energía De Ca
8. CONEXIONES A TIERRA Y ENERGÍA DE CA 8.1 Este cargador de batería está destinado a NOTA: De acuerdo a las Leyes un uso en un circuito con tensión nominal Canadienses, el uso de un enchufe de 120 V y posee un enchufe con descarga adaptador no es permitido en el Canada. -
Page 16: Instrucciones De Operación
11. INSTRUCCIONES DE OPERACIÓN ADVERTENCIA: UNA CHISPA 6. Presione el botón START para PROVOCADA CERCA DE LA BATERÍA comenzar a cargar inmediatamente. PUEDE CAUSAR UNA EXPLOSIÓN. Si el botón START no se presiona dentro de los treinta segundos CARGA DE LA BATERÍA posteriores a cuando se encendió... - Page 17 MODO DE DESULFATACIÓN 1. Con el cargador desenchufado del La desulfatación puede durar 8 a 10 tomacorriente de C.A., conecte el horas. Si la desulfatación falla, la carga se cargador a la batería siguiendo las abortará y luz LED Bad Battery (rojo) se instrucciones que figuran en la sección encenderá.
-
Page 18: Mantenimiento Y Cuidado
• Esperar para dar arranque – ENCENDIDO AUTOMÁTICO El cargador espera hasta que se le de Este cargador está equipado con una arranque al motor antes de suministrarle función de inicio automático, que se activa amperes para que arranque. sólo cuando el cargador se enciende por primera vez. - Page 19 PROBLEMA CAUSA POSIBLE SOLUCIÓN Sin inicio al arrancar Consumo mayor a índice de El tiempo de arranque varía según el motor. arranque. la cantidad de corriente consumida. Si el arranque consume más de índice de arranque, el tiempo de arranque podría ser menor a 5 segundos.
-
Page 20: Antes De Devolver A Reparaciones
14. ANTES DE DEVOLVER A REPARACIONES Si estas soluciones no eliminan el problema, o para obtener más información sobre la solución de problemas, llame al: Servicio de atención al cliente de Schumacher Electric Corporation 1-800-621-5485 Devuelva producto para reparación bajo garantía a su tienda de AutoZone local.
Need help?
Do you have a question about the DL-200D and is the answer not in the manual?
Questions and answers
why is the yellow light flashing and none of the functions will work, even after turning it off and letting it rest over 30 minutes?
A flashing yellow light on a Duralast DL-200D indicates that the Engine Start LED is blinking. This means you need to wait 3 minutes (180 seconds) of rest time before attempting the next crank. The functions are not working because the charger requires this cooldown period between cranking attempts.
This answer is automatically generated
Tienen el diagrama de conexión y cableado de la la placa principal? Accidentalmente se jalo el cable de toma de energía y se desconectaron los cables pero no se cómo va el orden para reconectar los, no sufrieron daño las terminales ni los cables, solo se soltaron
start charger electic diagram fo 200 Duralast 20 Amp
Electrical diagram
Can I see a diagram of electrical inside battery chargers