
Subscribe to Our Youtube Channel
Related Manuals for Kingwell 600 Series

Summary of Contents for Kingwell 600 Series
- Page 1 Instruction For Use High Precision Colorimeter High Precision Colorimeter Professional Professional color color environmental testing environmental testing instruments instruments...
-
Page 2: Table Of Contents
C O N T E N T S 1、Summarize Introduction ……………… … … … … … … … … … … … … …… … … … … … … … … … … … … … … … … … … Feature ………………... - Page 3 ……………… … … … … … … … … … ……………… 5.4 Time ……………………… … … … … … … … … … … …… 5.5 Rest ……………………………… … … … … … … ……… 5.6 Menu 5.7 Es timat …...
- Page 4 6.2 Power function ……………………………………………… …………………………………………… 6.3 Safety instruction ……………………………… … … … … …… 6.4 Powder test tube 7、USB connection & computer driver installation 7.1 Driver description …………………………… … …………… 7.2 Instrument … … … … …… … … … … … … … … connection 7.3 USB ……...
-
Page 5: 1、Summarize
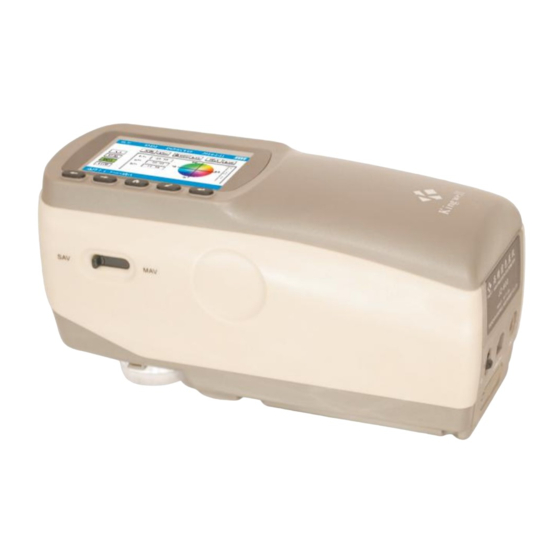
1. Summarize 600 series high precision colorimeter JZ-600 JZ-610 JZ-630 JZ-650 High precision Small-caliber Large-caliber Multifunction 1.1 Introduction: This high precision colorimeter is developed and produced according to the international standard of CIE and GB. By adopting the latest 8/d optical configuration and equipped with sensor of high sensitivity. -
Page 6: Accessory
Optional micro-printer accessory * Note: In the 600 series, only JZ-650 has 8MM and 4MM dual port, other models just have one. Condition: Operating temperature: 0 to 40°C,relative humidity 80% or less, no condensation. Storage temperature:10 to 30°C, relative humidity 70% or less. -
Page 7: 2、Architectural Feature And Working Principle
Lithium battery can not be squeezed and put into fire, otherwise it will be dan- gers.Recharge the battery if necessary so as not to affect the test accuracy. The instrument should not put on the high temperature environment long-term, it would cause the instrument accuracy reduced and performance fault. Do not use the instrument in areas where dust, smoke, corrosive gases into the instrument inside, it may cause the damage of instrument. -
Page 8: Working Principle
Main parts 14MM objection cover objection cover objection cover Calibration box Zero correction White correction 2.2 2 Wo rk ing prin ci ple According to the light of tristimulus principle established by CIE, the standard illuminant irradiates to the surface of the object, and then the light will be sensed by the sensor by the diffuse of the internal integrating sphere, the information of the reflected light received by the sensor will be transmitted to the micro- computer for calculating and analyzing, at the same time the digital color data... -
Page 9: 3、Technical Characteristic
△ E* =[(△L*)2 +(△a*)2+(△b*)2 ]1/2 △E*:The total color difference △ L* = L*Sample- L*Standard △ L+ Whitish, △L- Blackish △ a* = a*Sample - a*Standard △ a+ Reddish, △a- Greenish △ b* = b*Sample - b*Standard △ b+ Yellow, △b- Bluish Basic judgment of Color-difference Color-difference range Basic judgment of Color-difference... -
Page 10: 4、How To Use The Instrument
large-caliber JZ-630 ultifunction JZ-650 Optical geometry 8/d, equipped with SCI and SCE Synchronous test mode Measure caliber 14MM MAV:8MM SAV:4MM Observer 2°& 10° Silicon photodiode array Sensor System language Simplified Chinese,Traditional Chinese, English Standard deviation △E﹡ab≤ 0.08( Using Standard deviation △E﹡ab≤ 0.06( Using repeatability the standard whiteboard to measure 30 the standard whiteboard to measure 30... -
Page 11: Standard Measured
4.2 Standard measured Press and hold the ‘Test’ key, target spot will appear in the instrument, the instrument will enter into the state of measurement after the p o s i t i o n i s set. After the instrument enters the test interface, the default is single measurement, the top status bar displays the measure caliber of current instrument is 8MM, the measuring condition is D65/SCI/10°, let the measurement hole being tightly connected to the object and then press the ‘Test’... -
Page 12: 5、Function Menu
5. Function menu Press ‘ ’ key to enter the system menu interface, 8 functions to select: <PC-USB>, <Tolerance>, <Test>, <Time>, <Rest>, <Menu>, <Estimate>, <language>. 5.1 PC-USB Select and enter into the interface of <PC-USB>, after the software is installed and enter into the communication state, then PC software can be operated. -
Page 13: Tolerance
5.2 Tolerance Tolerance setup is setting the qualified color difference data, which should be the maximum, allowable when testing. After you setup, it would automatically determine if the measured object is qualified or not. Select the <tolerance>, and press the ‘Enter’ key to enter the tolerance setup interface, the default value is 1.0, After tolerance has been adjusted by the fr- ont and rear key keys, exit and save current settings. - Page 14 5.4 Time After entering <Time setup> interface, you can adjust and reset the time. After exit, the reset can be automatically saved. 5.5 Rest Formatting will clear all the saved data in the instrument, please be careful!
- Page 15 5.6 Menu In the Angle of view, the measurement conditions can be reset, the instru- ment defaults to SCI/10°. If you need auto save, confirm with the front and rear key and then exit. In this way will the instrument automatically save the standards and sample values.
-
Page 16: Power Function
5.8 Language There are Simplified Chinese, Traditional Chinese and English three languages to select, it will be automatically saved when you confirm exit. 6. Other function introduction 6.1 Standby and wake up In order to save the battery power, the instrument would enter the standby state of black screen if you don’t use it for 5 minutes. -
Page 17: 7、Usb Connection & Computer Driver Installation
7. USB connection & computer driver installation 7.1 Driver description When you connect the computer of the first time, you should install our own drive. 7.2 Instrument connection Enter the <PC communication> interface and select the PC communication, it would appear the USB connection interface when you press Enter key. Note: The instrument must enter into “USB<----->”can connect communication with it. - Page 18 It would popup the dialog box later. Click‘Next’ to install, or install the specified location from the list.
- Page 19 Click‘Browse’ to find the ‘Driver File’ in the CD-ROM directory, and click ‘Next’,the installation wizard will automatically install the driver. Click ‘Finish’, the driver has finish the installation...
- Page 20 8. Troubleshooting guide Checkpoint Condition Recommended action A、Change a new battery 、 no power of the battery 、 can not startup 、 、 insert the wrong polarity B Insert the correct polarity A、Close contact of the 、 not close contact, or it may object surface, and shake when you measured measuring smoothly...
- Page 21 S H E N Z H E N K I N G W E L L I N S S T R U M E N T C O ., LT D Tel :07 55 - 2 819 2 52 1 Fa x:0 75 5 - 28 19 70 9 8 H ttp:w w w .s zj zyq .co m E- ma i l:14762308@qq.com...
Need help?
Do you have a question about the 600 Series and is the answer not in the manual?
Questions and answers