
Subscribe to Our Youtube Channel
Related Manuals for Bistos BT-350E


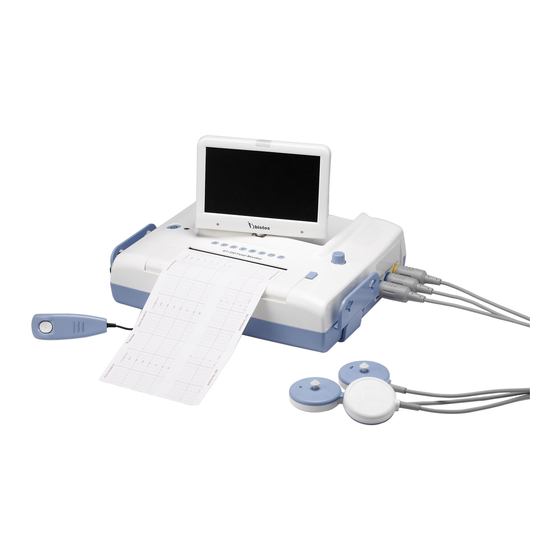
Summary of Contents for Bistos BT-350E
- Page 1 BT-350 Fetal Monitor Operation Manual BT-350, BT-350E Keep this manual for future reference P/N: 350-ENG-OPM-EUR-R18 Printed in Korea, July 2019...
-
Page 2: Table Of Contents
2.6 Trend mode ································································································································ 25 2.7 CTG (Cardiotocography) analysis function ················································································ 25 2.8 CCV (Cross-channel verification) function ··············································································· 27 3. Operation of BT-350E ································································································ 29 3.1 Buttons ····································································································································· 29 3.2 Information messages ·············································································································· 29 3.3 Control knob and system setting ····························································································· 30 3.4 Data saving ·······························································································································... - Page 3 BT-350 Operation Manual 8. Event marker ·········································································································· 45 8.1 Event marker ···························································································································· 45 8.2 Clinical event marker ··············································································································· 45 9. Cleaning and disinfection ························································································ 46 9.1 Monitor ···································································································································· 46 9.2 Probes ······································································································································ 46 9.3 Belt ··········································································································································· 47 9.4 Contacting components ··········································································································· 47 9.5 Description of Cidex ··············································································································...
-
Page 4: Safety Information
BT-350 Operation Manual Safety information This manual is for trained healthcare professionals using the BT-350 fetal monitor. It describes how to set up and use the monitor and transducers. Familiarize yourself with all instructions including warnings and cautions before starting to monitor patients. You should be: ... - Page 5 BT-350 Operation Manual Indicates the weight limit This symbol indicates the manufacturer. This symbol indicates the production date. This symbol indicates the serial number of the device. This symbol indicates the authorized representative in the European Community of the manufacturer. This symbol indicates a type BF applied part.
- Page 6 BT-350 Operation Manual 0.1 Before using the monitor Fetal monitoring technology available today is not always able to differentiate a fetal heart rate (FH) signal source from a maternal heart rate (MHR) source in all situations. Therefore, you should confirm fetal life by independent means before starting to use the fetal monitor, for example, by palpation of fetal movement or auscultation of fetal heart sounds using a fetoscope, stethoscope, or Pinard stethoscope.
-
Page 7: General Precautions, Warnings And Cautions
Only the AC line cord supplied with the BT-350, or its equivalent, is approved for use with the BT-350. • Do not attempt to service the BT-350 monitor. Only qualified service personnel by Bistos Co., Ltd. should perform any needed internal servicing. •... - Page 8 Do not remove the covers of BT-350 yourself to avoid damage to the equipment and unexpected electric shock. Only qualified Bistos service engineer must repair BT-350 or replace a component. Check the rating of the power source compatible with the input voltage rating of the...
- Page 9 BT-350 Operation Manual adapter. Only use the supplied or appointed AC/DC adaptor. CAUTION The equipment conforms to Class I according to IEC/EN 60601-1(Safety of Electric Medical Equipment) This equipment conforms to Level B according to IEC/EN 60601-1-2 (Electromagnetic ...
-
Page 10: Shock Hazards
BT-350 Operation Manual CAUTION cause the finger wound. Also, do not prick the inside of BT-350 when the printer door is open. This can cause damage to the device or electric shock. 0.3 Shock hazards WARNING Do not attempt to connect or disconnect a power cord with wet hands. Make ... -
Page 11: General Precautions On Environment
Power off when the Do not disjoint or equipment is not fully disassemble the device. ready to operate. Bistos Co., Ltd. does not Otherwise, the equipment take responsibility for it. could be damaged. -
Page 12: System Basics
The two probes are equipped to detect the fetal heart rate and heartbeat sound of twins. The detection and measurement result can be displayed on the LCD (BT-350) or on LED (BT-350E). 1.3 System configurations The basic configuration of BT-350 •... - Page 13 BT-350 Operation Manual • UC probe Options of BT-350 • AST probe • Li-ion Battery (14.8V, 2600mAh) Accessory Name Description Ultrasound Transducer for Measuring FHR Doppler Probe (IPX8: Waterproof) Pressure Sensor for Measuring Uterine contraction(UC) UC Probe (IPX8: Waterproof) Event Marker Used for a Fetal Movement event Z-folded type Z-folder type thermal Paper...
-
Page 14: Product Outlook
BT-350 Operation Manual 1.4 Product outlook BT-350 BT-350E Figure1-1: Front view Left side view Right side view Figure1-2: Side view... -
Page 15: Description Of System Components
BT-350 Operation Manual 1.5 Description of System components... - Page 16 Mode change button: The monitor operating mode change ⑩ Printer ON/OFF button: Turn the printer On or Off ⑪ Print door open button ⑫ Printer door ⑬ 7 segment LED Display(for BT-350E) ⑭ Name & Description Power adaptor jack connector ① Event marker connector ② RS-232C port ③...
-
Page 17: Understanding The Display
BT-350 Operation Manual Name & Description DOP1/AST connector ① DOP2/AST connector ② UC connector ③ 1.6 Understanding the display 1.6.1 BT-350 main monitoring screen display Figure 1-3 – Main monitoring screen display (BT-350) – Graph mode 1.6.1.1 Mode frame The mode frame shows the current mode. There are monitoring mode, setup mode, and trend mode. 1.6.1.2 Patient ID frame This frame displays patient identification. - Page 18 BT-350 Operation Manual 1.6.1.3 FHR graph frame The FHR graph frame displays a graphical representation of the FHR. The horizontal line is scaled according to the printer paper setting (Refer to the “Printer paper select” chapter). The graph displays 4 minutes and 30 seconds of data. This frame will show two heart rate trends when two ultrasound transducers are connected.
- Page 19 BT-350 Operation Manual the device is unable to operate properly. If this error message displayed, stop using the device and check. Message Description DOP1 OPEN DOP1 is not connected while BT-350 is monitoring DOP2 OPEN DOP2 is not connected while BT-350 is monitoring DOOR OPEN Printer door is opened while BT-350 is printing No PAPER...
-
Page 20: Essential Performance
BT-350 Operation Manual 1.6.2 BT-350E main monitoring screen display Figure 1-5 – Main monitoring screen (BT-350E) 1.6.2.1 Heart Rhythm The heart symbol is turned on according to FHR value. If FHR value is out of normal range (30 ~ 240), the heart symbol is turned off. -
Page 21: Operation Of Bt-350
BT-350 Operation Manual Operation of BT-350 2.1 System startup: Self-test The monitor performs a self-test each time it is turned on. This process allows the monitor to check various systems for proper operation. The monitor displays the startup screen during the power-on- self-test. -
Page 22: Control Knob And System Setting
BT-350 Operation Manual UC Reference Button Resets the UC baseline in monitoring mode. Puts the monitor into trend scroll mode. The trend Mode Button frames show historical patient data and the control knob provides navigation capability. Record On/Off Button Turns the record on or off. 2.3 Control knob and system setting Use the control knob to select the parameter to change and to adjust the parameter value selected. - Page 23 BT-350 Operation Manual The basic operation of the control knob to parameter settings is as follows. Activity Desired Result Press down Enter the setup menu Rotate Move the cursor Press down Select the parameter to change. Rotate Change the value Press down Store the new value.
-
Page 24: Printer Paper Select
BT-350 Operation Manual 2.3.7 Entering the patient ID Patient ID is generated automatically when BT-350 has turned on. This ID is composed of YYMMDD + 3 digits serial number. The 3 digits number can be changed manually. 2.3.8 Set date and time Set the date and time if required. -
Page 25: Data Saving
BT-350 Operation Manual CAUTION If you use a different type of paper from the selected paper type, the printed data will be incorrect. Be sure to check the selected paper type is the same with used paper. When paper type is changed, the alarm upper limit is changed to 190 and alarm lower limit is ... -
Page 26: Trend Mode
BT-350 Operation Manual Fig. 2.5 Trend mode display 2.6 Trend mode In trend mode, you can see the saved data. Press down the mode button [ ] to activate the menu shown in figure 2.4. Rotate the control knob to select the “Trend Mode”. Press down the control knob to enter the trend mode. - Page 27 BT-350 Operation Manual Fig. 2.6 CTG analysis function After selecting ON the CTG analysis function, you can use this function by pressing the [Print] button in the monitoring mode. On pressing the [Print] button, the mode will change from <Monitoring Mode> to <CTG Mode>...
-
Page 28: Ccv (Cross-Channel Verification) Function
BT-350 Operation Manual Fig. 2.9 CTG result in trend mode 2.8 CCV (Cross-channel verification) function When monitoring two fetuses with two Doppler probes, CCV function will compare the values from both probes and alerts when the values could be the same source (fetus). If the difference between two probe values is within 2 bpm for more than 25 seconds during 30 seconds monitoring period, CCV alert will be generated and icon will be displayed. - Page 29 BT-350 Operation Manual Fig. 2.12 CCV printed...
-
Page 30: Operation Of Bt-350E
The following messages are displayed to indicate the error and current operation status. The error message is displayed when the monitor is unable to operate properly. If the error message is showing up, stop using BT-350E and take appropriate action. Message Description DOP1 OPEN. -
Page 31: Control Knob And System Setting
BT-350 Operation Manual Message Description DOOR OPEN. The print door is opened. NO PAPER. Paper is not loaded LOW BATTERY. Battery charging level is 3.3 Control knob and system setting Use the control knob to select the parameter to change and to adjust the parameter value selected. The monitor has several configuration settings that the user can change. - Page 32 BT-350 Operation Manual Fig. 3.1 Alarm Upper /Lower Limit 3.3.2 DOP2 offset set The two waveforms for each Doppler transducer can be separated to prevent some confusing and enable to see the waveform clearly. When ultrasound trace separation is enabled, the trend data for ultrasound channel 2 is shifted up by 20 BPM in printing.
- Page 33 BT-350 Operation Manual Fig. 3.4 Printing speed 3.3.5 Auto printing The printer can be turned off automatically. If the value is set to 0, the printer will print out until the paper ended. If the value is set to 10, the printer will turn off after 10 minutes. You can choose among off, 10, 20, 30, 40, 50, and 60.
- Page 34 BT-350 Operation Manual Fig. 3.7 Printer paper select CAUTION If you use a different type of paper from the selected paper type, the printed data will be incorrect. Be sure to check the selected paper type is the same with used paper. When paper type is changed, the alarm upper limit is changed to 190 and alarm lower limit is ...
- Page 35 BT-350 Operation Manual 3.3.10 IP address set Set the IP address as required. Fig. 3.10 IP address set 3.3.11 Subnet mask set Set the subnet mask as required. Fig. 3.11 Subnet mask set 3.3.12 Gateway set Set the gateway as required. Fig.
-
Page 36: Data Saving
3.4 Data saving The measured data can be saved to the USB memory. After connecting USB memory to BT-350E, press down the mode button [ ] to activate the data saving function. The USB data saving indicator will be lit and the “ding-dong” sound will be generated. -
Page 37: Ccv (Cross-Channel Verification) Function
CCV information sound will be generated When the difference between two probe values is more than 2 bpm for more than 5 seconds, the CCV information sound will be turned off and BT-350E will be operating normally. If the CCV appears during printing the data, icon will be printed on the paper. -
Page 38: Understanding Alarms
BT-350 Operation Manual Understanding alarms The monitor will generate an alarm when the FHR exceeds the set alarm limits. But these limits have no significant meaning in clinical uses. One time exceeding the limits will not generate the alarm. If the alarm condition (exceeding the limits) endures for more than 20 seconds the alarm sound will be generated and the red led is flashing with the heart rate value on display will be blinking as long as the alarm condition persists or alarm is disabled by the user. -
Page 39: Pinter
BT-350 Operation Manual Printer 5.1 Loading paper Open the printer door by pressing down the [Printer door open button]. Unwrap a pack of paper and put it into the paper tray. A page from the top of the paper pack should drape forward over the shaft of the printer. The orientation of the paper is with the printed grid facing up (unfolding from the top of the pack) and the UC grid area is the right side. - Page 40 BT-350 Operation Manual FHR Trace Situation FM Trace UC Trace Fig. 5.2 Printing result Symbol Description Source of mark Possible events Press Event marker When a pregnant woman feels fetus Event Mark (by a pregnant movement woman) Press [ ] button When doctor judges fetus movement Clinical Event Mark over 2 seconds...
-
Page 41: Monitoring Fetal Heart Rate
BT-350 Operation Manual Monitoring fetal heart rate 6.1 Electromagnetic interference Strong electromagnetic fields can interfere with the ultrasound transducer and cause a false heart rate reading that does not originate from the fetus. This interference is rare and usually found in the vicinity of large machinery. -
Page 42: Detail Procedure
BT-350 Operation Manual Check the ultrasound transducer to verify proper attachment to the monitor. For monitoring twins, make sure the second ultrasound transducer is properly connected. Adjust channel one speaker volume to the middle level. Adjust channel two speaker volume to zero if monitoring twins. - Page 43 BT-350 Operation Manual Connect the ultrasound probe to the “DOP” connector. Apply a small amount of ultrasound coupling gel to the face of the transducer. Determine the position of the fetus using Leopold’s maneuvers. The strongest fetal heart tones are heard through the fetal back.
-
Page 44: Uterine Contraction (Uc)
BT-350 Operation Manual Uterine contraction (UC) Uterine contraction is measured externally by placing a pressure sensor (UC sensor) on the maternal abdomen and measure the relative pressure change. CAUTION The cable of the UC probe is not intended to contact the patient. To prevent such contact, ... - Page 45 BT-350 Operation Manual Press the UC reference button [ ] to set the UC baseline at 10. Note: After connecting or re-connecting the UC probe to the UC connector, you must wait at least 10 seconds before pressing the UC reference button [ ...
-
Page 46: Event Marker
BT-350 Operation Manual Event marker 8.1 Event marker The event marker arrow is provided so that the patient can record the time of important events. The patient merely presses the marker button at the time an event occurs. This marker time is recorded in the monitor. -
Page 47: Cleaning And Disinfection
BT-350 Operation Manual Cleaning and disinfection BT-350 requires proper care and preventive maintenance. This ensures consistent operation and maintains a high level of performance necessary in monitoring procedures. 9.1 Monitor Keep the external surface clean and free of dust, dirt, and residual liquids. Clean with a damp cloth using mild soap and water or hospital approved nonabrasive disinfectants. -
Page 48: Belt
BT-350 Operation Manual 7. Wrap the dry transducer with a fresh sterile soft towel or transparent sterile wrap for storage until next use. 9.3 Belt Wash soiled belts with soap and water. CAUTION The water temperature must not exceed 60°C (140°F). ... -
Page 49: Specifications
BT-350 Operation Manual Specifications Physical Characteristics Dimensions 9.6cm(H) x 32.6 cm(W) x 27.6cm(D) Weight Approx. 5.5 kg Safety Standard EN 60601-1, EN 60601-1-2, EN 60601-2-37 Classification Class I, Internal Powered Equipment Mode of Operation Continuous operation Protection against electric Type BF applied part shock Protection against ingress IPX8(Dop/UC probe) - Page 50 BT-350 Operation Manual Paper Pack Style Z-Fold. Pack Size 150 mm x 90 mm x 15 mm End-of-Pack Mark along the paper edge Loading Open-door, slide-in Paper Detectors Paper Out Loading door open Speed Normal 1, 2 and 3 cm/min ± 1% High-speed 10 cm/min (only in Trend mode) Tracking accuracy...
- Page 51 BT-350 Operation Manual Acoustic output information for the transducer assembly Operating Mode : PW Mode Acoustic SPTA.3 SPPA.3 Output (mW/cm (mW/cm Global Maximum Value 0.04 17.6 0.396 (MPa) 0.063685 (mW) 16.7* 16.7* (MHz) 0.985 0.985 0.985 (cm) Associated Beam (cm) Acoustic dimensions (cm)
-
Page 52: Troubleshooting And Maintenance
BT-350 Operation Manual Troubleshooting and maintenance 11.1 Self-test The monitor performs self-test each time it turns on. 1. Make sure the monitor power is properly connected. 2. Check the printer paper and printer door closed. 3. Connect the probe to the monitor 4. -
Page 53: Battery
BT-350 Operation Manual 4. The change of pressure should be displayed on the screen if the probe operating properly. If there are no changes, please stop using the probe and call for the service. 11.4 Battery The capacity of the battery is gradually decreased over time and usage. Consequently, the operating time with the battery can be reduced. -
Page 54: Manufacturer's Declaration On Emc
BT-350 Operation Manual Manufacturer’s declaration on EMC BT-350 needs special precautions regarding EMC (Electromagnetic compatibility) and needs to be used according to the EMC information provided in this user manual. Wireless communications equipment such as wireless home network devices, mobile phones, cordless telephones and their base stations, walkie-talkies can affect the BT-350 and should be kept at least 1 m away from the equipment. -
Page 55: Recommended Separation Distances Between Portable And Mobile Rf Communications
BT-350 Operation Manual those directly connected to the public low-voltage power supply network that supplies buildings used for domestic Harmonic emissions purposes, provided the following warning is heeded: Class A IEC 61000-3-2 Warning: This BT-350 is intended for use by healthcare professionals only. -
Page 56: Electromagnetic Immunity
BT-350 Operation Manual 12.3 Electromagnetic immunity The BT-350 is intended for use in the electromagnetic environment specified below. The customer or the user of the BT-350 should assure that it is used in such an environment. IEC 60601 Electromagnetic environment - Immunity test Compliance level Test level... - Page 57 BT-350 Operation Manual The BT-350 is intended for use in the electromagnetic environment specified below. The customer or the user of the BT-350 should assure that it is used in such an environment. Compliance Immunity test IEC 60601 test level Electromagnetic environment - guidance level Portable mobile RF communications...
Need help?
Do you have a question about the BT-350E and is the answer not in the manual?
Questions and answers