Table of Contents
Advertisement
Quick Links
Advertisement
Table of Contents

Related Manuals for HEINKEL TOURIST

Summary of Contents for HEINKEL TOURIST
- Page 3 G U A R A N T E E Subject to the stipulations set out overleaf, we undertake to guarantee HEINKEL 175 cc. “TOURIST” MOTOR-SCOOTER Chassis No. Engine No. supplied to ER N S T HEI NK EL AKTIEN GESELLSCHAET...
- Page 4 (in block letters or typewritten) and send to the HEINKEL WORKS. The guarantee becomes effective only after this counterfoil is received. Chassis No. »HEINKEL-TOURIST« as licensed on the Engine No . Date) Steering lock key No.
- Page 5 Inspection prior to supply 1. Check electrical installation: The vehicle described overleaf was inspected before a) parking light being handed over to the customer, and the tests b) bright and dipped light incl. speedometer lighting listed down the right-hand side of this page were carried out.
-
Page 6: Heinkel Service
CONDITIONS OF GUARANTEE 1. HEINKEL guarantee the first owner-user of a new HEINKEL Scooter for a period of six months from the date of first registration of the vehicle with the competent authorities, faultless material and good workmanship corresponding to the present level of technical progress, this guarantee, however, being limited to 6250 miles. - Page 8 It is our aim to make sure that your HEINKEL Scooter gives you entire satisfaction. E R N S T H E INK EL A KT IE NG E S E L LS CHAF T...
- Page 9 Scooter will readily give you the personal service which goes with it. Wherever you see the HEINKEL Service Sign, your Tourist Scooter will get careful attention. At these Service Stations, trained and skilled mechanics with special tools take care of your TOURIST and ample spares are always available.
-
Page 10: Service
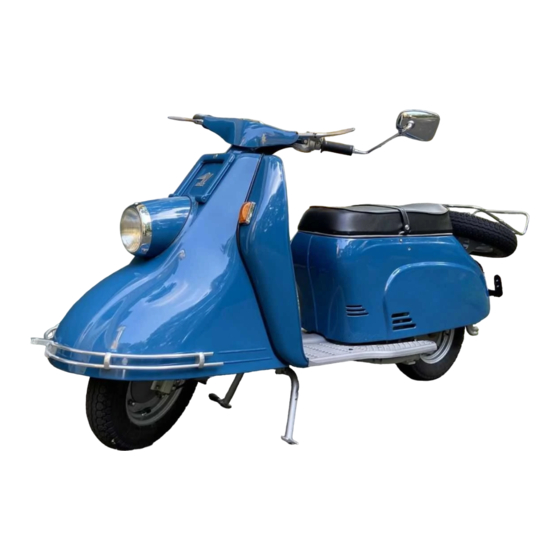
6,000 miles will be carried out at a specially reduced rate. The life and trouble– free service given by your HEINKEL TOURIST depends to a large extent upon the Running–in and Service Instructions being closely followed. Comply carefully with these Instructions and your... - Page 11 When the seat is opened, the engine and chassis numbers are located as shown chassis number dipstick model plate engine number...
- Page 12 Note! The steering lock key can only be replaced if you quote the key number Therefore enter your key number in this booklet. Number of steering lock key (i.e. number indicated on key head) Engine number Chassis number...
-
Page 13: Technical Data
TECHNICAL DATA Engine Mode of operation 4–stroke o.h.v. Model 407 A–1 Output 9.2 h.p. at 5500 r.p.m. Number of cylinders Arrangement of cylinders vertical Bore 60 mm Stroke 61.5 mm Swept capacity 174 cc Compression ratio 1 : 7.4 Valve arrangement overhead valves Valve clearance when engine cold inlet 0.15 mm exhaust 0.20 mm... -
Page 14: Carburettor
Thermal coefficient of spark plug Spark gap .020 –.024 ins. Contact breaker gap .014 –.018 ins. Spark plug thread M 14 x 1.25 Carburettor Needle carburettor with accelerator pump PALLAS–Type 20/14 P BING–Type 1/20/46 Carburettor passage 20 mm 20 mm Main jet Idling jet Needle jet... - Page 15 Gear reduction 1st gear 3.51:1 2nd gear 2.07:1 3rd gear 1.38:1 4th gear 1:1 Reduction: Engine–Gearbox 1.882 : 1 Solo Sidecar Reduction: Gearbox–Rear wheel 2.727: 1 3.10 : 1 Total reduction: 1st gear 18.05 : 1 20.50 : 1 2nd gear 10.60 : 1 12.02 : 1 3rd gear...
-
Page 16: Brakes
Front–wheel suspension telescopic fork with central springing and hydraulic shock–absorber Rear wheel suspension fully–enclosed swing arm (chain running in oil–bath), spring leg with hydraulic telescoping shock–absorber Handlebars shell handlebar unit with incorporated speedometer and twist–grip controls Brakes internally expanding shoe brakes drum diameter 140 mm (5 1/2”) width 25 mm (1”) Brake controls... - Page 17 Saddle height 735 mm Ground clearance 145 mm (approx) Wheel base 1375 mm Weights Admissible total weight Unladen weight, ready for traveling 330 Ibs. Admissible load, solo 440 Ibs. 770 Ibs. with sidecar 660 Ibs. 990 Ibs. Admissible weight of loaded sidecar 321 Ibs.
- Page 18 Fuel consumption for consumption curve, see P. 58 Fuel consumption to DIN 70030 3 litres per 100 km at 43 m.p.h. standards Maximum speed (with two riders up) 57 m.p.h. Equipment see wiring diagram 12 volt electric light special wide–beam built–in headlamp, 130 mm diameter, with BILUX bulb, 35/35 watts and parking light 2 watts Tail and number–plate lamp...
- Page 19 CONTROLS 1. Ignition switch (incorporated in front shield) a) ignition key engaged in middle position ignition switched on (red lamp in speedometer push in until resistance is felt; lights up) b) push key beyond the resistance you operate the electric starter (only when gear set to neutral) c) push key in until resistance is felt;...
- Page 20 3. Braking light This is operated automatically by the braking light switch fixed on frame covered by front shield, when ignition key has been pushed in and brake pedal depressed. Controls 1. Twist–grip throttle control zu = closed auf = open 2.
- Page 21 flywheel magneto is charging battery. If red light does not go out, this proves that either the flywheel magneto or the regulator is damaged. Have them checked at a HEINKEL Service Station or Bosch Service. 5. Dipper switch on left handlebar Turn downwards for main beam Turn upwards for dipped beam 5.
- Page 22 RUNNING–IN INSTRUCTIONS UP TO 1200 MILES The running–in period is of vital importance to the future life and the reliability of your Scooter. During this time, when all moving parts have to bed down, the throttle should not be opened fully, except for very brief periods.
- Page 23 STARTING PREPARATIONS of at least 82 octane rating (ROZ). Fuel tank capacity 11.3 litres FiII–up with branded petrol 1.8 litres of which is a reserve. Only use a branded oil (see Lubricating Schedule on P. 62), Check engine oil such as Mobiloil Special for the whole year or Mobiloil AF (SAE 40) in summer, Mobiloil A (SAE 30) in winter.
- Page 24 Test tyre pressure: Front wheel Rear wheel Sidecar Solo 18 psi 26 psi with pillion passenger 18 psi 29 psi Solo with occupied sidecar 22 psi 29 psi 22 psi with pillion passenger and occupied sidecar 22 psi 36 psi 29 psi STARTING THE ENGINE Open fuel tap opened, Once the small door on the right–hand side of the body is...
- Page 25 Open and close the twist–grip throttle a few times briefly. When the engine is cold Then press in the ignition key (red light comes on) to operate starter and at the same time open the throttle slightly. Open throttle slightly and press in key to start. When the engine is warm Starting 1.
- Page 26 DRIVING AND OPERATION OF CONTROLS Removing scooter Take hold of handlebars and push machine forward. At the same from stand time place your left foot in front of stand to avoid movement, and roll machine off stand. When the engine has been started (neutral gear), pull the clutch lever and turn the gear control twist–grip to position 1.
- Page 27 Locking of the wheels should be avoided. Use both brakes together if possible. Your TOURIST four–stroke engine, in contrast to a two–stroke engine, will take over a large part of the braking on long descents.
- Page 28 The machine is held on the left side by the handlebars and the Putting on stand stand pressed to the ground with the foot. Whilst holding the scooter by the handlebars, pull it smartly backwards until the catch of the stand is reached. This is done without difficulty and without having to lift the scooter.
- Page 29 SCOOTER MAINTENANCE AND CARE Cleaning The reliability of operation and the service life of the machine depend to a great extent on maintenance and cleaning. Very often, trouble and annoyance can be traced back to lack of proper care. The highly–polished coachwork is best washed with a sponge under running water and afterwards dried with a chamois leather, as is done with any car.
- Page 30 When replacing the rear body cowling, take care to connect the stop light cable to the correct connectors. When fastening the frame–retaining bolts, make quite sure that the cables for the braking Note! and tail lights are not trapped under the frame (danger of short–circuiting).
- Page 31 Engine Maintenance Lubrication is of particular importance with a four–stroke engine and the instructions for oil– changing must therefore be strictly adhered to. Use only proprietary oils such as Mobiloil Special for the whole year round or Mobiloil AF in the summer (SAE 40), and Mobiloil A in the winter (SAE 30).
- Page 32 open the oil filter plug (1) at the top of the cylinder cover and extract the drain plug at the bottom of the engine housing (Figs.3 and 4). When the old oil has drained away, replace the drain plug and fill with just over 1 3/4 pints of proprietary oil such as Mobiloil Special. Turn over the engine for a short time in neutral and then drain the engine oil again.
- Page 33 Checking the engine oil level Pull out and wipe dipstick (Fig. 4), then re–insert it as far as the screw cap. Check the oil level every time you fill up with petrol; it must never fall below the bottom mark on the dipstick. The maximum level is to the top mark on the dipstick.
- Page 34 Wash all parts in petrol, blow through the jets and reassemble. Re–adjust the needle position and the air control screw exactly as it was. Should the carburettor adjustment become changed, do not experiment but call on your HEINKEL Service Agent. Carburettor setting For carburettor adjustment see P.
- Page 35 Description and Component List of the BING–Carburettor Type 1/20/46 A Carburettor housing Pump piston Air regulating screw Sprayer air borehole Valve disc Spring B Cover plate Spring N Carburettor clip Cover screw G Pump jet needle Clip screw Adjusting screw Cramp bow U Float chamber H Main jet...
- Page 36 BING–Carburettor Type 1/20/46 Needle Position...
- Page 37 Description and Component List of the PALLAS–Carburettor Type 20/14 P 1 Float chamber 21 Adjuster screw 2 Slide 22 Stop spring 3 Return spring 23 Pump jet cover 4 Mixing chamber cover 24 Gasket 5 Adjuster screw 25 Float chamber cover 6 Lock nut 27 Float 8 Pump jet needle...
- Page 38 PALLAS–Carburettor Type 20/14 P...
- Page 39 If, with a cold engine, the throttle is operated several times,the pump injects into the mixing chamber amply sufficient petrol for starting. The cylinder of the accelerator pump is the lower enlarged extremity of the pump needle jet, into which the pump piston with valve disc and the pump valve screw are inserted. The pump spring presses the piston against the bottom end of the jet needle.
- Page 40 The inflow of fuel during fast running is determined by the main jet (16); with the engine running not so fast (about 3500 r.p.m.), the inflow of fuel is determined by the pump–needle jet (10) and jet needle (8). The idling jet (17) fixed on the carburettor housing by the idling jet return screw (18) provides for correct quantity of fuel necessary for idling.
- Page 41 Micronic air filter The micronic air filter needs no servicing. It keeps any dust out of the engine. The life of the paper filter insert therefore depends on the amount of dirt handled. In town and on tarred roads, it should last some 5000 miles.
- Page 42 Clutch Power is transmitted to the gearbox by means of a multi–plate clutch. Special care must be taken that the clutch lever on the handlebar has 1/16”–1/8” play. If there is too much play, the clutch does not disengage freely; too little play causes the clutch to slip and results in rapid wear. The adjuster screw for the clutch control cable is placed on the left hand engine housing cover.
- Page 43 Gear change control The gear is changed by twist–grip control on the handlebars. Gear change from handlebar to gear shift lever is by two Bowden cables. Locking of the gears in the twist–grip can be suited to the touch of the driver by adjustment of the screw (between the figures). For readjustment of the gear–shift, adjuster screws are provided on the clutch cover (see Fig.9).
- Page 44 The Brakes The front brake is adjusted by the Bowden cable adjuster screw on, the hub brake disc at the right–hand side. If the adjustment of the screw has reached its limits, the adjuster screw is screwed in completely, and the brake actuating lever is advanced by removing nut 3, prising actuating lever from the cam spindle and replacing one notch clockwise.
- Page 45 Only adjust the brakes as far as is necessary for the wheels to turn slightly, without grinding; however, have no more clearance than is necessary. Brake shoes on which the linings are worn out, should be exchanged at your HEINKEL Agent’s. µ...
-
Page 46: Electrical Equipment
It is advisable to pay special attention to the ignition and lighting system, as the reliability of the engine depends on it. Dismantling and reassembling should be done only at a HEINKEL or BOSCH Service workshop, so as to avoid damage to crankshaft or dynamo. From time to time, have the equipment checked by a specialist. - Page 47 This includes: a) Checking the contact breaker points the gap should be .014–.018 ins. (every 1500 to 2000 miles); b) Greasing of the lubrication felt at the contact breaker (use grease, not oil). c) Removal of carbon deposits and checking of brushes. require no further maintenance, but it is advisable to check the cable Coil and Regulator connections from time to time (to gain access to these, raise the cowling).
- Page 48 Plug Check the electrode gap every 1200–2000 miles. It should be .020–.024 ins. The sparking plug is accessible from the lug gage boot. Push the little metal flop aside and remove the plug, using the box spanner. When screwing in the spark plug, do so by hand, using the spanner only for final tightening, so as not to damage the thread.
- Page 49 up with distilled water. The acid level should be kept a little above the top edge of the plates. Only accumulator acid (1.28) should be used. For charging instructions, see battery cover. Do not let petrol or parrafin touch the battery. Should the scooter be laid up for some time (4 weeks or more), the batteries should be taken out and taken care of separately.
-
Page 50: Wheel Changing
Fuse Box The fuse box is located at the top right–hand side of the front shield. Access to the fuses is gained by unscrewing the fuse box cover (Fig. 14). Wheel changing Front wheel Disconnect Bowden control cable at brake lever and lean the machine over on its right side until the footplate rests on the ground and loosen 4 cap nuts with the box spanner. - Page 51 that the speedometer cable and gearbox are correctly located. The speedometer mechanism has 2 pins which ensure correct fitting of the drive to the counter ring. The notch in the brake anchor or, at the first sharp braking, the plate must be located correctly in the right–hand front fork, wheel will jam and the driver will fall.
- Page 52 Checking the tyre Pressure The life of your tyres depends to a great extent on correct pressure and careful treatment. Inflate tyres as specified on Page 19. Changing the Tyres Since, in our experience, more strain is put on the rear tyre than on the front tyre, it is advisable, in the interests of even tyre wear, to change over the front and rear wheels every 1850–2500 miles.
- Page 53 Removing the tyres Make it a principle never to use force when removing or fitting tyres! Unscrew the valve caps and screw out valve insert with reversed cap, let the air out and unscrew rim nuts from the valve. Lay the wheel flat on the ground and, by treading on it, loosen the tyre bead all round.
- Page 54 the rim. Then take out the inner tube, stand the wheel up and, using the tyre levers, force the second tyre bead (see Fig. 17) over the edge of the rim and pull the tyre sideways and off the rim. Fitting the tyres Place the slightly pumped–up inner tube in the cover so that there are no creases and with the inner tube valve, inserted at the side, facing upwards.
- Page 55 the rim), lifting the last portion of the lower bead over the rim with the tyre lever. In contrast to the lower bead, the upper bead is pushed into the drop–base rim first on the side opposite the valve. By kneeling on it, the cover can be compressed and alternately to the right and left a further section of the bead lifted over the Cross–section through tyre and rim Tyre fitted...
-
Page 56: Front Fork
edge of the rim with the tyre lever (see Fig. 18), until, in the vicinity of the valve, the last piece jumps into place; tighten the rim nuts. Always see (Fig.19) that (B) both beads lie in the drop–base rim whilst at (A) the opposite side of the tyre is being fitted. Pump the tyre up a little and check that both beads are securely inside the rim, as prescribed, by lifting up the wheel and letting it bounce on the ground. -
Page 57: Bowden Cables
Every 5000 miles, the oil in the arms of the front fork must be drained and approx 30 cc. of new oil, such as Mobiloil A (SAE 30), poured into each arm (see Fig. 21). To remove the fork, take off the front mudguard. These jobs should only be done at a HEINKEL Service Workshop, which also ensures correct assembly. -
Page 58: Exhaust
must be greased every 1500 miles with ball–bearing grease, such as Mobilgrease NO.5 (see Fig. 22). Exhaust Once the retaining ring nut has been loosened, the air duct can be turned approximately 90° so that the exhaust can be removed (see Fig. 23). Exhaust 1. -
Page 59: Winter Operation
WINTER OPERATION If the scooter is used in winter too, take care to drive slowly and to use brakes carefully on slippery roads. If all–year–round oil, such as Mobiloil Special, is not used, fill up with winter oil (SAE 30) – at any rate when the temperature drops below 40° F. To economise on weight, the scooter batteries are correspondingly small. - Page 60 STORING OF SCOOTER If the vehicle is not going to be used for a fairly prolonged period (wintering, or for any other reason), you should: 1. Clean the whole scooter thoroughly. 2. Change the oil with anti–corrosion oil, such as Mobil–Kote 503, just before storing the machine (approx.
-
Page 61: Storage
TAKING THE VEHICLE OUT OF STORAGE Run the engine warm; drain off anti–corrosion oil and fill up with 1.5 litres of proprietary oil, such as Mobiloil Special. Carry out the next oil–changes as prescribed in the Lubricating Schedule. -
Page 62: Loading Schedule
LOADING SCHEDULE Maximum Axle Loading: 275 Ibs. Maximum Axle Loading: 528 Ibs. Dead weight of scooter, ready for drive 343 Ibs. with one driver and one pillion rider up 330 Ibs. + luggage 97 lbs. Total admissible weight 770 Ibs. - Page 63 FUEL CONSUMPTION DIAGRAM Average Consumption Speed in km/hr.
- Page 64 ADJUSTING THE HEADLAMP At regular intervals, the setting of your scooter’s headlamp should be checked and, if need be, adjusted. This will give you proper lighting of the roadway, increases your riding safety and avoids endangering yourself and other road–users.
- Page 65 Preparations tor the test Mark a cross on a light wall, at the height of the beam centre. When the driver is mounted, this height is 25 ins. Set the vehicle on its wheels a little more than 16 feet from the wall (measured from the wall to the centre of the front wheel).
- Page 66 SERVICE CHART FOR 175 cc. HEINKEL TOURIST SCOOTER and every SERVICE TO BE PERFORMED miles 1. Trial run to worm up engine 1200 2. Change engine oil every 700 miles 3. Change oil in swing arm check check check check 2500 4.
- Page 67 Service at miles Lubricating Type of lubricant to be used Service point summer winter Special Engine Complete change X X X X X X X 1250 Mobil-Oil when engine warm gearbox 2500 Complete change Swing arm Mobil-Oil Front fork Drain and refill 6250 Mobil-Oil Dismantle and...
-
Page 68: Breakdowns
BREAKDOWNS 1. Engine will not start though operated according to the instructions on Page 19/20 1. Fuel tank empty refill tank 2. Fuel tap closed or not set for reserve open fuel tap or set for reserve 3. Fuel system blocked clear system by blowing through it with compressed air 4. - Page 69 II. Starter turns engine, but engine does not start 1. Spark plug fouled, defective clean or replace plug, correct gap to or gap too wide .020–.024 ins. 2. Contact breaker points dirty or clean contact breaker points, reset or replace, worn, contact breaker rocker clean contact breaker rocker arm pivot arm sticking...
- Page 70 IV. Engine cuts out and stops suddenly 1. No fuel or insufficient reaching engine fuel proceed as under I, 1–4 2. Sparking plug defective replace sparking plug 3. Ignition cables loose fasten and tighten cable connections 4. Contact breaker rocker arm sticking clean contact breaker rocker arm fulcrum pin V.
- Page 71 3. Engine needs oil check oil level in engine and fill up if necessary 4. Carburettor mixture too lean tighten carburettor clamp bolt and test for original setting 5. Brakes bind and get hot re-adjust brakes VII. Lights not working 1.
-
Page 72: Table Of Contents
CONTENTS Foreword ..........3 Gearbox ..........38 HEINKEL Service ........4 Brakes ..........39 Service ..........5 Electrical equipment ......41 Important Data ........6 Wheel changing ........45 Technical Data ........8 Front fork ..........51 Operation ..........14 Bowden cables ........52 Running-in ..........17 Speedometer drive ........52 Preparing to start ........18 Exhaust ..........53...
Need help?
Do you have a question about the TOURIST and is the answer not in the manual?
Questions and answers