Table of Contents
Advertisement
Quick Links
Advertisement
Table of Contents

Related Manuals for Automaxx 400 Watt Turbine


Summary of Contents for Automaxx 400 Watt Turbine
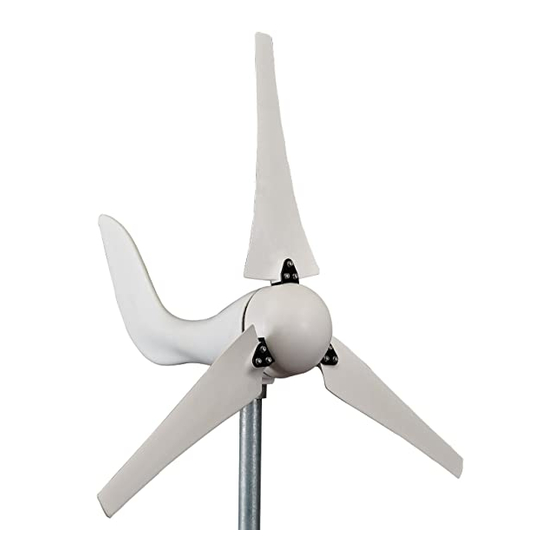
- Page 1 400 Watt Windmill User’s Manual Version: 2022, Sep.
-
Page 3: Table Of Contents
3. SYSTEM PROTECTION ..................7 3.1 Digital-controlled MPPT..................7 3.2 Manual Stop Switch ..................8 4. PACKAGING CONTENTS.................10 5. INSTALLATION PROCEDURE.................11 6. AUTOMAXX BLUETOOTH APP.................15 7. MAINTENANCE ..................17 8. FAQS ......................18 9. TROUBLESHOOTING ................21 AUTOMAXX WARRANTY POLICY................22 APPENDIX A IMPORTANT SAFETY INSTRUCTIONS........26 APPENDIX B BEAUFORT WIND SCALE ..........29... -
Page 5: Safety
1. SAFETY Your wind turbine is designed with your safety as the priority. However, there are still some inherent dangers involved with any electrical and/or mechanical equipment. Safety must be the primary concern as you plan the location, installation, and operation of the turbine. Please carefully read the following: Important Safety Instructions Carefully go through this manual before initiating the wind turbine... -
Page 6: Mechanical Hazard
1.1 Mechanical Hazard Rotating blades present the most serious mechanical hazard. The rotor blades are made of very strong glass fiber & polypropylene and the blades may reach velocities over 15 m/s. At this speed, the tip of the blades are nearly invisible and can cause serious injury. - Page 7 B) Distance from human habitat. • Install your turbine with some distance from the human activity areas as not to disturb your neighbors and animals around. The noise and vibration element cannot be got rid of even if this wind turbine offers the lowest noise than any others on the market.
-
Page 8: Specification And Protection
20 feet (6m) 2. SYSTEM SPECIFICATION 2.1 Specification Model 400 Watt Turbine Rated speed 28 mph / 12.5 m/s Rated power 400 watts Output Voltage 0-15V Cut-in wind speed 6.7 mph / 3 m/s Survival wind speed 112 mph / 50 m/s Rotor diameter 4 ft / 1.22 m... -
Page 9: Performance
* The Manual stop switch should be activated when the wind speed upwards of 30mph (13 m/s). * Survival wind speed means that the wind turbine will survive at 112 mph (50 m/s), when the Manual stop switch is turned on. Exceeding this will result in wind turbine failure and collapse. -
Page 10: Wiring Requirement
2.3 Wiring Requirements 12V Volt System, AWG / Metric Wire Size mm2 Distance between Turbine 0 - 30 ft. (0- 9 m) 0 - 70 ft. (0- 21 m) and Battery Bank Wire Gauge 10/6 mm2 8/10 mm2 Please refer to the recommended wire gauge table and select the appropriate wire size for your system. -
Page 11: System Protection
Caution 1: Any usage of under-sized wire can be potentially dangerous; our warranty does not cover damages caused by using an incorrect wire gauge. Distance between turbine and the battery pack should be kept as low as possible and should not exceed more than 30 meters for safety reasons (Be sure to include the height of the turbine). -
Page 12: Manual Stop Switch
3.2 Manual Stop Switch The wind turbine has a built-in controller with braking device protection. Further to this protection, we have incorporated a secondary level of safety and convenience with a manual brake. During periods of high winds (upwards of 30 mph, 13 m/s) it is strongly advised to utilize your manual stop switch. - Page 13 Turbine Yellow (BRAKE) Manual Stop Switch NOTES • It is strongly advised to test the manual stop switch periodically. • Your manual stop switch is pre-wired with 8 AWG wire, this should not be altered. • The manual stop switch should be placed close to your turbine in a dry ventilated environment.
-
Page 14: Packaging Contents
4. PACKAGE CONTENTS Check the parts listed with the contents of the box and make sure that you have everything needed for assembly. Caution: The edges of the blades are sharp. Please handle it with care. Parts List Parts Name Quantity Generator (integrated with Tail and Hub) Blade... -
Page 15: Installation Procedure
5. INSTALLATION PROCEDURE Step 1 : Open box and ensure all parts are present. Blade Generator Tail Nose Cone Base Step 2: Carefully observe windmill layer for easy and quick installation. Step 3: Install the wind turbine to your chosen tower and fasten the bolt securely by using the hex key (The Yaw Shaft includes a rubber spacer to ensure the connection is secure). - Page 16 Step 4 : Fasten the blades on the hub with nuts by using the hex key and unilateral open wrench. (Make sure that all of the bolts are secured with nuts.)
- Page 17 Step 5 : Fit the nose cone onto the hub by applying a gentle pressure to ensure a secure fit. Step 6 : Final product diagram. Note : The wind turbine pole kit is not included with the unit.
- Page 18 Caution: After installing, check and make sure that there is no flange/ coupler/ support cable ring lies within 1.7 m from the wind turbine center/ hub. Cylindrical shape poles are recommended for installing the turbine and there should be sufficient free space/ gap between the pole and the wind turbine blades as, during the wind gust, blades bend a little towards the inside.
-
Page 19: Automaxx Bluetooth App
6. AUTOMAXX BLUETOOTH APP You can control and monitor your wind turbine by using our App. You can download the App by scanning the barcode. You can also download our App by visiting our website, https://automaxxwindmill.com/support/ Introduction to the App First turn ON the phone/ device's Bluetooth. - Page 20 • On top of the home page, the total power generated from the turbine will be displayed. • The bottom section will provide you information such as the wind blowing, manual brake status, and battery status (Full / Charging / Low ). •...
-
Page 21: Maintenance
7. MAINTENANCE Your wind turbine has been designed to run for long periods. The performance will be enhanced if you periodically inspect your system. Review the following simple maintenance procedures and implement them every six months. Caution : Do not go near the wind turbine during operation. The blades are sharp. -
Page 22: Faqs
8. FAQS (1) How does the wind turbine control power and RPM in high winds? Your Turbine’s operation will be halted to reduce the risk of damage due to overcharge and over-spin of the rotor blades. This process of braking is handled internally through the in-built MPPT charge controller. - Page 23 (6) Where can I locate tubing to make a tower? Your wind turbine is designed to make mounting as simple and straightforward as possible. Should you not wish to purchase the custom tower kit feel free to utilize schedule 48.3 mm steel tubing. This should be available through your local hardware outlet.
- Page 24 (9) Is lightning protection necessary? You should ground your wind turbine. Proper grounding (illustrated below) protects individuals to individuals and equipment by eliminating the possibility of dangerous voltage. Remember a steel tower is a conduit for lightning. Every wind turbine and turbine tower needs to be grounded at the tower base even though the system may be grounded at the battery bank.
-
Page 25: Troubleshooting
For more latest FAQ's, checkout our website: https:// automaxxwindmill.com/faq/ or Scan the QR Code: 9.TROUBLESHOOTING You may require an extra person to assist with these tests. We strongly advise the activation of the manual stop switch during any maintenance of or around your turbine. This will prevent the blades from spinning and voltage to be transferred. -
Page 26: Automaxx Warranty Policy
The Automaxx warranty valid for the period of one year (365 days) after the date of first purchase. If proof of purchase cannot be provided, the manufacturer date as recorded by Automaxx will be deemed to be the start of the Warranty Period. - Page 27 If the Product is under Warranty, You hereby agree to transfer the ownership of replaced defective parts/ accessories and such parts shall automatically become the property of Automaxx and returned to Automaxx for inspection. Customer Responsibility When using the Product 1.
- Page 28 It's cheap and worth it. 5. You are responsible for the cost of shipping the product back to us. 6. Automaxx have no liability for the loss, damage or destruction of items within the package during shipment. Refund Amount and Processing Time We refund you the product price, which is your total order amount minus shipping costs.
- Page 29 Out Of Warranty Cases Sending the Product to Automaxx repair center does not automatically mean that it will be repaired free of charge. Upon receiving your product, Automaxx reserves the right to check the validity of your warranty and your request for warranty service.
-
Page 30: Appendix A Important Safety Instructions
APPENDIX A IMPORTANT SAFETY INSTRUCTIONS Read these instructions below before installing your wind turbine to ensure people and property against accidents. Please also make sure it is set up under environmental and operating conditions. 1. Install the wind turbine in open and windy sites. So, the turbine will be exposed to winds properly and the benefit can be maximized. - Page 31 Warning: Make sure that there is no flange/ coupler/ support cable ring within 1.7 m from the wind turbine center/ hub. Cylindrical shape poles are recommended and there should be sufficient free space between the pole and the blades as, during the wind gust, blades bend a little towards the inside.
- Page 32 Operating Environment: A. Operating Temperature: -4°F (-20°C) ~ 122°F (50°C) B. Operating Humidity: < 80% C. Average Wind Speed: < 30MPH (<13 m/s or <54KMH) D. Max. Peak Wind Speed: < 45MPH (<20m/s or <70KMH) E. Elevation: < 1000m F. Applicable Installation Height: 8.85ft~33ft (2.7m~10m) It is subject to IEC 61400-2 safety standards.
-
Page 33: Appendix B Beaufort Wind Scale
APPENDIX B BEAUFORT WIND SCALE Beaufort Description Avg. Wind Avg. Wind Avg. Wind Avg. Wind image Calm Speed (knot/h) Speed (km/h) Speed (m/s) Speed (mi/h) Clam <1 <2 <0.55 < 1.24 Light air 1 – 3 2 - 6 0.55~1.66 1.24~3.73 Light breeze 4 –... -
Page 34: Investigation Form
Investigation Form RMA No. Purchase Details Name: Purchase Date: Email: Phone No.: Order ID: Model/ Product: Event Date: Location: Please fill out the following questions for further investigation. 1. The wire length between the wind turbine and the MPPT ___________m/ ft, MPPT and the battery ____________ m/ ft.
Need help?
Do you have a question about the 400 Watt Turbine and is the answer not in the manual?
Questions and answers